Beautiful Custom Paper Daffodils
Generate your own colorful garden of decorative paper flowers with the ScanNCut and plant them anywhere you like!
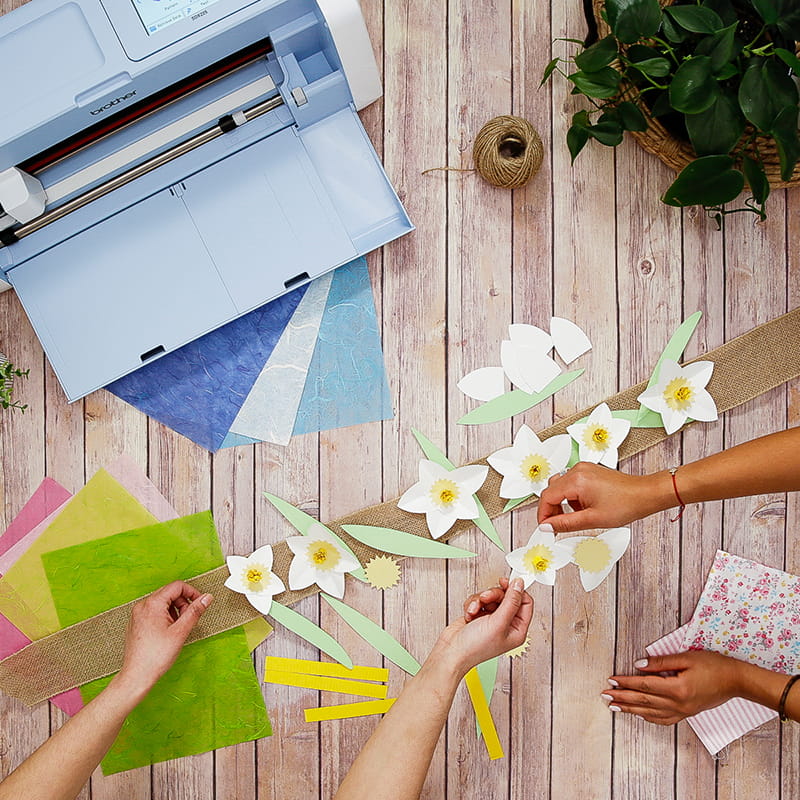
You will need: Colored paper or cardstock, ScanNCut, Low-tack cutting mat, hot glue, something to decorate (we created a garland using a length of jute ribbon–but get creative and decorate anything you desire!)
Steps:
- 1. Download the 3 .fcm cutting files onto your machine.
- 2. Starting with “Flower1.fcm”, select a color of paper that you want the larger petals to be. (We chose white!)
- 3. Stick the paper to the low-tack mat and cut out the petals.
- 4. Load “Flower2.fcm” into the machine. These are the leaf shapes- they are meant to be layered on top of each other and under the constructed flowers. Choose a green paper color.
- 5. Stick paper to the low-tack mat and cut.
- 6. Load “Flower3.fcm” into the machine. These shapes make up the inner structure of the flowers. Select two paper colors and cut to the pattern’s proper sizes according to the mat.
- 7. Stick to the low-tack mat and use the machine’s scanning function to check that the cutting patterns are properly aligned to the paper areas. Adjust as needed and cut.
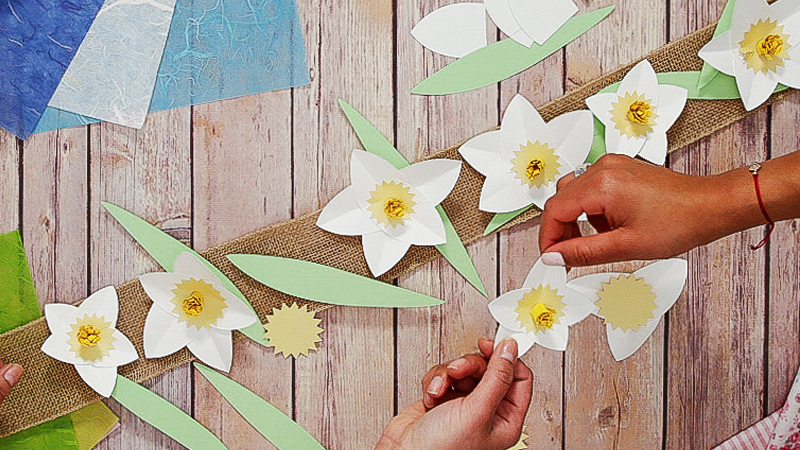
- 8. For each of the larger petal shapes, take the flaps at the bottom of the shapes (where there is a notch) and slightly overlay one on top of the other so that the petal shape puckers and curves slightly. Secure with glue.
- 9. Take the long, skinny notched rectangles and roll them up tightly lengthwise, making sure to bend the cut notches out to resemble a slight floral shape. Secure the bottom with glue so that it doesn’t roll open.
- 10. Layer 4 or 5 of the larger petals on top of each other as in the picture, and secure together with glue.
- 11. Place a starburst shape over the center of the stacked petals and secure with glue.
- 12. Place the rolled shape into the very center of the flower and secure with glue. The flower is complete!
- 13. Repeat steps 8-12 until the desired number of flowers are created. Cut more flower shapes out using the machine if needed!
- 14. When assembling your craft, make sure to layer the “Flower2.fcm” leaf shapes underneath the flowers to achieve a pretty, leafy effect.
- 15. Done!
Related Projects
Stay Connected
Follow Us
Brother Support
Corporate Information
Partnership Opportunities
About This Website
