Custom Folder Labels with Brother Foiling Kit

Create custom labels for your home office with the Brother Foil Kit and your ScanNCut.
You will need:
ScanNCutDX, Brother Foil Kit, white cardstock, contrasting color cardstock, adhesive, tape, folders and binders to customize
Steps:
To create labels shown in the photos; feel free to adapt these instructions with your own text in CanvasWorkspace for further customization!
- Open up the Brother Foil kit and review the instructions.
- Download “BossBabe_Label.fcm” to your machine.
- Load a sheet of white cardstock onto a low-tack mat. Make sure it’s firmly stuck down.
- Select the text portions of the cut file on the screen (but don’t move them around). Double check that the fill setting is ON in the object edit section of the screen.
- Move on to the next screen and choose the “Foil Glue” function.
- Load the machine with the glue pen and its correct holder (comes with the Foil kit).
- Press the start button. Wait until the glue pen is finished drawing.
- Let the glue dry for a couple of minutes, until it has a shiny but not wet surface on the paper.
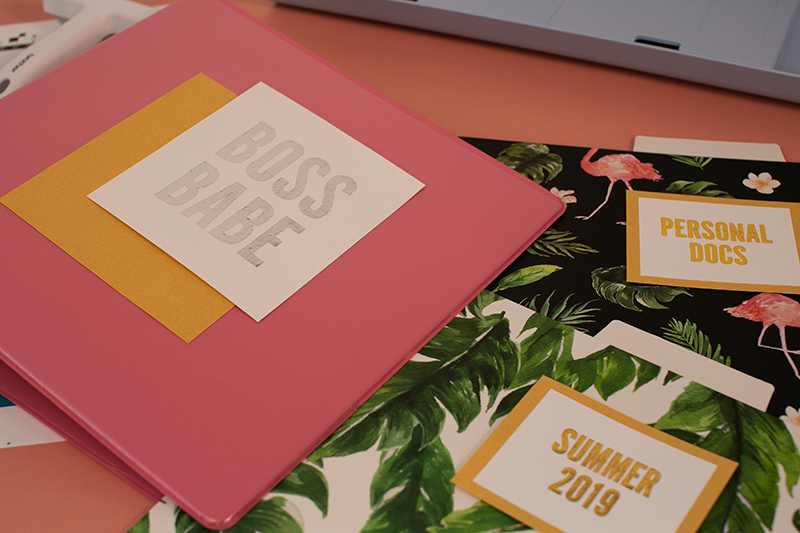
- Take a sheet of silver foil and place it SHINY SILVER SIDE UP on top of the glued section. Press down to stick it to the glue.
- Layer the Brother blue protective sheet (comes with the Foil kit) on top of the foil sheet. Affix to the mat with tape.
- Change out the glue pen with the foiling holder and lock it into the machine.
- Navigate to the screen where you can select the function and select “Foil2.”
- Press the start button and wait until the function is complete.
- Remove the protective sheet and carefully pull back the foil
- Finally, change out the foiling holder with the auto blade.
- Navigate to the screen where you can select the function and select “Cut.”
- Cut out the foiled piece and set aside.
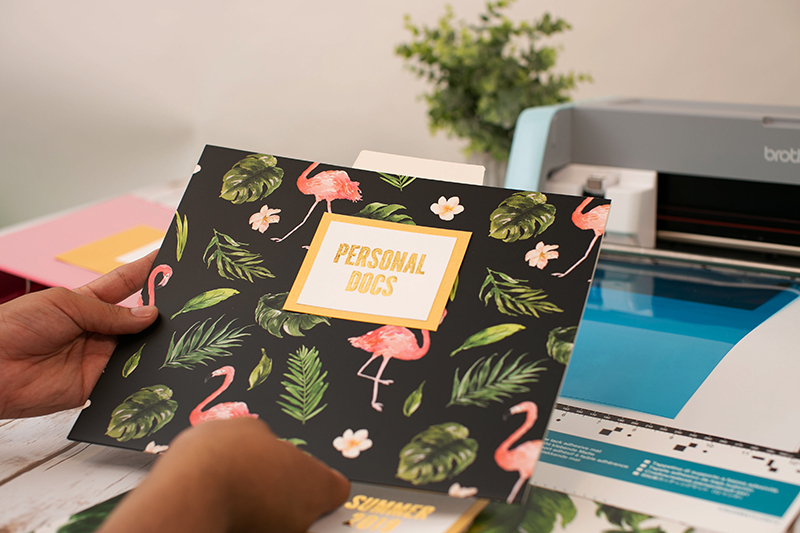
- Repeat steps 2-17 with the file “PersonalDocs_Summer2019_Labels.fcm”, but with gold foil this time instead of silver.
- Finally, download “Labels_BackgroundSheets.fcm” to your machine.
- Choose a contrasting color of paper -- we used a shiny gold. Affix the paper to the mat.
- Cut out the designs using the auto blade.
- Take the cut-out shapes and the cut-out foil labels and glue them together to make a framed design.
- Glue the finished labels to the folders or binders of your choice.
- Done!
Related Projects
Stay Connected
Follow Us
Brother Support
Corporate Information
Partnership Opportunities
About This Website
