How to customize a vinyl beach bag
-Brother Crafts Blogger
When I became a mom, customizing things was one of my top favorite ways to craft for kids. I mean, it was pretty basic at first; adding their names on all of their bags, clothes, toys, etc. As I became better at my craft, I would see things I loved in retail stores and tell myself that I can make that very thing, but make it exactly how I want it. I would change up the colors, change up the style a bit, and just overall make it custom to my liking. Creating custom items has always been a part of my craft and I don’t think it’s going anywhere anytime soon.
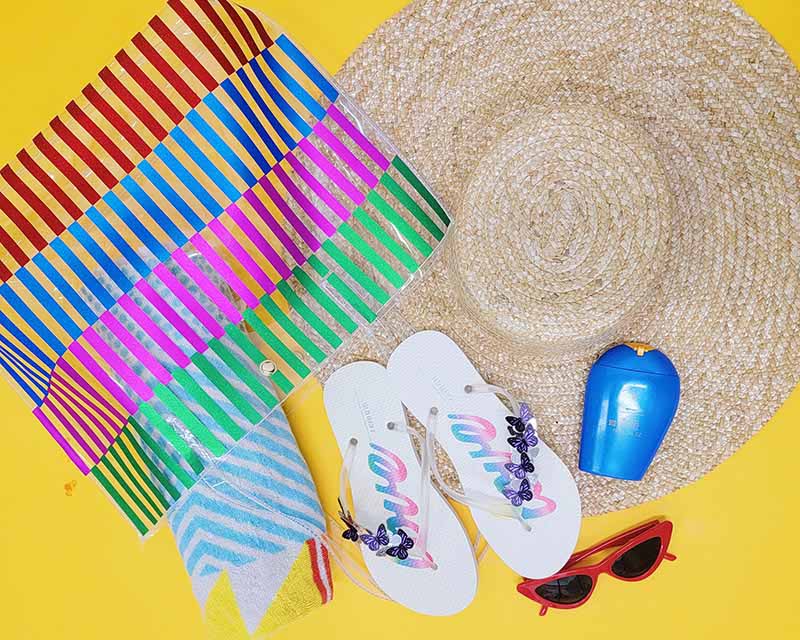
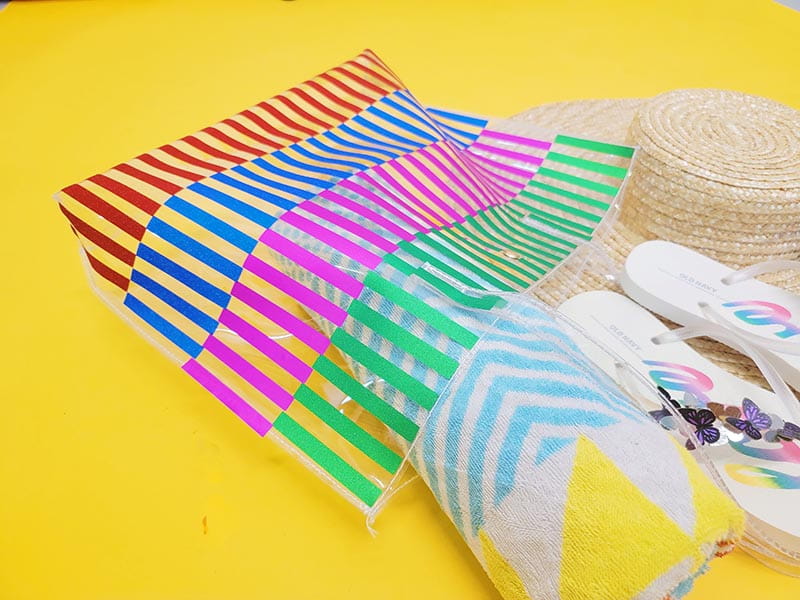
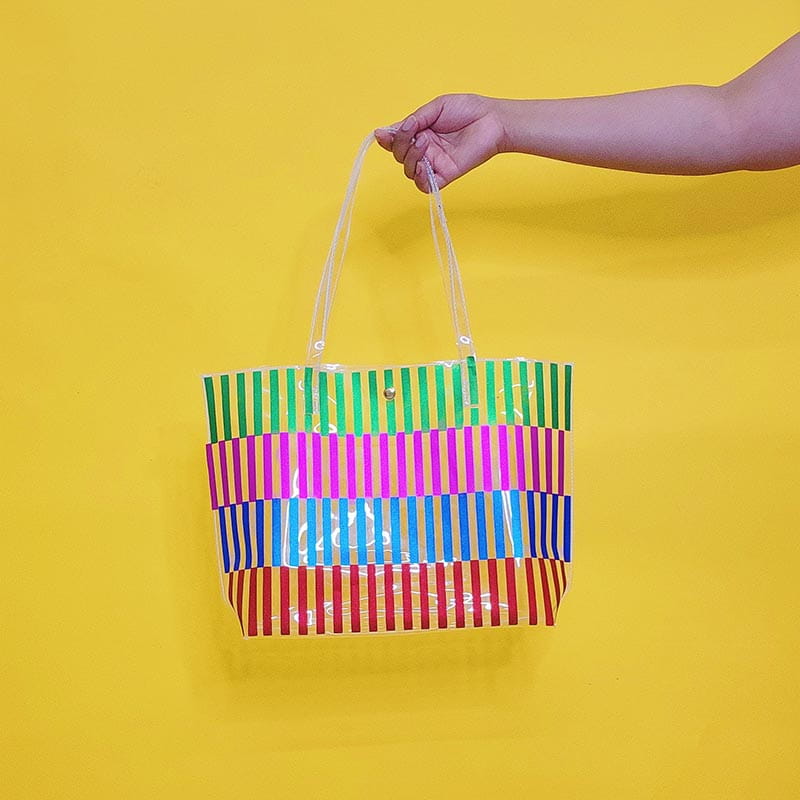
The Brother ScanNCut makes customization so much fun. Since owning a machine, I feel as though I've elevated my skills. I can take the most basic t-shirts, bags, and apparel and give it an incredible wow factor. In today’s project, we are doing just that. I purchased a very simple transparent vinyl tote bag and we are going to transform it into this super fun and colorful tote bag that you can wear to the beach, shopping, overnight stays, etc.
The design for this bag is pretty simple’ nothing complex about it. Layering different colors will make it a stand out design for sure. As with all of my projects, I want to inspire you and to simply use this idea as a doorway to many more creative ideas that you may very well have up your sleeve. If you want to take it a different route outside of stripes. Do that! I’m just hear to jump start your creativity and show you all of the amazing ways the Brother ScanNCut can get you well on your way to creating some great projects.
Other Ideas:
- Fruit
- Cats
- Sun
- Cocktails
- Gemstones
- Rainbows
- Polka Dots
Supplies & tools
- Brother ScanNCut
- Brother ScanNCut Cutting mat (12” x 24”))
- Vinyl Bag (L 14.1 x H 11.8)
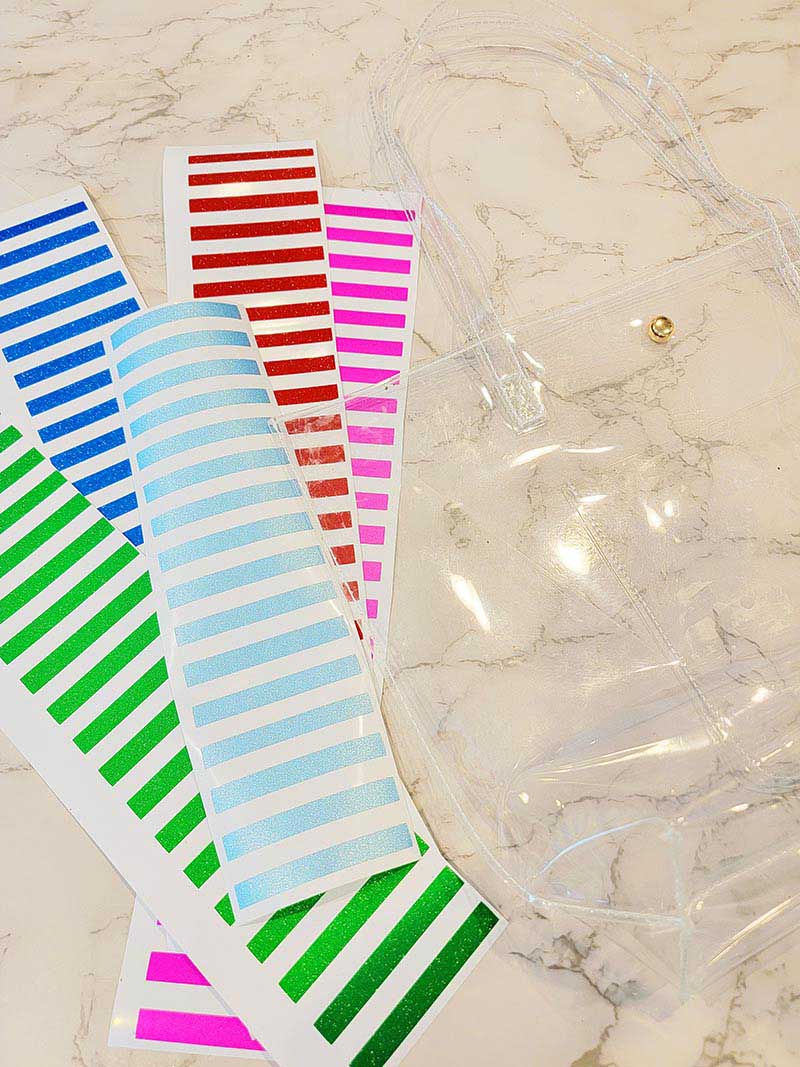
- Craft Vinyl in 4 Different Colors (Do not use HTV)
- Clear Transfer Tape
- Stripes Cut File (Optional)
Instructions:
1. With a damp cloth, clean the surface of your bag. Ensure that the bag is fully dry.
2. Take 4 colors of your choosing and lay it on to your Brother ScanNCut cutting mat making sure that 14.5 inches of vinyl is attached.
3. Insert your cutting mat into the Brother ScanNCut and open your canvas app. Upload the striped file into the canvas platform and lay it out for each color you placed onto your mat. Note: The file may not work if you already have Canvas open. You may need to close Canvas, right click on the cut file and click on the option that says ‘Open with Brother Canvas.'
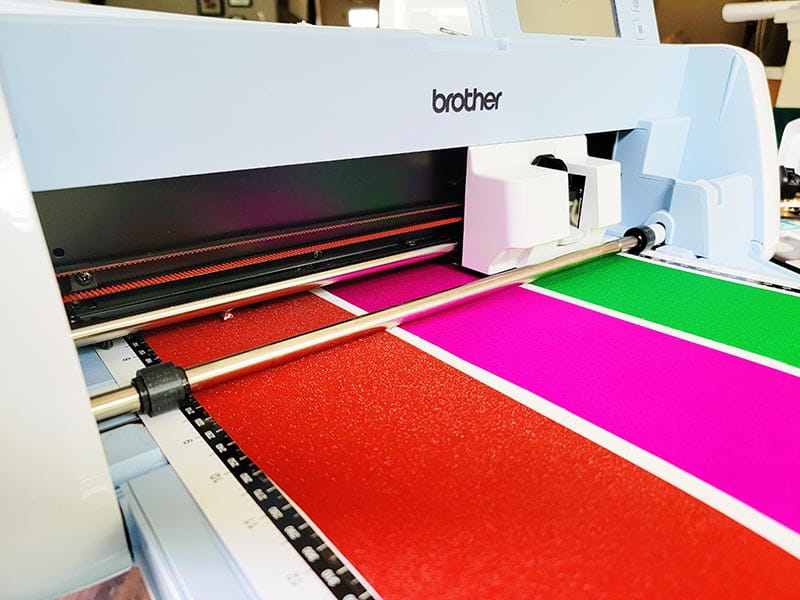
4. Once your file is set up, proceed with cutting.
5. Once your files are cut, transfer each color onto it’s own transfer tape.
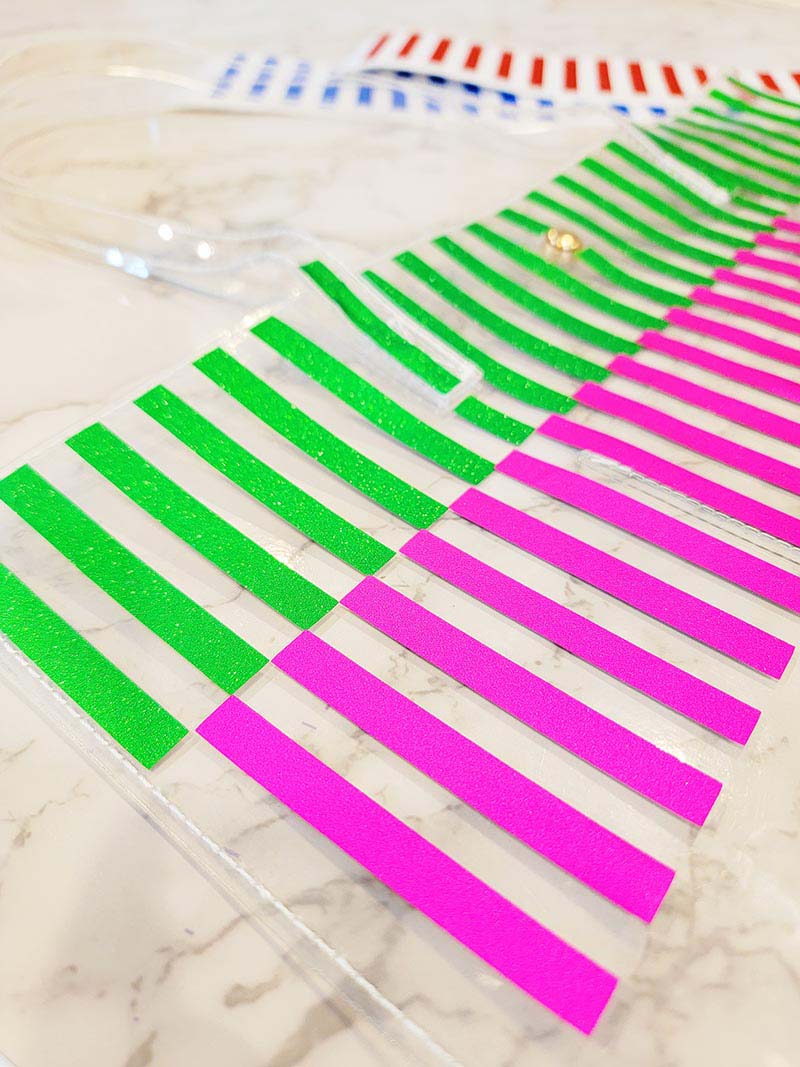
6. With the stripes in the vertical direction, we will start with applying the vinyl to the top of the bag. The clear transfer tape helps because it ensures that you lay down the vinyl as straight as possible. Once you lay down the first color of stripes, repeat until all stripes are placed on the front of the bag. Design Idea: When placing the stripes, you can lay them all centered to each other; Laying them all in one line vertically down the front of the bag. Another option is to off-center the stripes; laying the stripes opposite of one another like a checkerboard. I only designed the front of my bag, but feel free to design the back if you want. That’s the best part of customizing things. Allow your creativity to lead you.
7. That’s it!
Tags
Shop this Project
No ScanNCut DX? No problem! Shop our full line of cutting products and get crafting!
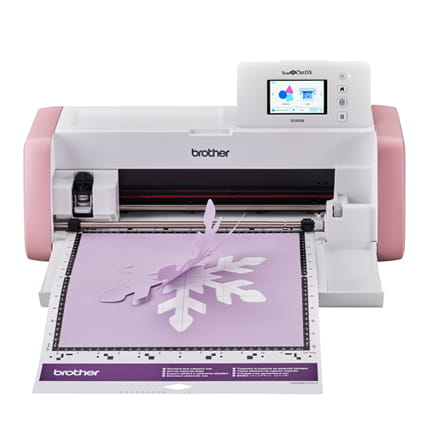
Brother ScanNCut DX
- 251 Built in Designs
- True Auto Blade, no manually adjusting blade pressure settings
- Built-in Scanner; scan in hand-drawn creations and cut them out!
Related Projects
Stay Connected
Follow Us
Brother Support
Corporate Information
Partnership Opportunities
About This Website
