DIY Fall Banner
ScanNCut Specialist Julie Fei-Fan Balzer creates a warm and inviting DIY Fall Banner for upcoming fall season.
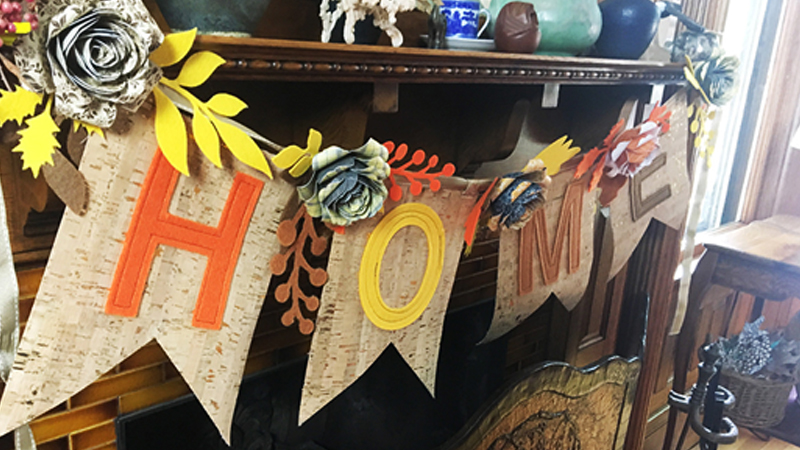
Looking for an easy way to transform your mantel for the holidays? How about a Fall banner?! This super fun project incorporates some basic sewing on no-ravel materials like cork fabric and felt.
No-ravel materials make this project quick and easy because they require absolutely no finishing!
The best part is that this entire project uses built-in designs from the ScanNCut DX225! If you haven't taken the time to explore what's already built into your machine, I hope that you will.
Watch the video for the how-to:
Here are the basics:
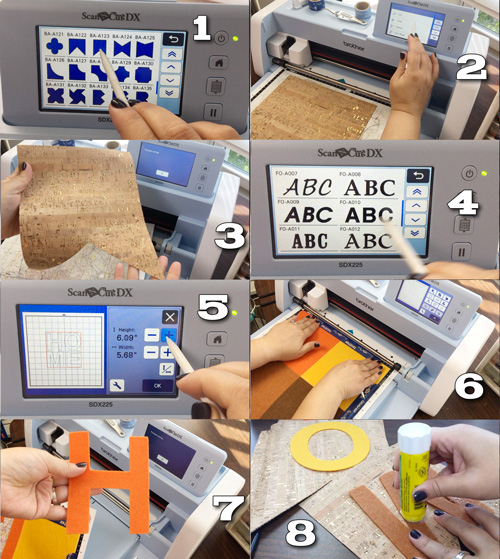
- Choose banner shape.
- Load a mat with cork fabric on it.
- Cut the shape from cork fabric.
- Choose a font.
- Resize the text.
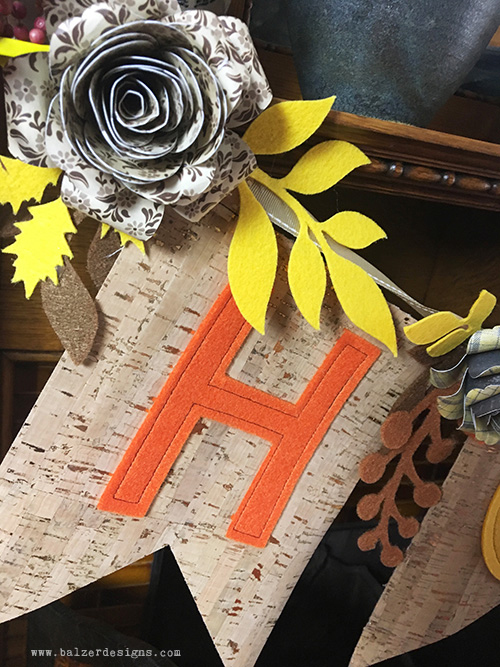
- Load a mat with four colors of stiff felt on it.
- Cut letters from felt.
- Tack felt letters to cork fabric banners with a glue stick.
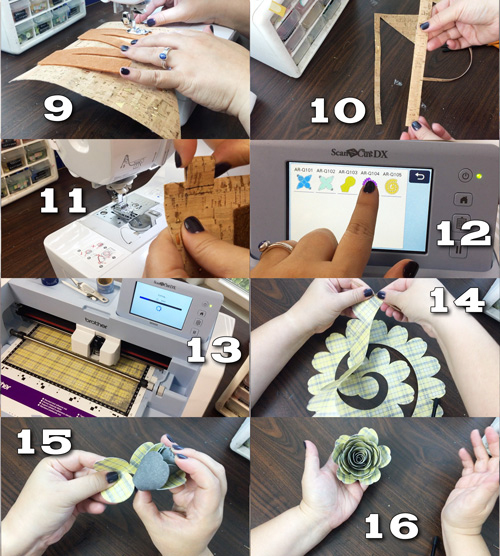
9. Sew fabric letters to cork fabric banners.
10. Cut small strips from excess cork fabric.
11. Use the strips to create loops for the banner pieces. Stitch the loops in place.
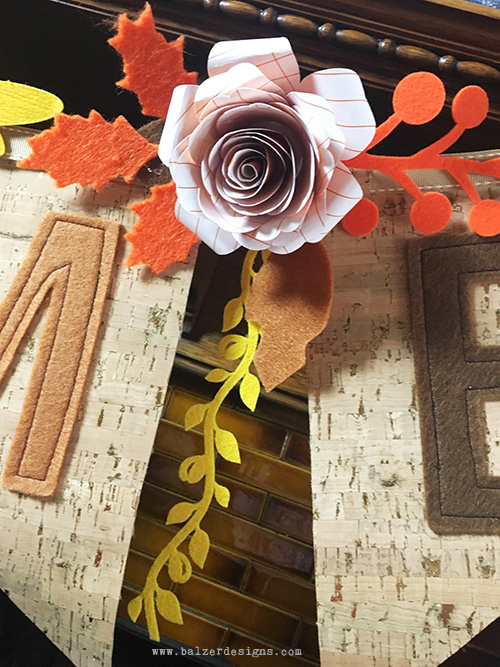
12. Choose one of the rolled flower designs.
13. Cut it from patterned paper.
14. Roll the flower.
15. Fold the base along the perforation line.
16. Release the rolled flower and glue to base.
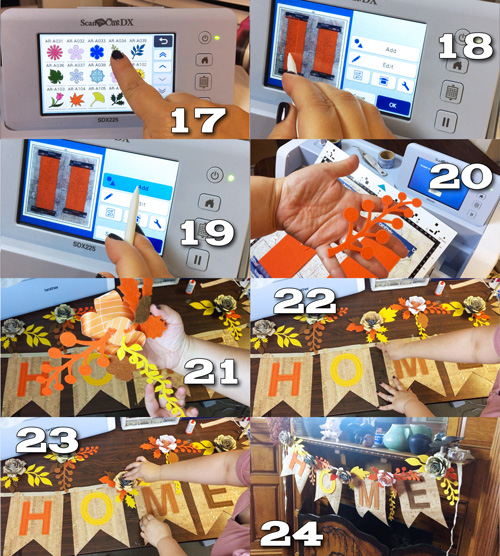
17. Choose a leaf design.
18. Scan in felt scraps and place designs so they fit on the scraps.
19. If you have extra room on your scraps, keep adding various leaf designs.
20. Cut leaves and other embellishments from felt.
21. Glue felt embellishments to the back of each paper flower.
22. String a ribbon through the cork fabric banners, leaving enough room for the paper flowers
23. Glue each flower/embellishment combo onto the ribbon between banners and at the two ends.
24. Hang in your home and enjoy!
I hope you enjoyed this tutorial!
Related Projects
Stay Connected
Follow Us
Brother Support
Corporate Information
Partnership Opportunities
About This Website
