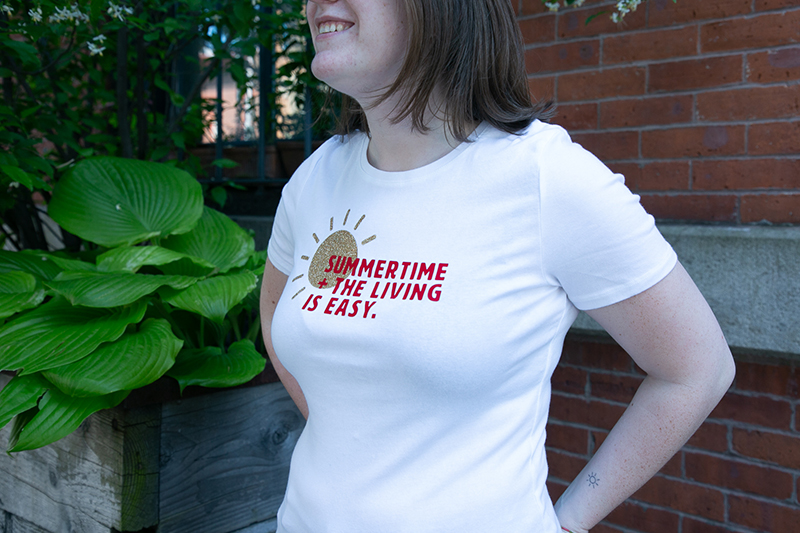
Easy Breezy DIY Summertime T Shirt
Proclaim your love of summer with this fun DIY summertime t-shirt project!
You will need:
A T-shirt, heat-transfer vinyl film, glitter heat-transfer vinyl, iron, scrap fabric, ScanNCut, standard mat
Steps:
- Download summertime.fcm to your machine. Trim a sheet of heat-transfer vinyl film to about the width and height of the design, using the scanning function if needed to make sure that everything is aligned.
- Flip the design on the machine using the Object Edit menu. This will ensure that the saying will not come out backwards once cut out and adhered to the fabric!
- Select “Cut” on the next screen. Go into the menu options and make sure that half cut is selected (on the DX, you can use all auto settings when half cut is turned on to get the correct cut). Otherwise, you’ll need to calibrate your blade to make sure that you only cut through the adhesive part of the vinyl (not shiny side) and not the carrier backing (shiny side).
- Place the vinyl film carrier side (shiny side) down on the mat.
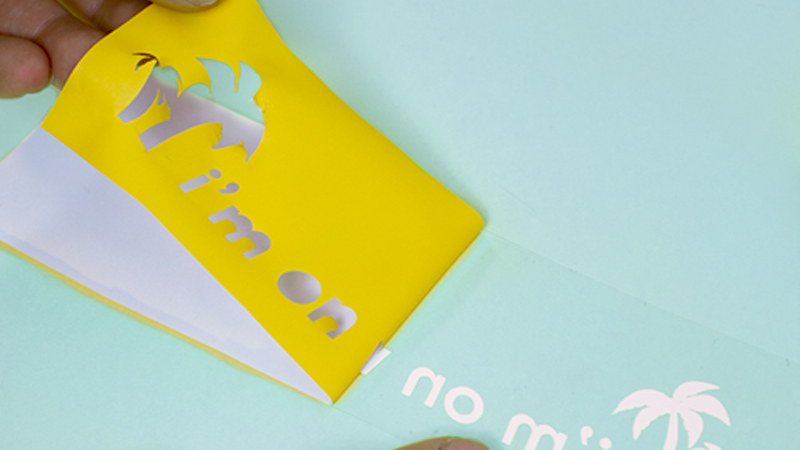
- Cut out the design.
- Weed out all unneeded vinyl so that only the design remains on the sticky clear carrier sheet. Set aside.
- Download sun.fcm to your machine. Trim a sheet of heat-transfer vinyl film to about the width and height of the design, using the scanning function if needed to make sure that everything is aligned.
- Repeat steps 2-6, using the glitter heat-transfer vinyl this time. Glitter HTV is typically thicker than film vinyl, so you may need to increase blade pressure or adjust manual blade settings to get a good cut.
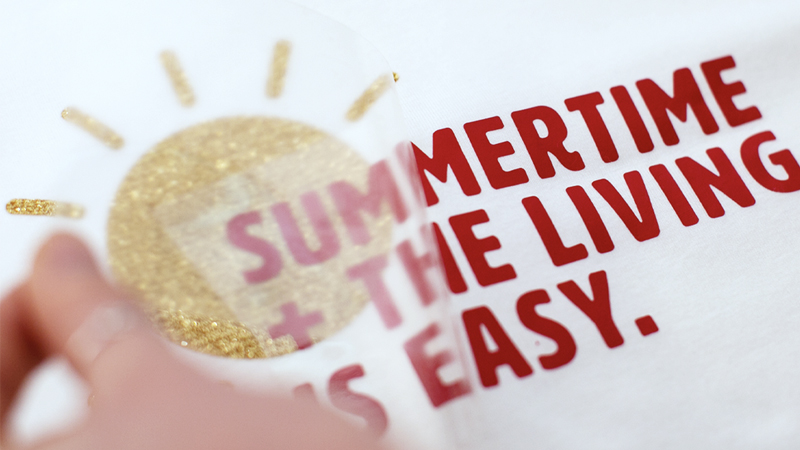
- Now it’s time to begin adhering the vinyl to the shirt! Place the sun graphic down on the shirt, and then layer the non-sparkly text graphic over it. Move the pieces around until you get an alignment you like. Note that the sticky carrier should stick to the fabric, and through the clear sheet you should be able to see your design that is at the correct orientation (not reversed).
- Pick up the text graphic and put it aside for now.
- Place a piece of scrap fabric over the sun graphic sheet. Set an iron to medium-high heat (or the setting recommended by HTV instructions), with no steam.
- Using a firm pressing motion, iron over the scrap fabric to seal the HTV to the t-shirt. Make sure to press firmly on the edges.
- Let the carrier sheet cool for a few seconds before touching it, then carefully peel the carrier sheet off. The glitter sun design should remain firmly on the t-shirt.
- Making sure that the design is completely cool, place the text graphic sheet back onto the shirt, having it overlap the glitter design.
- Repeat steps 11-13 for the text graphic design.
- You’re done!
Related Projects
Stay Connected
Follow Us
Brother Support
Corporate Information
Partnership Opportunities
About This Website
