How to make a Tote Bag with Disney's "Lion King"
-Brother Crafts Blogger
Supplies:
- ScanNCutSDX230Di
- standard mat
- tote bag
- heat transfer vinyl (two colors)
- iron
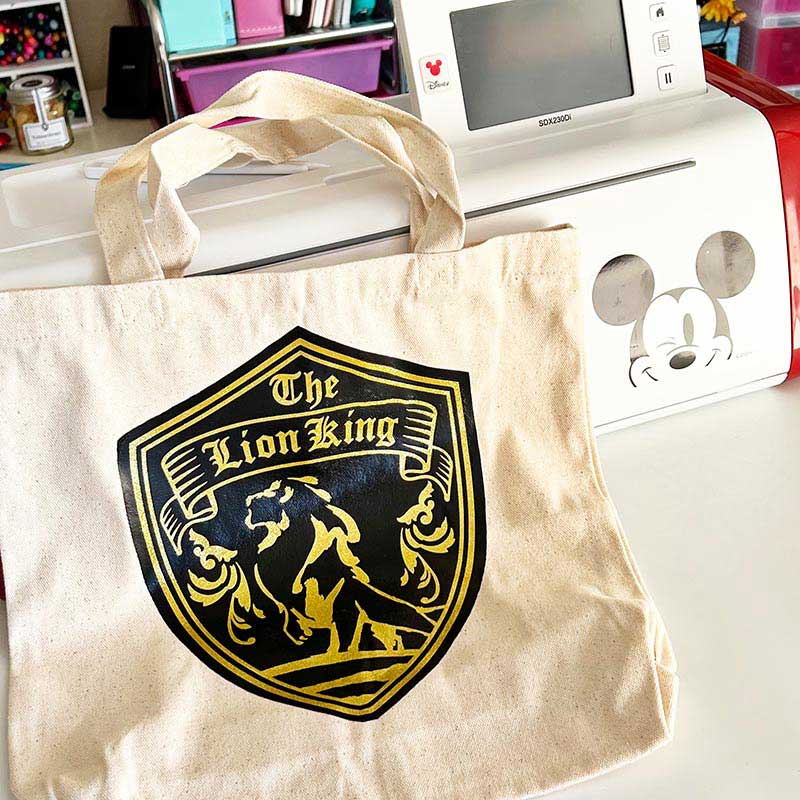
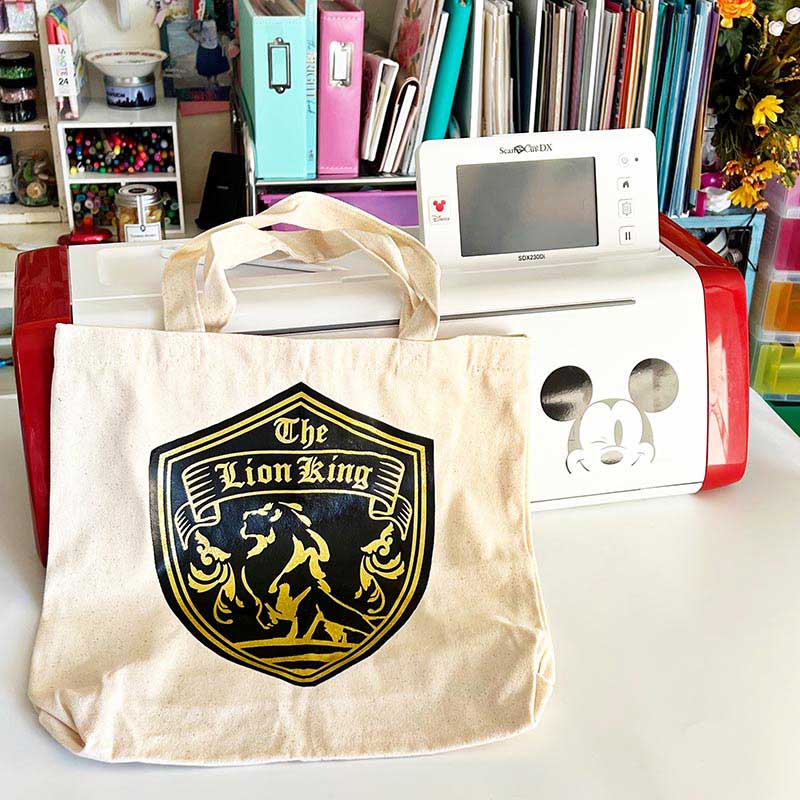
Multi-color layered patterns built in the ScanNCutSDX230Di are so much fun and bring such life to the characters and designs. What could be better? Brother makes them SO easy to use – the ScanNCut DX will walk you through the process with perfectly sized and positioned designs, and prompts as you cut to select next parts.
This Lion King design is one I’ve not used before – but this won’t be the last time! I love how elegant and stunning this is, and how much this design will stand out on any project big or small. For this project, we are simply layering the heat transfer vinyl pieces onto a tote bag – ready for filling with gifts and more!
You can create your own tote, or find them at craft stores for purchase. Be sure to iron it well, get all of the creases or marks out before you start applying your heat transfer vinyl. This will ensure a really good pattern transfer.
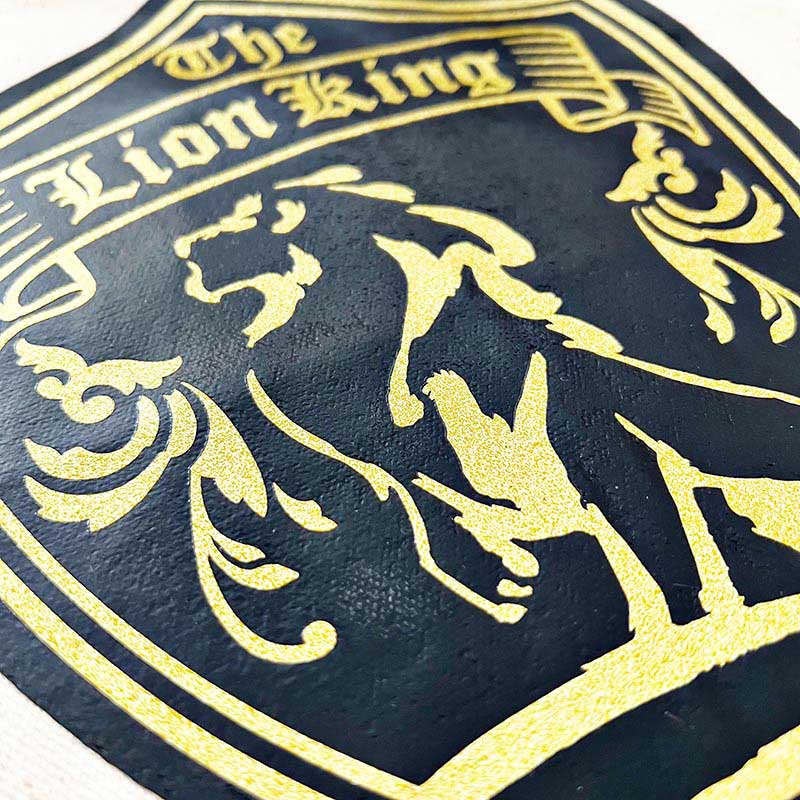
Tip: If using a glitter or flocked vinyl, be sure to use it on the ‘top’ layer versus a vinyl layer that will have other things on top of it.
Contrast is your friend be sure to work with colors that will compliment each other and help the layers pop. If you aren’t sure try a small test swatch of the colors near each other before you commit to cutting.
Working with layered designs, and creating tote bags can be as simple as I’ve shown here- or they can become much more complex and include stitching and other handmade elements as well. Remember this technique of working with heat transfer vinyl will work on any fabric surface that you can use HTV on – and your ScanNCut DX will help you create your designs!
Related Projects
Stay Connected
Follow Us
Brother Support
Corporate Information
Partnership Opportunities
About This Website
