How to Make Your Own DIY Freezer Paper Stencil T-Shirt Designs
-Brother Crafts Blogger
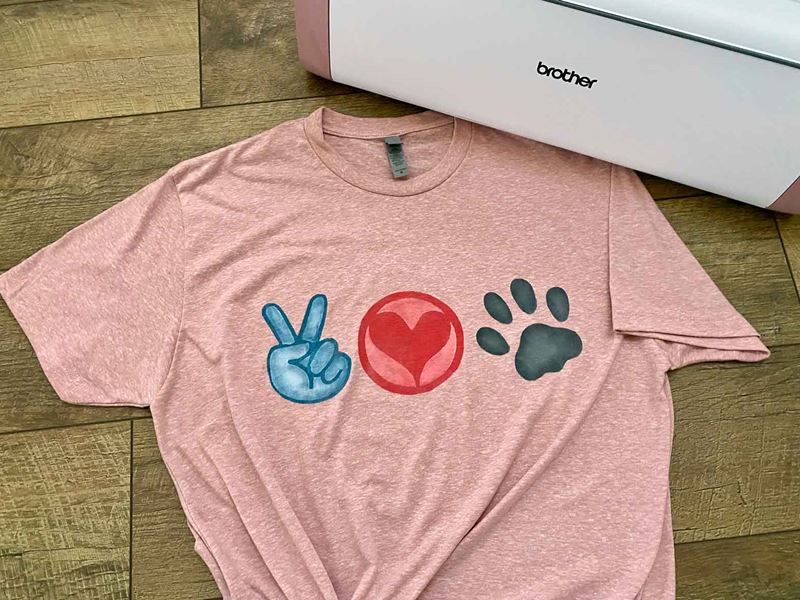
I love using iron-on vinyl to make DIY custom T-shirts and other projects, but there’s only so much you can do with it. Making stencils out of freezer paper gives you flexibility in what products you use with it and opens up creativity in how you create your one-of-a-kind project. This T-shirt project example will spur your imagination of all the ways you can use freezer paper stencils in your projects.

TIP: Freezer paper is applied to your mat with the paper side down, but you iron it onto your fabric with the waxy side down so make sure your digital pattern is flipped accordingly.
Supplies:
• Brother ScanNCut DX Machine and Accessories
• Brother ScanNCut DX CanvasWorkspaceWorkspace
• T-shirt
• Freezer Paper
• Fabric Paint (3 Colors plus White)
• Paint Brushes
• Download the FREE cut file
• Tweezers (optional)

5 steps to creating and using Freezer Paper Stencils:
1. Design in ScanNCut DX CanvasWorkspace – ScanNCut DX CanvasWorkspace is a free program you can use with whatever model of ScanNCut DX you have.
• Download and then import this FREE cut filefor this project into ScanNCut DX CanvasWorkspace.
• Add in a heart design from the basic shapes or other patterns in ScanNCut CanvasWorkspace.
• Transfer those designs over to your ScanNCut DX using the “Transfer FCM File” option under “File” in ScanNCut DX CanvasWorkspace.
2. Import and Composition
• On your ScanNCut DX machine’s screen, press “retrieve data” on the lower bar. Then choose which method you used to transfer the designs over to your ScanNCut DX.
• Add an additional pattern to your design from one of the built in patterns on your machine by pressing “add” and “pattern” and then choosing one from one of the categories of patterns your machine has. Then click “set” to place it on the digital mat.
• Using the “edit” and “object edit” mode on your machine, select each of the designs and resize them to fit on your T-shirt. You may need to flip your design so that it cuts out the correct way on your freezer paper. Just go to “edit,” “object edit,” and then press the “flip” icon.
• Select all your designs and then using the “edit” and “nudge” icons on your machine. Next, press the “align” icon and choose how you want to align them. Then press “ok” until you get to the “select” screen.
3. Cut out Freezer Paper Stencils
• Select “cut” from the list of choices.
• Load the freezer paper onto your mat paper side down so it will stick to the mat.
• Double check your settings on the screen. If you need to change any settings, press the wrench icon.
• Press “start” to begin cutting.
• When it’s finished cutting, press ”finished” and then press the mat button to unload your mat.
• Carefully remove all the pieces of the stencil from your mat. For this project we will use both the positive and negative parts of the stencil.
4. Iron on Freezer Paper Stencils
• Place the negative parts of the stencil onto your T-shirt and iron them on using the suggested iron settings on your T-shirt label.
• Paint those in, remove the stencil while it’s still wet and allow the design to dry.
• Iron on the positive parts of the stencil design onto your T-shirt, over the painted areas.
• Paint those in, remove the stencil while it’s still wet and allow the design to dry.
5. Fabric Painting
• For each of the designs, paint in the base color into the open areas of the negative stencil with a lighter color.
• For each of the designs, paint in the base color into the open areas of the positive stencil with a darker color
• Add some dimension by pulling in the darker color around the edges of the design into the lighter areas.
• Use a fine tip brush to fix any mistakes or where paint seeped under the stencil.
Tags
Shop this Project
No ScanNCut DX? No problem! Any products mentioned in this project are available to buy here.
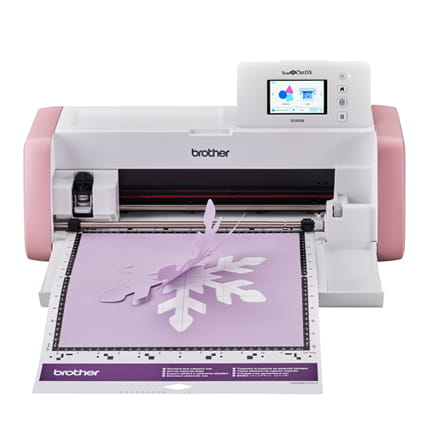
Brother ScanNCut DX
- 251 Built in Designs
- True Auto Blades, no manually adjusting blade pressure settings
- Built-in Scanner; scan in hand-drawn creation and cut them out!
Related Projects
Stay Connected
Follow Us
Brother Support
Corporate Information
Partnership Opportunities
About This Website
