School is in Session! Back to School Projects
\
School is back in session and the ScanNCut is here to assist! Check out how to create a custom writing journal for those language arts classes and next, add some fun decals to personalize a lunchbox. Have a great school year!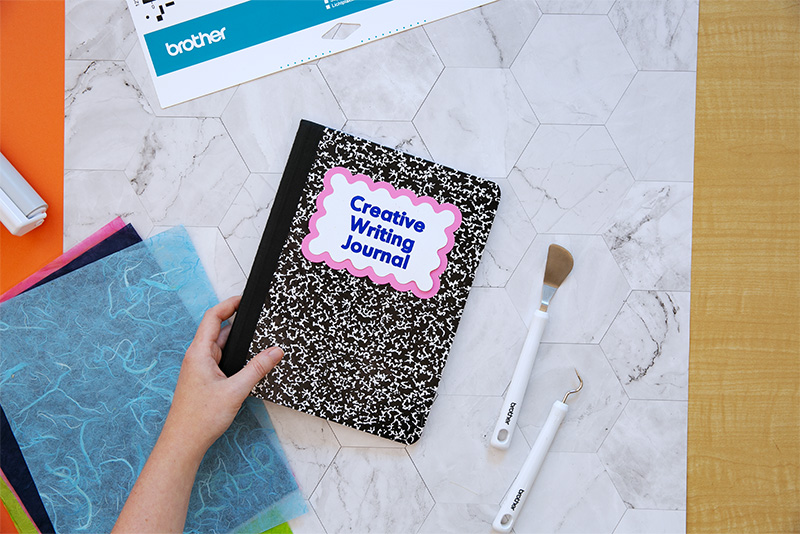
2. Load the roll feeder with your color choice of vinyl.
3. Use the auto blade to cut out the design. Trim and remove the vinyl from the roll and set aside.
4. Download “Notebook_Paper.fcm”
5. Apply cardstock to a low-tack mat.
6. Select the “Draw” function. Select a pen color and load it into the Pen tool.
7. Draw the design on the cardstock. When done, don’t remove from the mat.
8. Select the “Cut” function, and load the Auto Blade into the machine.
9. Cut out the design, and set aside.
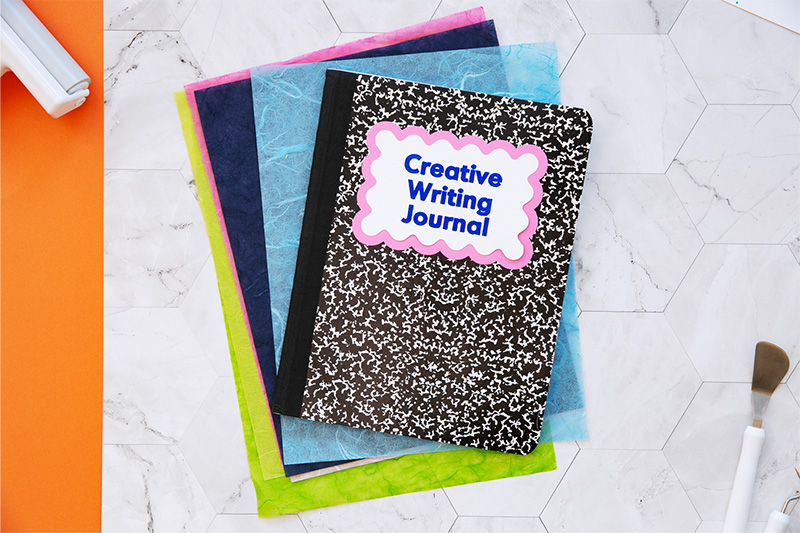
10. Get your notebook and carefully align the vinyl piece where you want your label to be positioned.
11. Apply the vinyl onto the notebook, smoothing out all air bubbles.
12. Apply double sided tape to the back of the cardstock piece and apply carefully over the top of the vinyl, taking care to position straight over the vinyl.
13. You’re done!
2. Load the roll feeder with white vinyl.
3. Check the size of the design; make sure the width and height of the cut file matches the width and height of your lunchbox’s surface.
4. Cut out the design using the Auto Blade. Trim off the design from the vinyl roll and set aside.
5. Repeat steps 1-4 with the rest of the attached cut files, choosing your vinyl colors according to the cut file name.
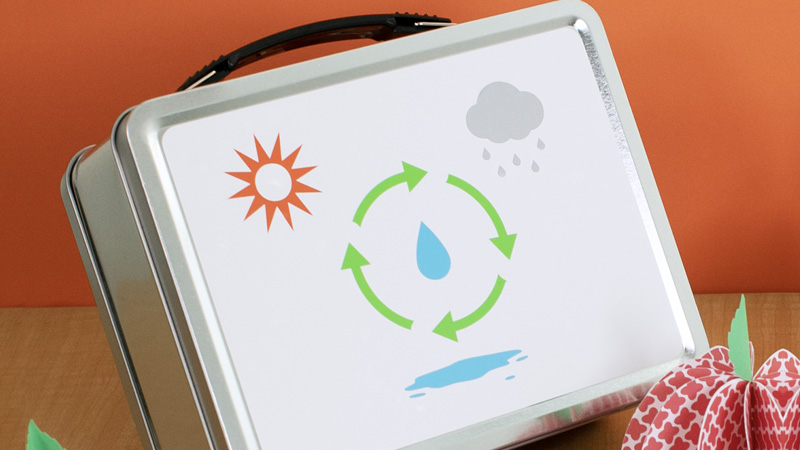
6. Begin by applying the white vinyl rectangle to the surface of the lunchbox, smoothing out carefully to avoid air bubbles.
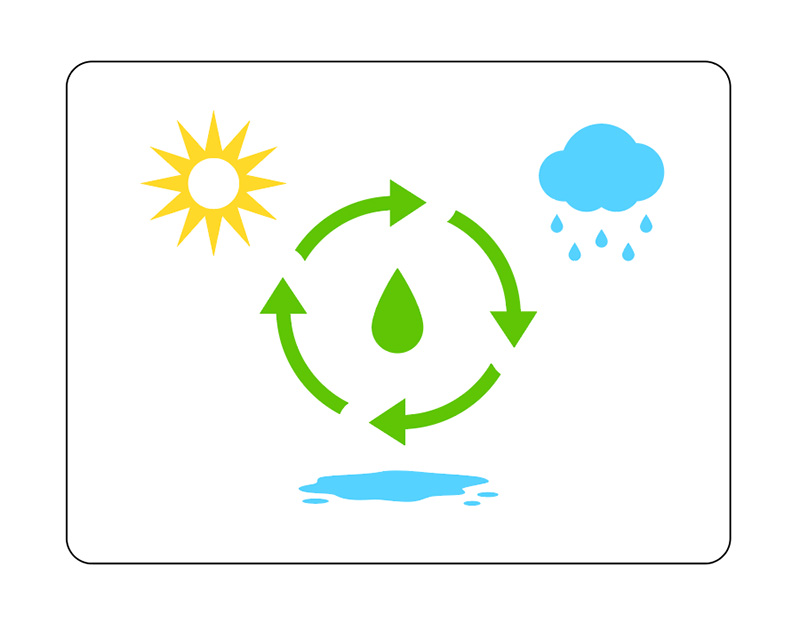
7. Begin laying out the water cycle design according to the cycle process (use this image for reference:) Make sure that all pieces are smoothed out and secure.
8. You’re done!
School is back in session and the ScanNCut is here to assist! Check out how to create a custom writing journal for those language arts classes and next, add some fun decals to personalize a lunchbox. Have a great school year!
For the Writing Journal, you will need:
- Brother vinyl, cardstock, roll feeder, ScanNCut, Auto Blade, Low-Tack mat, Drawing / pen tool, Brother felt-tip pens, double sided tape, notebook
- Notebook_Vinyl.fcm
- Notebook_Paper.fcm
Steps:
1. Download “Notebook_Vinyl.fcm” to your machine.2. Load the roll feeder with your color choice of vinyl.
3. Use the auto blade to cut out the design. Trim and remove the vinyl from the roll and set aside.
4. Download “Notebook_Paper.fcm”
5. Apply cardstock to a low-tack mat.
6. Select the “Draw” function. Select a pen color and load it into the Pen tool.
7. Draw the design on the cardstock. When done, don’t remove from the mat.
8. Select the “Cut” function, and load the Auto Blade into the machine.
9. Cut out the design, and set aside.
10. Get your notebook and carefully align the vinyl piece where you want your label to be positioned.
11. Apply the vinyl onto the notebook, smoothing out all air bubbles.
12. Apply double sided tape to the back of the cardstock piece and apply carefully over the top of the vinyl, taking care to position straight over the vinyl.
13. You’re done!
For the Water Cycle Lunchbox Decals, you will need:
- Brother vinyl in assorted colors (White, Blue, Green, Orange, Gray/Silver), Roll Feeder, tin lunchbox, ScanNCut, Auto Blade, tin lunchbox (we used this one: measuring 8.65” x 6.75” x 3.9”)
- WaterCycle_White.fcm
- WaterCycle_Blue.fcm
- WaterCycle_Green.fcm
- WaterCycle_Orange.fcm
- WaterCycle_Gray.fcm
Steps:
1. Download “WaterCycle_White” to your machine.2. Load the roll feeder with white vinyl.
3. Check the size of the design; make sure the width and height of the cut file matches the width and height of your lunchbox’s surface.
4. Cut out the design using the Auto Blade. Trim off the design from the vinyl roll and set aside.
5. Repeat steps 1-4 with the rest of the attached cut files, choosing your vinyl colors according to the cut file name.
6. Begin by applying the white vinyl rectangle to the surface of the lunchbox, smoothing out carefully to avoid air bubbles.
7. Begin laying out the water cycle design according to the cycle process (use this image for reference:) Make sure that all pieces are smoothed out and secure.
8. You’re done!
Related Projects
Stay Connected
Follow Us
Brother Support
Corporate Information
Partnership Opportunities
About This Website
