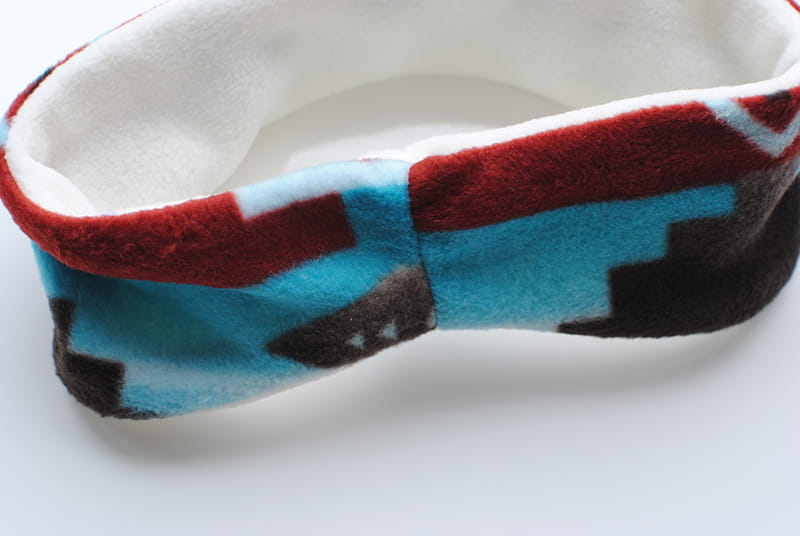
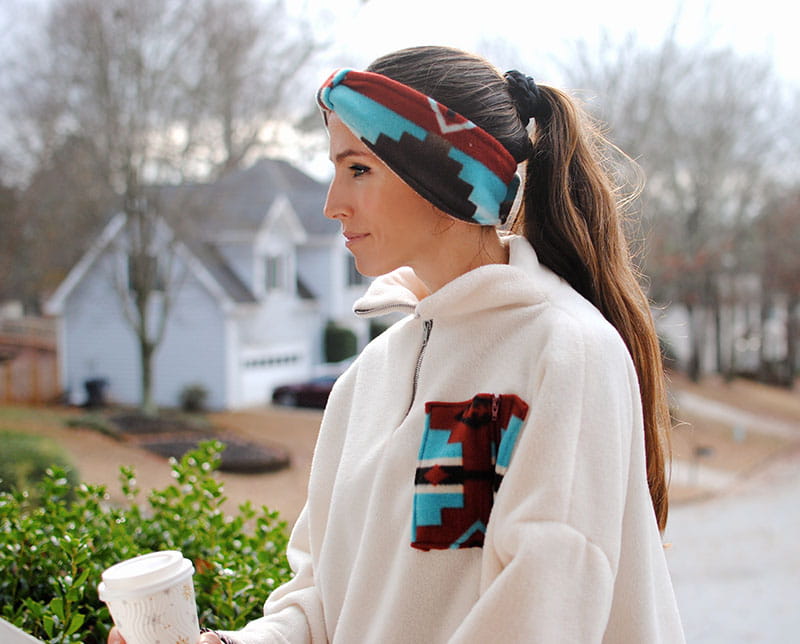
How to Sew a Fleece-Lined Ear Band (Warmers):
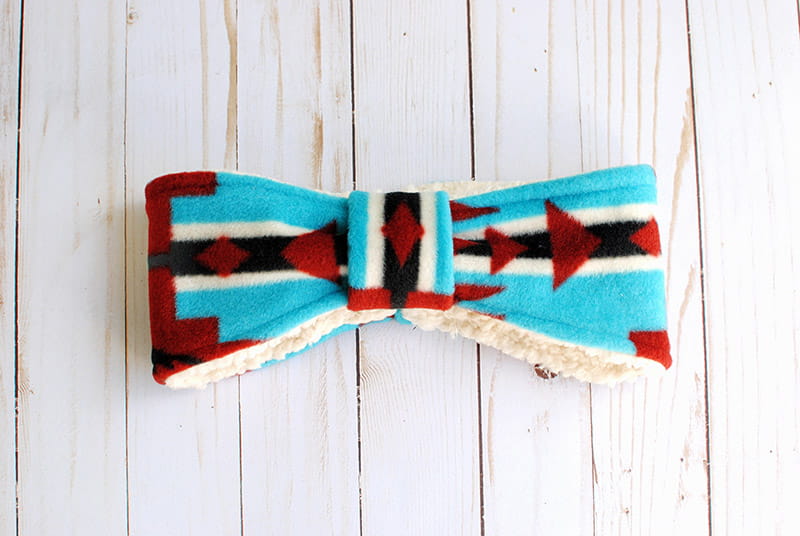
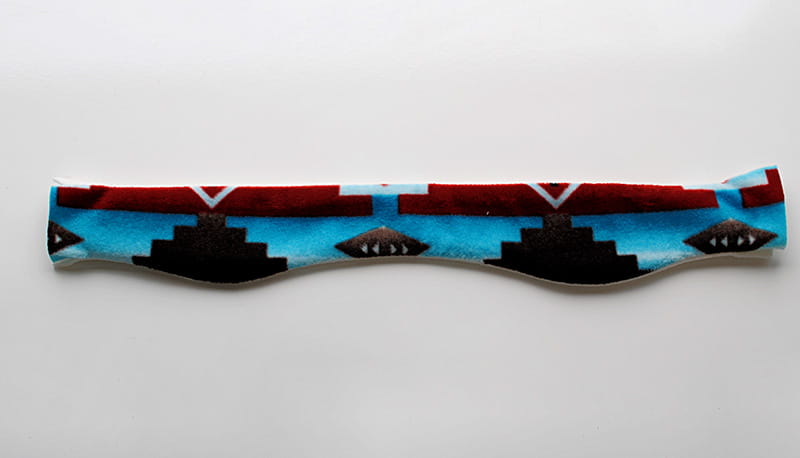
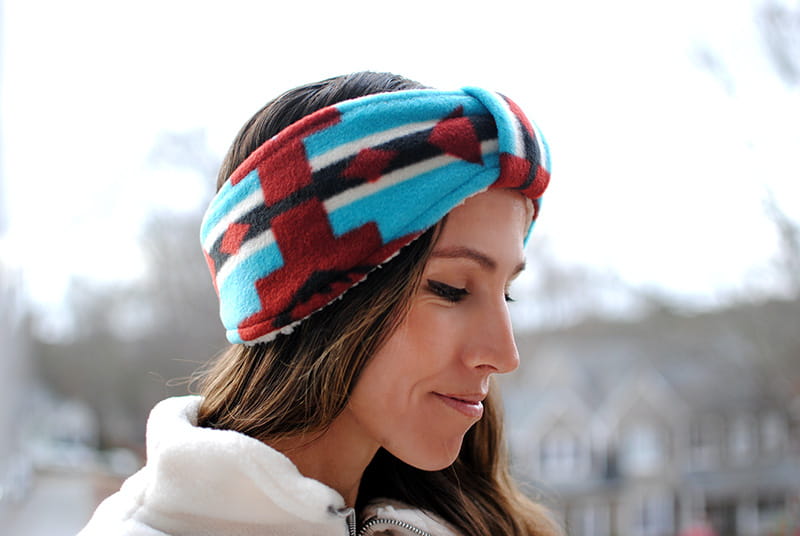
Winter is here, and it’s a great time to be outdoors. Cozy up with these fleece or Sherpa-lined ear warmers. Perfect for keeping the ears warm and hair up during outdoor activities. Pick fun fleece prints and have an array of options; they are great to make as gifts as well. Get the DIY tutorial below on how to sew a fleece ear band.
Supplies:
- Brother SE1900 Sewing Machine
- Fleece (front and back)
- Pattern
- Jeans Needle
- Pattern PDF
Step 1
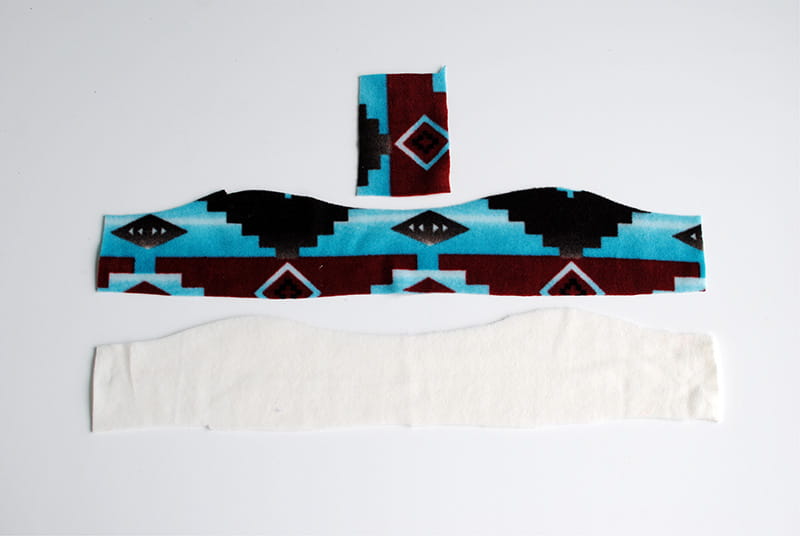
Cutting :
Use this pattern or cut 2 pieces of fabric (front and interior) that measure 4.5 x 21” and a smaller rectangle that measures 3 x 4”
Step 2
Sew :
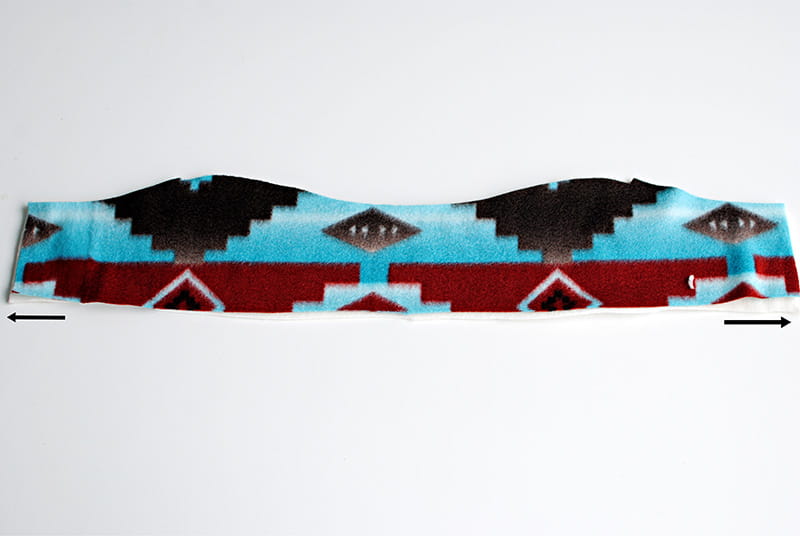
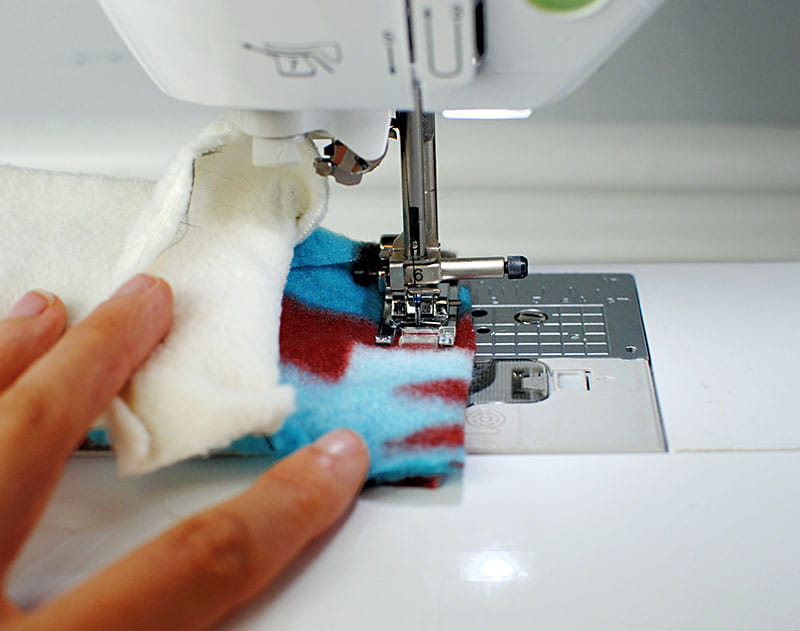
Place front and back right sides together, clip, and zig zag stitch from one side to the other leaving a 1” opening on both edges and both sides. Tip: use a jeans needle to sew through the thick layers.
Step 3
Clip the curved edges.
Step 4
Flip the right sides out and press.
Step 5
Sew :
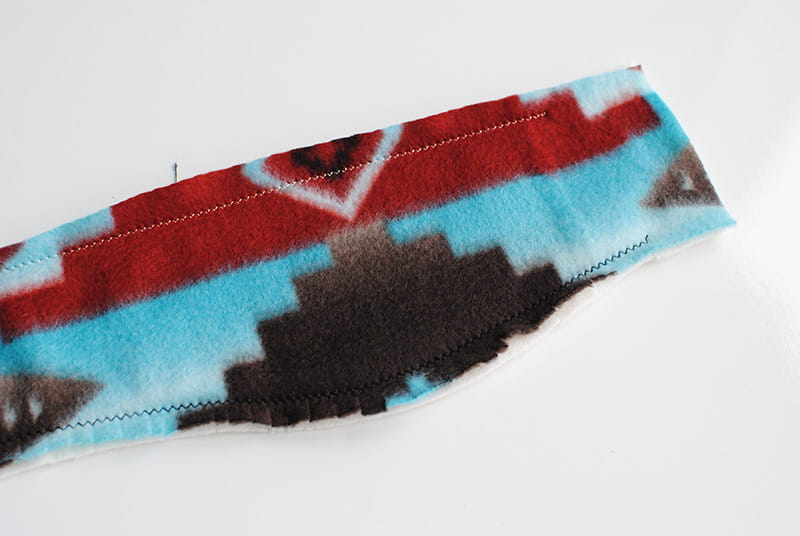
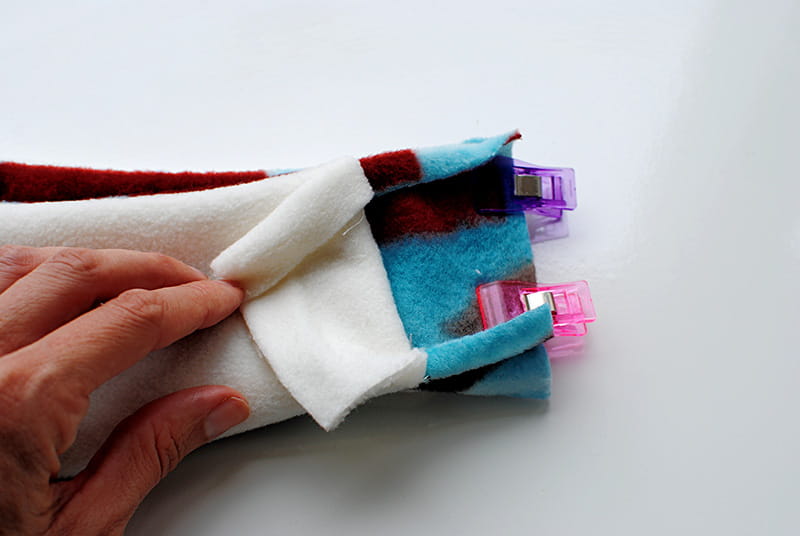
Take the opening edges and place them right sides together, front piece matching front and interior matching interior. Clip into place. Tip: This is a good time to try on the ear warmers before sewing. Do they fit or need to be a little snugger? Adjust as needed. Next, sew the edges together with a ¼- ½” seam allowance, depending on if you need more or less room. Repeat for alternate side.
Step 6
Sew :
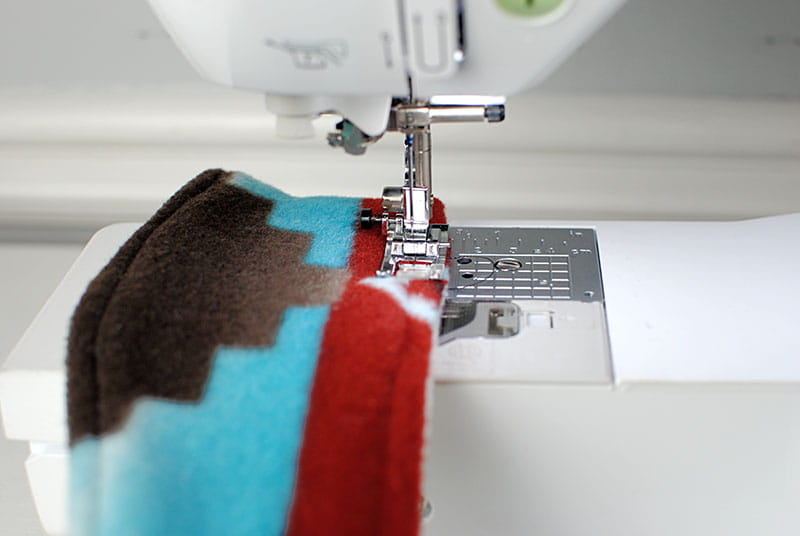
It should now form a loop…check to see if fitting is right. Fold in seams allowance and edge stitch all the way around the top and bottom. You can use a zigzag stitch or straight stitch (3.0-3.5).
Step 7
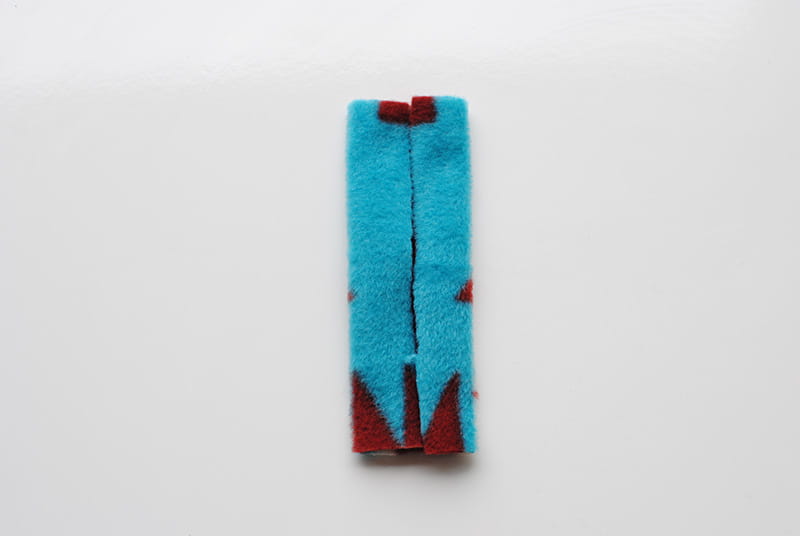
Take the smaller piece of fabric and fold sides into center. The right side is out.
Step 8
Sew :
Wrap around center of ear warmer right sides facing and sew edges together.
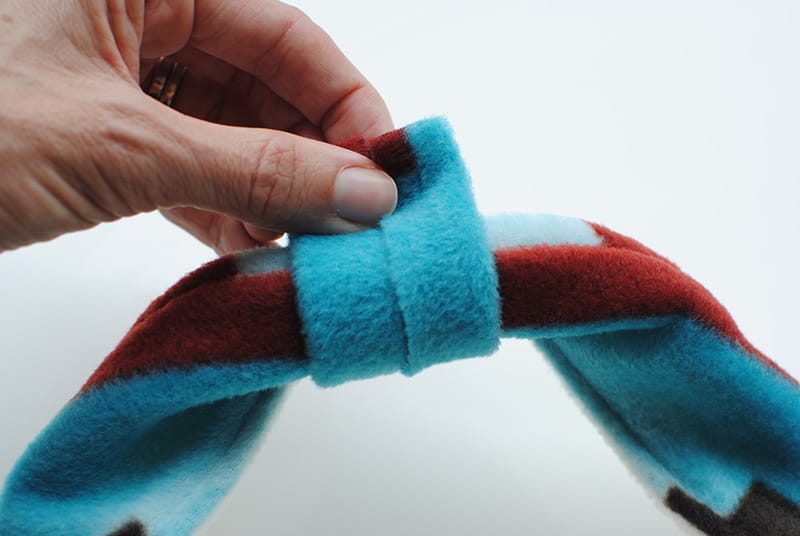
Flip the right side out and center on your ear warmer.
Related Projects
Stay Connected
Follow Us
Brother Support
Corporate Information
Partnership Opportunities
About This Website
