Free Design of the Month: Embroidered Jean Jacket
Jean Jackets are a true classic and a great canvas for machine embroidery. The Free Brother Design this month is perfect for stitching on denim! In this project you’ll learn about adhesive type stabilizer and see how to hoop a jacket back to stitch two motifs color matched to coordinate with your denim. Materials and Supplies
- Brother Sewing and Embroidery Machine
- Brother Free Design of the month
- SA5906
Brother Adhesive Backed Water-Soluble Stabilizer - Brother
embroidery thread and bobbin thread - Embroidery needle for embroidering.
- Wash away marker or chalk
- Gridded mat or other similar surface for aligning fabric in the hoop.
- One piece of felt- optional but helpful for testing new color combinations. Back the felt with a piece of Brother
cut-away or tear-away stabilizer for best results.
- Brother
Couching Dual Feed Foot for select Brother machine models. Note: This accessory may be included with your machine or available separately as an add-on accessory. - Yarn suitable for couching.
- Jeans needle size 16 for couching yarn.
- Sharp, large-eyed hand needle for feeding yarn to back of jacket.
- Seam sealant for treating ends of couched yarn.
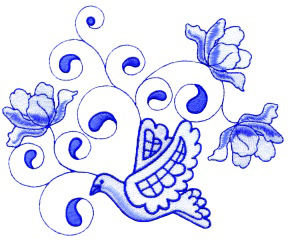
Brother Free Design of the Month
Original Colors: Shades of blue Modified Colors: Light, medium & very dark grey
FD_September 2017_Dove with Flowers.pes
Design size: 5.00” X 4.00”
 Steps to Create Embroidery on Jacket
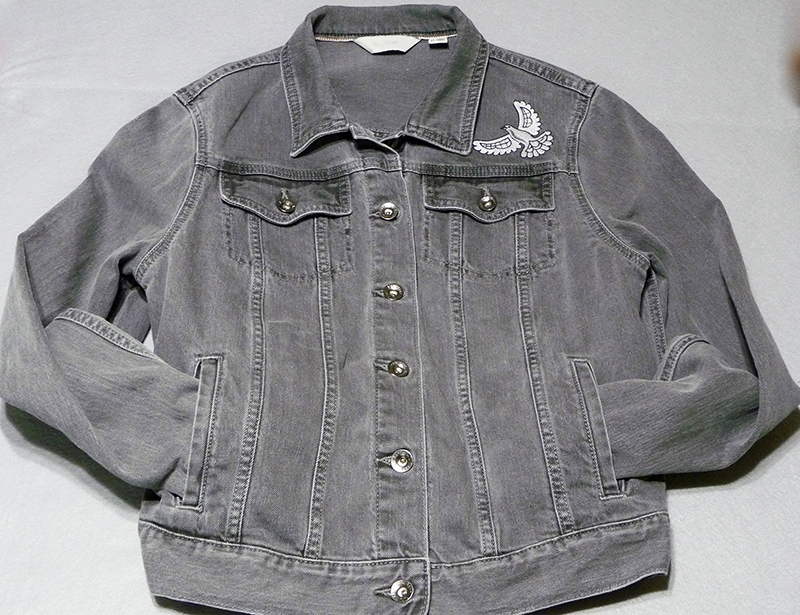
- Please review instructions before beginning this project. Test design on felt using a mixture of colors similar to your jacket for a subtle, tone on tone effect. This jacket features a light, medium, and very dark grey to color coordinate with the special color of the denim jacket. Felt is available in many colors. You may be able to find a piece that is very close to the jacket color. See Figure #1.
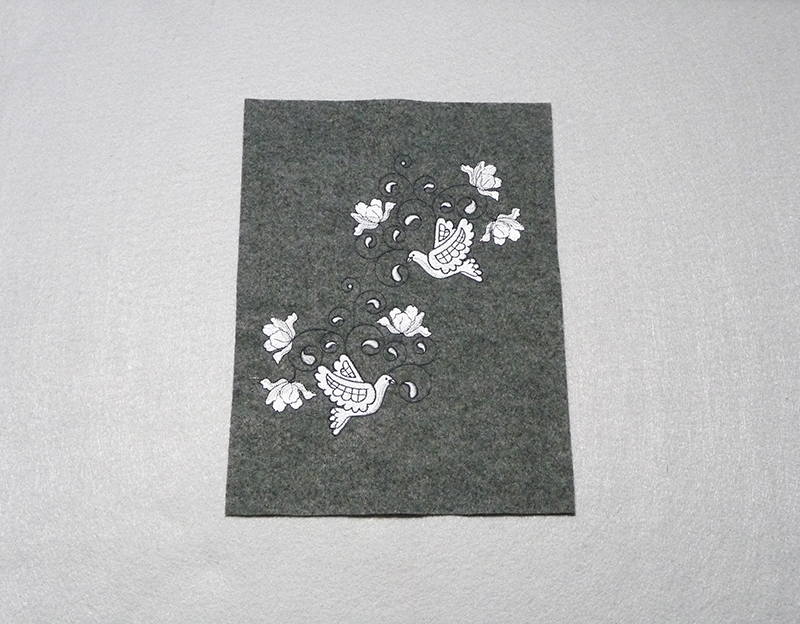 Figure #1[/caption]
Note: The featured free design fits within a 5” X 7” hoop. You can choose to stitch to separate motifs, using the mirror image function on your machine to create a look similar to the one shown here. In this example two motifs were combined and stitched in an 8” X 12” hoop. For most jacket back areas this will be the perfect size hoop.
- To hoop the jacket back you’ll need adhesive backed stabilizer to hold the jacket in place. A denim jacket is very stable so you shouldn’t need any additional stabilizer. Steps for hooping stabilizer are as follows:
- Cut a piece to fit within the hoop. Tightly hoop with the shiny side of the paper facing up.
- Use a pin to lightly score the paper making an “X.”
- Pull away the paper to expose the sticky side. See all steps in Figure #2a – #2c.
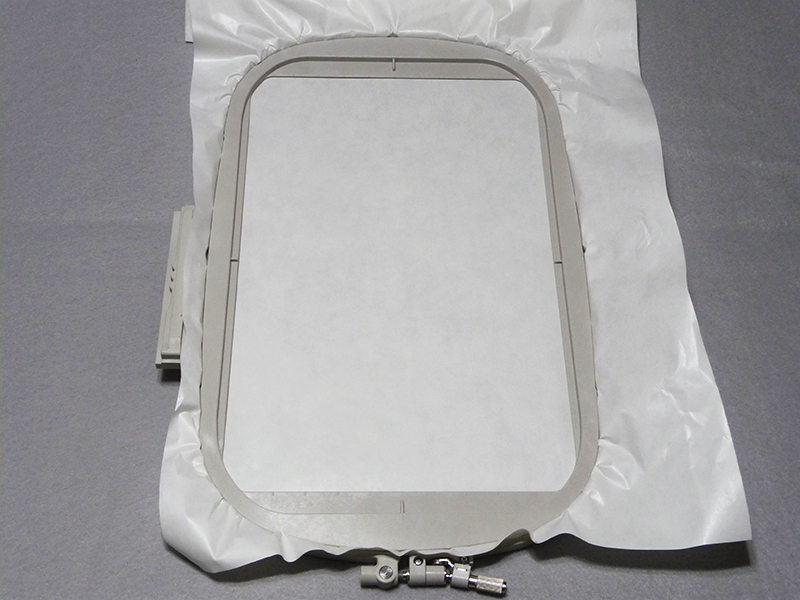 Figure #2a[/caption]
[caption id="attachment_9627" align="aligncenter" width="800"]
Figure #2a[/caption]
[caption id="attachment_9627" align="aligncenter" width="800"]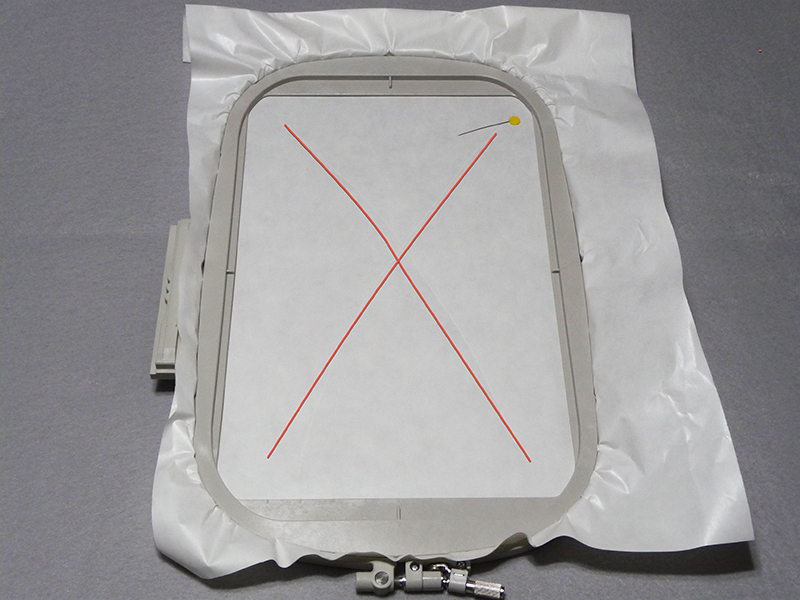 Figure #2b[/caption]
[caption id="attachment_9628" align="aligncenter" width="800"]
Figure #2b[/caption]
[caption id="attachment_9628" align="aligncenter" width="800"]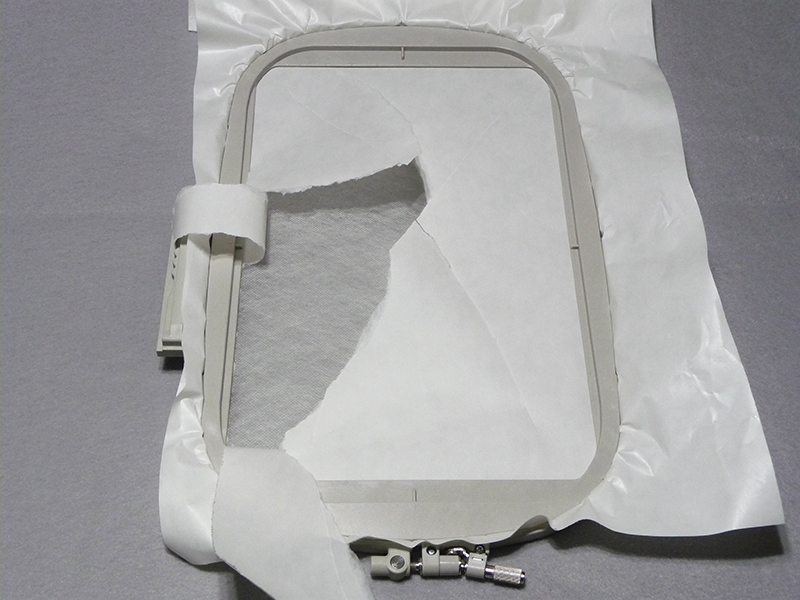 Figure #2c[/caption]
Tip: Adhesive backed wash-away stabilizer is temporary and washes out completely when you follow the directions on the package. This product is ideal for items that are difficult to hoop in the traditional manner. Keep in mind the fact that this stabilizer does not add any permanent stability. For items that require permanent stabilizer you would apply the permanent stabilizer directly to the wrong side of the garment, and then use the method shown here to secure fabric for embroidering on the adhesive.
- Mark the center of the jacket back on the wrong side of the jacket.
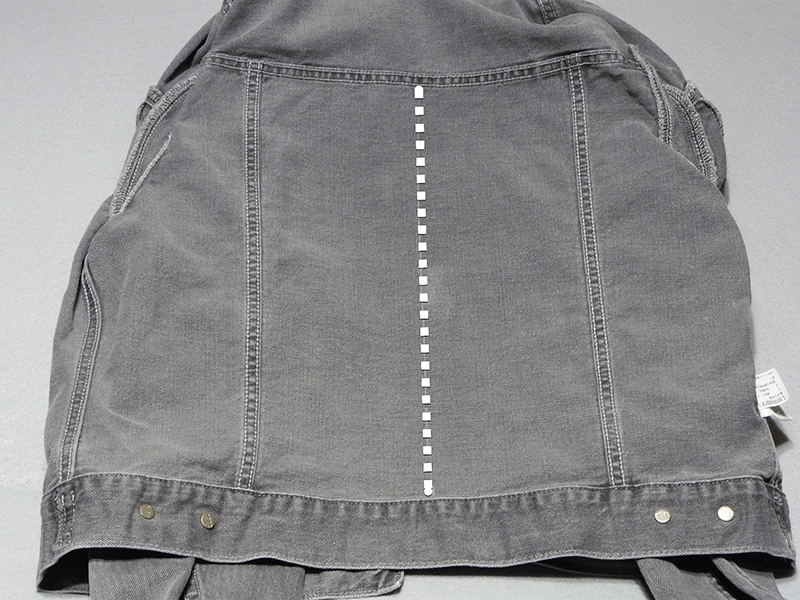
- Place the hoop on top of the gridded mat, lining up the center markings indicated on the hoop with grid markings on the surface below.
- To hoop the jacket begin by folding the jacket in half to expose the center marking. Align the center marking of the jacket with the center line on the grid below the hoop. See Figure #3.
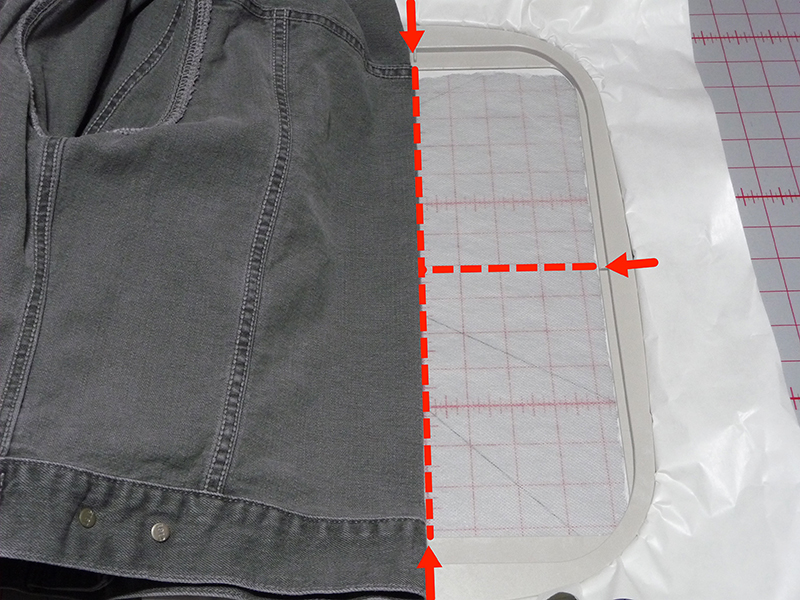 Figure #3[/caption]
- Smooth the jacket back so it is thoroughly attached to the stabilizer.
- Embroider one or more motifs as desired, centering designs to fit on the back panel of the jacket.

- Pull away, and then trim as much of the stabilizer as possible to make washing easier. See Figure #4a and #4b.
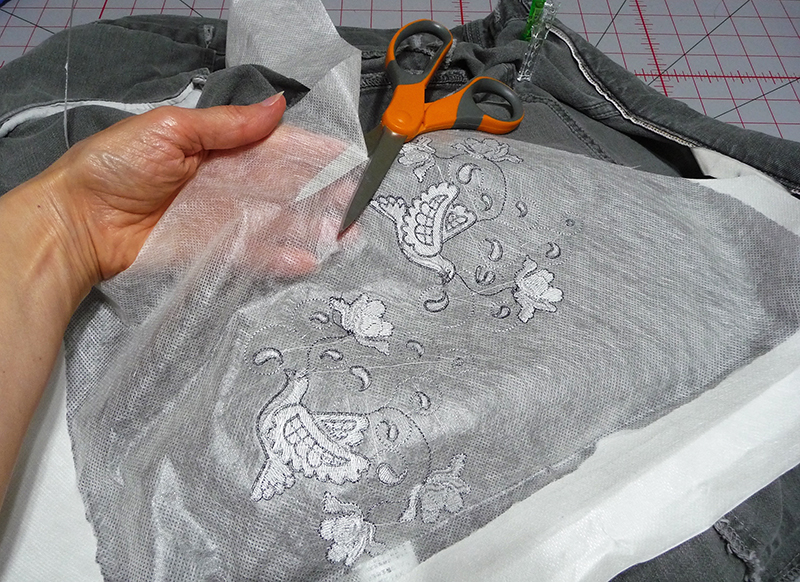 Figure #4a[/caption]
[caption id="attachment_9631" align="aligncenter" width="800"]
Figure #4a[/caption]
[caption id="attachment_9631" align="aligncenter" width="800"]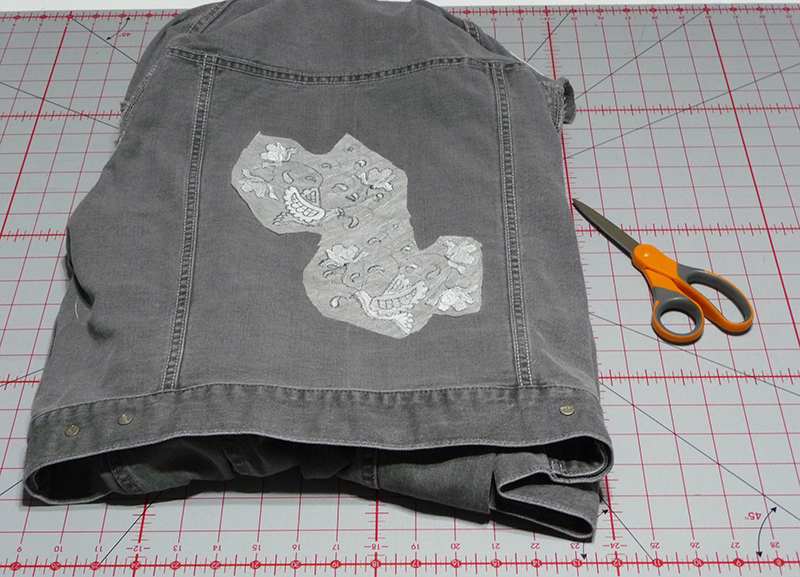 Figure #4b[/caption]
Tip: I like to keep my hand under the stabilizer and lift it slightly to keep scissors away from garment.
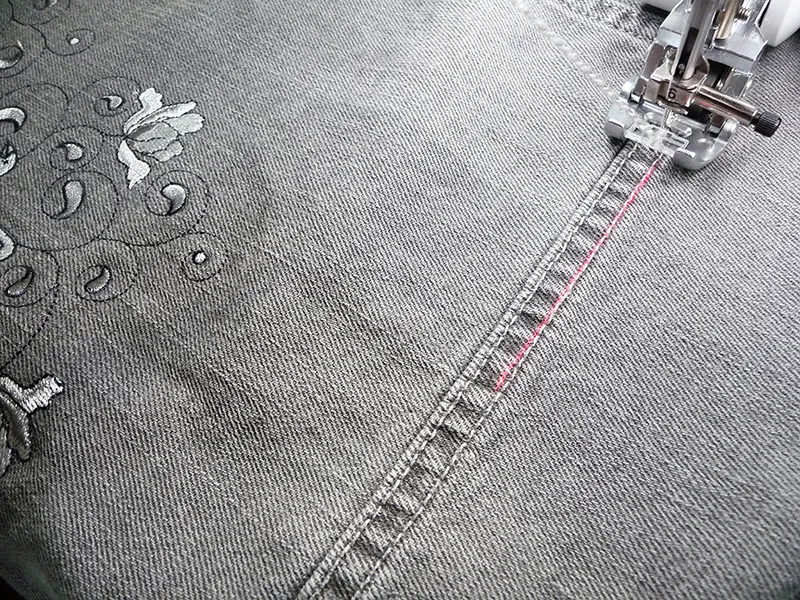
- For optional couching set up machine for couching as directed in the included instructions. Insert the size 16 jeans needle and use a slightly longer zigzag length to accommodate the added thickness. Couch yarn along the seams surrounding the embroidered area to accent the design and tie the color scheme together. See below:
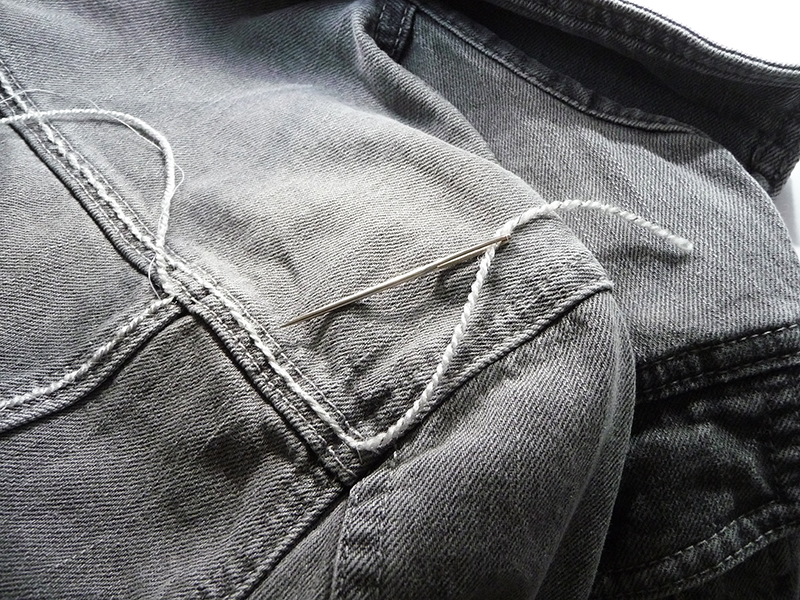
- To finish ends thread yarn and needle thread into a large eyed needle. Feed to the back side. Tie yarn and thread into a knot and then apply a small amount of seam sealant to the ends. Clip excess yarn and thread when dry. See Figure #5.
 Additional ideas:
- Add iron on crystals or other embellishments to accent the embroidery on your jacket.
- There are many designs that coordinate with this free design, including a variety that fit smaller hoop sizes. Visit the Heirloom in Blue
design category found on the Brother iBroidery.com
design download site.
Related Projects
Stay Connected
Follow Us
Brother Support
Corporate Information
Partnership Opportunities
About This Website
