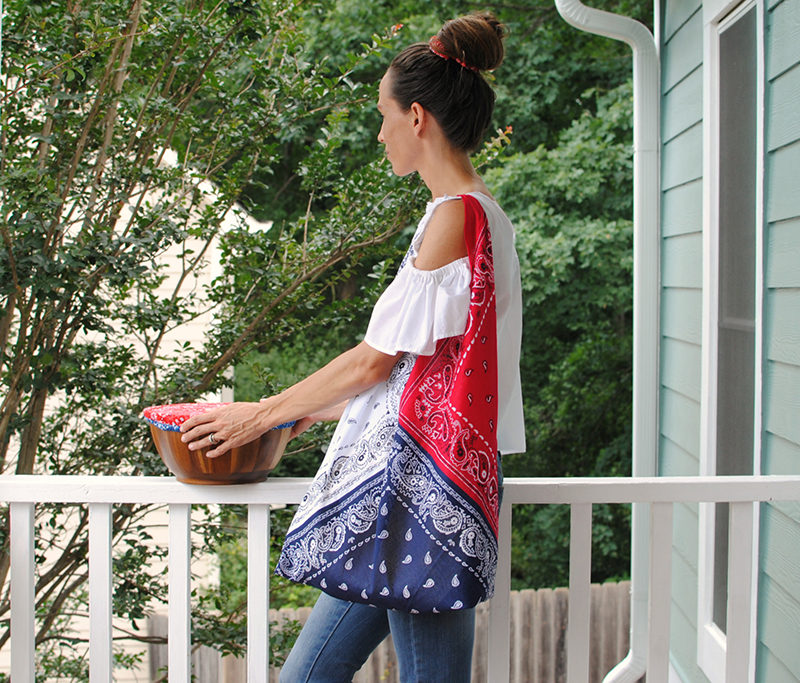
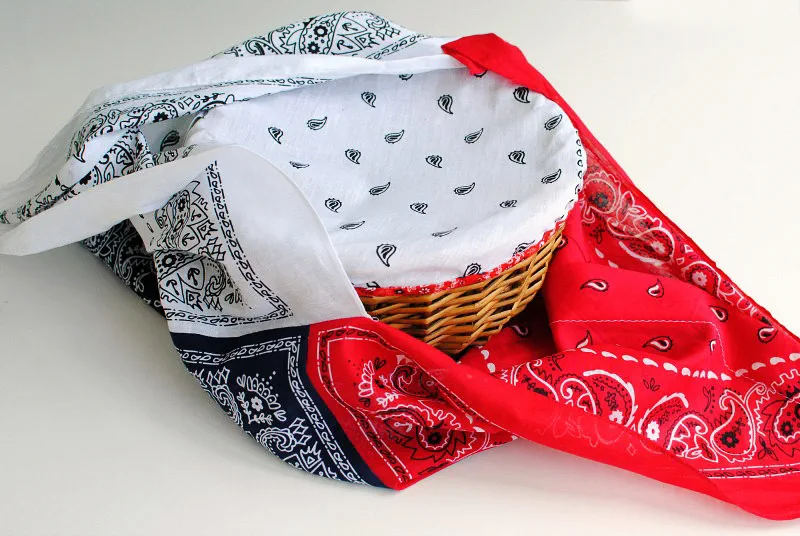
Patriotic Bandana Picnic Bag
 Now that we have mastered the dish covers,
it’s time for some more patriotic fun! We do need something fun to carry these dishes in and why not keep the bandana theme going here. I always have a stack of them handy because they can be used for simple projects like this picnic bag. Get the details below and make your own!
Supplies:
- Brother SE1900
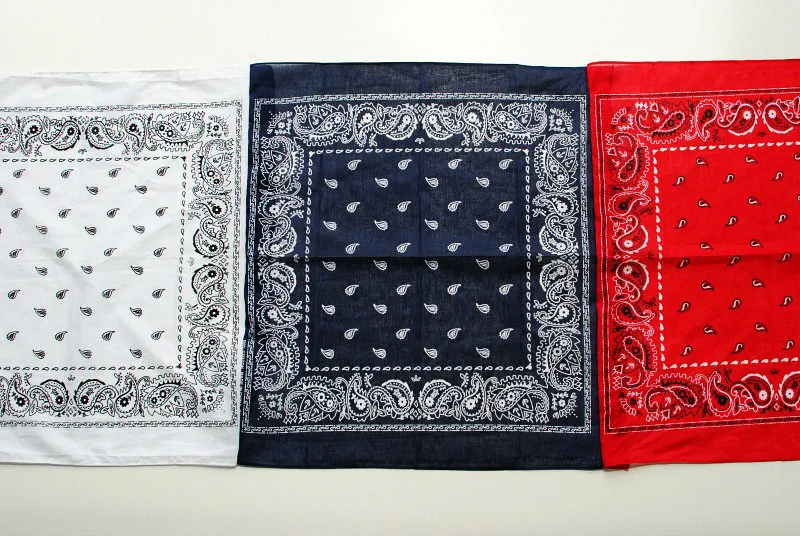
- 3 bandanas
- general sewing supplies
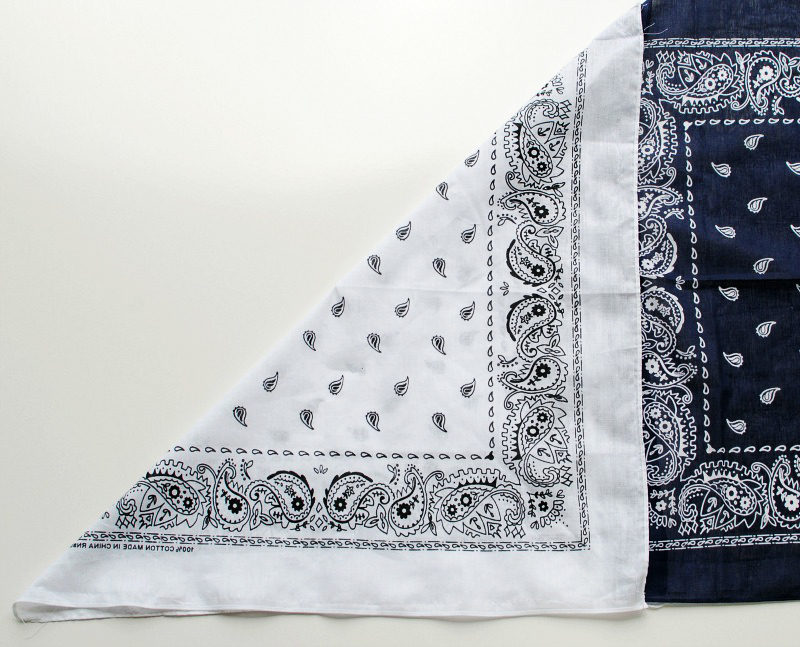
 Step 1
- Pick your center color.
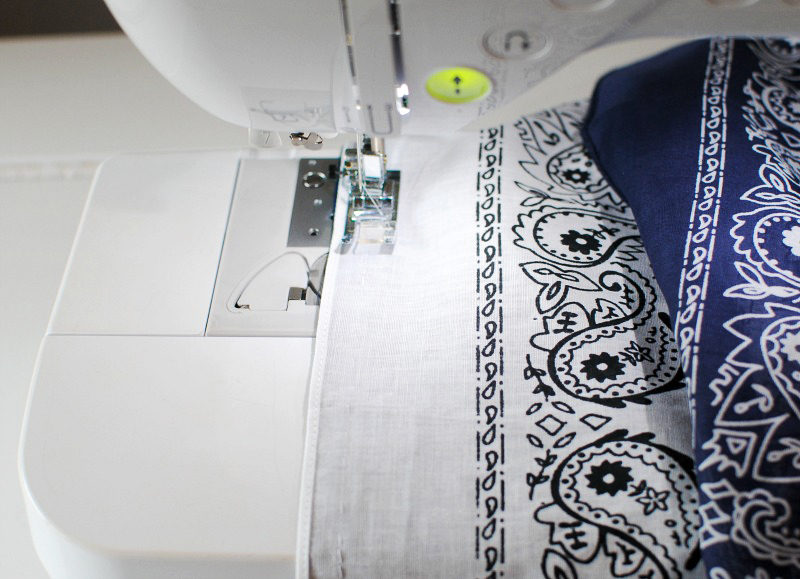
- Place one of the side bandanas right sides together over the center one. Sew down the side from top to bottom.
- Repeat for the last bandana on the other side of the center.
- You will should now have a row of bandanas sewn together.
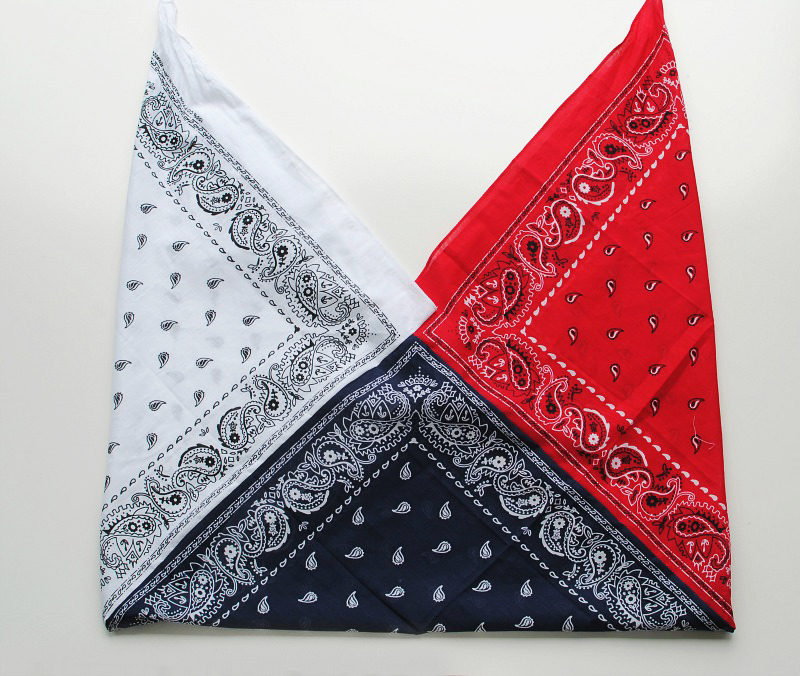
 Step 2
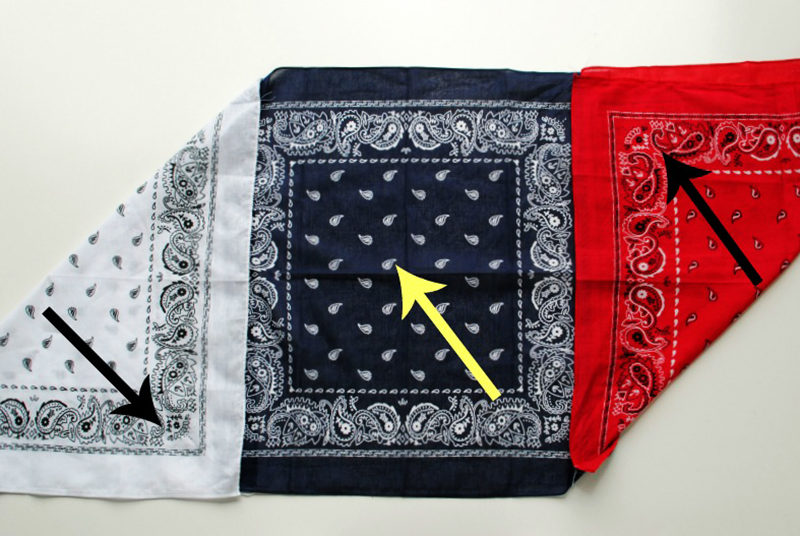
- Fold the side bandanas down toward the corners in the opposite direction as each other. See the arrows.
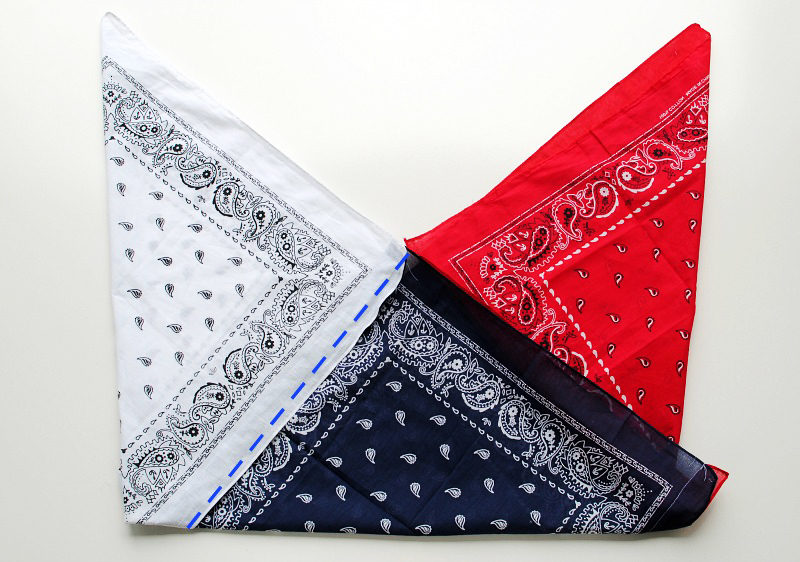
- Fold the center up so it will now appear as such. This is basically the bag…
- Still lying flat, you will notice the left side where it meets the center needs to be pinned and sewn together to finish the bag in this origami type pattern. Stitch that side right sides together with the center.
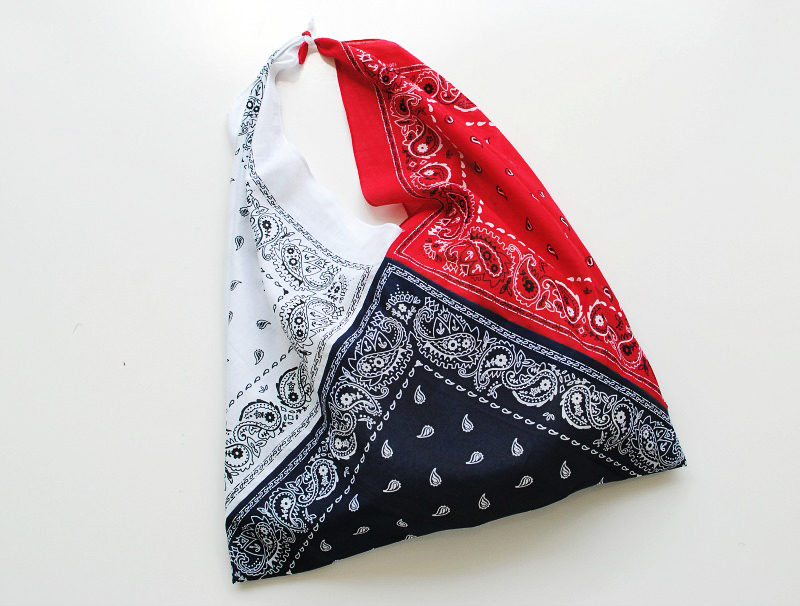 Step 3
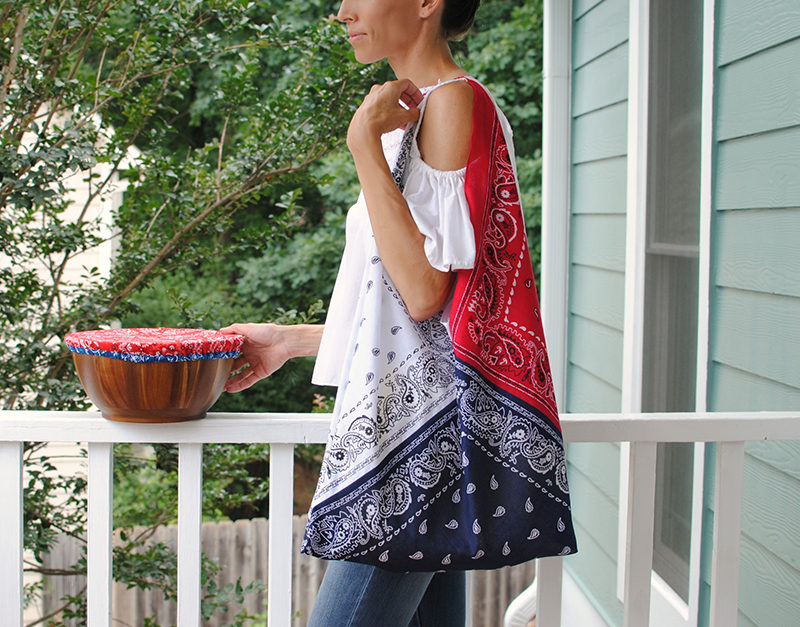
- Once it’s done, flip right side out and you should see the bag should be formed. Now just knot the top corners together.
- Place your dishes in and your good to go. This also makes a great bag in general. You can add a leather handle over the top or even strapping to add length to the arm area. Alter the sizes of the squares to get a smaller or larger bag. This is a great project to do with fat quarters just make sure to finish the edges first or add a liner. You can even wrap it around the waste for an apron when serving… oh goodness, I’ll stop now!
Related Projects
Stay Connected
Follow Us
Brother Support
Corporate Information
Partnership Opportunities
About This Website
