Fairy Inspired Wall Décor
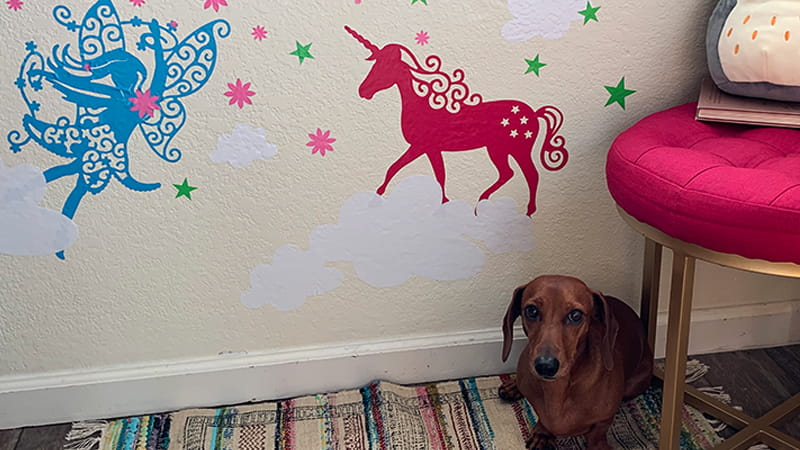
ScanNCut Specialist May Flaum creates a one of a kind fairy tale inspired reading corner that is sure to warm hearts. Watch as she walks you through the fun easy steps to create your own.
Craft Vinyl is a fun product to use for many reasons, especially when it comes to temporary home décor! I wanted to create a fairy inspired reading corner, using some of the patterns from Tattered Lace 4 (Collection available for separate purchase) as inspiration. Craft vinyl sticks beautifully to my walls; however, it will also peel away when done so I can change out my designs if I would like! Be sure to test your material on a small inconspicuous area, as well as taking care to check the type of vinyl you are working with. For my project today, I’ll be working with the standard 12x24 mats and ScanNCut DX, as well as sharing both ways to approach designing your cut files.
Supplies needed: ScanNCut DX, CanvasWorkspace, Tattered Florals #4 and #8, 12x24 mat for the ScanNCut DX, assorted colors of craft vinyl, transfer material
Before we get started, I have a tip for you. I recommend cutting your files from inexpensive card stock or other paper to ensure the sizes are good, and that you like the design. Using a small amount of masking tape, I placed my main designs up on my wall first to check sizing and if I like it, then cut from the vinyl.
Getting your cut files ready:
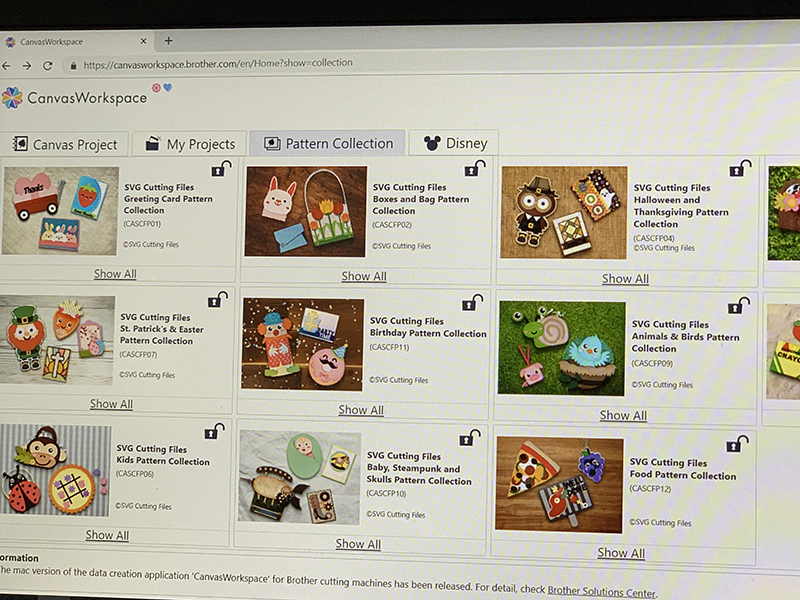
1. To retrieve the Tattered Lace files, open CanvasWorkspace and select “Pattern Collection”. Then click on the collection you wish to open (Note that you must first purchase the files, if using paid files vs free). Click on the file you wish to select, and download to your computer. Repeat this with any additional files, then open and unzip the files from your downloads. I recommend renaming them at this point so that you can easily identify what file is each design easily.
2. At this point, you can save your files to USB drive if you wish to transfer, or if you wish to edit in CanvasWorkspace click on “Canvas Project” and click new.
3. Click the “import SVG/FCM” button, and select the Tattered Florals design you wish to edit first. Then click “project”, and change the area size from 12x12 to 12x24 to allow for working on the larger mat size. Once this is done, resize your image, add other images, and edit as needed. Once you are finished, click the large download button on the left and save to a USB drive (if not transferring wirelessly). I recommend naming the file for easy access from the machine as you retrieve data.
4.Take your USB drive to your ScanNCut DX and insert. Then turn on the ScanNCut DX and click the tool button to select the cut area. You will need to change this to the 12x24 option vs standard mat. Then click retrieve data, USB, and find the first file you wish to cut.
Note that if you have any further editing to do, or if you prefer to edit size and orientation on the machine vs CanvasWorkspace, you can, and this will be the time to do so.
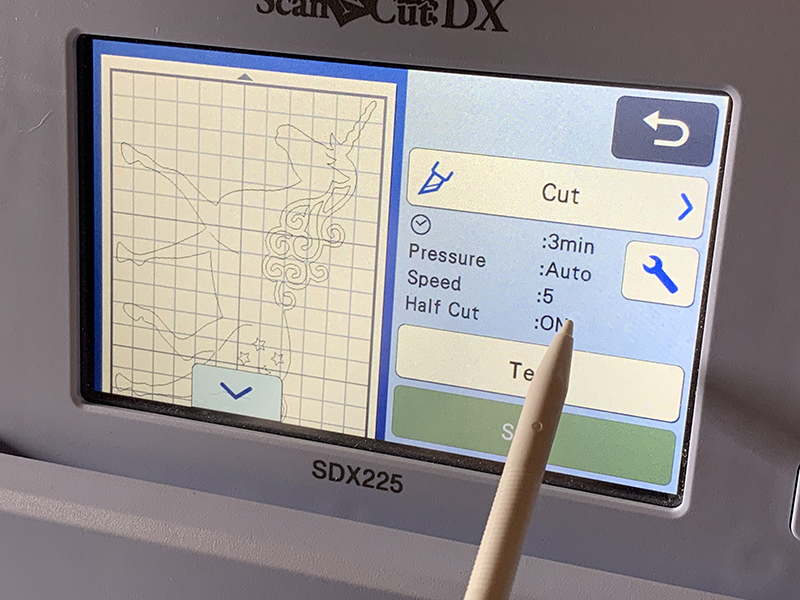
5. Follow the prompts through, accepting and saying OK, until you reach the select function screen. Select cut. Then click the tool button and make sure “half cut” is on. This will ensure that your vinyl is cut, but not the backing sheet.
6. Cut and place your vinyl on your mat. I recommend using a scraper or similar tool to ensure the vinyl sheet is firmly and evenly on the mat. Once set, load the mat by pressing the mat load button with mat arrow facing the ScanNCut DX.
7. With the design and mat ready, press cut and the ScanNCut DX will cut out your image(s). Repeat steps with additional designs. While additional designs are cutting, take the time to weed or remove unwanted vinyl from your finished cut sheets. This is a great way to multi-task and have a strong work flow for this project!
Editing from ScanNCut DX if desired:
If you prefer to work from the ScanNCut DX vs CanvasWorkspace to edit and size your files, this is how you will do so:
1. Click the tool button from home screen and confirm the mat size.
2. Click retrieve data and select the file you wish to work with. “OK” and this brings you to the mat screen.
3. Click Edit and object edit to edit. The things you might wish to do include:
- mirror image: useful for getting the opposite direction of a cut file!
- edit size
- rotate image: useful for a file that can be bigger if rotated, or to fit more designs on the sheet
- add more, or otherwise adjust file
4. Once satisfied, click OK and follow to screen to select cut, verify half cut is on, load mat, and begin.
Assembling the project:
1. Once your designs are weeded, you are ready to set up your wall. Make sure the space is clean and free of dust first. Then, working one file at a time take a piece of transfer material and lay it over the design. Press firmly (the scraper tool or spatula works well) to transfer it, then lift the transfer material with design attached and head to your wall. Place the design on the wall, again press firmly to transfer the vinyl from the transfer to the wall itself, and gently peel away the transfer material.


2. Repeat this step one design at a time until you have your main pieces placed. Then evaluate if any additional designs are desired, sizes, and how many. Once you have completed this, enjoy your newly decorated wall!
About the large files used for this project:
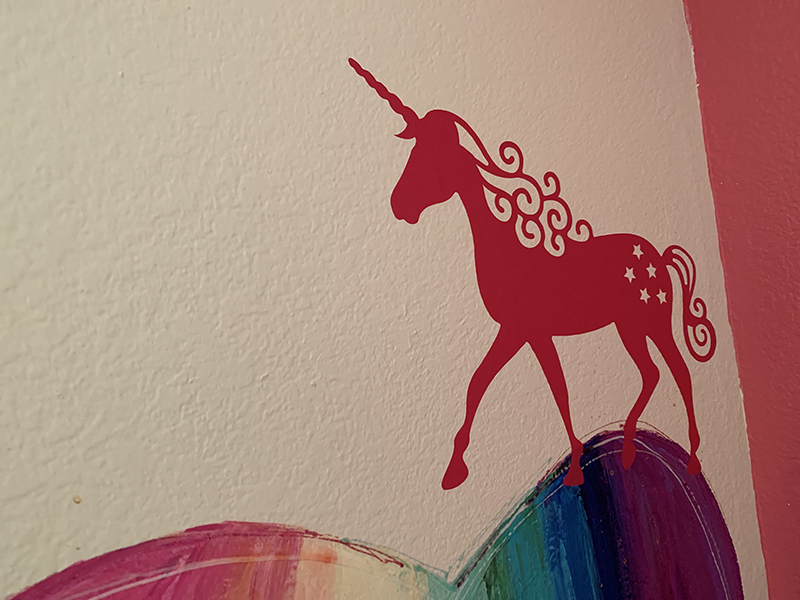
Tattered Lace 4 (TTLP04001 and 019): I turned the unicorn sideways on the mat, so that I could get the largest possible image (approx. 14” long), and for the fairy made a version about the same length. You could create smaller fairies if desired.
Tattered Lace 8 (TTLP08012): I cut this pattern twice (Sized 24” long), the second time I was sure to go in the edit screen, hit the “mirror/flip” button, then cut. This way I had mirror images of the same cut file to place along the bottom of my window.
About the small files used for this project:
I used the built-in designs of a star 1-2” wide, cloud (ARA006) from 6-12” wide, and flower part A (ARA102) ½ - 3” wide to fill in my designs once on the wall. I cut the approximate numbers and sizes I needed after the Tattered Lace patterns were placed and I knew what sizes and built-in designs I would want. Working large to small is a tactic that works well for me on a project like this.
Related Projects
Stay Connected
Follow Us
Brother Support
Corporate Information
Partnership Opportunities
About This Website
