Grill in Style with a Custom BBQ Apron
Summertime grilling is here so ScanNCut Specialist May Flaum created a personalized BBQ apron for her latest outdoor party!
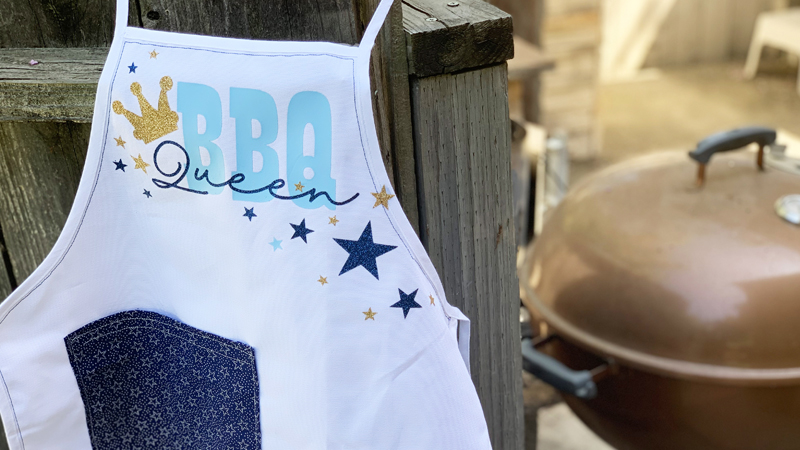
BBQ Queen Apron
When it comes to hostess gifts, I like to customize to the occasion. This project is a lot of fun, all thanks to the ScanNCutDX! Beginning with a plain apron, I was able to customize the front with a variety of heat transfer vinyl’s and shapes. What could be better? A project like this can be reimagined in any theme, color, or for any occasion! Utilizing the ability to move and visualize the pieces while on the screen (prior to cutting) really helped ensure I got the exact sizes I wanted for my project.
Supplies needed:
ScanNCutDX, standard mat, heat transfer vinyl’s, apron, iron, fabric, and pick tool for weeding.
Directions:
1. For this project, I began with the type converter tool on my PC. I selected two different fonts for “BBQ Queen” and saved those files to a USB drive.
Tip: You can size, weld, and otherwise edit your text once on the ScanNCut, or in CanvasWorkspace whatever works better for you! You can also pull text for a project like this from anywhere!
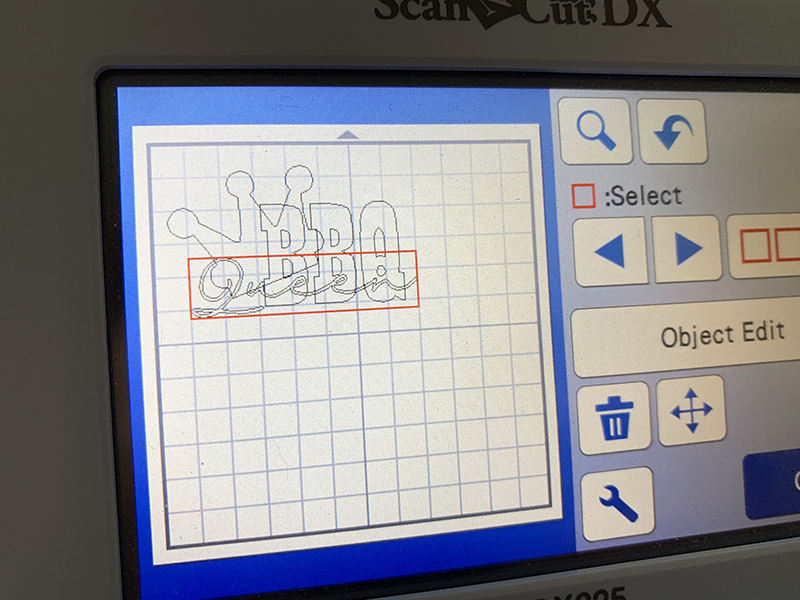
2. Open first file using retrieve data (USB drive) on the ScanNCut DX. Select this, click the red boxes, and then in object-edit, click unify. This will create one-word file (vs individual letter or cut files) so that resizing and moving is much easier. Repeat with additional words.
3. If using a cursive word, select all pieces as before, but then click weld instead of unify. This will remove any overlapping cut lines and create one seamless piece.
4. Add in other designs (such as star, crown, etc.) and in the object edit area, click and resize pieces as needed.
Tip: Want to see how it’ll look all together? Go ahead and overlap files and really get a feel for the sizing and look. Once you’re satisfied with the size ratio, then move things apart again.
5. Load vinyl (carrier sheet down) onto your mat, then load the mat into the ScanNCut. Scan the mat in and move pieces to be cut onto the appropriate color block of material.
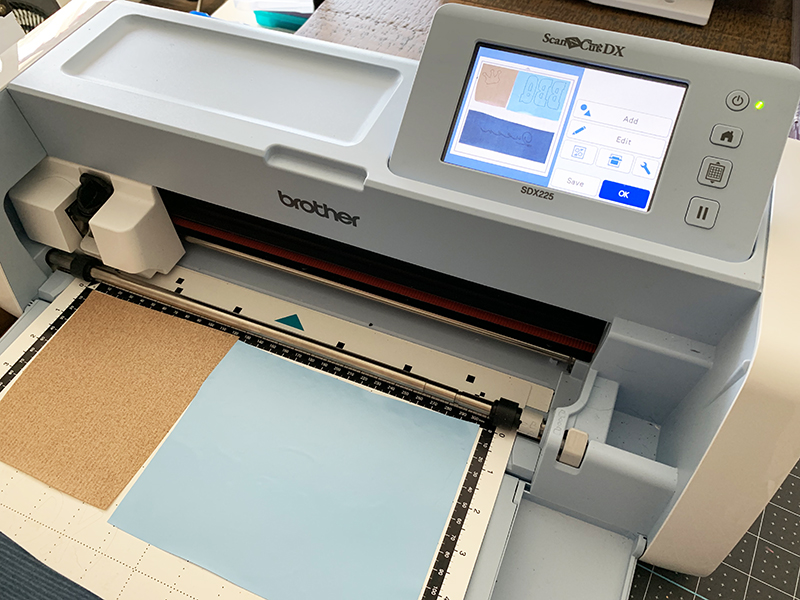
6. Press “Ok” on your screen to the select function then select cut. Press the tool button to turn on half cut, then start to cut the design.
7. Remove the vinyl pieces, and weed out any unwanted vinyl from designs.
8. Beginning with BBQ (or your base piece), iron into place and then remove transfer sheet. Repeat with all designs, removing the transfer material as you go, replacing it only if needed to re-apply heat to that area.

Tip: Do not touch your iron directly to the iron-on vinyl. Place a transfer sheet back down if needed to ensure this as you can harm the material.
9. Finish by adding any other accents, designs, stitching, or other details you like and enjoy!

Related Projects
Stay Connected
* Required fields