Pysanky Egg Decorating with ScanNCut
Julie Fei-Fan Balzer, crafting expert and educator, is a paid consultant of Brother Crafts USA.
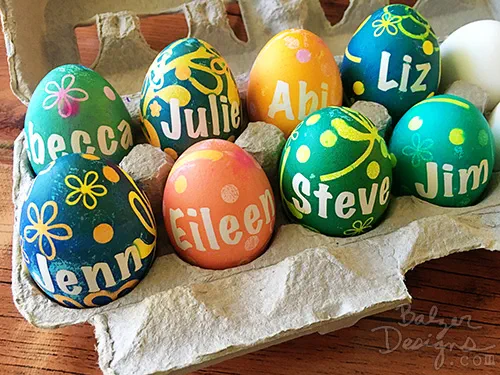
I know that Easter has come and gone, but I wanted to share the eggs I made this year! They were inspired by psyanky.
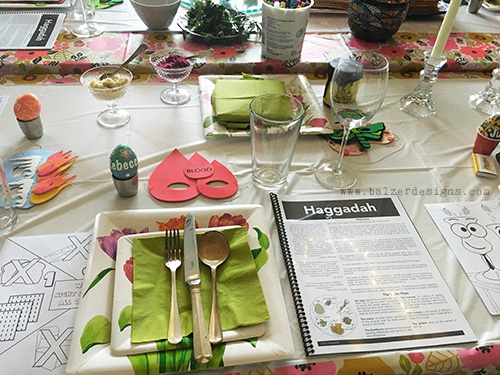
What is pysanky? In the simplest of terms: you dye eggs multiple times adding wax at each layer to preserve the various colors. Inspired by this notion but looking for an easier process than wax, I turned to my ScanNCut for help and made these pysanky inspired Easter Egg Place Cards...
 ..
..
.for my Passover seder:
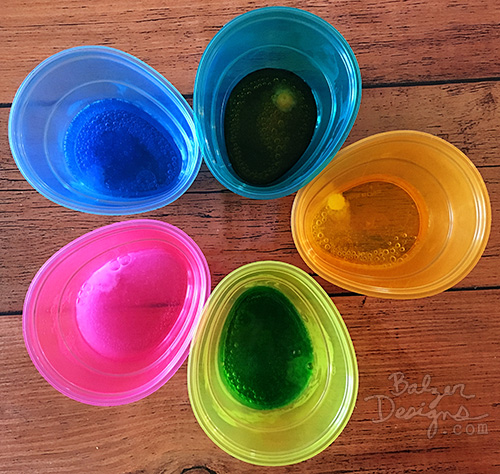
I started with a carton of hard boiled eggs and a package of dye cups. Put the pellets into the cups and then add vinegar and water and you've got dye:
To create an egg:
- Cut names and shapes from adhesive backed craft vinyl using your ScanNCut.
- Onto a clean dry egg, place your vinyl name. (You can watch this video on how to use a Transfer Sheet to apply vinyl: https://youtu.be/cHDf0WtBGvI)-video needs to link to Brother Crafts USA Youtube.
- Place egg into dye.
- Once the egg has reached the color you desire, remove it from the dye and allow it to air dry.
- Once dry, apply various shapes to the dyed egg.
- Place the egg in a new dye color.
- Repeat steps 4-6 until you’re satisfied.
- Allow the egg to air dry and then remove all of the vinyl. I find the hook tool helpful for this process.
That’s it! You’re left with a collection of gorgeous pysanky inspired eggs!
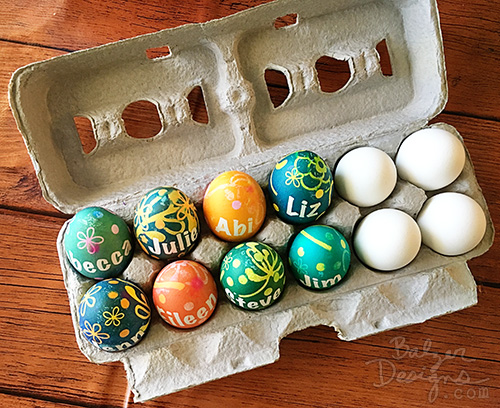
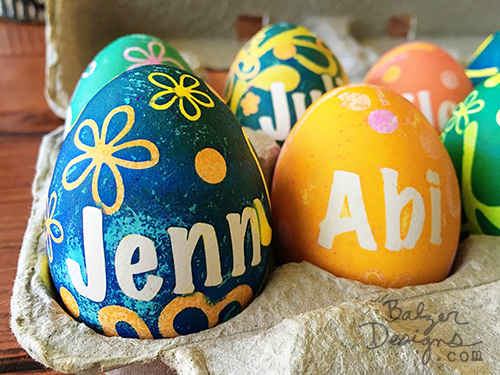
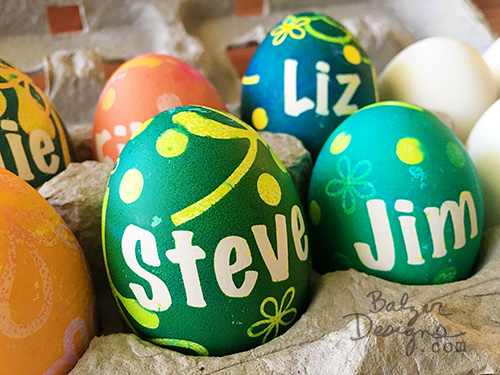

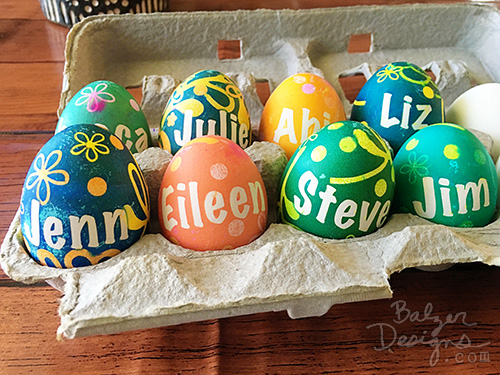
I love how these turned out!
Talk to you next week!
Related Projects
Stay Connected
* Required fields