How to elevate a basic white button-up
-Brother Crafts Blogger
One of the coolest features on the Brother ScanNCut is the Scan feature. I mean, it’s in the name. You can either scan and go directly to cutting or send it straight to the Canvas workspace and make necessary edits. It’s such a neat feature because it takes away the guesswork on trying to figure out certain designs that I’m interested in making. If I can’t make something, I’ll typically look for a cool design online and scan it into my Brother ScanNCut. There’s nothing too difficult about it. It works like your typical scanner on your at home printed with the added benefit of cutting through heat transfer or craft vinyl. It’s quick, easy, and efficient.
If you follow me on social media, you know that I am very much known for taking designer looks and recreating them within an affordable price point.

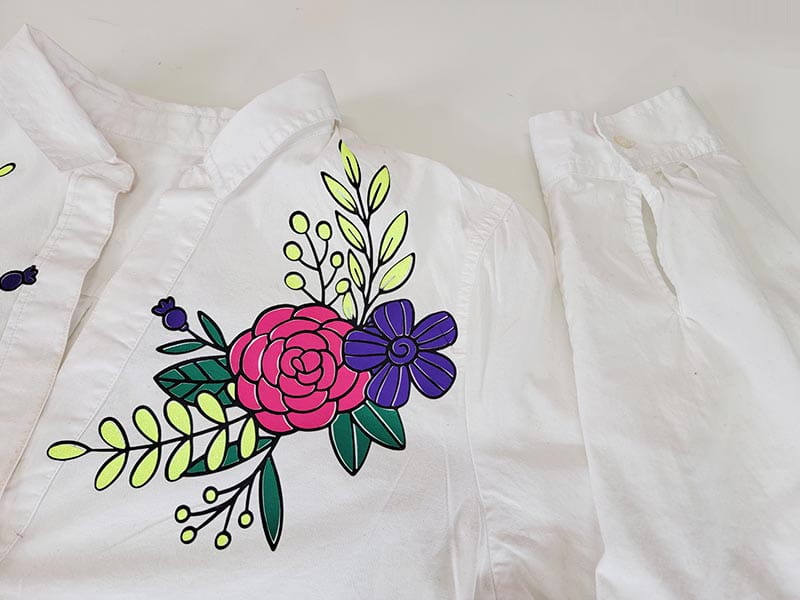
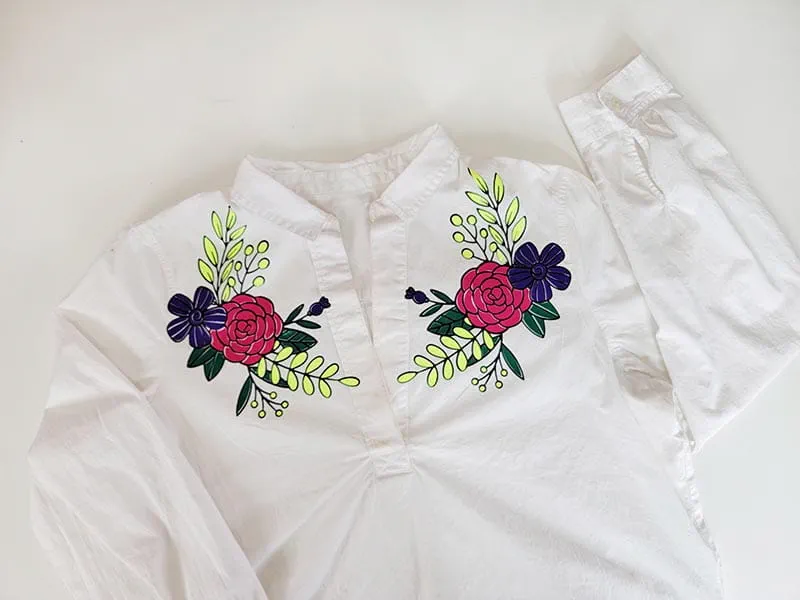
With that said, let’s elevate a button-down shirt. I got the idea from a shirt I saw at one of my favorite designer stores. The shirt had embroidered flowers on both the left and right shoulders. The flowers were big and bold in color. Here’s where the Brother ScanNCut comes into play.
Supplies & Tools:
- Brother ScanNcut
- Old White Button- Up Shirt
- Heat Transfer Vinyl (Various Colors)
- Iron and Ironing Board
Instructions:
Note: These project will not necessarily give you the cut file because the focus is more about experimenting with the ScanNCut feature of the machine.
1. Find an image you like on Canvas Workspace. I try and focus on clip art or an image that has very clear, distinct lines.
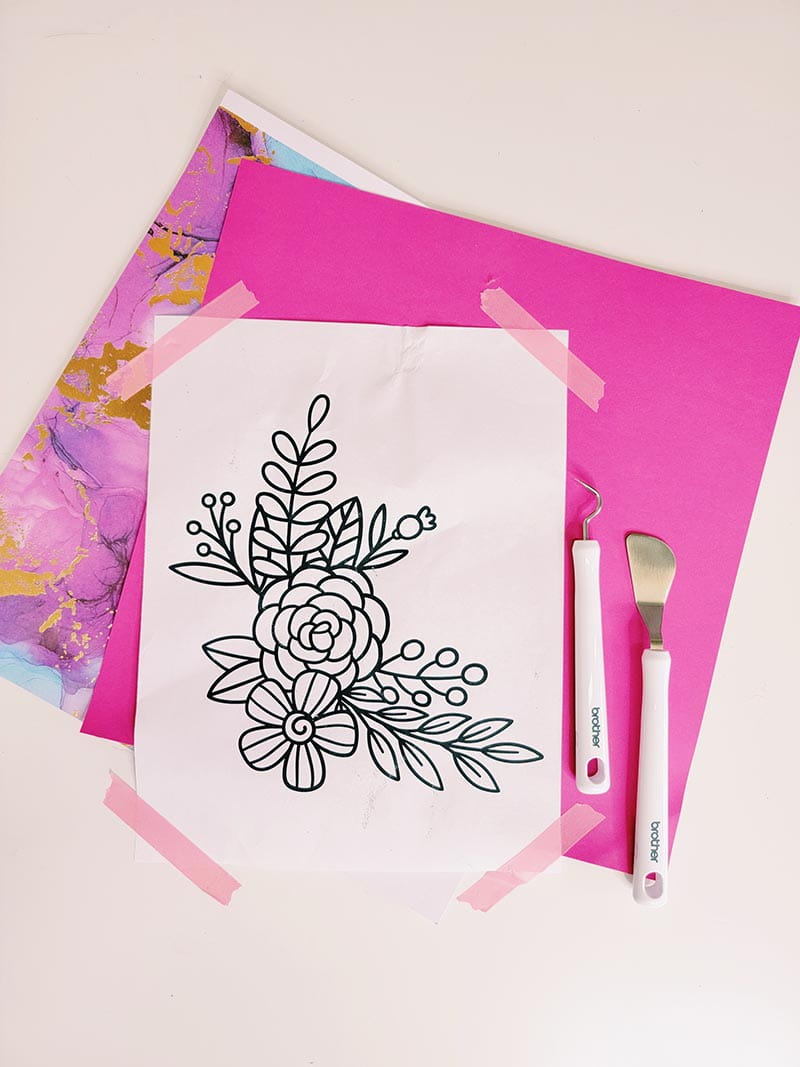
2. Print it and scan it into your machine. Once scanned, I like to send it over to canvas because I want to remove anything I dislike about the image and resizing it for the project I am working on is very important. In this step, you can also group parts of the image that go together in order to make the cut easier if you plan on cutting different colors. Note: You don’t necessarily have to send the file to the Canvas workspace. You can make your edits, if needed, from the ScanNCut workspace. I prefer making the edits only computer because for me, it’s easier to see and I have better control.
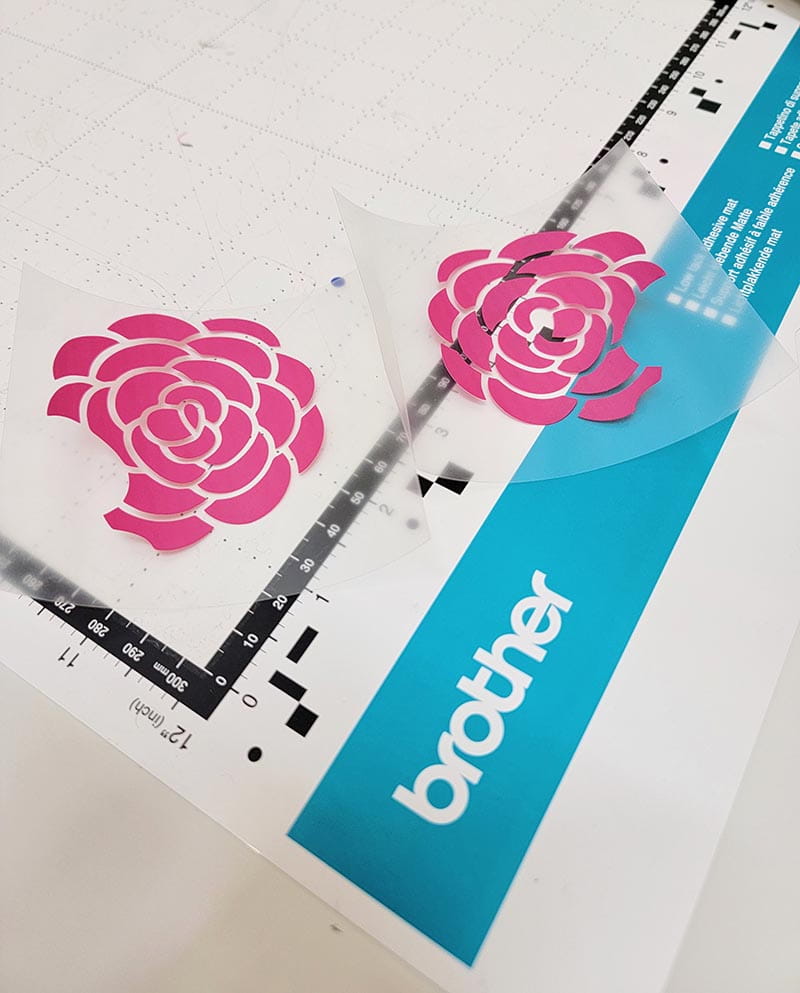
3. Once that’s complete, I duplicated the image. For this project, I need 2. I also mirrored the 2nd image.
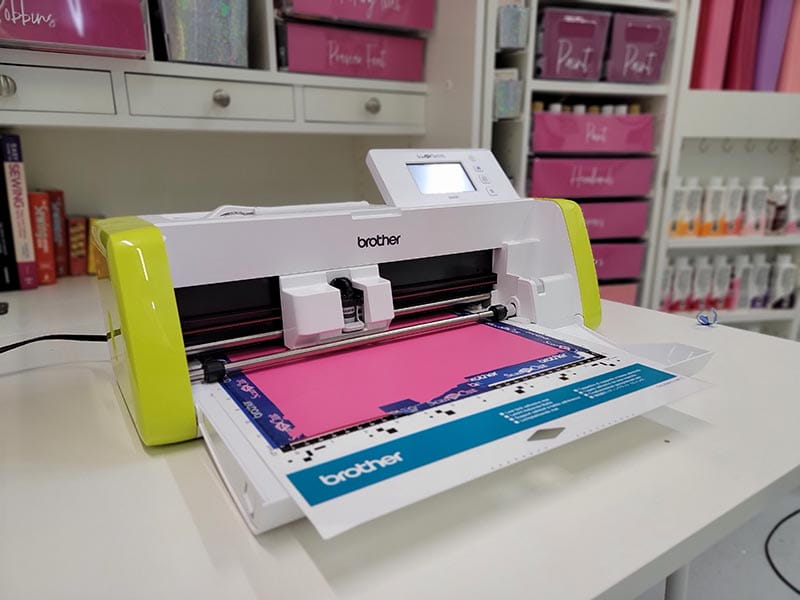
4. From there, I send it back over to my ScanNCut and cut my vinyl using a half cut.

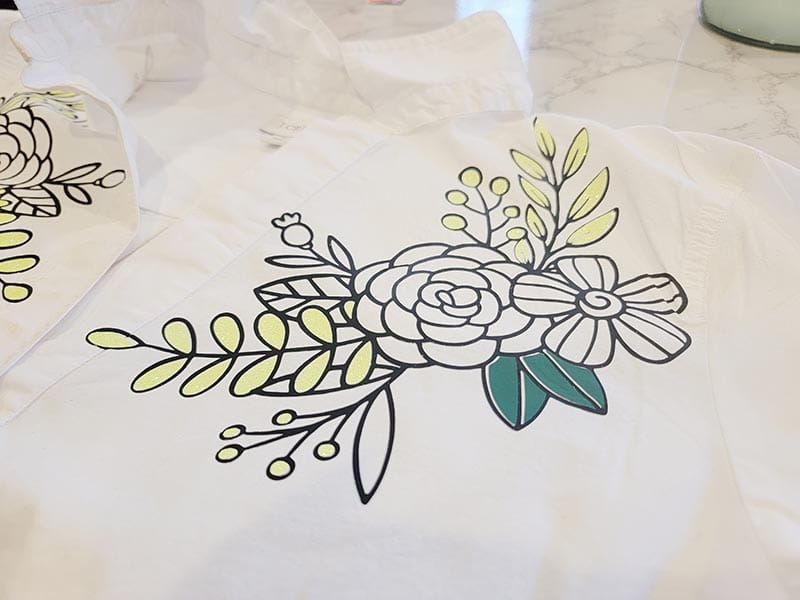
5. Once all of your files are cut, iron the vinyl onto your shirt and your finished.
Tags
Shop this Project
No ScanNCut DX? No problem! Shop our full line of cutting products and get crafting!
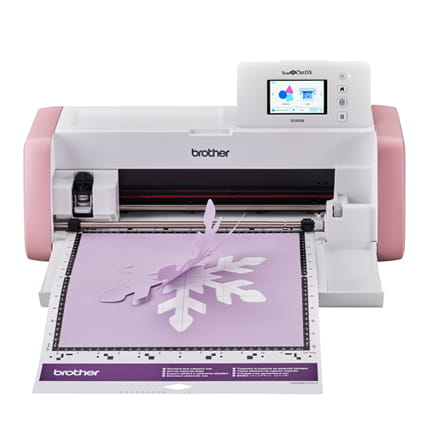
Brother ScanNCut DX
- 251 Built in Designs
- True Auto Blade, no manually adjusting blade pressure settings
- 600 DPI built-in scanner with on screen editing
Related Projects
Stay Connected
* Required fields