How To Make A Monogram With Your ScanNCut Cutting Machine for Custom Décor
When it comes to creating custom décor for your home or bedroom, personalization is key. You want your creations to show off who you are – and the right cutting machine makes this a fun and easy task.
With the Brother ScanNCutDX you can design sorts of different crafts. Using a variety of different materials, colors, and mediums, the sky is the limit when it come to new creations!
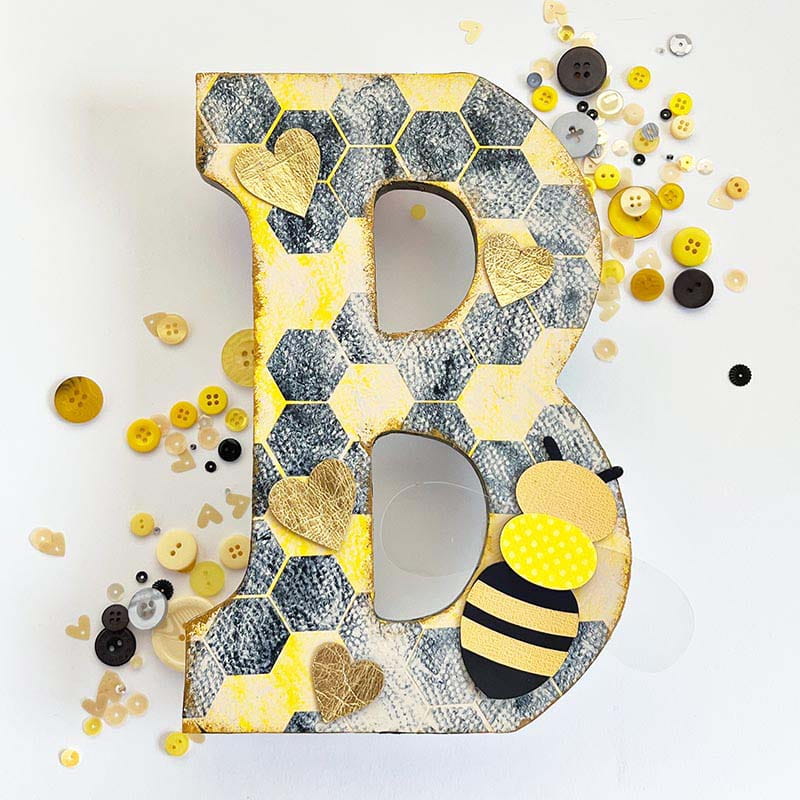
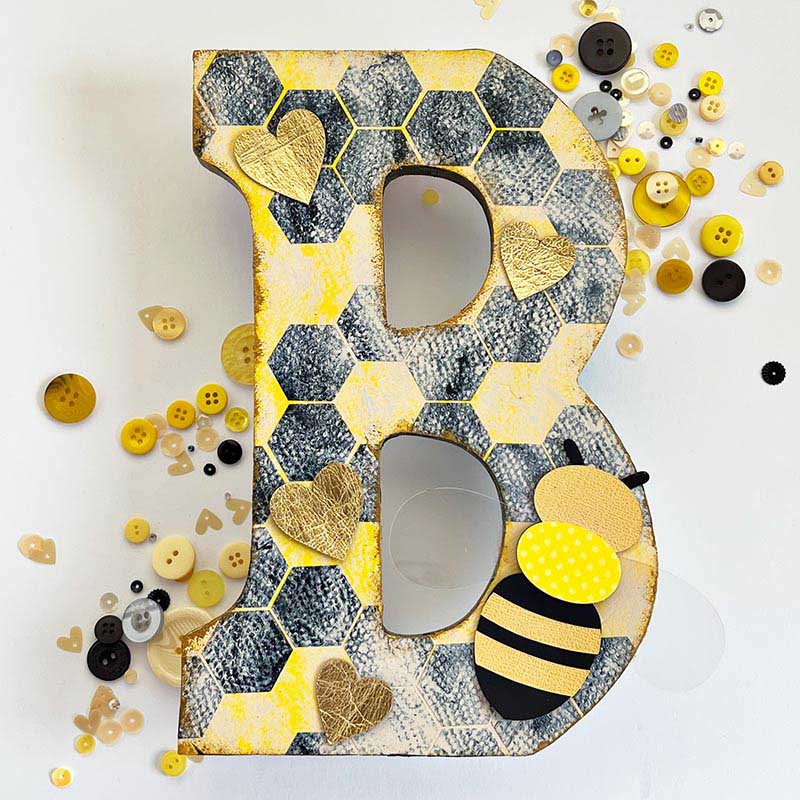
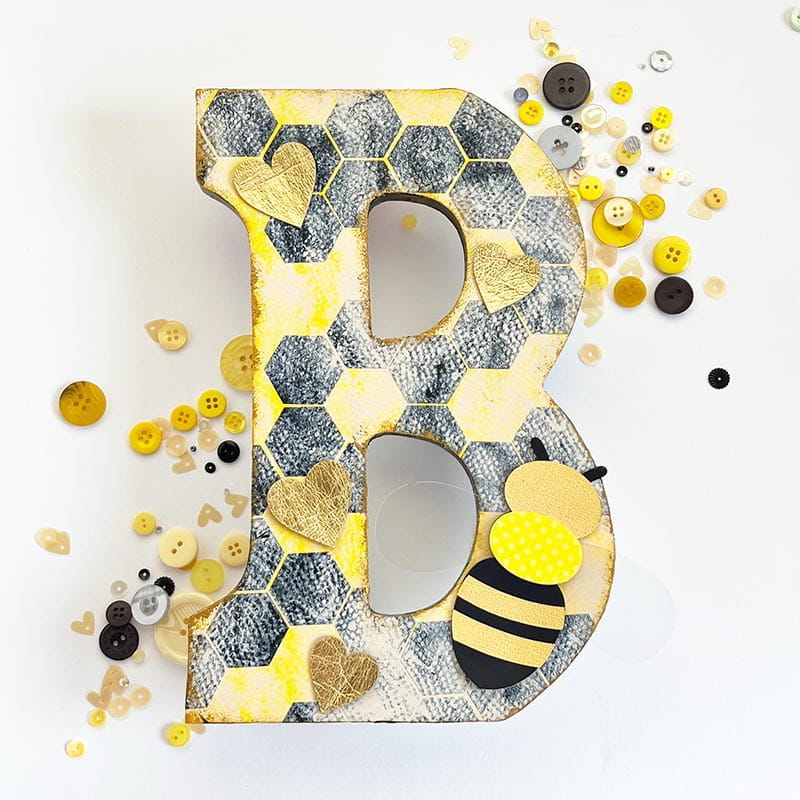
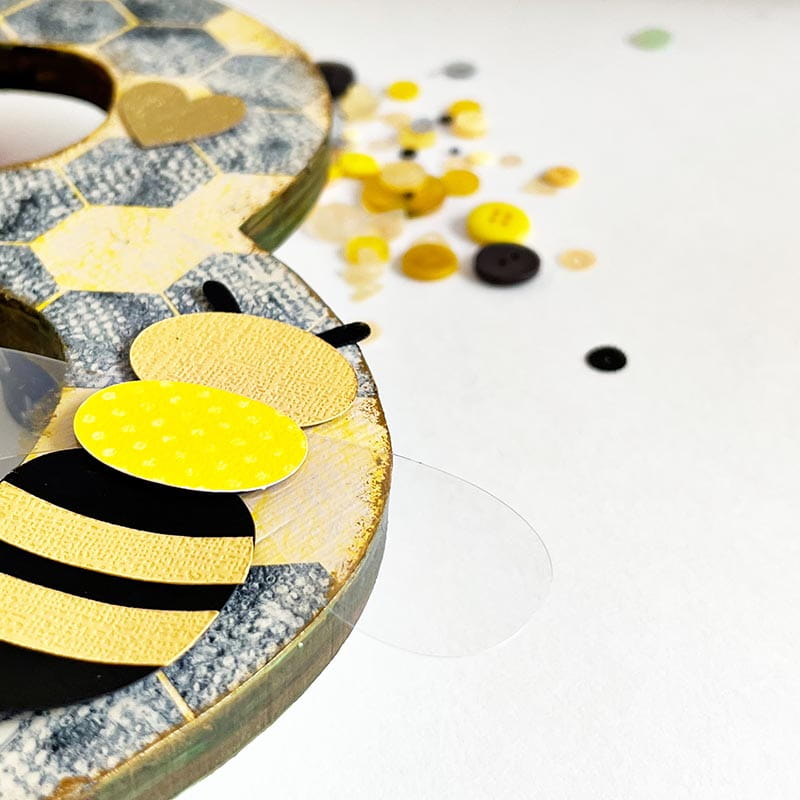
For this project, I wanted to play around with my monogram design. Since I was monogramming the letter ‘B,’ I thought it would be fun to create a bee-themed monogram. I knew that my Brother ScanNCutDX had a layered bee file I could use as a feature, but I also wanted to add my own layers and texture for the base of this project.
When mixing and matching your materials, always try to keep in mind what you want your final product to look like. Now, let’s learn how to craft a custom monogram!
Supplies:
- ScanNCut SDX230Di
- Standard Mat
- Vinyl
- Transfer Material
- Wood Letter
- Acrylic Paint
- Liquid Adhesive or Sealant
- Cardstock
- Acetate
- Alcohol Markers (optional)
- Faux Leather
Instructions on how to make a mixed media monogram using your ScanNCut
- Cut approx. 1” hexagons (built-in design) from black vinyl using the ScanNCut DX model of your choice. Select half-cut so that the machine will cut the vinyl, but not the backing material.
- Remove the excess vinyl from the sheet, leaving only the hexagons.
- Take your plain or base-painted wood letter and use the transfer material to apply the hexagons in a pattern of your choosing. Allow some of the hexagons to overlap along the edges. Fill as much space as desired.
- Apply clear drying adhesive or sealant over the letter, then apply some acrylic paint and create the design and texture by dabbing some away. Allow to fully dry.
- Select the design (a bee, in this case) and cut each piece from your selected materials. The design is approximately 3 ½” and the machine will auto-size the pieces to fit together perfectly.
- Once done cutting, select the next part and cut the wings from acetate or other material
- Select hearts, stars, or other basic shapes and cut from faux leather (or other material) to decorate the finished project.
- Take the bee pieces and adhere them together to assemble, then glue to the B.
- Finish by adding additional shapes such as faux leather hearts, or adding finishing touches such as glitter glue, buttons, or other embellishments.
Note: Repeat step one if more hexagons are needed.

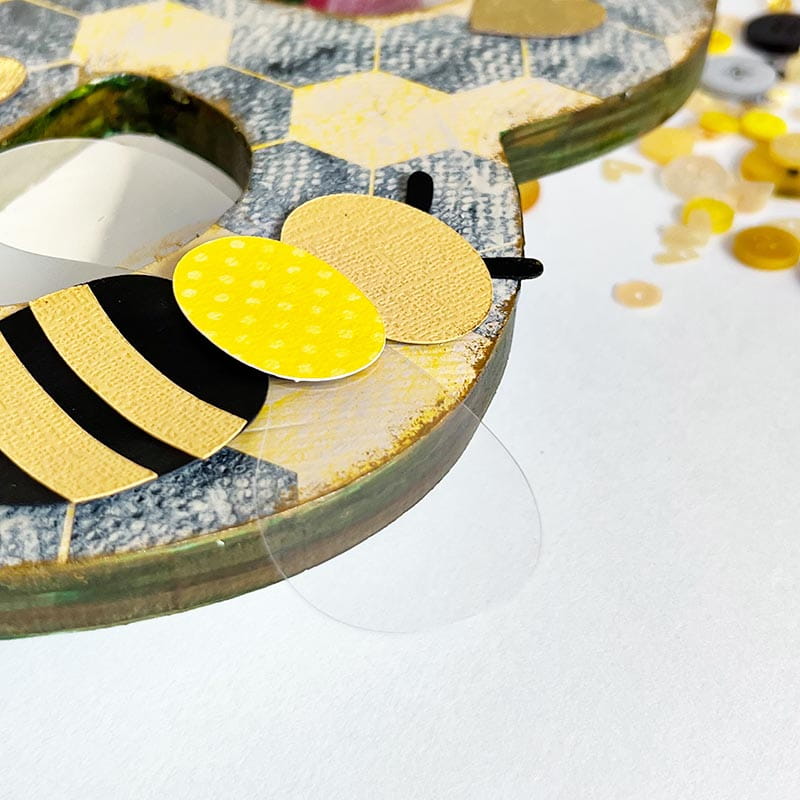
Tip: Only cut materials of the same thickness at the same time. This means if you wish to make acetate, vellum, or wings of a material in a thickness different than the body cardstock you’ll need to cut it separately.
Tags
Shop this Project
No ScanNCut DX? No problem! Shop our full line of cutting products and get crafting!
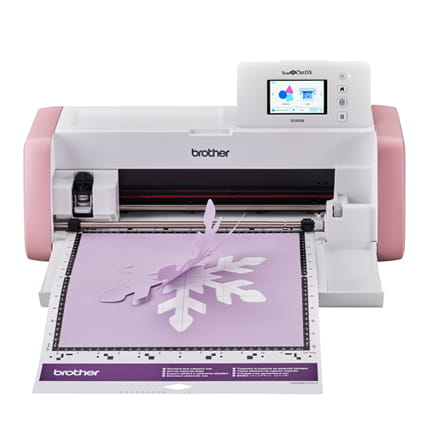
Brother ScanNCut DX
- 251 Built in Designs
- True Auto Blade, no manually adjusting blade pressure settings
- 600 DPI built-in scanner with on screen editing
Related Projects
Stay Connected
Follow Us
Brother Support
Corporate Information
Partnership Opportunities
About This Website
