Create a Fun and Modern Paper Ornament
Brother Crafts Blogger
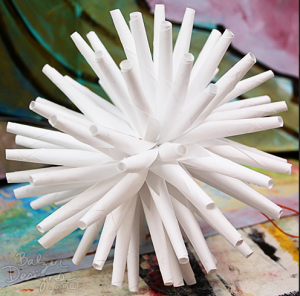
I found a great tutorial for making a cool paper ornament on the blog "How About Orange." Here's my version of the ornament:
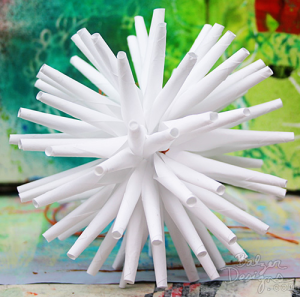 If you don't want to hang it, the ball will actually stand by itself.
 Cool, right?
 Some tips:
- I followed the basic instructions from this tutorial.
- I created a digital cutting file for the pieces of the ball. It's slightly different than the one in the original tutorial because after some trial and error I found it was easier to cut the paper with a narrower wedge. I'm happy to offer you my cutting file for free. (For personal use only, of course.) Download an .svg file HERE or an .fcm file HERE.
- I cut the pieces of my ornament from copy paper on my low-tack mat with a blade setting of "2" on the standard cut blade.
- I found the rolling easiest around a tapered chopstick rather than a pen. The tapered chopstick helped me get the smallest and tightest roll possible.
- I used a toothpick to apply the glue while the chopstick was still inside the roll.
- Because my template has a hole in the center, I needed to tie a knot in the end of the string.
Happy crafting!
Related Projects
Stay Connected
* Required fields