Creating the Wow Display for the CHA show with ScanNCut
Julie Fei-Fan Balzer, crafting expert and educator, is a paid consultant of Brother Crafts USA.
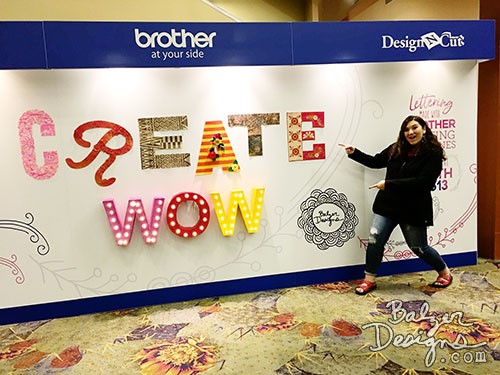
I made that.
And in case you weren't clear on the scale of those letters:
Oh, yeah. They're BIG! Other than the "C," every letter was pieced together from multiple pieces because they were TOO BIG TO FIT ON THE 12X24" MAT. Yeah. That's big, baby!
When I first started this epic project, I thought it wouldn't take me that long to get these done. I was wrong. I was so so so wrong. Overall, it took about three weeks of steady work to get them all designed, cut, assembled, and decorated. Whew.
Each letter of the word "Create" demonstrates the ScanNCut and DesignNCut's ability to work with different materials. Let's go through them, shall we?
The letter "C" is paper -- and reversible!
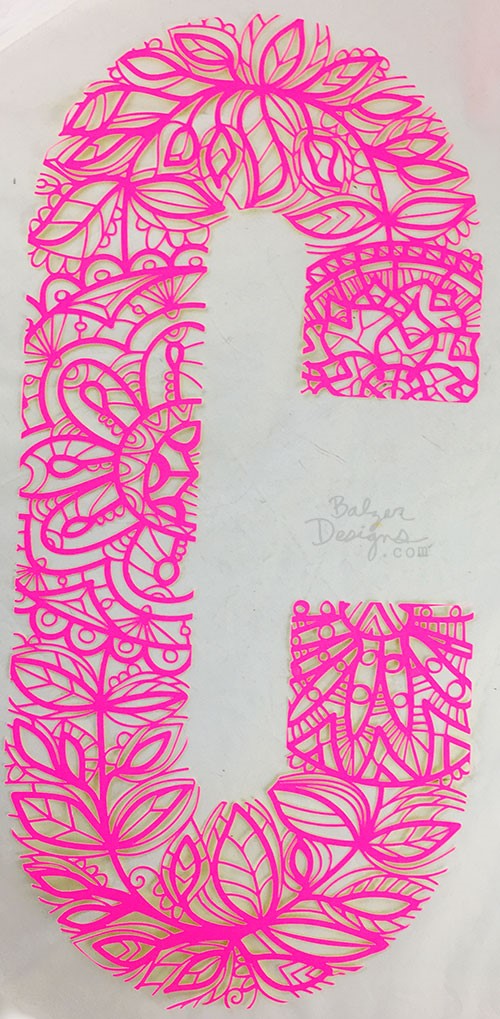

It's cut from a single piece of double-sided neon posterboard. Took about 28 minutes to cut.
Here are the details:

The letter "R" is plastic.
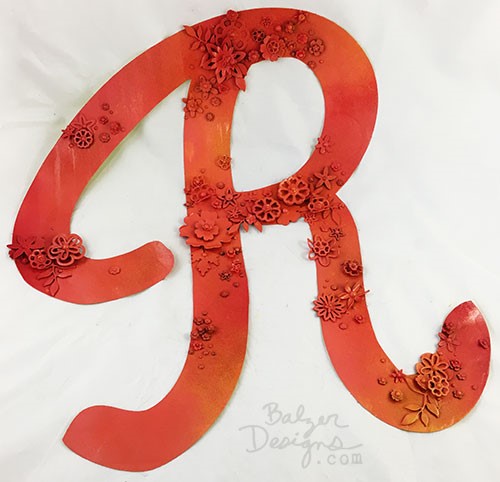
The base layer is vinyl and then it's decorated with shrink plastic flowers and leaves and spray painted. Those flowers and leaves represent sheets and sheets of shrink plastic. The smell of shrinking plastic still lingers in my studio!

I used some glitter spray, which makes it look grainy in photos. But it sparkles in real life!
The first letter "E" is made from wood veneer.
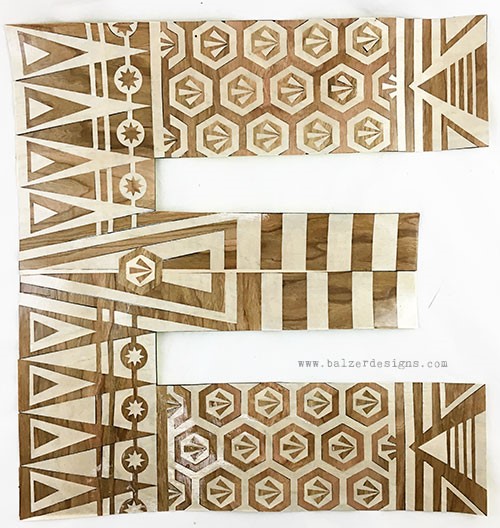
This is the most ambitious wood veneer project I've ever worked on. It wasn't easy and it didn't
turn out perfectly, but I love the results nonetheless!

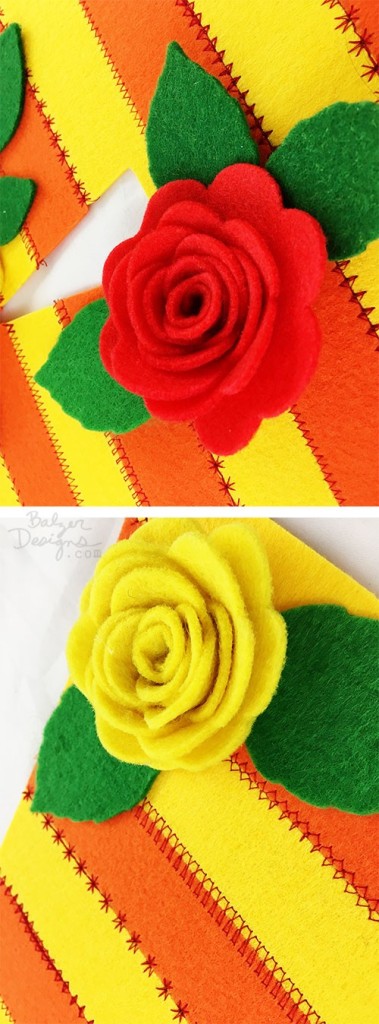
The letter "A" is made from felt.

The stripes are stiff felt and the roses were made from wool felt.
The letter "T" is made from embossed metal.
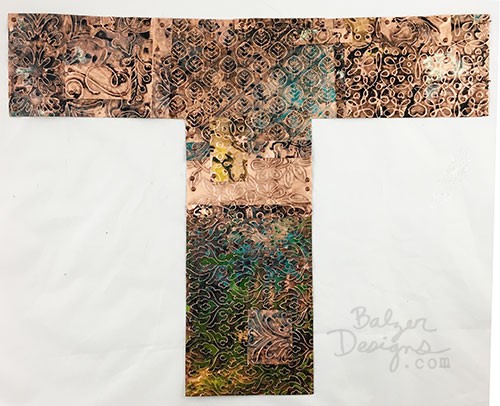
I wanted to show off the amazing texture you can get when embossing with the ScanNCut or DesignNCut. I used brads to keep the small sheets together and brought out a lot of the beautiful embossed texture with some acrylic patination:

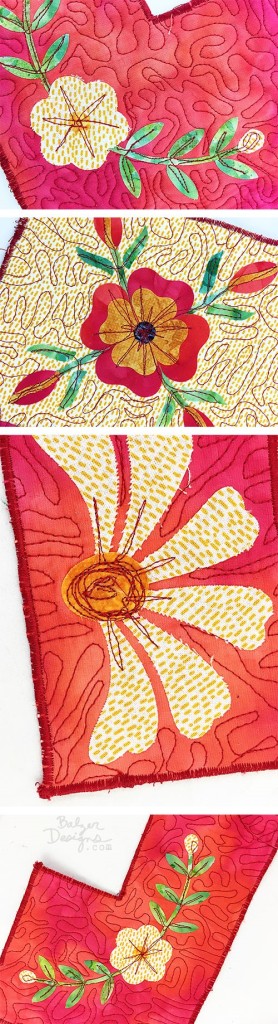
The second letter "E" is a quilt. And it tested my brain power to figure out how to make it a quilt around those corners.
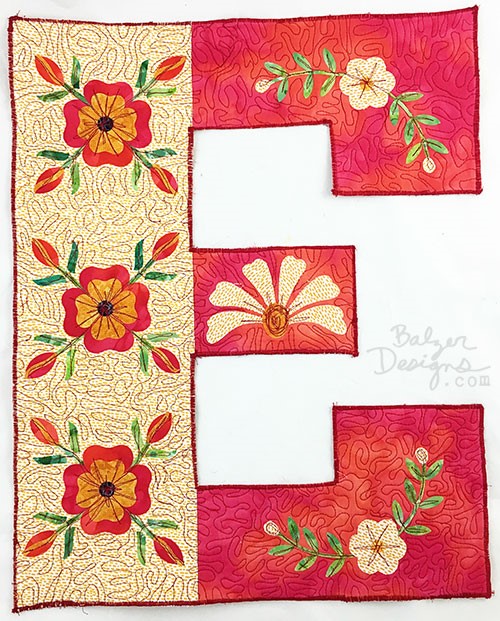
Then I figured out that I could just zig zag over the edges and not put on a binding. Yay! All of the appliqué pieces were cut from built-in designs in the ScanNCut CM650WX.
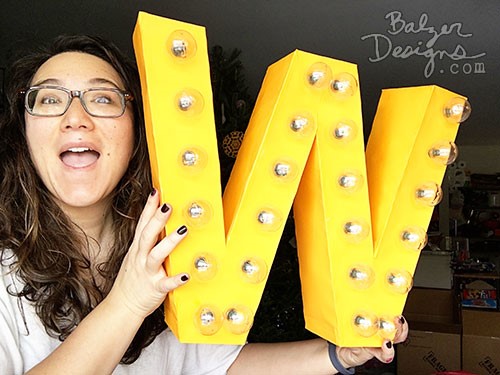
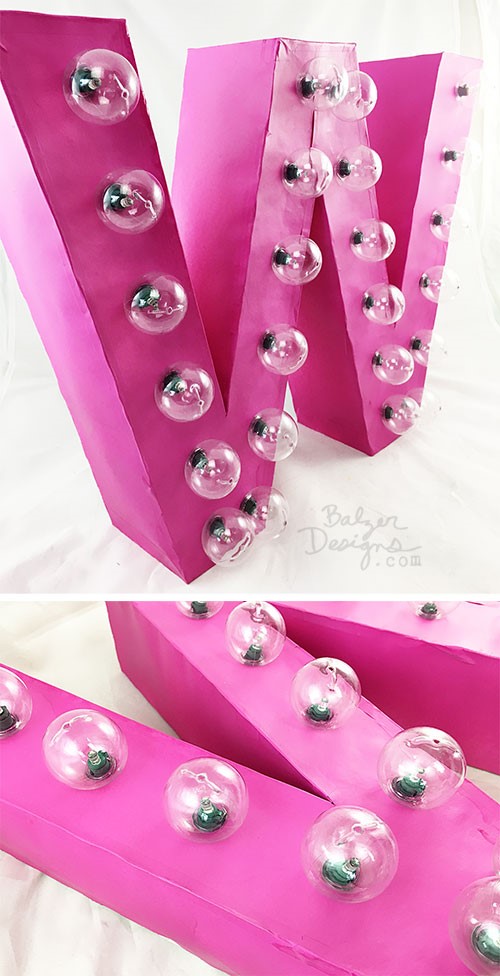
And here is the WOW:
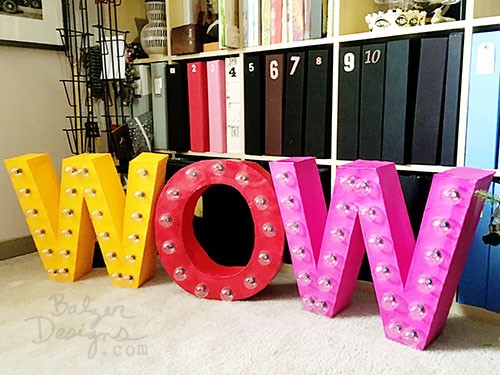
They're cut from paper and I used Christmas lights to make them light up!
During the making of this wall of letters I had a few moments where I worried that I had bitten off more than I could chew. But, I'm not one to shy away from a challenge. And now, of course, I'm so pleased with how it turned out! The ScanNCut and DesignNCut are amazing machines that make so many projects possible!
Talk to you next week!
Related Projects
Stay Connected
* Required fields