How To Create A Fabric Hair Bow
Brother Crafts Blogger
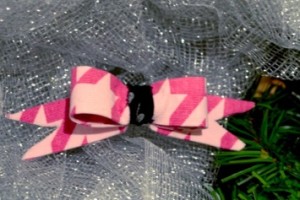
There are so many ways to complete an outfit for the holidays. Today we decided to share with our friends step-by-step instructions on how to create your very own fabric hair bow with the ScanNCut machine. Materials: Cotton fabric, craft fuse, alligator clip (pin or hair clip), hot glue gun
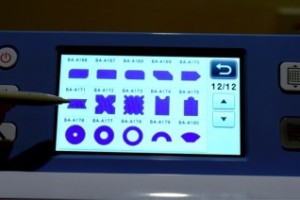
Step 1: To start your bow, take your craft fuse and fusible and place them onto your standard cutting mat that has already been prepared with your fabric support sheet. Cut a pointed-rectangle that is 11" tall by approximately 1" wide out of both materials using the settings to cut for fabric. Step 2: Take your stabilizer and fusible off and place your fabric onto your mat, making sure there are no wrinkles, puckers or bubbles in your fabric. (Tip: Use the backside of your spatula as an aid to press the fabric down if necessary.)

Step 3: Load your mat into your machine and set to cut the same pointed-rectangle, plus an additional rectangle. This time, however, you’ll need to add a 1/4" seam allowance to the design.


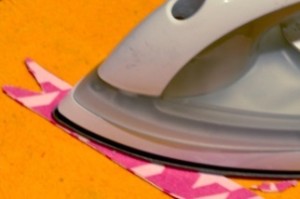
Step 4: Now you are ready to assemble the bow once your materials have been cut. Start by placing the larger rectangle (with the 1/4" seam allowance) with the backside facing up, while centering your craft fuse down the center of your fabric. Next, you’ll have to iron the craft fuse to your fabric. Once this has been done, simply fold over the seam allowance and iron flat. (Trim as needed.
Step 5: Next, take your other rectangular fabric piece (the same size as your craft fuse) and iron on the matching cut of fusible. Release your fusible backing and iron it on to your other piece to encase your craft fuse.
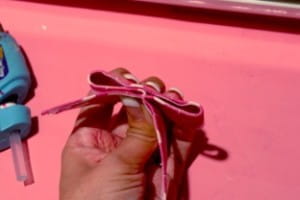
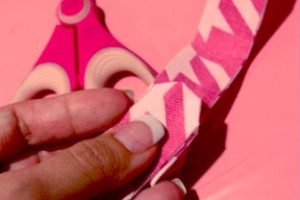
Step 6: To form your bow, simply fold your rectangle in half and press the center down, allowing the ends to stick out farther than the bow center. (Note: You may need to cut into the center in order to form your bow.)


Step 7: Secure your fabric bow to a hair clip by using a hot glue gun.
Related Projects
Stay Connected
* Required fields