DIY 3D Apples Project
Take a bite out of your day and make some adorable 3D apples with your ScanNCut.
You will need:
Patterned paper 12” x 12”, plain green cardstock, ScanNCut, glue, ruler. Makes Three Apples
Steps:
- Download “3D_Apples.fcm” to your machine.
- Affix a 12” x 12” piece of patterned paper to a low-tack mat.
- Cut out the design.
- Repeat this process 5 more times with different patterns and paper colors.
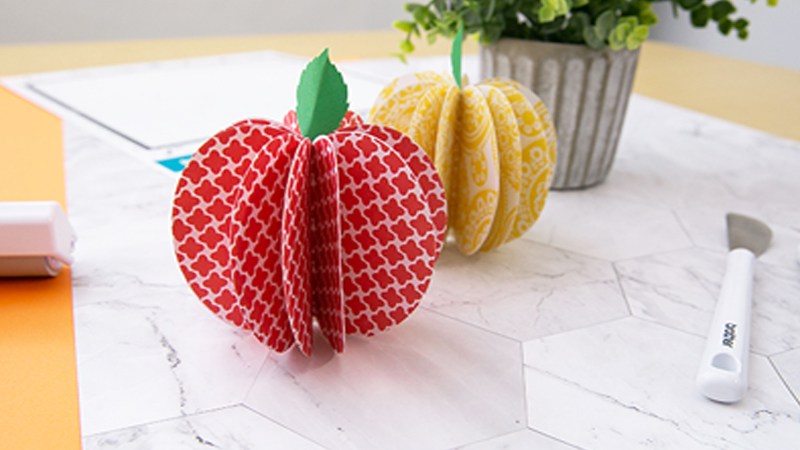
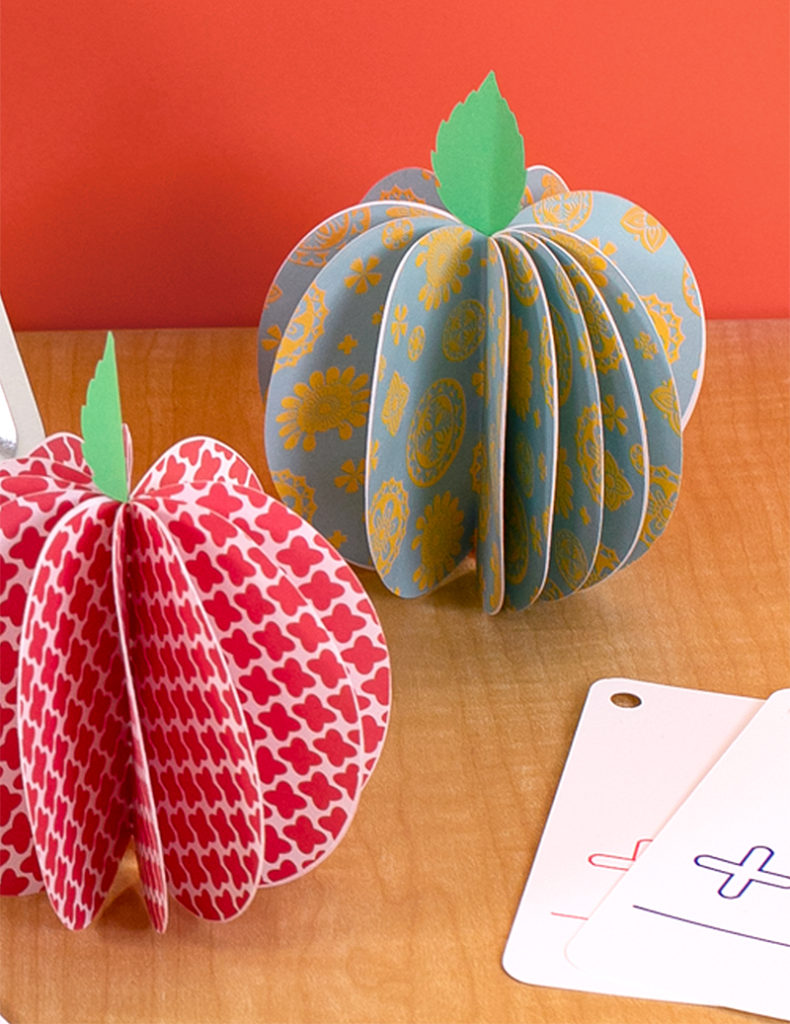
- For each apple, collect 12 cut outs. You can alternate colors in each apple (e.g. use 6 cutouts with a light pattern and use 6 cutouts with a dark pattern) if desired.
- Fold each cutout in half, making sure the crease folds right down the middle of the apple shape.
- Glue the inside halves of each apple to their neighboring inside halves, letting the apple form its 3D, accordion-like shape. Close the circle, making the apple into a 3D shape that stands up on its own.
- Go to your machine and look up its built-in patterns. Find a simple leaf pattern and size it to 1” height. Repeat the leaf shape 3 times
- Place plain green cardstock down onto the mat. Cut out the designs.
- Use a tiny bit of glue to secure one leaf to the top of each apple.
- Done!
Related Projects
Stay Connected
* Required fields