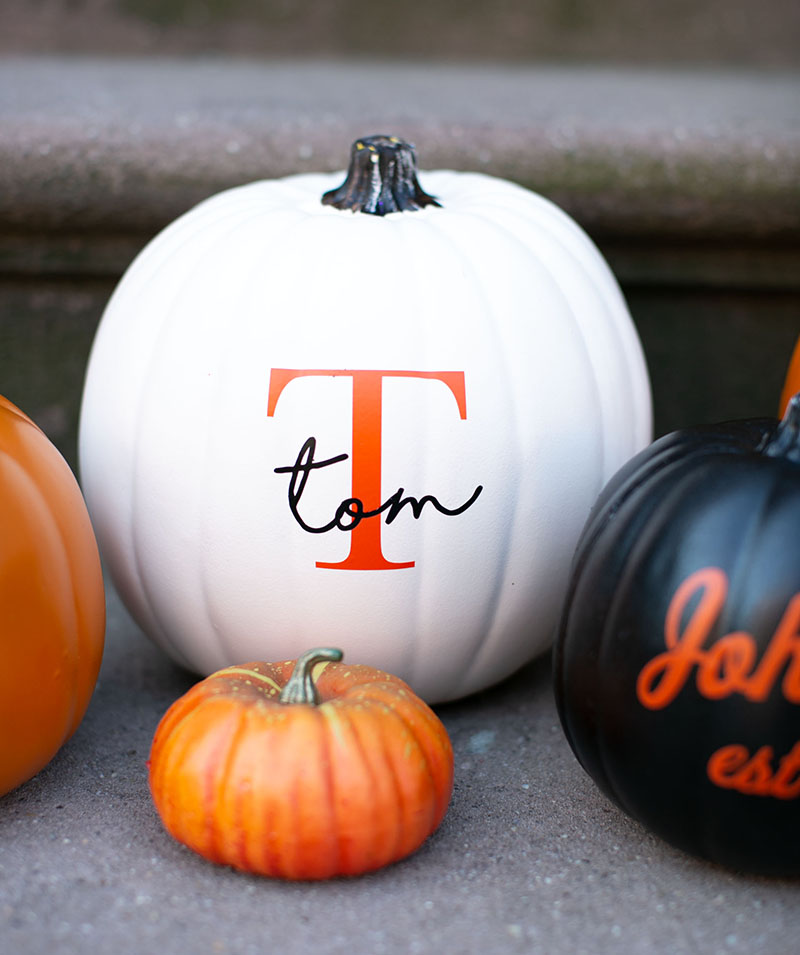
A Pumpkin Patch of Personalized Pumpkins
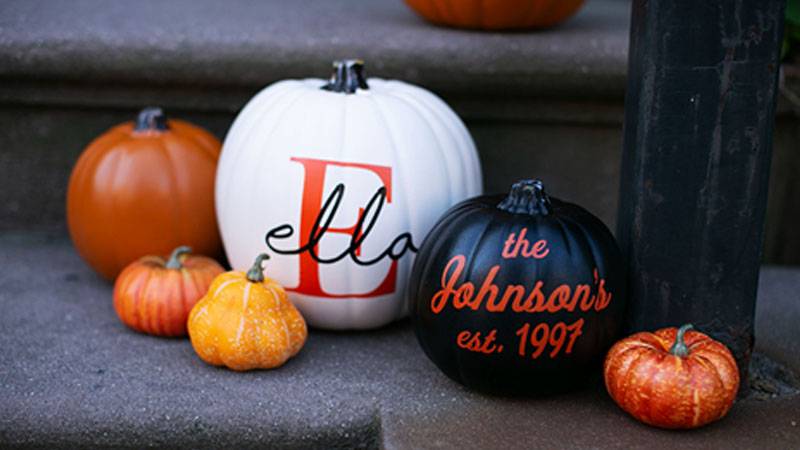
Create your very own pumpkin patch of personalized pumpkins with custom pumpkin decals and vinyl pumpkin face elements!
You will need:
Custom Fall Pumpkin Decals- Black and orange vinyl (or other contrast color)
- Roll Feeder
- ScanNCut DX
- Pumpkins (can be craft store pumpkins or real ones)
- JackOLantern_Faces.fcm
- Black vinyl
- Roll Feeder
- ScanNCut DX
- Pumpkins (can be craft store pumpkins or real ones)
Steps:
Custom Fall Pumpkin Decals1. Head over to CanvasWorkspace, or alternatively use your machine’s built-in text editing feature to get started.
2. Select a serif font—Times New Roman is a good example of what a serif font looks like. (The letters will have little “hooks” on the ends!)
3. Type in the first initial of the name you’ll be customizing your pumpkin with.
4. Size the letter to be about 5 inches tall.
5. Transfer data to your machine and cut out the letter using the contrast color vinyl and the roll feeder.
6. Next, select a handwriting or cursive font.
7. Type in the full name that you’ll be customizing your pumpkin with.
8. Size the written design to be about 1.5 to 2 inches tall (let the width auto-size accordingly so that the proportions remain correct).
9. Transfer data to your machine and cut out the letter using the black vinyl and the roll feeder.
10. Start with the initial letter in the contrast color. Apply the vinyl to your pumpkin, making sure to align the initial to the center of the pumpkin.
11. Next, apply the cursive lettering in black, centered over the top of the contrast color initial.
12. You’re done!
Vinyl Pumpkin Face Elements
1. Download “JackOLantern_Faces.fcm” to your machine.
2. Load the roll feeder with black vinyl.
3. Cut out the decal designs.
4. Weed away all excess vinyl.
5. Apply a piece of transfer sheet on top of each weeded vinyl face design, using the sheet to remove the vinyl from the adhesive backing.
6. Using the transfer sheet, apply each vinyl face design to your pumpkins. Carefully peel away each transfer sheet to reveal the finished object.
7. Done!


Related Projects
Stay Connected
* Required fields