Valentine’s Day Crafts: Disney HTV Pillowcase and Paper Quilling Project
You will need:
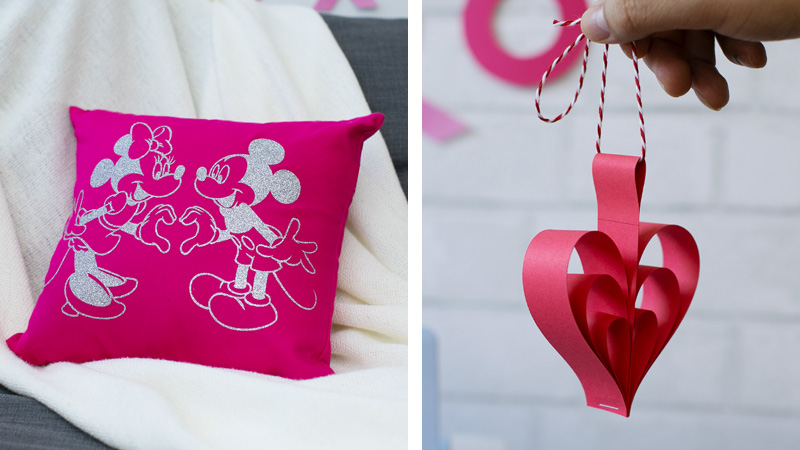
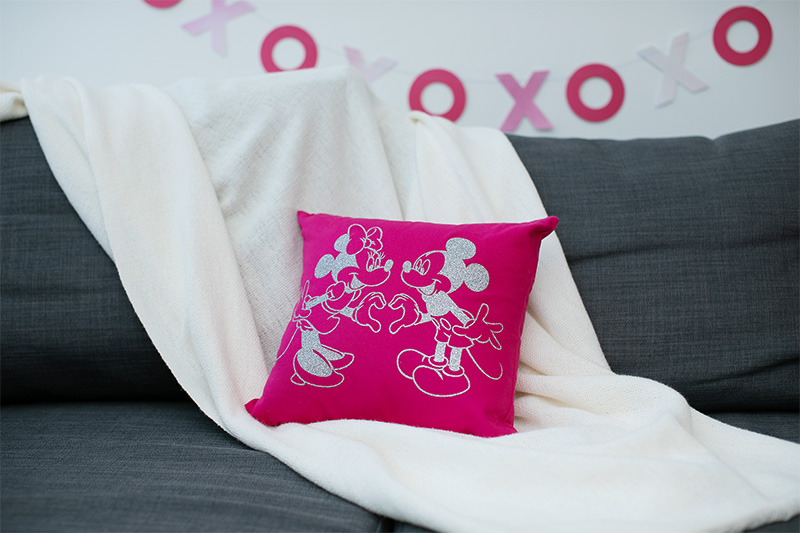
Disney HTV Pillowcase
• Glitter Heat-Transfer vinyl, 12” x 12” pillowcase, 12” x 12” pillow, ScanNCut DX, iron
Paper Quilling Project
• Paper in color of your choice, low-tack mat, ScanNCut DX, stapler, glue, twine or ribbon
• PaperHeart_Quilling.fcm
Steps for the Disney HTV Pillowcase
1. Select your Disney pattern of choice from the built-in patterns on the SDX230D.
2. Size the pattern to be around 10” x 10” in dimensions, or vary the size if you wish!
3. Place a sheet of glitter heat-transfer vinyl onto your mat, making sure to place the carrier (super shiny!) side down. Cut out the design.
4. Peel away all excess vinyl. There should only be your design left on a sticky clear sheet.
5. Place the vinyl sticky side down onto the center portion of the pillowcase.
6. Lay a piece of scrap fabric over your design, and use an iron on medium heat (no steam) and press the design firmly into the pillowcase. Make sure all parts of the design are pressed down.
7. Once the design is bonded to the material, let the fabric cool for a few seconds.
8. Peel off the clear backing and let cool for a couple of minutes.
9. You’re done! Put a pillow inside of the case and you’re good to go.
Steps for the Paper Quilling Project
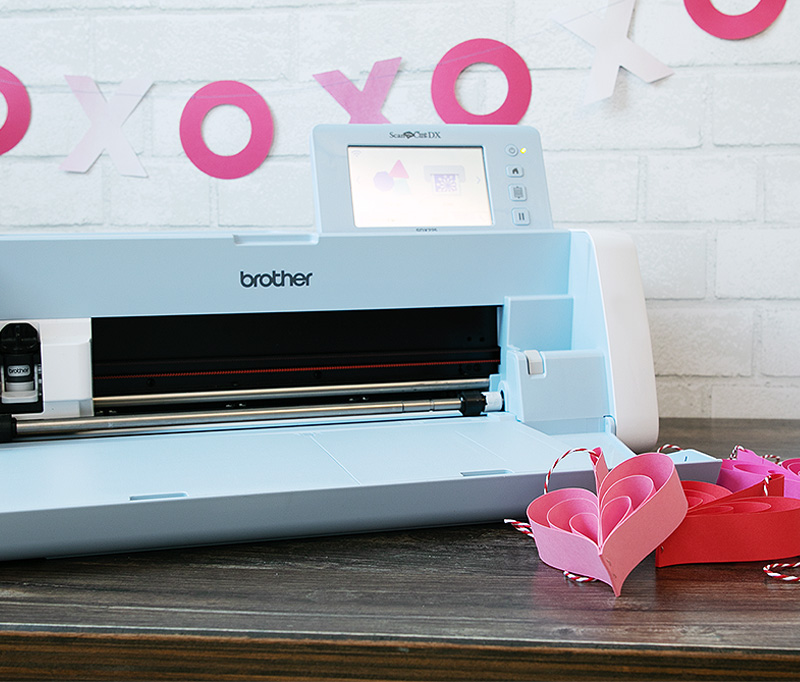
1. Download “PaperHeart_Quilling.fcm” to your machine.
2. Load the low-tack mat with your desired color of paper and cut out the pattern using the Auto blade.
3. Gather all strips of paper that you just cut out and stack in the following order:
• Long, Medium, Short, Medium, Short, Medium, Long
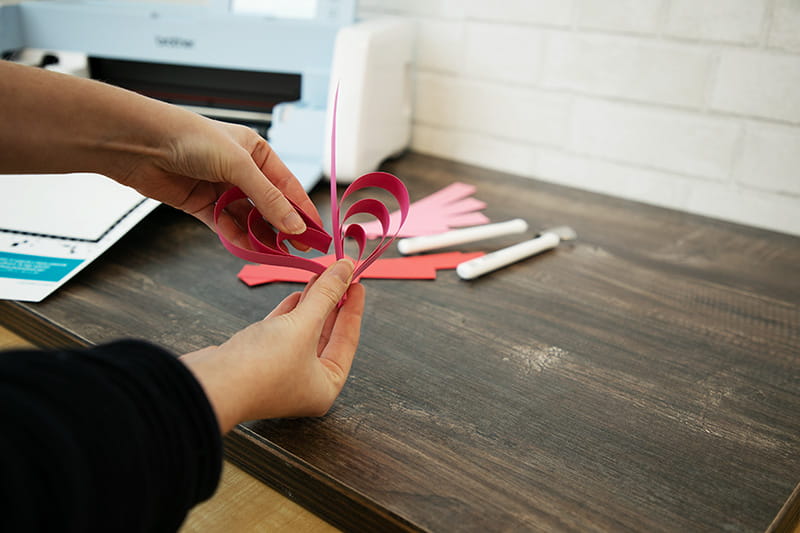
4. Align all strips along one bottom edge and staple together, getting the staple as close to the bottom edge as possible.
5. Take the three outermost strips on either side of the center middle strip (leaving the center strip alone!) and staple the ends of those strips together. It may look/feel a little wonky, as the strips are all different lengths.
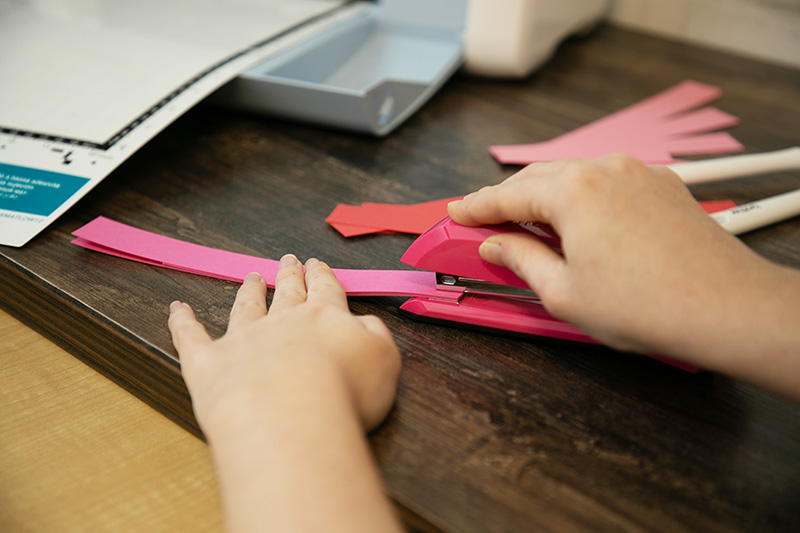
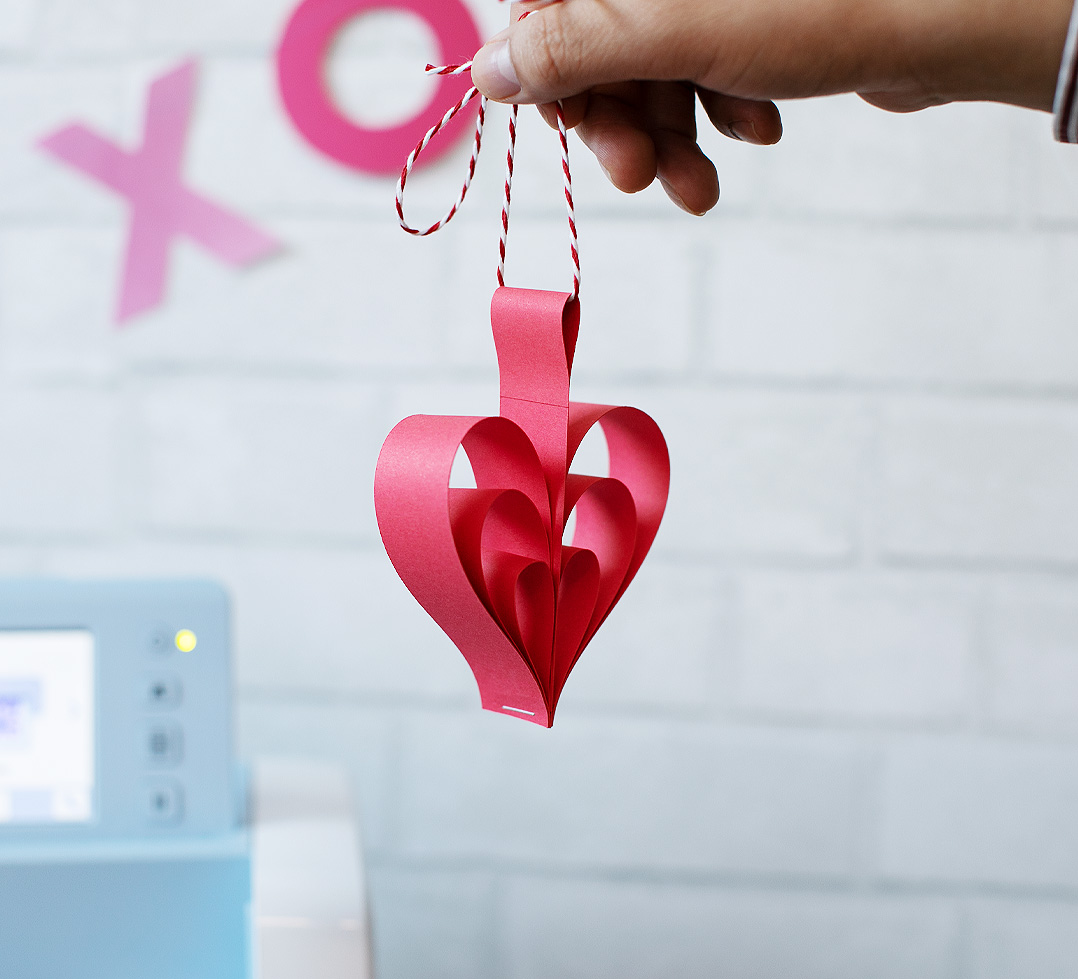
6. Without creasing the strips, curve them downward and paste the stapled end of each bunch of strips into the base of the center medium-length strip.
7. Once both sides are pasted down, you should be left with a quilled heart shape!
8. Take the center strip and create a loop at the top by curving the end down and pasting it about halfway down the strip.
9. Thread a piece of twine or ribbon through the loop and tie a pretty bow. You’re done!
Related Projects
Stay Connected
* Required fields