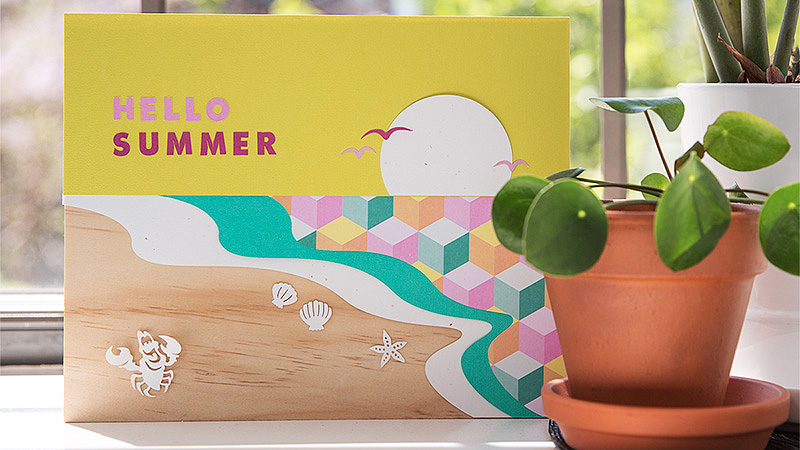
First Day of Summer Disney Artwork
You will need:
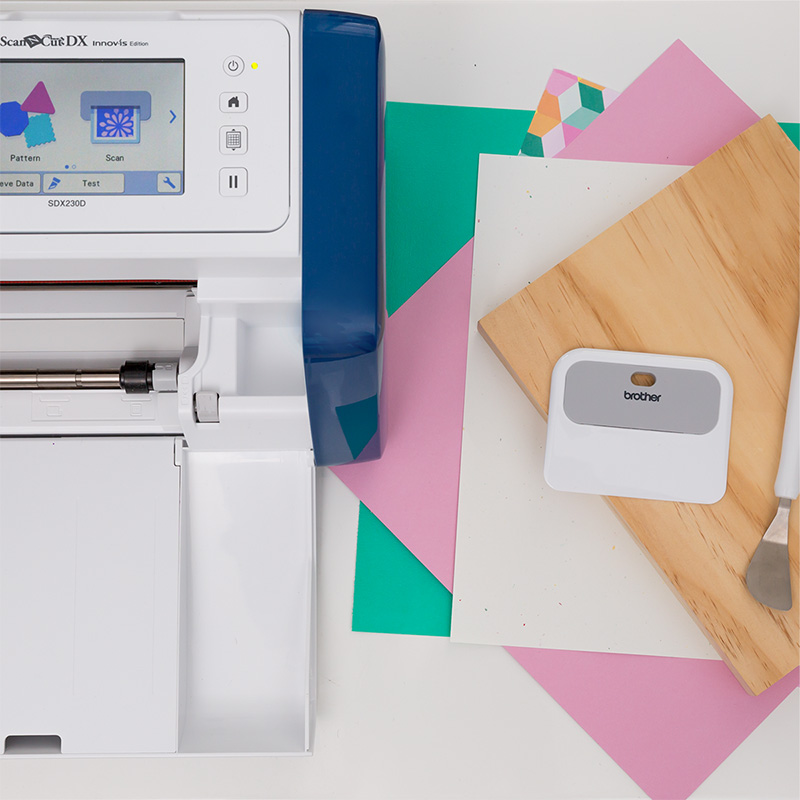
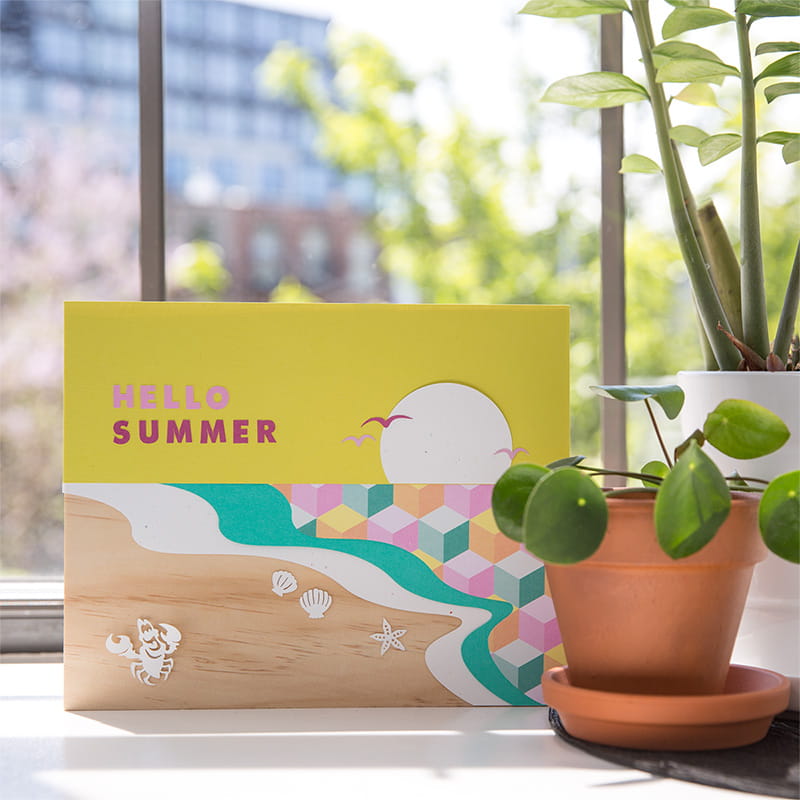
● Yellow Paper, White Paper, Teal Paper, Patterned Paper, Pink Paper, 8x10 Wood Panel, ScanNCut DX 230D , Auto Blade● SummerDisney_Sky.fcm
● SummerDisney_OceanBase.fcm
●SummerDisney_OceanMiddle.fcm
● SummerDisney_OceanTop.fcm
● SummerDisney_Birds.fcm
● SummerDisney_Sun.fcm
● SummerDisney_HelloSummerText.fcm
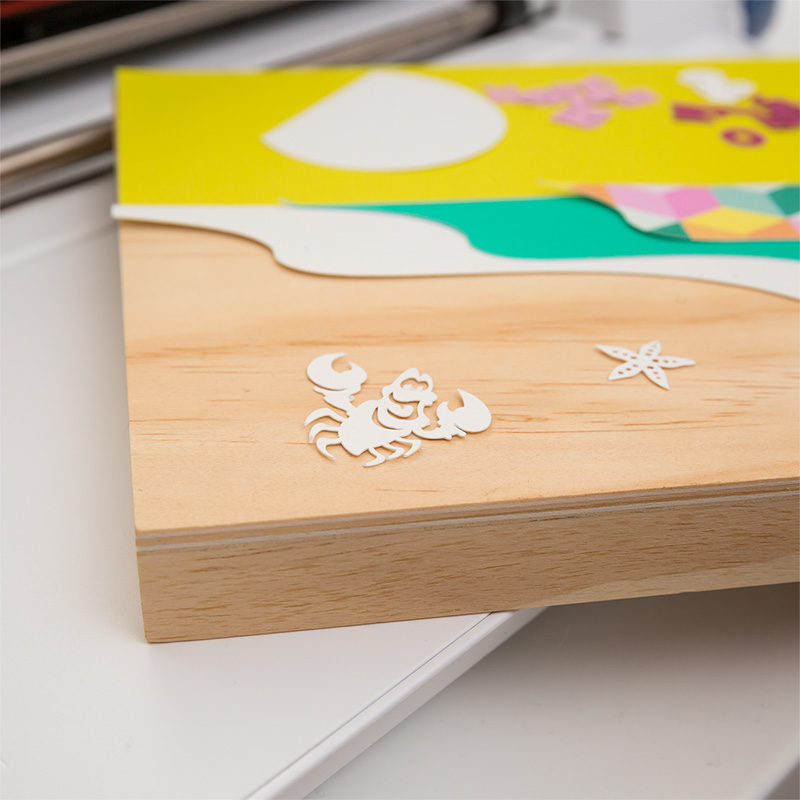
● Disney Cinderella and Ariel Paper Craft Collection
○ DSNP07014
○ DSNP07017
○ DSNP07018
Steps for the First Day of Summer Disney Artwork:
1. Download the files to your ScanNCut.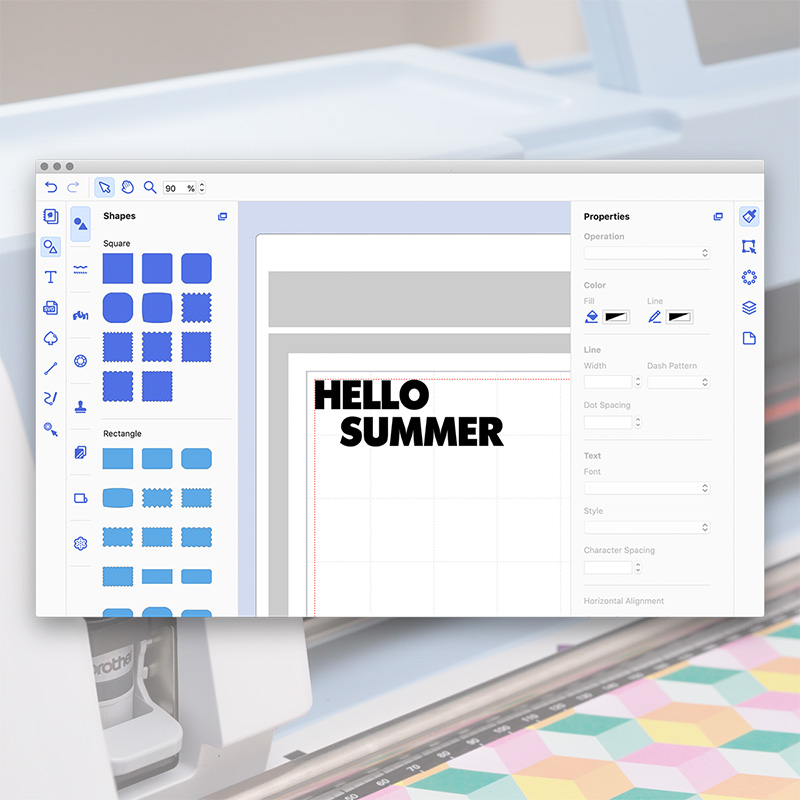
2. Load the Low-Tack mat with your Yellow Paper and cut out SummerDisney_Sky.fcm.
3. Load the Low-Tack mat with your White Paper and cut out
SummerDisney_OceanBase.fcm, SummerDisney_Sun.fcm , and the Disney
Cinderella and Ariel Paper Craft Collection.
4. Load the Low-Tack mat with your Teal Paper and cut out
SummerDisney_OceanMiddle.fcm.
5. Load the Low-Tack mat with your Patterned or Pink Paper and cut out
FavoriteSong_OceanTop.fcm.
6. Load the Low-Tack mat with your Pink and cut out SummerDisney_Birds.fcm and
SummerDisney_HelloSummerText.fcm.
7. Time to assemble! Let’s start with the ocean.
a. Glue the ocean base layer first, lining up the bottom right corner with the bottom right corner of the wood panel.
b. Next glue the ocean middle layer on top with the same alignment.
c. Finally glue the ocean top layer with the same alignment.
8. Now assemble the sky.
a. Glue the sky on top of the wood panel.
b. Next, glue the sun on the “horizon”.
c. Now glue the birds on top, slightly overlapping the sun.
d. Lastly, carefully glue the “Hello Summer” letters. Using tweezers can help to place them. You can glue them in the straight line or spread across the sky!
9. Lastly, place your Disney cutouts on the exposed wood panel.
10. Done!
Related Projects
Stay Connected
* Required fields