How to update an old dress in your closet
-Brother Crafts Blogger
How many of you have an old dress in your closet that you're tired of and will most likely throw it out or give it away? (Raises hand) Before you do that, have you ever thought about updating it? Lately, I’ve really been interested in making the most of the garments in my closet and lengthening its lifespan. We’ve all heard that cats have 9 lives. Well, your clothing does too! Yes. You heard that right, I came up with 9 ways in which you can update your clothing in your closet. Let’s talk about it.
1. Style it differently. I love this idea because it pushes you out of your comfort zone and allows you to be creative with your wardrobe. I know we all get used to wearing our clothes the same way every time, but think of at least different styled looks with your garment. Here is one example: If you have a dress, wear it layered over a pair of jeans. If your dress has buttons down the front, wear it with the buttons undone layered over a simple top. Buttoning the top of the dress, but leaving the bottom open would be fun too. Add accessories and you’re done. Using the dress as a layering piece adds visual interest to the look. You can never be wrong with this idea.
2. Dye it. This is one of my favorite ideas. I do this all the time. This idea is great because in my opinion, it give you a dramatic change without a lot of work or thought. You simply choose a color that you like, dye it, rinse, and dry. It’s that easy. All of my dress are solid color, so it’s easy for me to switch from one color to another. If you have a garment that you've dyed once or a few times in the past or a garment with a darker color, use a color remover first, then dye it your preferred color.3. Change the buttons. If you didn’t know, now you know, I am button obsessed! So much so that I make and sell them. To me, buttons are like jewelry to your clothes. They don’t have to be boring. They can be the star of the garment. There are so many colors and shapes to choose from that will take a boring garment into a showstopper. Ready to wear button-ups and dresses typically have basic buttons sewn on it. Adding your own will give your garment a fun customization and personal style. Also, sewing on buttons isn’t that hard at all. You simply remove the older ones with a seam ripper, find ones that are similar in size, and you can either hand sew the buttons back on or use your Brother sewing machine. (I love that my Brother sewing machine has the function to do this.)
4. Shorten it. Cutting into your garment may sound intimidating, but trust me, it doesn’t have to be. First, make sure you know how much you’ll want to cut. Write that measurement down. Then, you’ll simply fold the garment in half and using the measurement you previously wrote down, create marks across the bottom of your garment. Connect those marks as straight as possible and cut. I love the idea of shortening a garment because it gives the garment a more youthful appearance. It’s almost like cutting your hair. A fresh, short hair cut makes a lot of women look younger, right? Try this idea!
5. Lengthen it. Now this one can be a bit tricky. In order to lengthen a garment, it has to make sense. For instance, you can’t lengthen a jacket, blazer, or vest if you don’t have the exact fabric or expertise to do so. I’d most definitely stay away from lengthening these garments. Dresses and skirts are a little easier. Again, it just depends on the design of the garment and if you can make it make sense. If you don't have the exact fabric or can't get a hold of the exact garment, you’ll need to get creative. Using the idea of color blocking is a way to get creative with placement. You can use a solid color or bold print if you are daring.You just need to make sure it makes sense with your own individual style.
6. Add a trim or embellishment. This idea is my current fave because trim and embellishment on garments is currently trending. Think feathers, stones, pom poms, safety pins, etc. This adds drama and so much fun to a garment. This allows you to get creative with the material you’d choose to embellish your garment with and also playing with placement. Anything that allows me to be creative, I’m here for it. I love this idea because it adds texture to a garment and if you know me, I’m obsessed with textural garments.
7. Remove sleeves. If you have a short or long-sleeved garment remove the sleeves to create a sleeveless garment. Depending on the look you are going for, you may need to take it to a professional (if you don’t sew) who can help you create a professional finish. If you are going for a more edgy look, cutting off sleeves and distressing the fabric edge can also be a great look. As with all of these ideas, if it makes sense for your own personal style, do it and have fun with it.
8. Turn it into a totally different garment. This idea is specifically for someone who knows how to sew. Garment flips or upcycling is a thing. Transforming a garment is most definitely a labor of love. I’ve really been into this idea lately and absolutely love the process. It’s literally like putting together a puzzle. Trying to figure out what you can create with the little bit of fabric you have is so challenging but the most fun. I love a good challenge so this idea is also one of my top favorites.
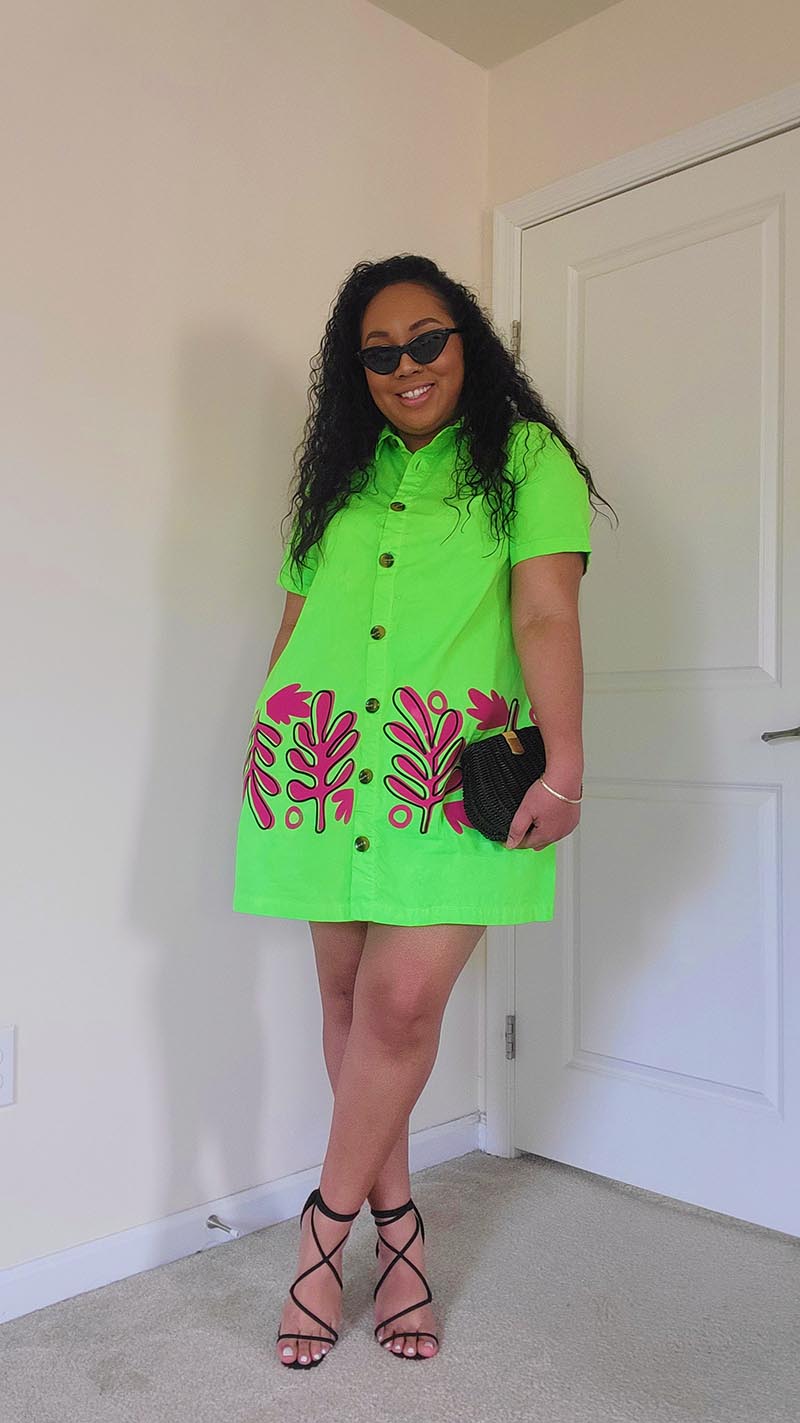
9. Add a fun print. Of course, I had to save the best for last. This is a great idea because it’s so unexpected. I’m sure, many of you are wondering how in the world can you add a print to your dress. Easy! You can add a print to your dress using your Brother ScanNCut. Be creative as you want. I decided to go bold or go home. LOL!
Supplies and tools:
- Brother ScanNCut SDX85
- Heat Transfer Vinyl
- Brother Cutting Mat
- An Old Dress
- Iron + Ironing Board
- Fabric Dye (optional)
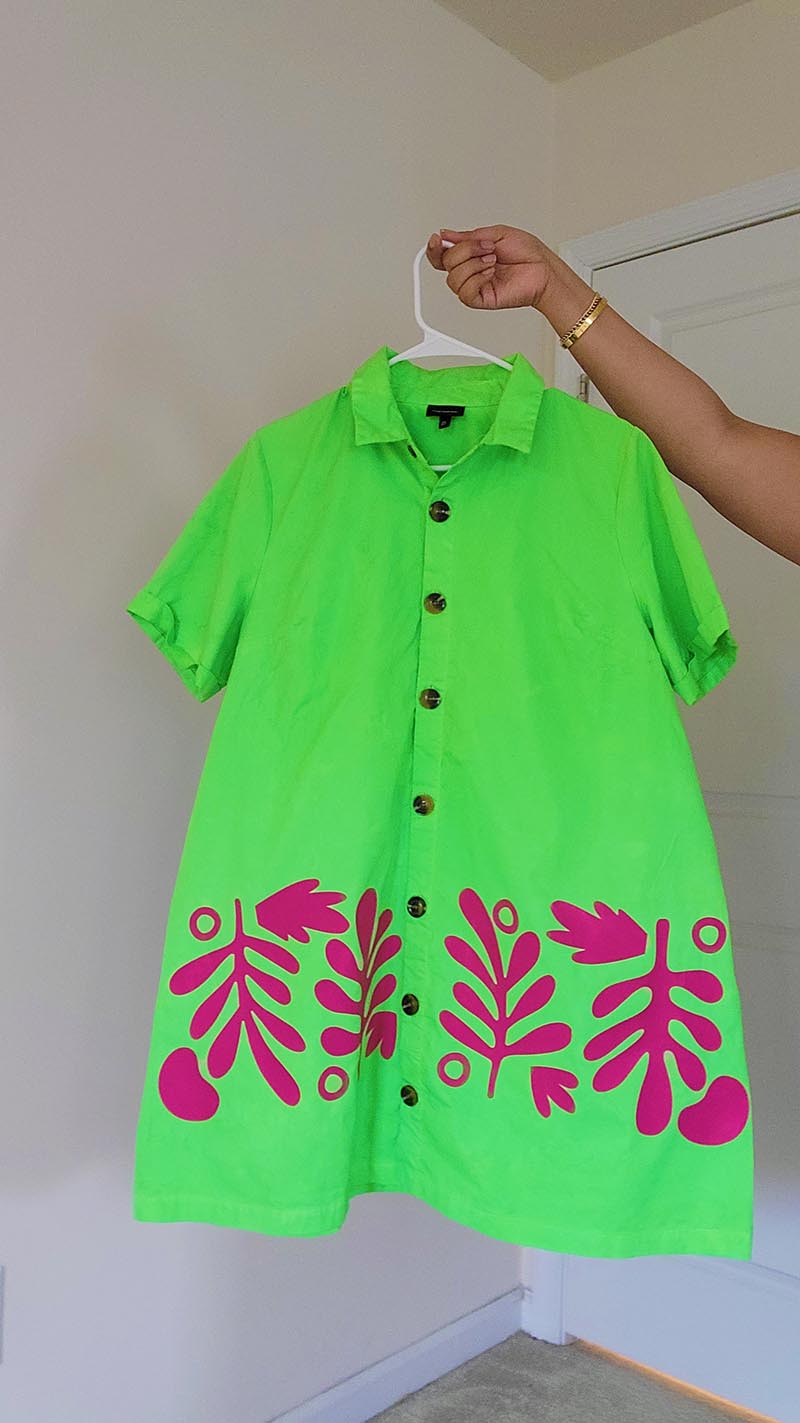
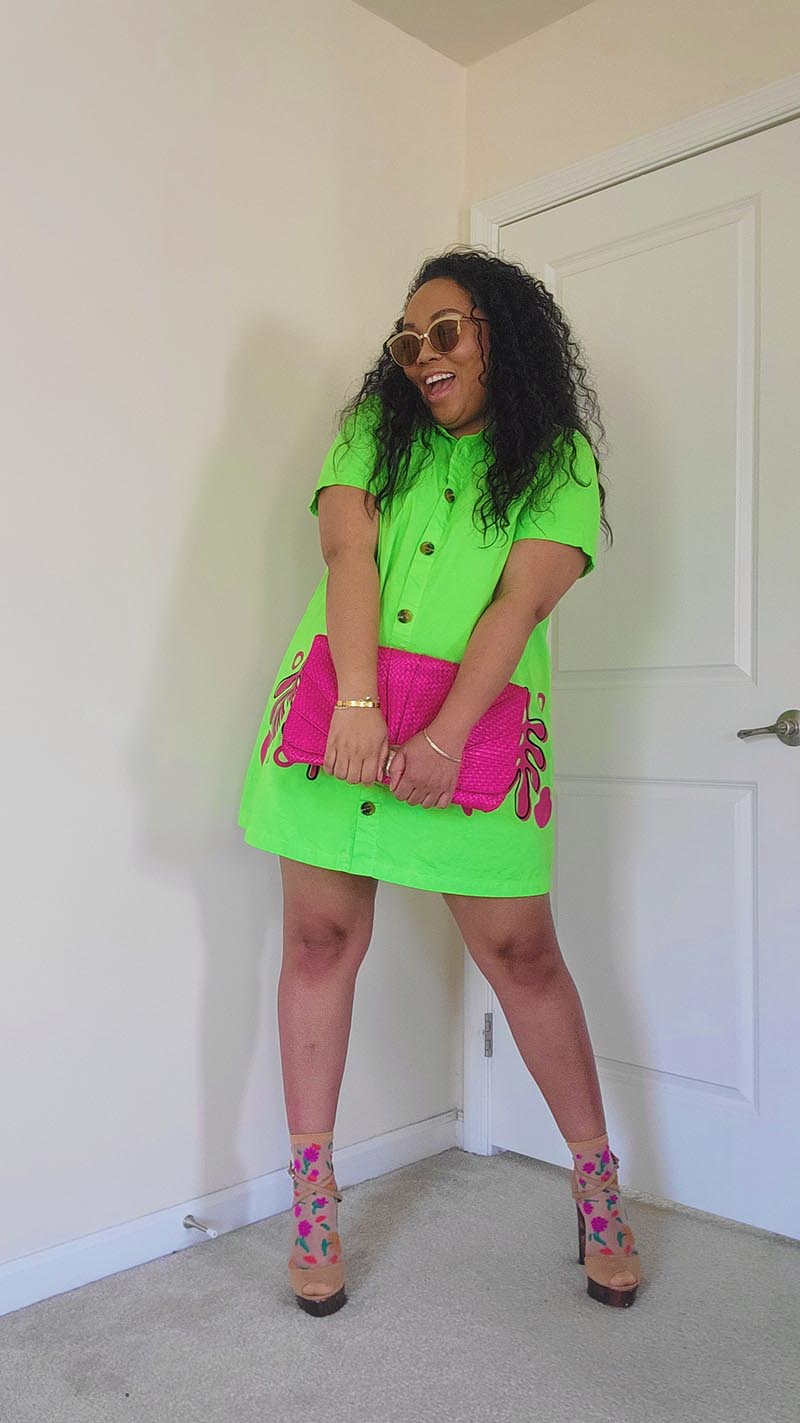
Here’s how I took my old dress and turned into something more fun to wear.
Instructions:
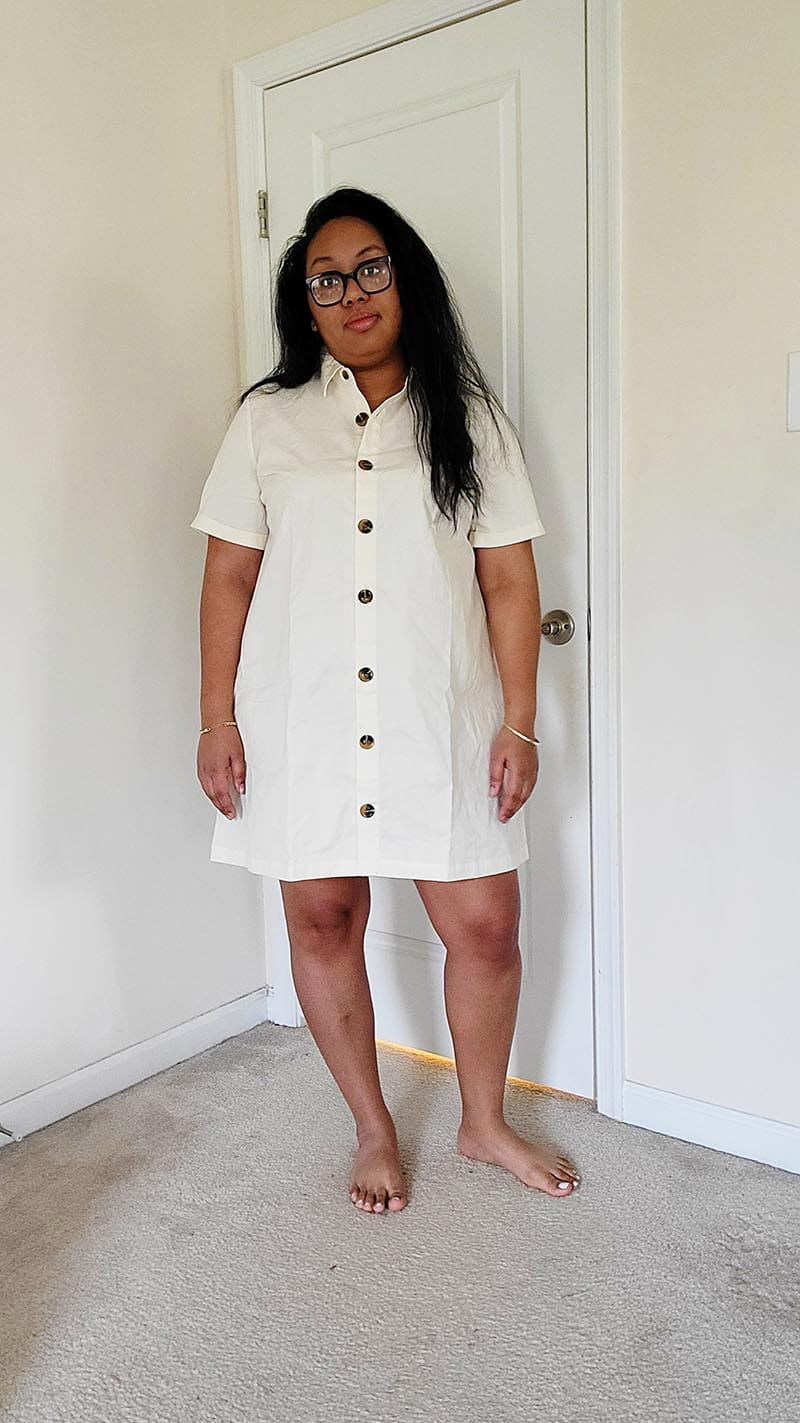
1. The before of this dress is something I'd never wear. It’s too boring and it doesn’t excite me.I dyed this dress into a neon green. Allow it to dry fully before moving forward.
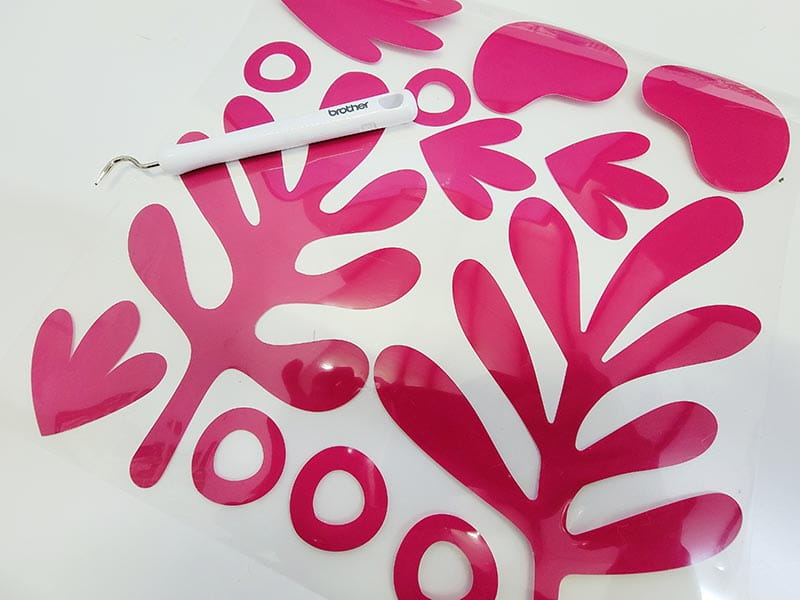
2. I planned to create a big, bold print trim to the bottom of the dress. I wanted a mixture of large and small cut files to create the look I was looking for. I measured and figured out what the largest cut file would be (9 inches) and the smallest (2-3 inches).
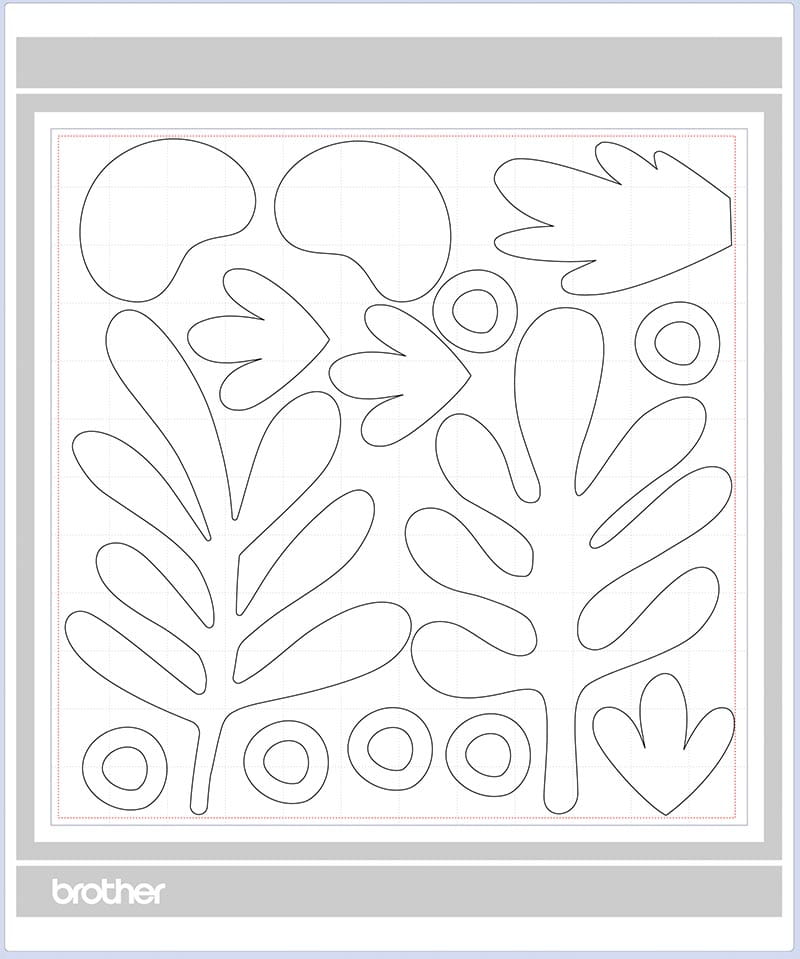
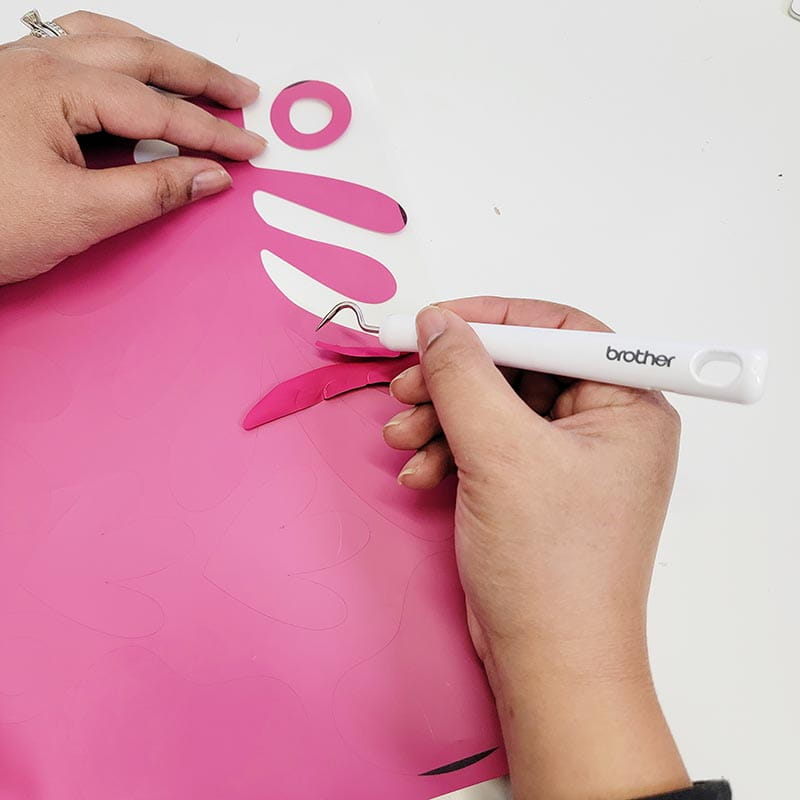
3. I found some clip art online that I really liked and outlined it in the Brother Canvas workspace. I resized them using the measurements I came up with previously. I cut the files out using my Brother ScanNCut. Be sure to cut out enough to repeat the pattern.
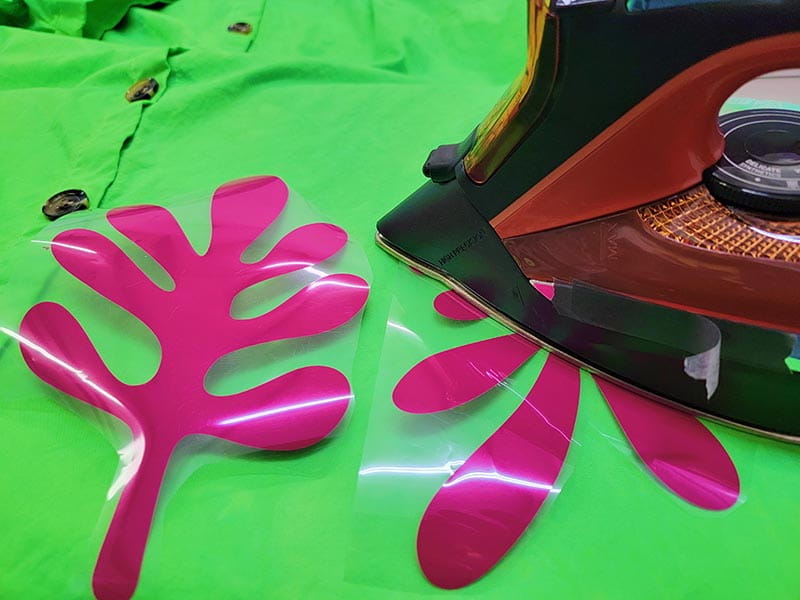
4. Using a hot iron, press the vinyl onto your garment.
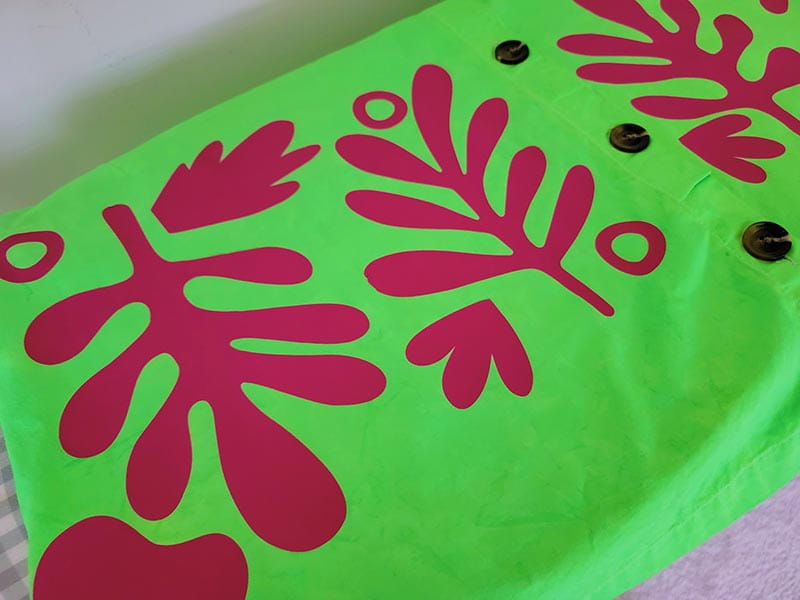
5. You can leave it as is, or add another dimension by creating an outline of any of the cut files and ironing it onto your design.
6. Style your look and have fun with it!
Tags
Shop this Project
No ScanNCut DX? No problem! Shop our full line of cutting products and get crafting!
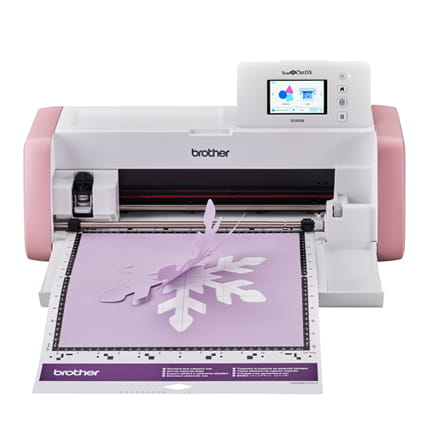
Brother ScanNCut DX
- 251 Built in Designs
- True Auto Blade, no manually adjusting blade pressure settings
- 600 DPI built-in scanner with on screen editing
Related Projects
Stay Connected
* Required fields