Simplify Your Crafting with the ScanNCut by Creating Custom Masks for Stamps
Supplies
- ScanNCut DX machine
- ScanNCut DX Mat that is less sticky (either Low Tack or very used)
- Optional: ScanNCut Scanning Mat
- Stamp Masking Paper
- Stamps & Ink
- Paper to print on
Time: less than 1 hour
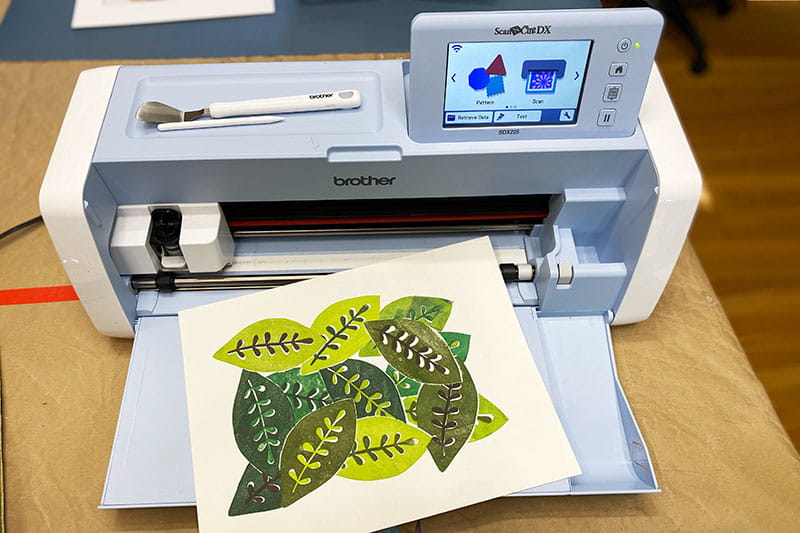
One of the things that I love to use my ScanNCut DX for is tasks that can be boring or tiresome, or simply take a long time. So today, I want to show you how to create custom masks for your stamps using the built-in scanner in the ScanNCut DX. It's super easy and can save you a lot of time and effort.
Directions
Step 1: Getting a Good Impression
The first step is to get a nice impression of the stamp you want to create a mask for.
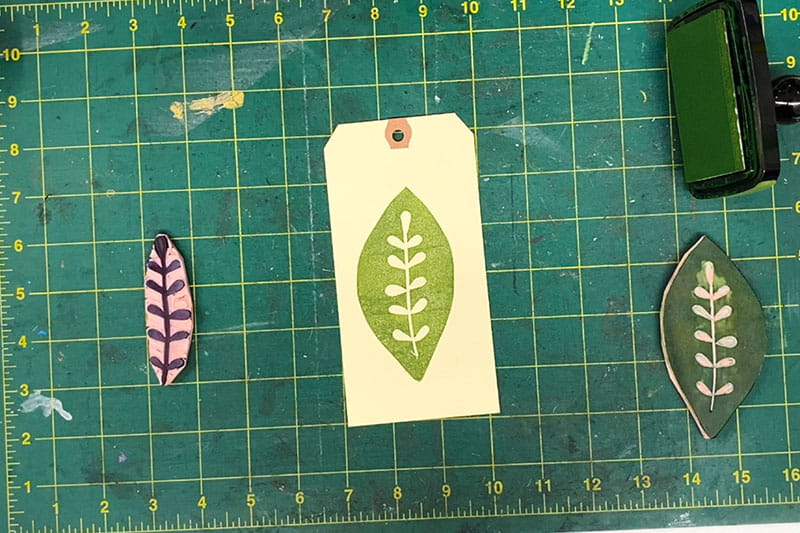
I'm using a manila tag, but you could use a scrap piece of paper or any other surface you prefer.
Step 2: Scanning Your Image
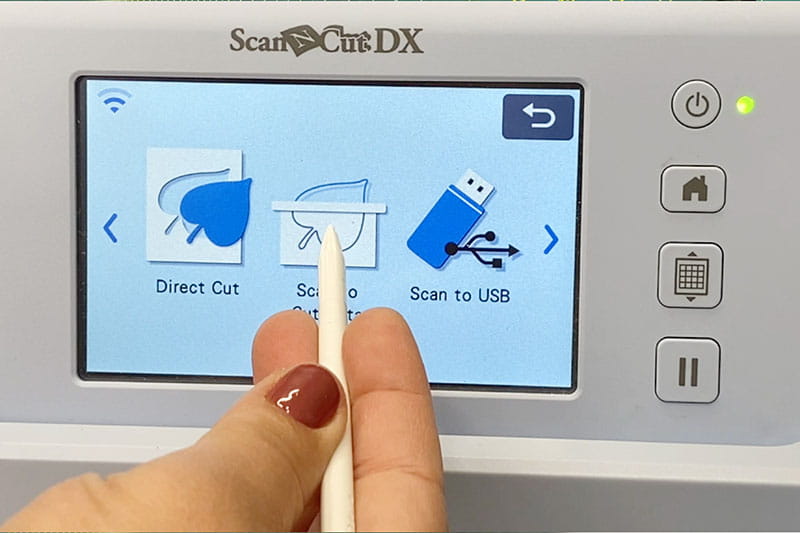
Now, take your stamped image over to the ScanNCut DX. I have placed the tag into my scanning mat (a non-adhesive mat), but you can also use a regular mat if you prefer. From the home screen, select "Scan," then "Scan to Cut Data…"
…and press start.
Since we're creating a mask, we only want the outside of the image. Choose the first scanning option.
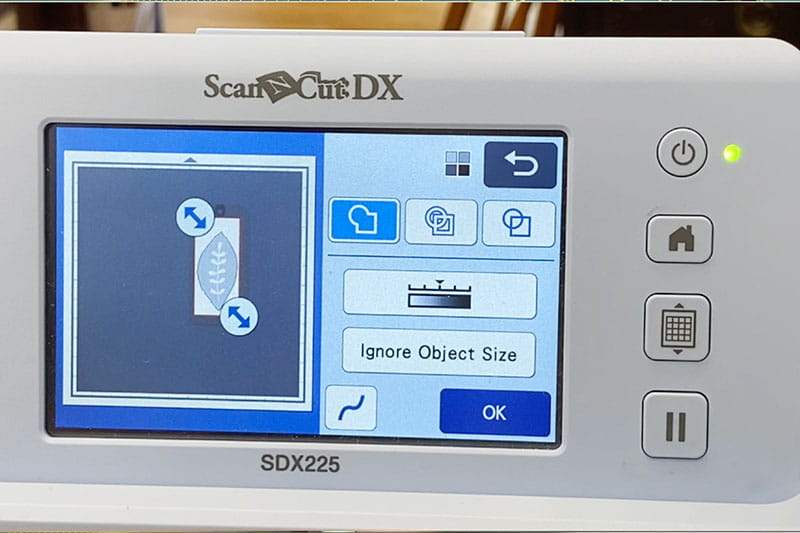
The darker line indicates what will be cut out. Hit "Preview" to ensure it looks good, and then say "Okay" to save it into the machine.
Step 3: Preparing for Cutting
Now, it's time to prepare your material for cutting. Because we’re using sticky back “stamp masking paper,” I like to use a cutting mat that's not too sticky. Place your masking paper on the mat…
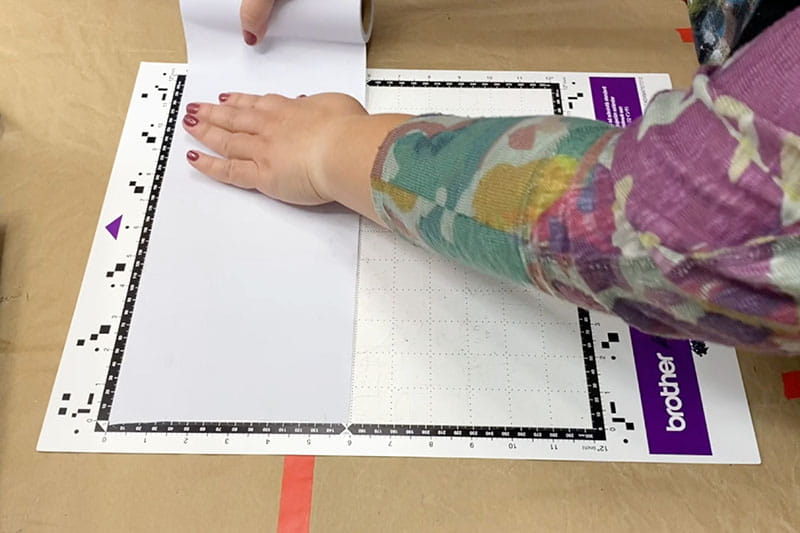
…and load the mat into the machine.
Step 4: Cutting Your Masks
Go to the home screen, select "Retrieve Data," find your saved file, and load it. You can then specify how many masks you want to create. After setting the quantity, use the "Auto Layout" option to arrange them efficiently on your mat.
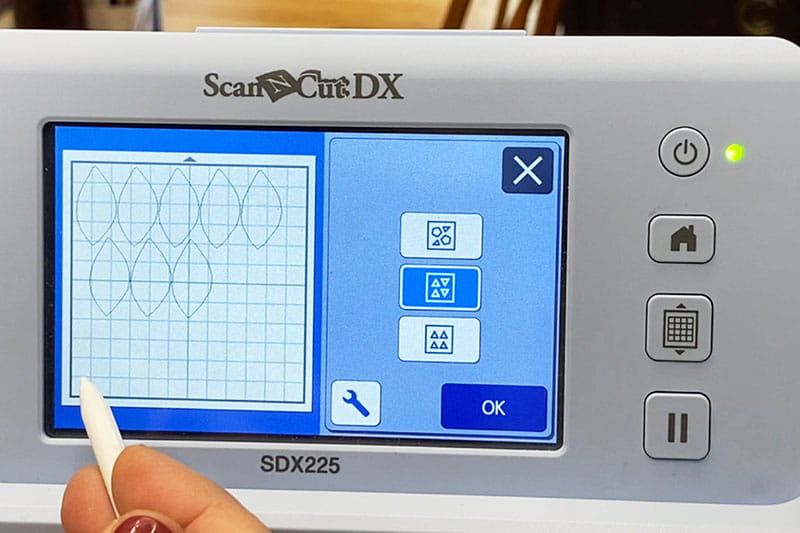
Once satisfied, say "Okay." Select "Cut," and the ScanNCut DX will do its magic, leaving you with perfectly shaped pieces.
Step 5: Using Your Custom Masks
Now, you can stamp your images and place your custom masks over them.
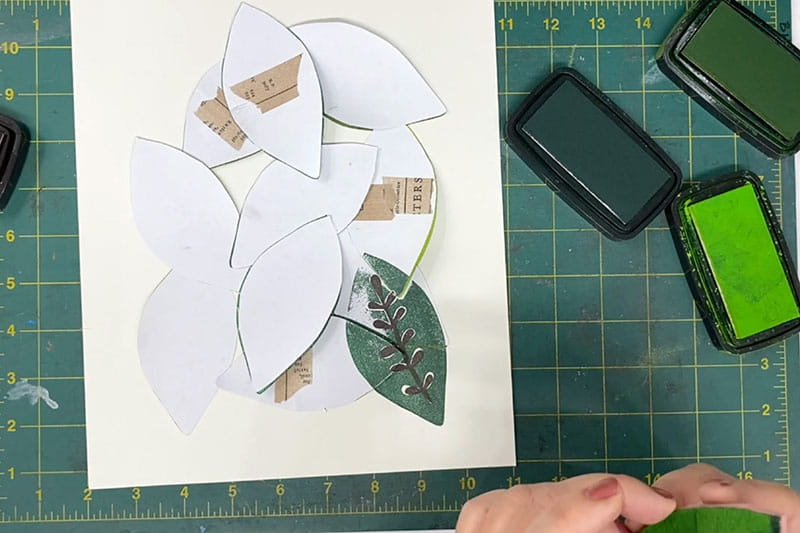
This allows you to easily layer your stamps for beautiful, layered prints with depth and interest -- all thanks to the custom masks created effortlessly with the ScanNCut DX.
Have fun crafting with your ScanNCut DX!
Related Projects
Stay Connected
* Required fields