Hand Drawings to Cut Files
Brother Crafts Blogger
It is amazing to watch a child’s artwork progress as they grow older. Today we are sharing how Liz Hicks, crafter and blogger, used one of her son’s hand drawings in a fun project with the ScanNCut machine from Brother.
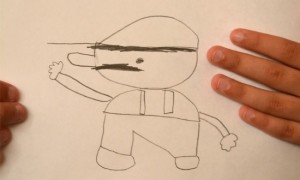
To start, have your child draw by hand their favorite character (or even just their own creation).
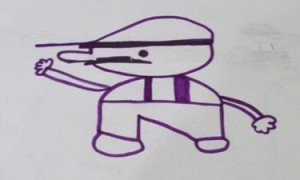
Next, take their hand drawing and sharpen the outline with a dark colored marker. (This will help the ScanNCut machine read the outlines of the design.) We suggest coloring in the pieces of the design that may be a bit more delicate in order to help keep the cut as precise as possible.
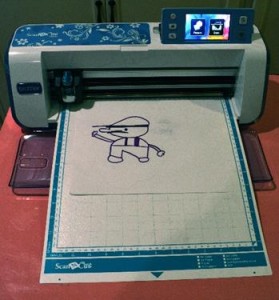
Use the “Scan-to-Cut” function to scan in the drawing and create a cut file. During this process, you can easily adjust the type of cut you would like to create.
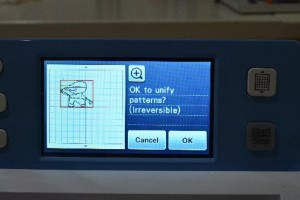
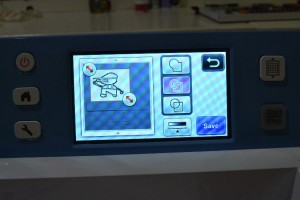
Once the design is converted to a cut file, use the editing features of the ScanNCut machine to clean up any stray items that the machine may have picked up. If your design has a lot of different parts, make sure to unify all pieces at this time as well. Next, check your surface with the machine by creating a test cut. Performing a test cut is the best way to make sure your designs are cut out as accurately as possible.

Now all that’s left is to remove the cut design from your cutting mat and adhere it to your project. It’s that easy!
Related Projects
Stay Connected
* Required fields