Woodland Baby Shower Crafts
You will need:
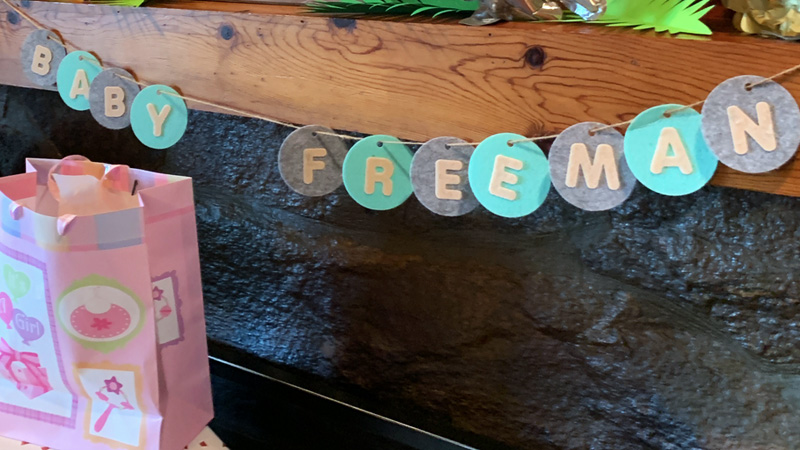
Baby Name Banner
- Felt in at least 2 contrasting colors, high-tack fabric support sheet, twine or string, hot glue, ScanNCut DX
- Baby_Banner_Circles.fcm>/strong>
- Burlap banner, about 12”w x 18”h, green heat-transfer vinyl, iron, press cloth, ScanNCut DX
- Deer_Burlap_Banner.fcm
Steps:
Baby Name Banner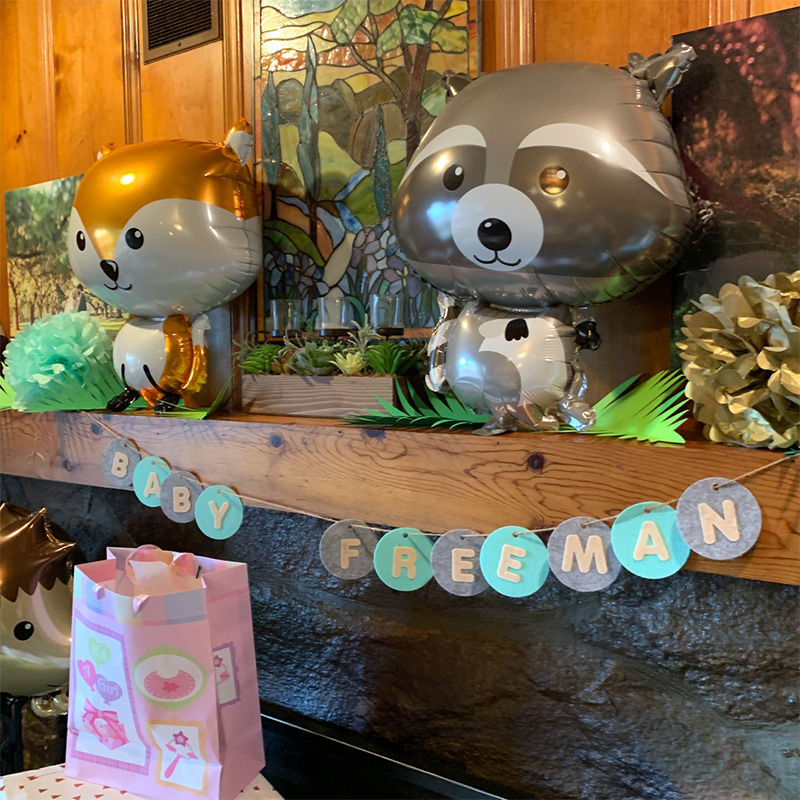
1. In CanvasWorkspace, use the text tool to type out the Baby name (or the baby shower theme, if there’s no name!). Make sure the letters are sized to be about 1.5” tall, and make sure to use a bold, rounded, all-caps font.
2. Transfer the design to your machine.
3. Apply a sheet of felt to a Standard Mat using a High-Tack Fabric Support sheet.
4. Cut out the letter designs and set aside.
5. Download “Baby_Banner_Circles.fcm” to your machine.
6. Repeat the designs on your machine until there are enough circles to correspond to the number of letters you cut out in the previous steps.
7. Apply a contrasting sheet of felt to a Standard Mat using a High-Tack Fabric Support sheet.
8. Cut out the circle designs.
9. Next, use hot glue to attach a letter cutout to the center of each circle cutout. Let cool.
10. Thread the banner circles onto a length of twine or string, in order.
11. You’re done!
Deer Burlap Banner
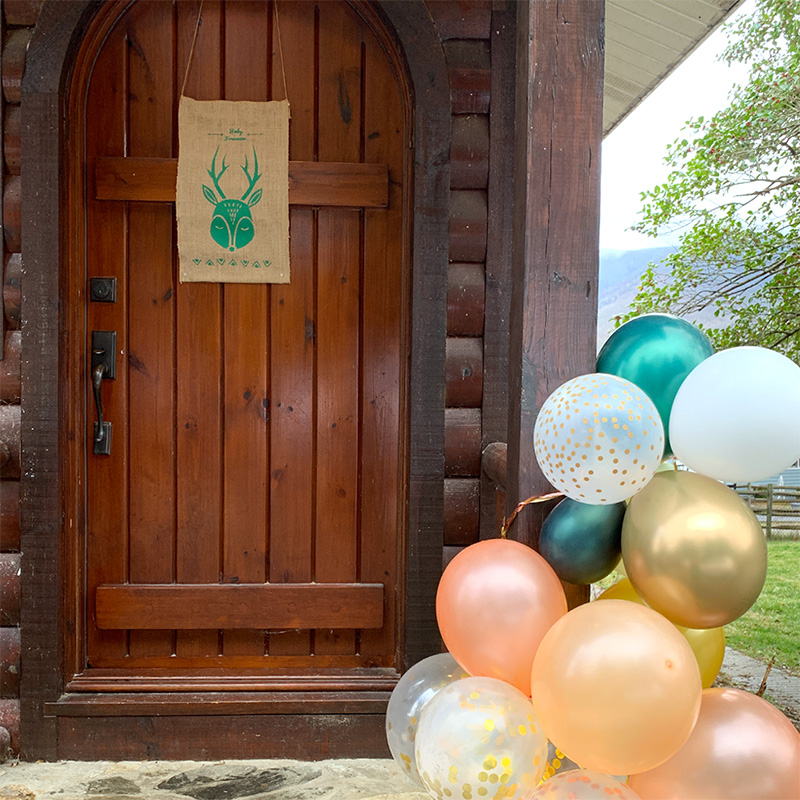
1. Download “Deer_Burlap_Banner.fcm” to your machine.
2. Place a sheet of green heat-transfer vinyl onto your mat, making sure to place the carrier (super shiny!) side down. Cut out the design.
3. Peel away all excess vinyl. There should only be your design left on a sticky clear sheet. Trim apart the designs so that the deer portion and the pattern portion are separate.
4. Place the deer portion sticky side down onto the center of the banner, aligning it in a way that looks good to you. Then align the pattern portion on the banner as well.
5. Lay a piece of scrap fabric over your design, and use an iron on medium heat (no steam) and press the design firmly into the burlap. Make sure all parts of the design are pressed down.
6. Once the design is bonded to the material, let the fabric cool for a few seconds.
7. Peel off the clear backing and let cool for a couple of minutes.
8. You’re done!
Related Projects
Stay Connected
* Required fields