How To Make Custom Cards Three Ways With Your ScanNCut DX
-Brother Crafts Blogger

Supplies:
• ScanNCut DX (any model)
• standard or low tack mat
• scraps (paper, vinyl, etc)
• cardstock base for cards (mine are sized 5 ½ x 4 ¼)
• adhesive, embellishments, trims, optional needle and thread or sewing machine, black pen

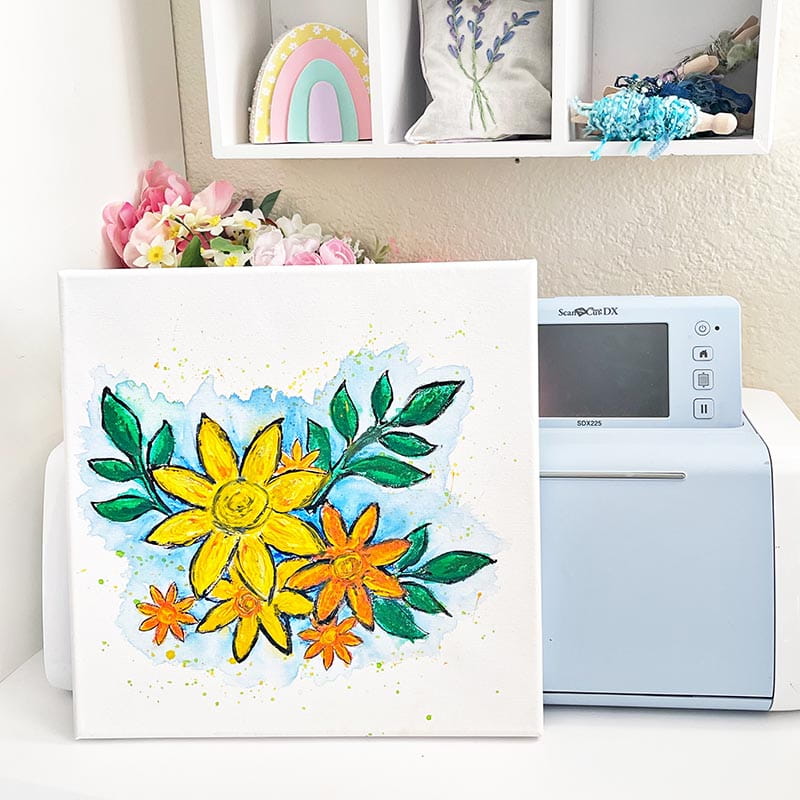
When it comes to using up scraps, demolishing crafting leftovers, and making the most of the supplies on hand there are two key elements: card making and my ScanNCut DX. With my ScanNCut DX, I can maximize the scraps of paper and vinyl and fabric that I have, turn them into shapes ready to create. When I do this, I use basic shapes, sayings, and cut files I know I can use in a lot of ways from scrapbooking to simple sewing projects and everything in between.
What about when I want to make the most of my scraps with the ScanNCut DX and also craft right then? I make cards! With the ScanNCut DX you have so many options and today in this video tutorial I will showcase three of my favorite ways to do this. When it comes to using up scraps my favorite ways to utilize the ScanNCut DX are:
• Cut shapes out of paper/vellum/other leftover material
• Cut word stickers from leftover craft vinyl (sticker material)
• Cut around key spots on the material and/or cut out key shapes using scan function
• Draw and doodle on scraps of material such as watercolor paper
• Cut around stamps and other shapes
• Cut card/journal card/photo mat sized papers for future use
Sometimes I gather and save these “scraps turned shapes”, but today I’ll be creating a trio of cards from them! Creating batches of cards can be a lot of fun, and then when you are ready to mail off a card you will have a batch to select from as well! There is no wrong answer to be had here – and you can create with any and all of these ideas in any theme as well.
Tags
Shop this Project
No ScanNCut DX? No problem! Any products mentioned in this project are available to buy here.
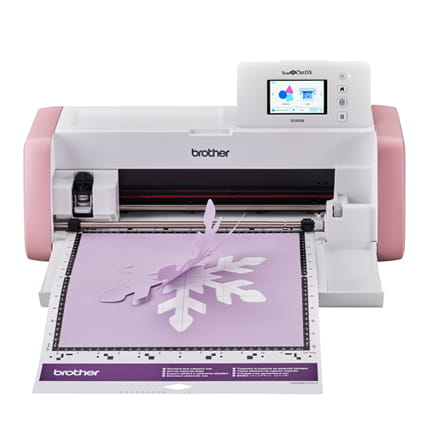
Brother ScanNCut DX
- 251 Built in Designs
- True Auto Blade, no manually adjusting blade pressure settings
- Built-in Scanner; scan in hand-drawn creations and cut them out!
Related Projects
Stay Connected
* Required fields