How to Create a Custom Welcome Mat
-Brother Crafts Blogger
Sometimes you can’t find a welcome mat to fit the feel of your home, but now you can create your own custom mat. I like to sketch and paint, so I made what I wanted in paint one afternoon. I love how it came out! You can make things like this too! Never say you can’t do anything or that you’re not crafty - you can totally make this cute welcome mat or something of your own design for your home or as a personalized housewarming gift.

Materials:
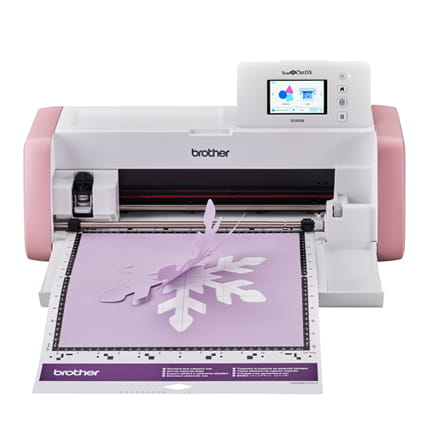
● Brother ScanNCut SDX85 machine with stylus
● Brother light grip 12x24 mat
● Blank welcome mat, vinyl, paint (outdoor acrylic), brush, painter’s tape
Steps:
1. Image to use for mat.

2. Trace image to make easier to scan. Scan and save using computer.
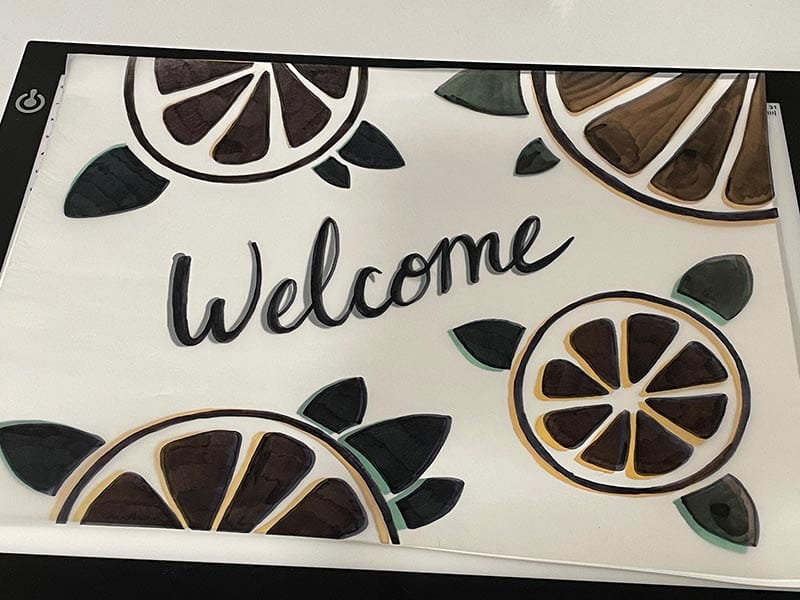
3. Open Canvas Workspace.
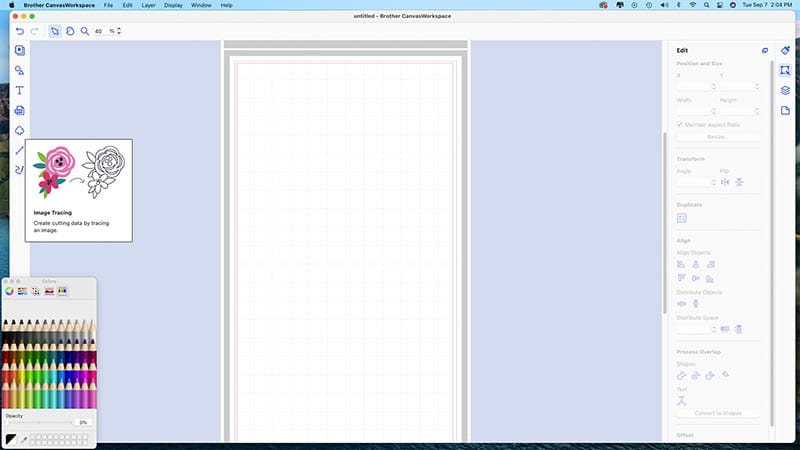
4. Select trace image.
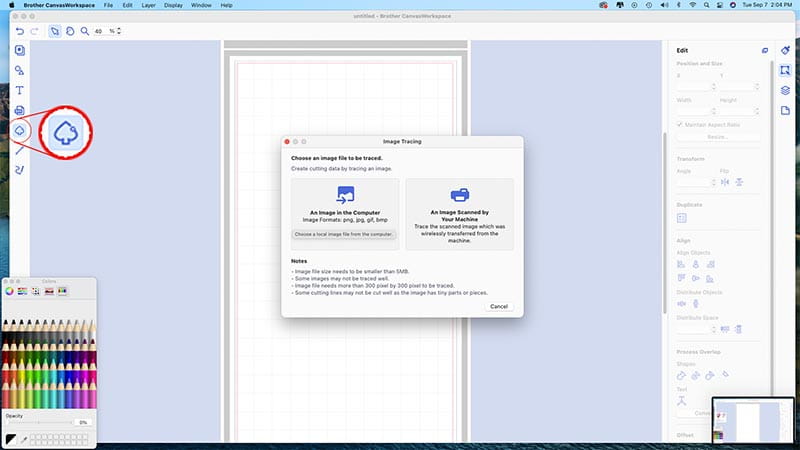
5. Select scanned image.
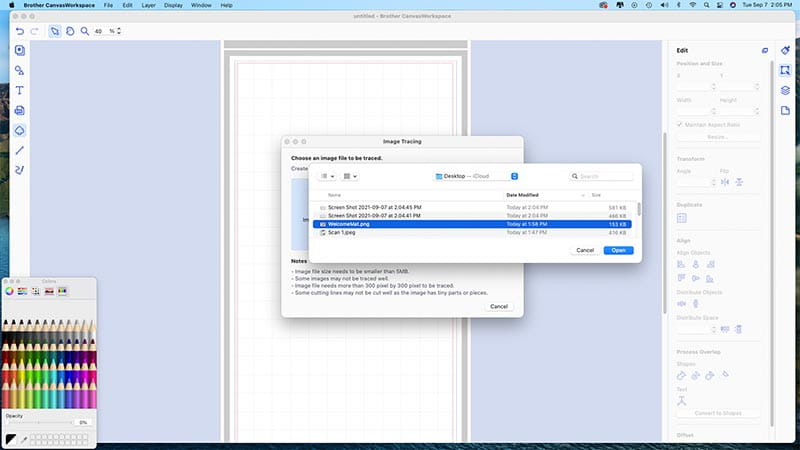
6. Trace area by color.
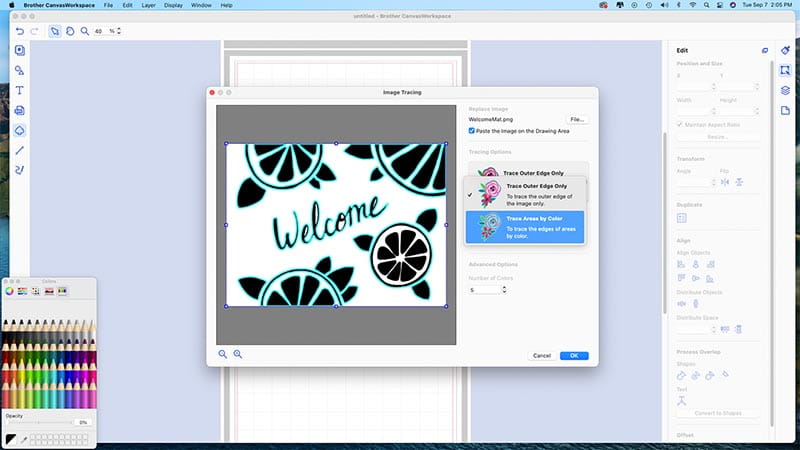
7. Check preview.
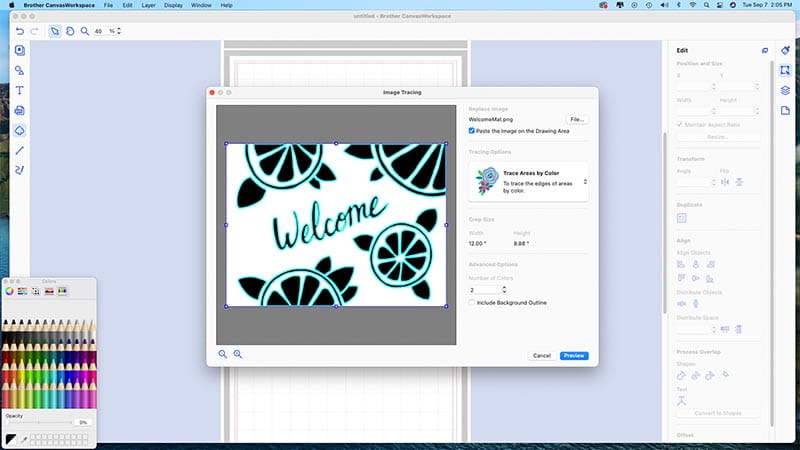
8. Image placed.
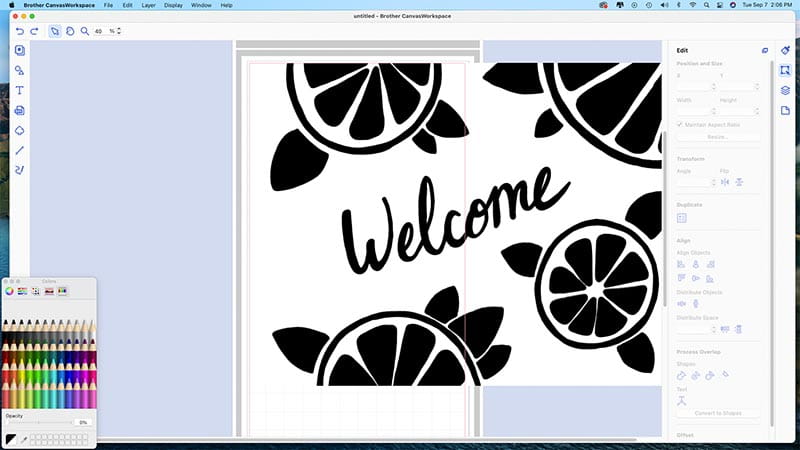
9. Select scanned layer and delete.
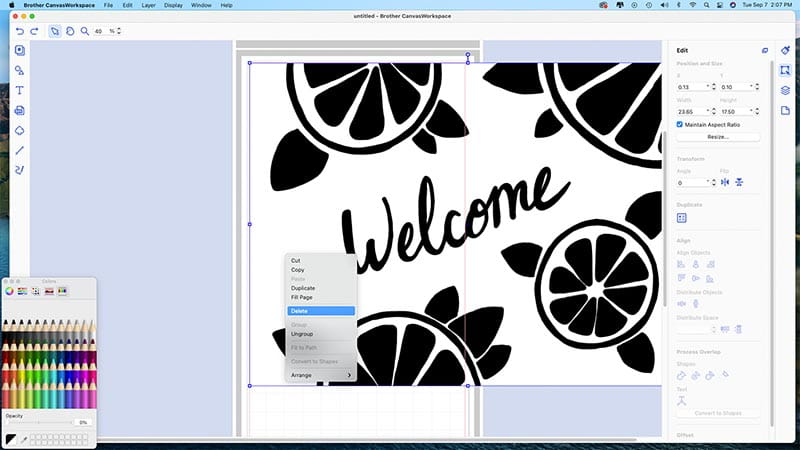
10. What you should be left with.
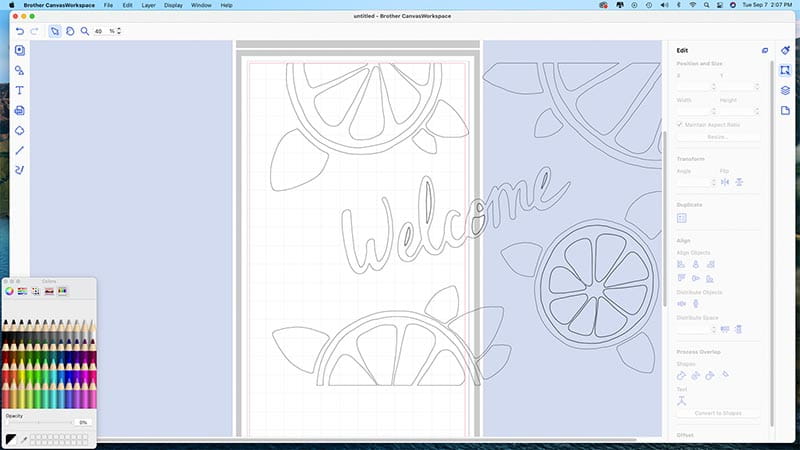
11. Rotate and duplicate layer.
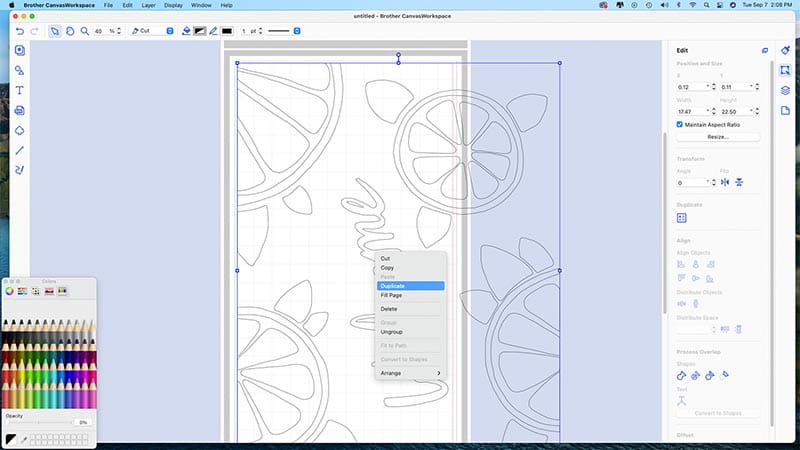
12. Select both layers.
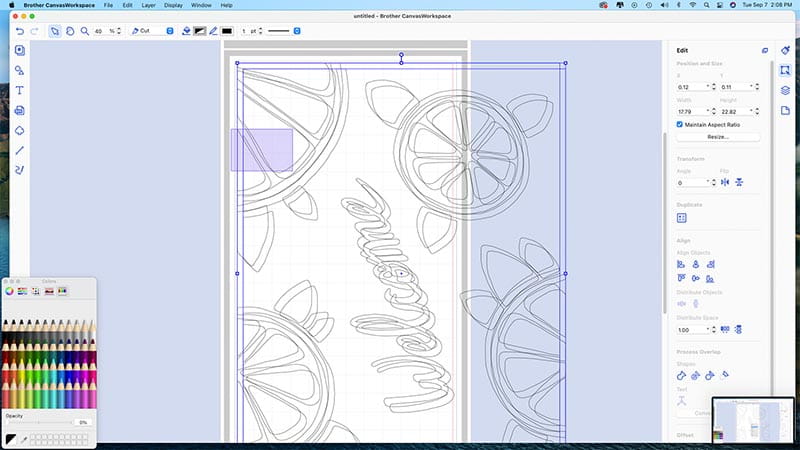
13. With both layers selected, align left.
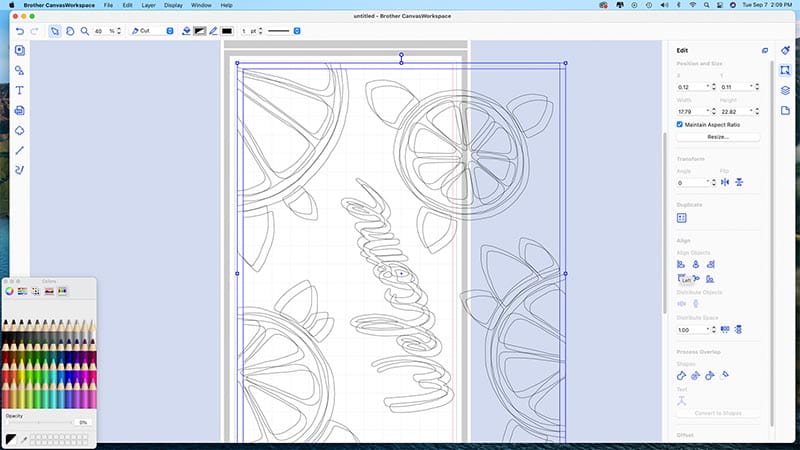
14. Align layers to top.
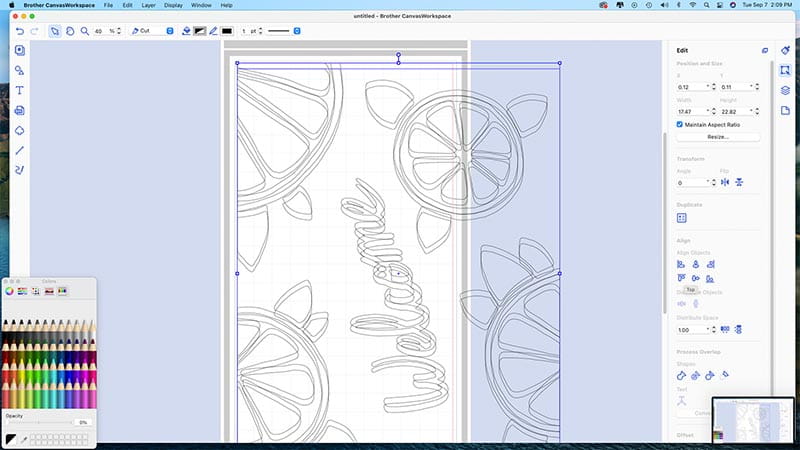
15. Select shapes palette after assigning each layer a color.
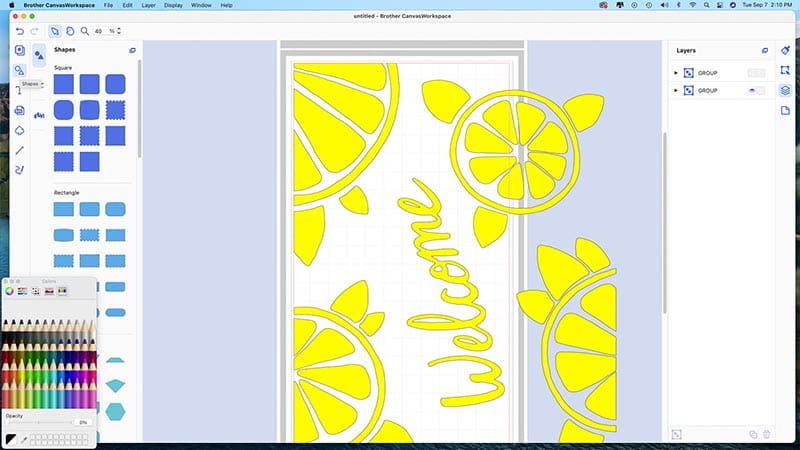
16. Hide one layer and make rectangle to cover live area of mat/canvas.
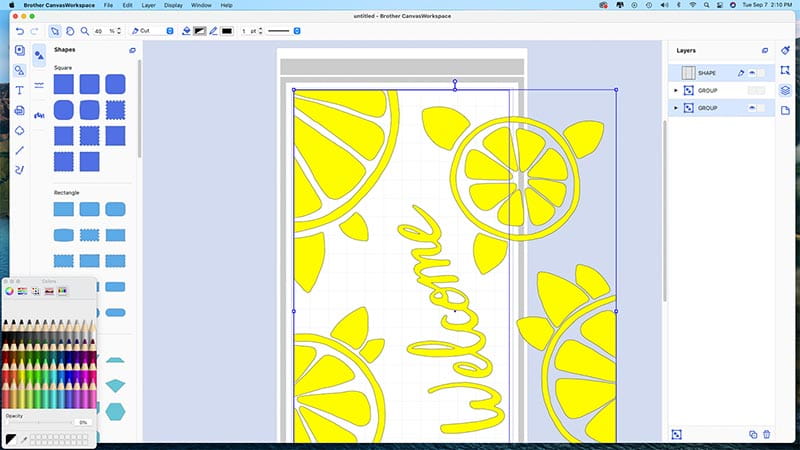
17. Select visible layers (rectangle and one design) and click edit function.
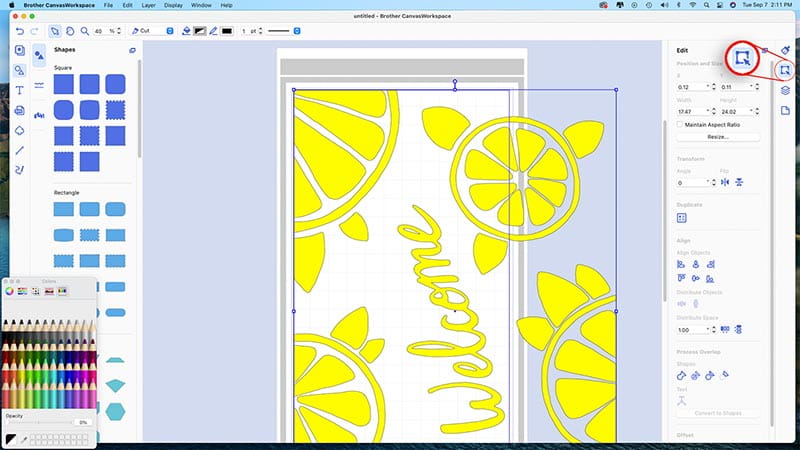
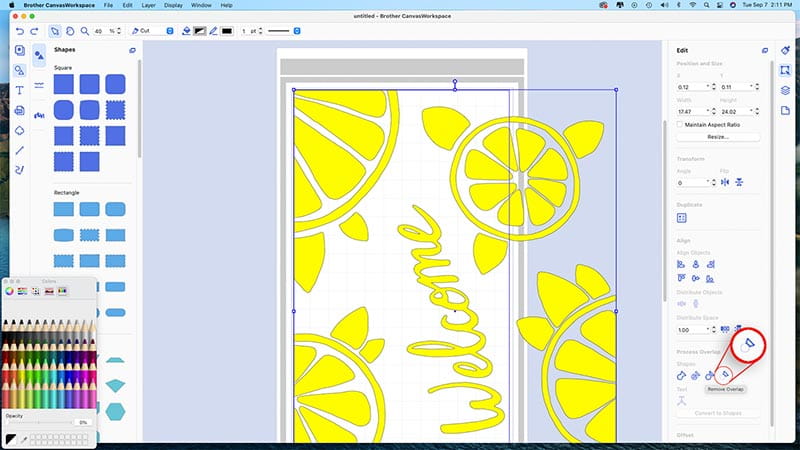
18. Remove overlap.
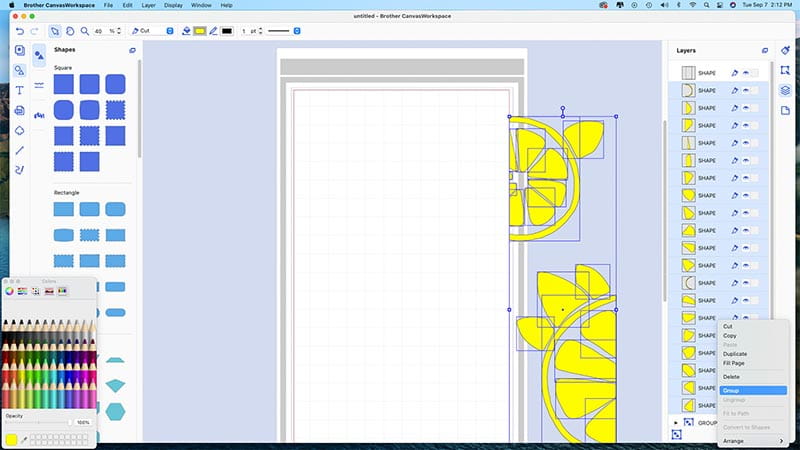
19. Select elements of visible layer and group.
20. Hide layer and make visible the other design layer.
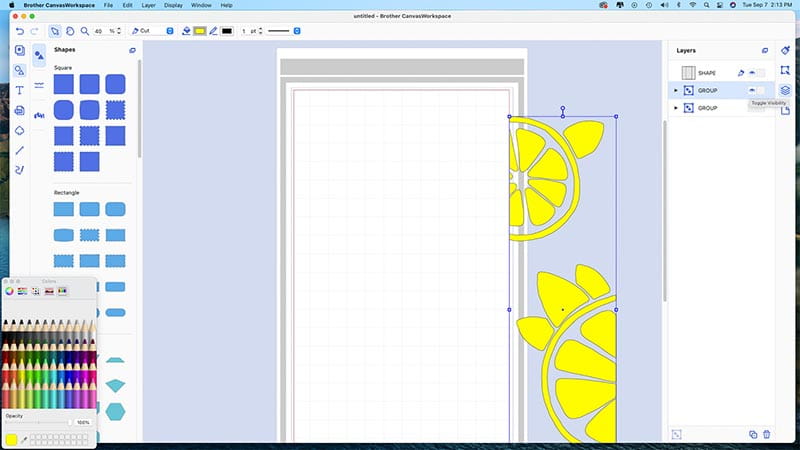
21. Move the rectangle over to cover design hanging off the live canvas.
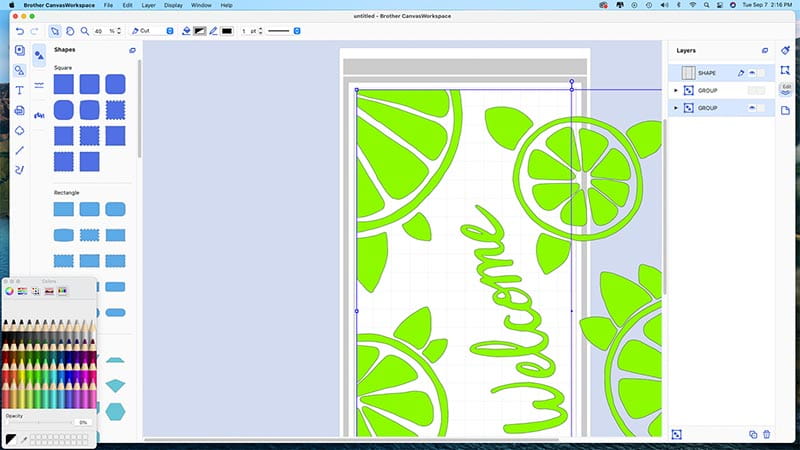
22. Select design layer and rectangle and remove overlap as in previous step (18).
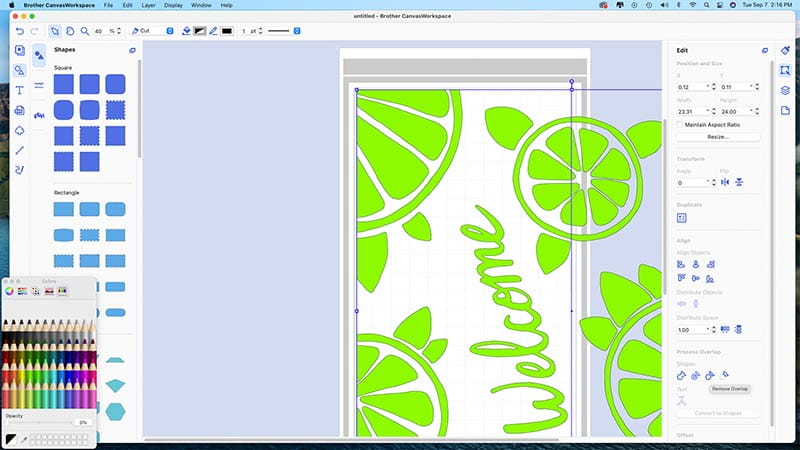
23. Select elements of visible layer and group.
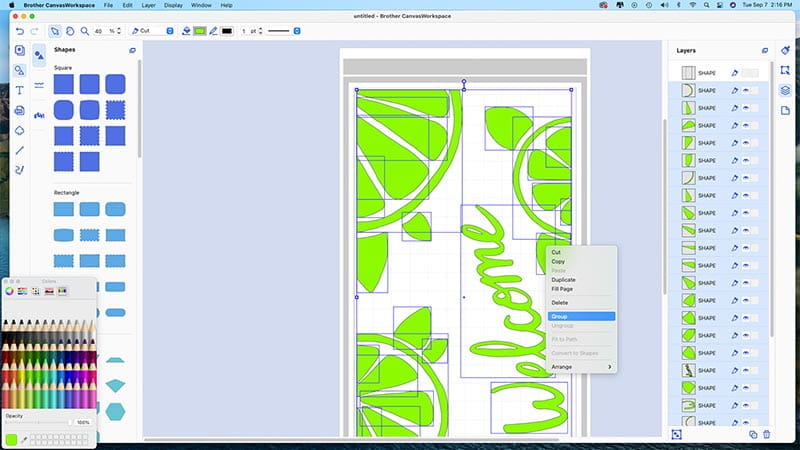
24. Make both layers visible and select both.
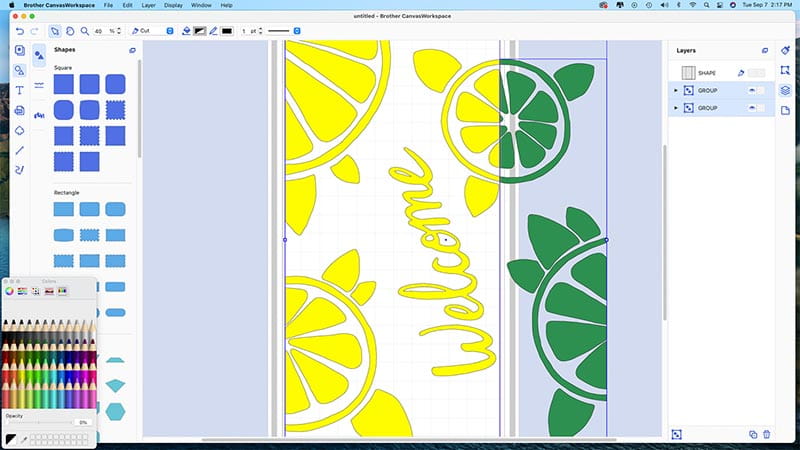
25. Align layers left.
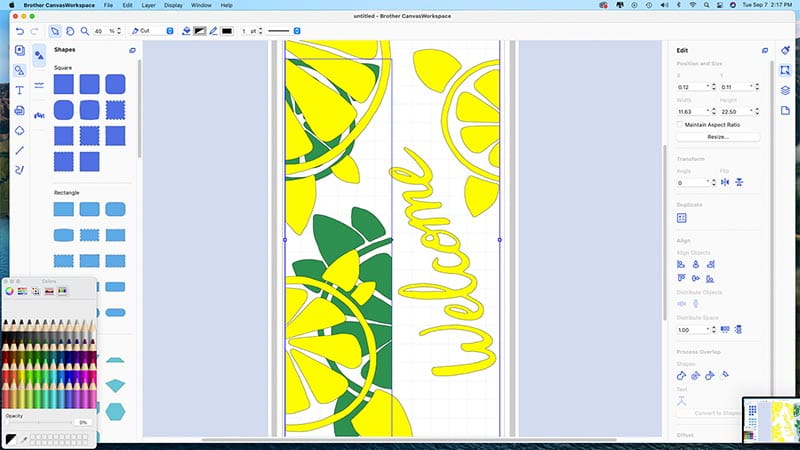
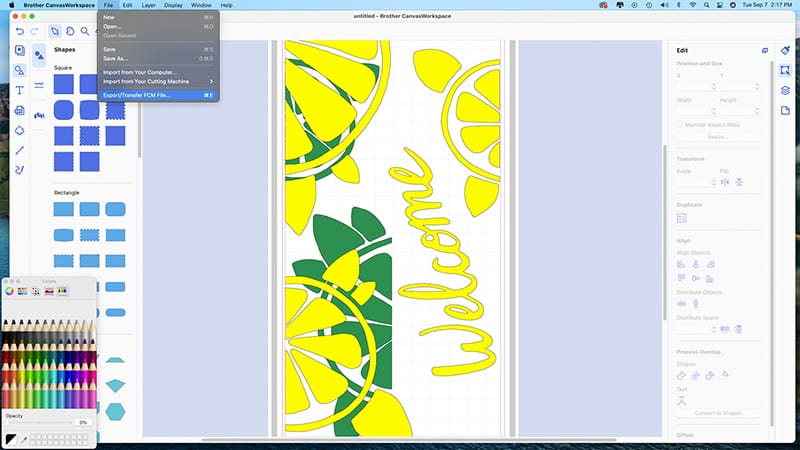
26. Select file and export transfer FCM file.
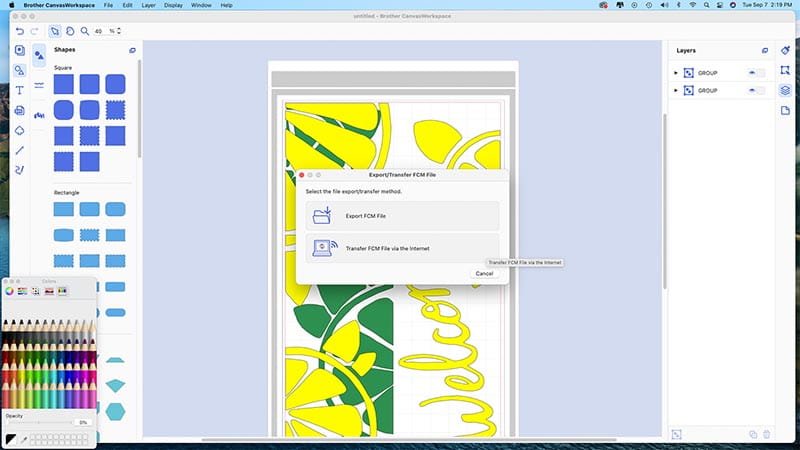
27. Transfer FCM file via the internet.
Using Brother ScanNCut DX Cutting Machine
1. Turn on your Brother ScanNCut DX cutting machine and click Retrieve Data with the stylus.
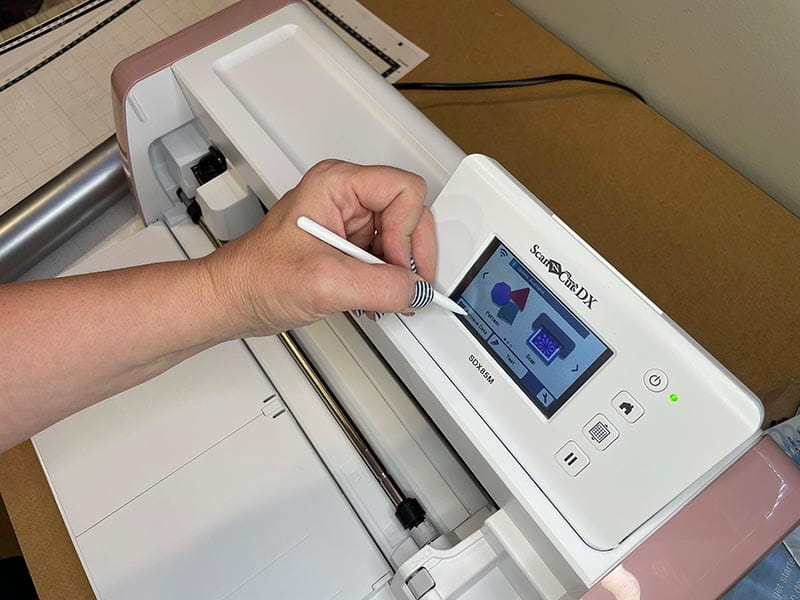
2. Retrieve data from wifi.
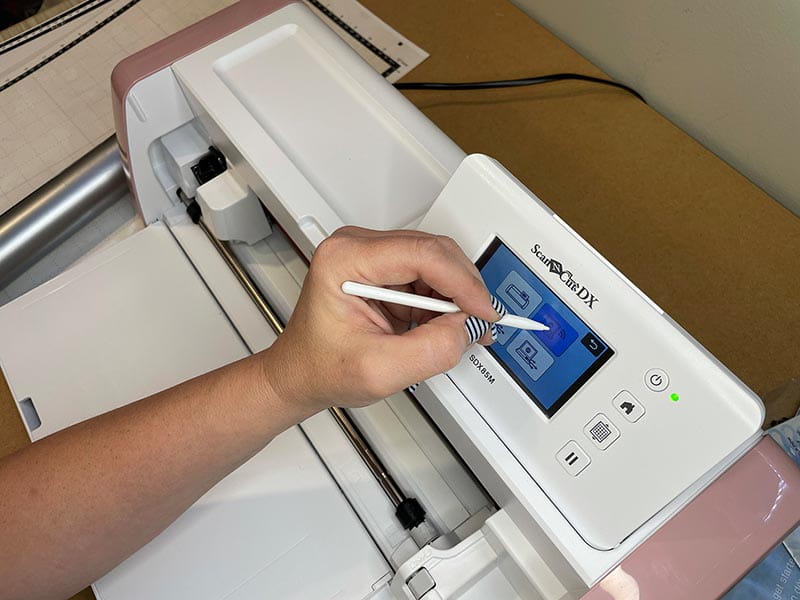
3. Both pieces of your file will now be on the screen.
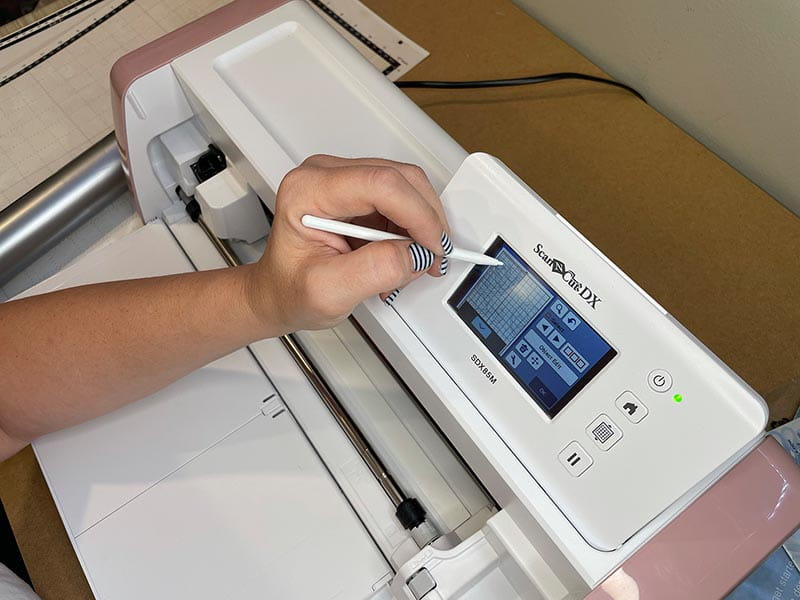
4. Using the stylus, select the file you are not cutting right now.
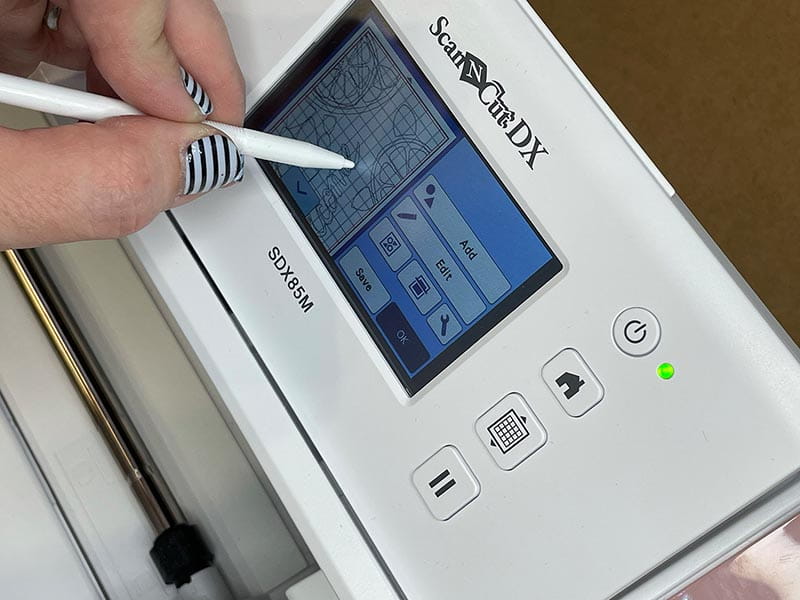
5. Click edit with the stylus.
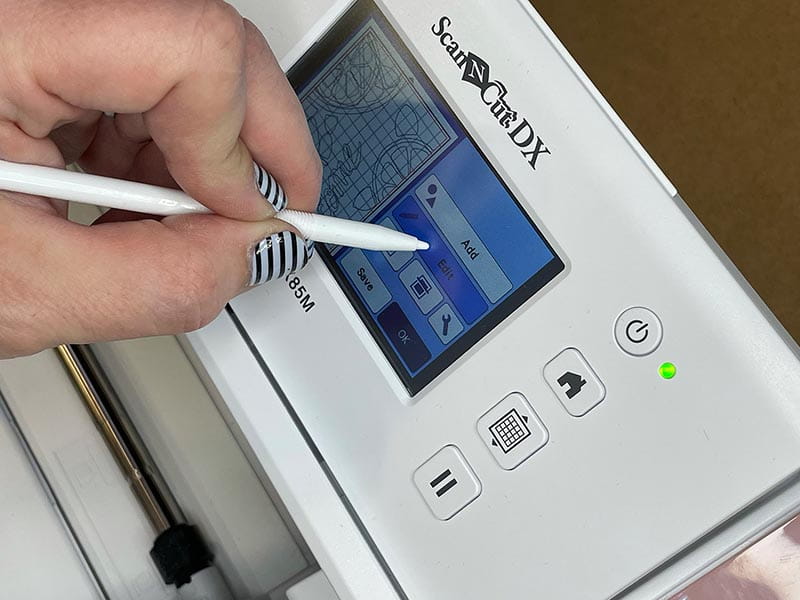
5a. Click the trash can icon with stylus.
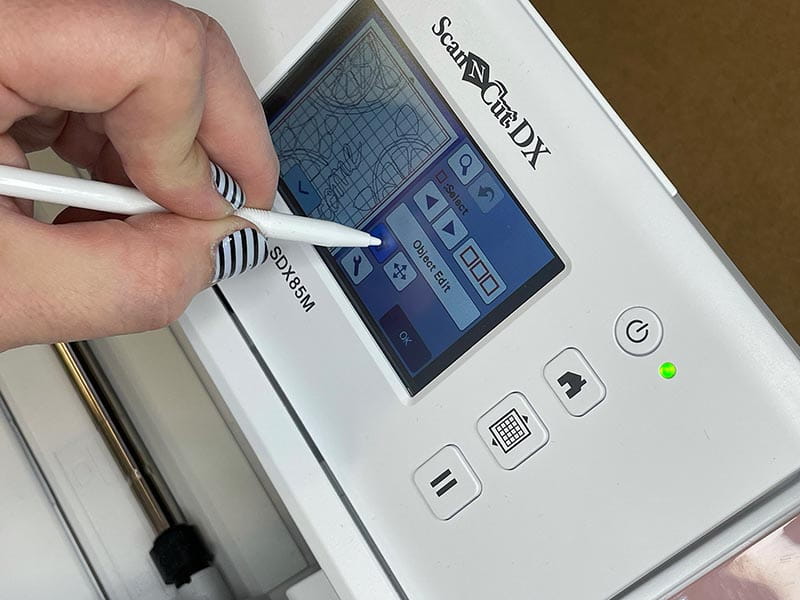
5b. Confirm delete.
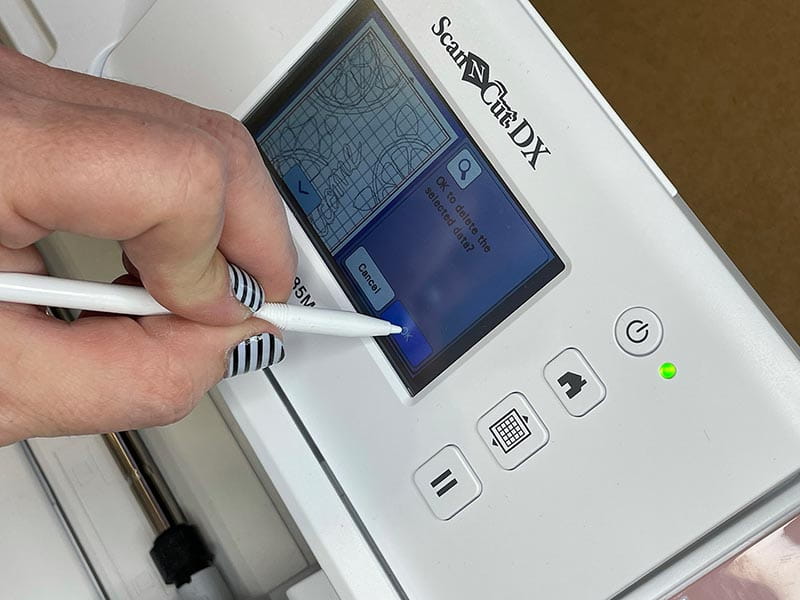
6. Select the tool icon.
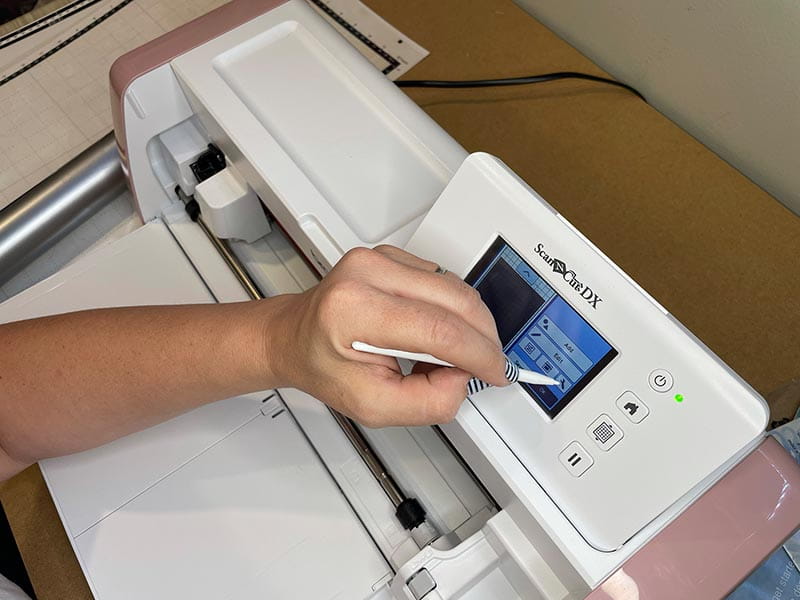
7. You will now edit the cut area.
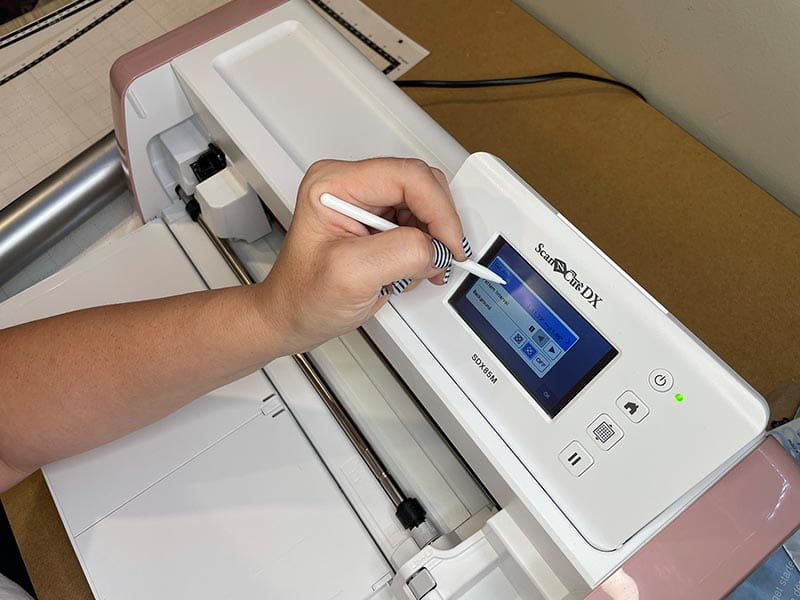
8. Select the mat size to fit this file. In this case, 12” x 24”.
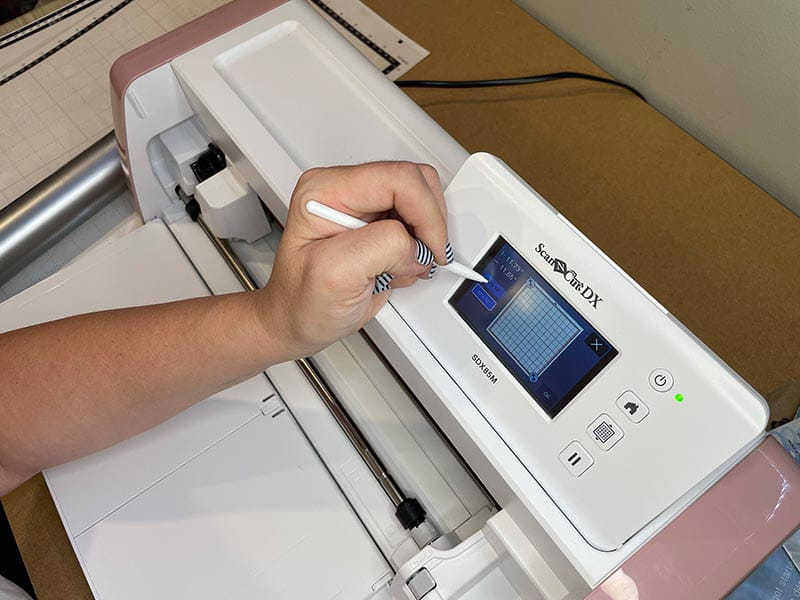
9. Confirm the mat size.
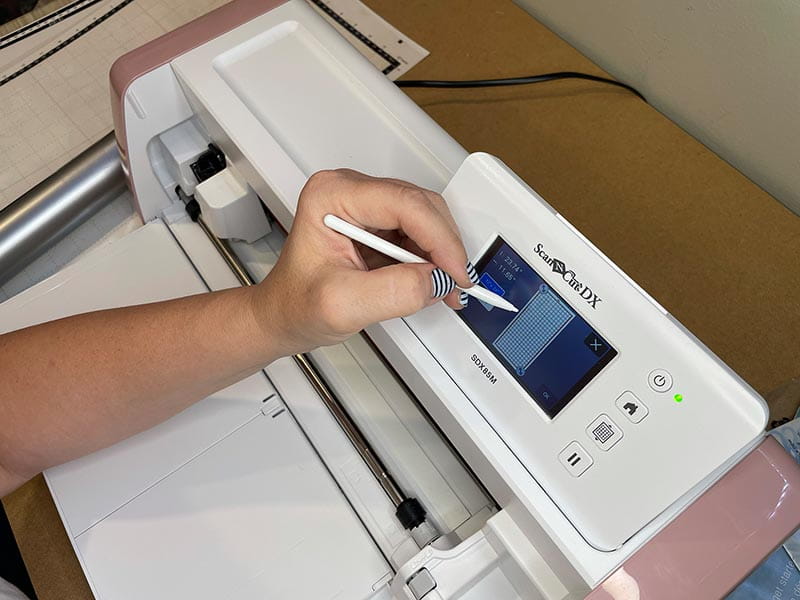
10. Confirm mat size.
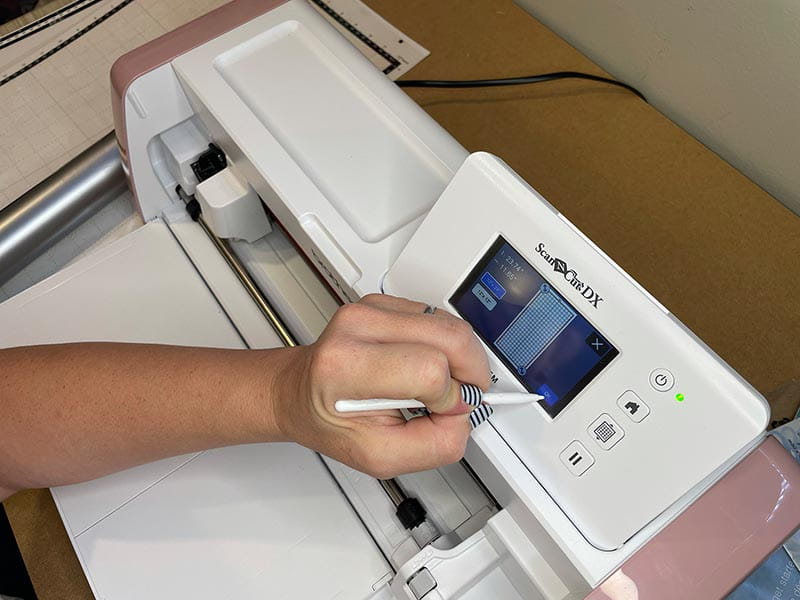
11. Click OK. We are now ready to select the task for your ScanNCut DX.
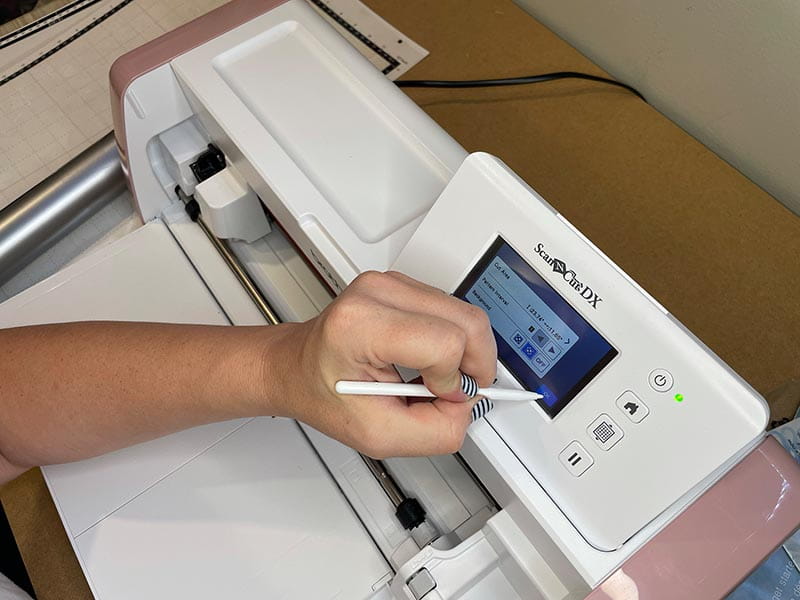
12. Click OK.
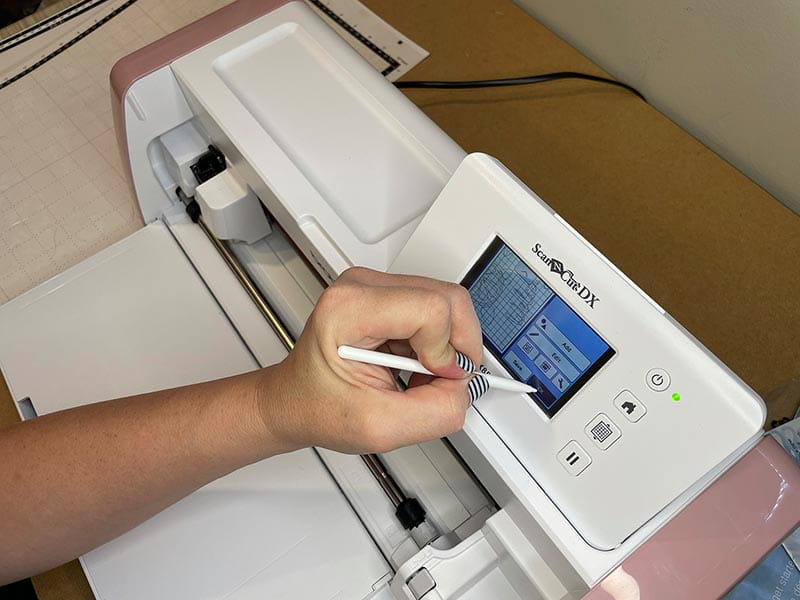
13. Using the stylus, click “please select” to open the menu of functions your ScanNCut DX can do.
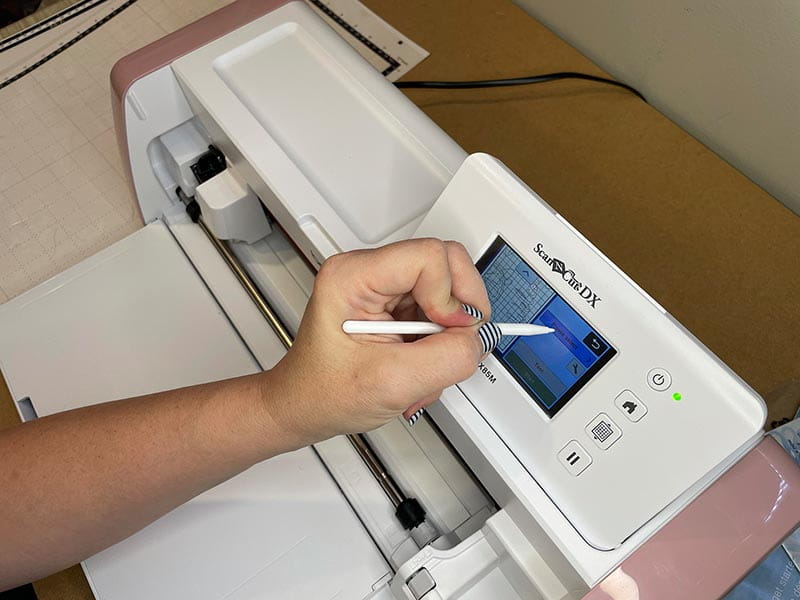
14. Select cut.
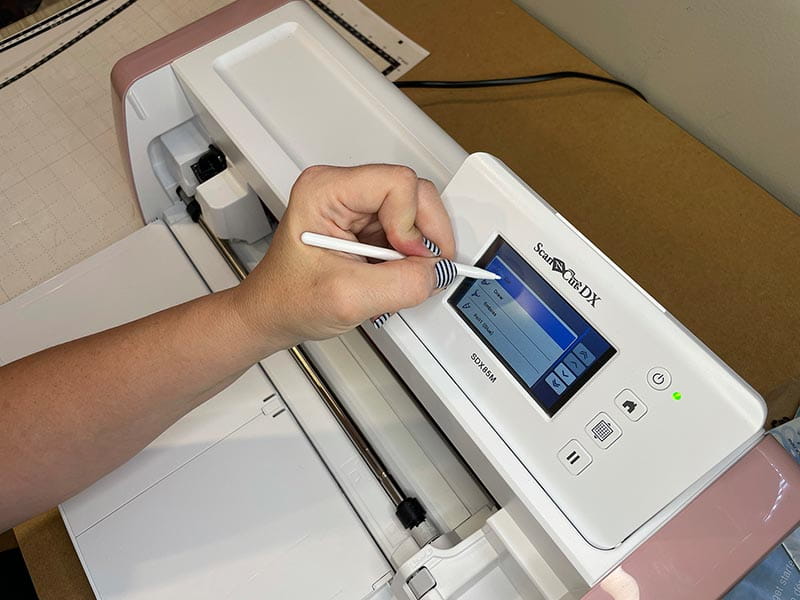
15. Select tool below “cut”.
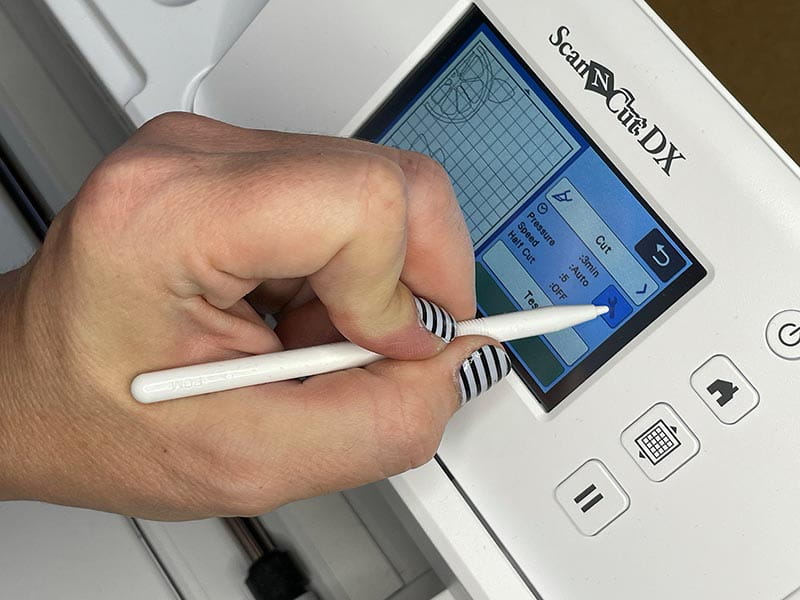
16. Adjust the depth and pressure settings to your preferences.
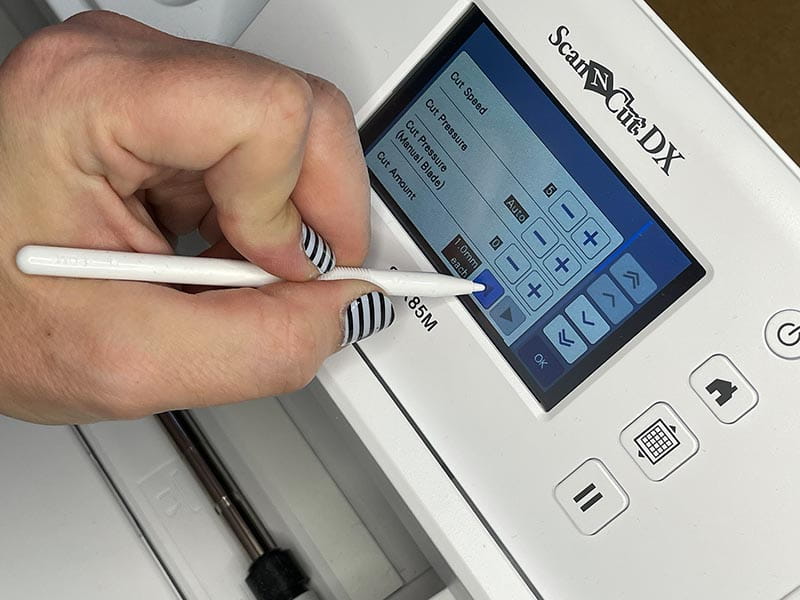
17. Confirm settings.
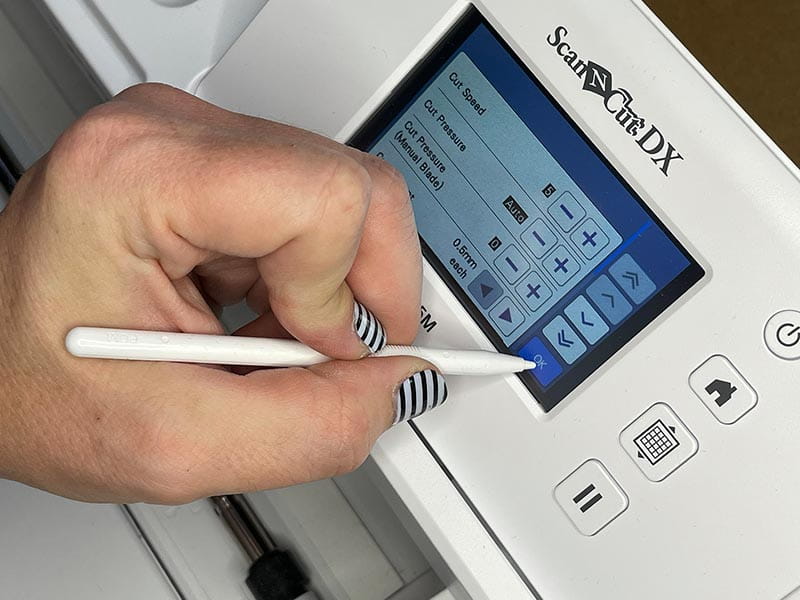
18. Load 12” x 24” mat with vinyl into ScanNCut DX.
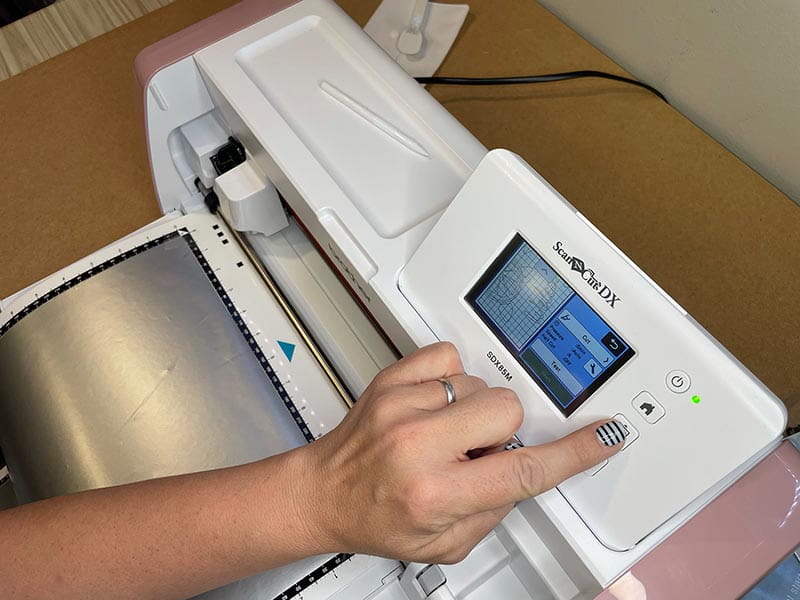
19. Using the stylus, click Start.
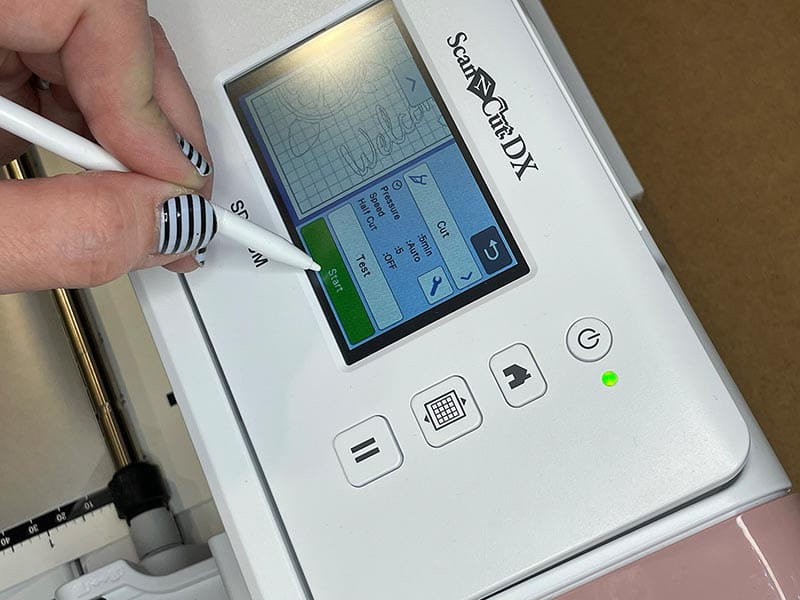
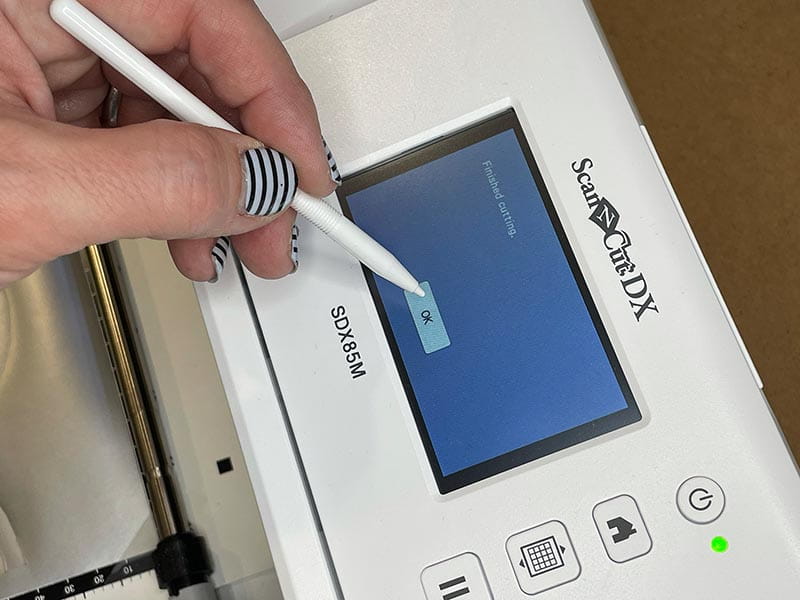
20. When cut is complete, click OK. Repeat these steps again for the other piece to cut.
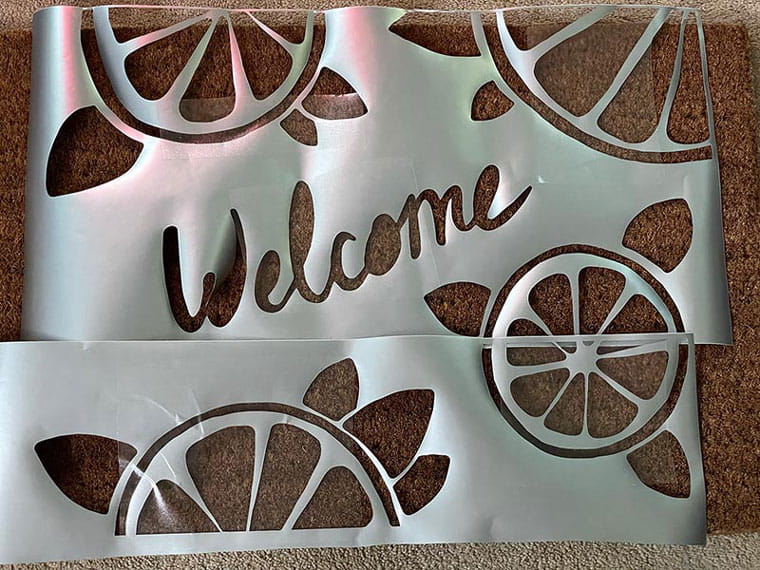
21. Here is what the initial placement looks like.
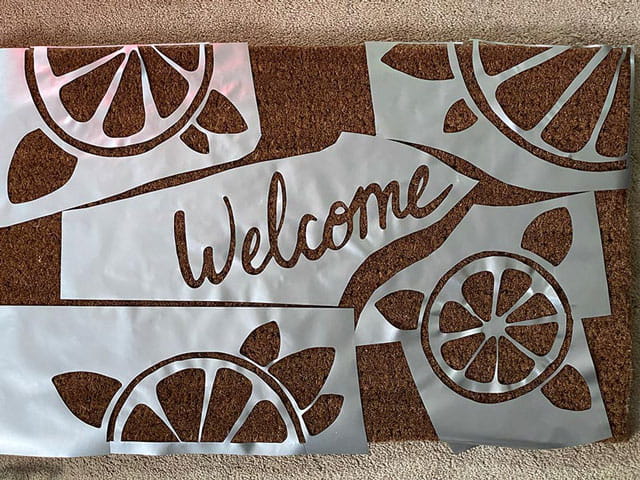
22. This isn’t pretty. Because the mat isn’t as large as my mat, I cut and placed my pieces where I liked them.
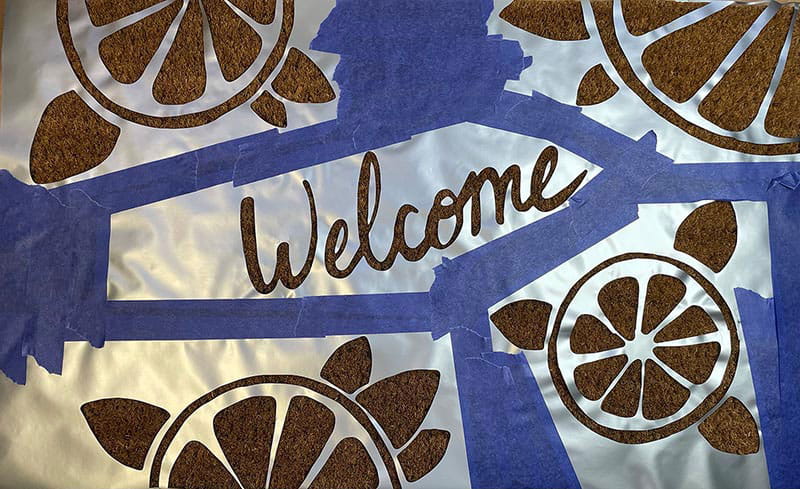
23. Using painter’s tape, I secured the vinyl placement to prevent shifting.
24. Dab paint onto the mat. You may need to press the vinyl, but if you use thicker paint, it should go where you want it. Glob it on. Don’t water down the paint or it will seep under the vinyl.
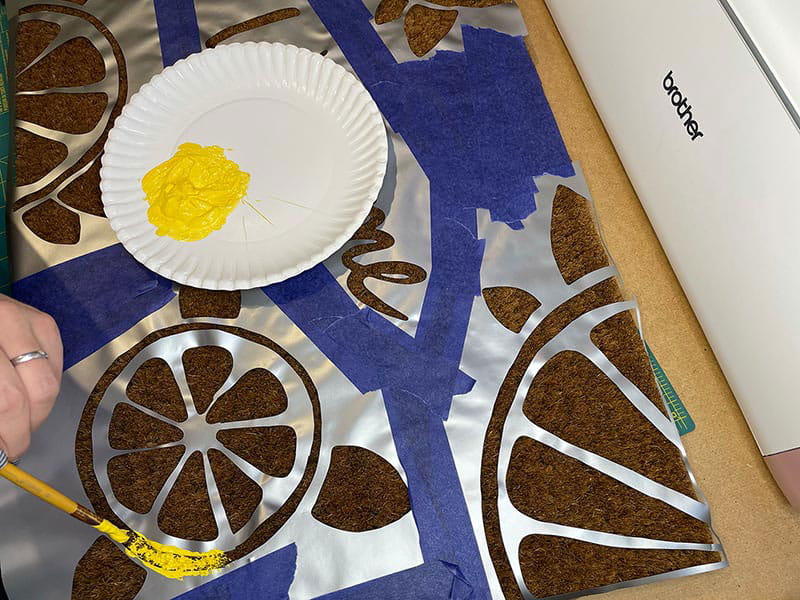
25. Here is what the paint looks like. Let dry and when ready, gently peel off vinyl and tape.
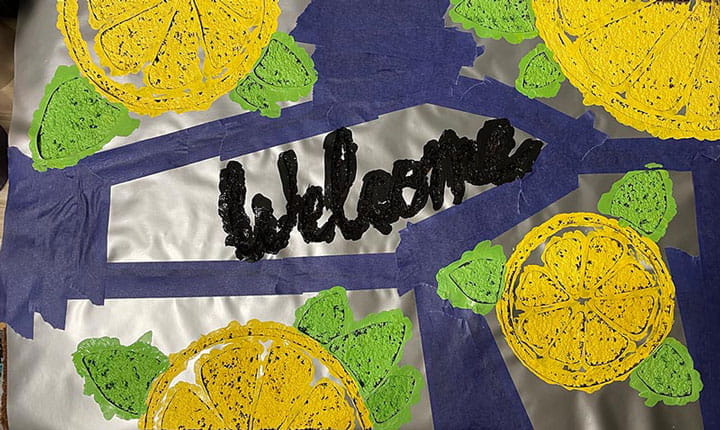
26. Here is what the mat looks like. Isn’t it cute? Imagine making mats for all seasons? These would be perfect for gifts too!

Sometimes you can’t find a welcome mat to fit the feel of your home, but now you can create your own custom mat. I like to sketch and paint, so I made what I wanted in paint one afternoon. I love how it came out! You can make things like this too! Never say you can’t do anything or that you’re not crafty - you can totally make this cute welcome mat or something of your own design for your home or as a personalized housewarming gift.

Materials:
● Brother ScanNCut SDX85 machine with stylus
● Brother light grip 12x24 mat
● Blank welcome mat, vinyl, paint (outdoor acrylic), brush, painter’s tape
Steps:
1. Image to use for mat.

2. Trace image to make easier to scan. Scan and save using computer.

3. Open Canvas Workspace.

4. Select trace image.

5. Select scanned image.

6. Trace area by color.

7. Check preview.

8. Image placed.

9. Select scanned layer and delete.

10. What you should be left with.

11. Rotate and duplicate layer.

12. Select both layers.

13. With both layers selected, align left.

14. Align layers to top.

15. Select shapes palette after assigning each layer a color.

16. Hide one layer and make rectangle to cover live area of mat/canvas.

17. Select visible layers (rectangle and one design) and click edit function.

18. Remove overlap.

19. Select elements of visible layer and group.

20. Hide layer and make visible the other design layer.

21. Move the rectangle over to cover design hanging off the live canvas.

22. Select design layer and rectangle and remove overlap as in previous step (18).

23. Select elements of visible layer and group.

24. Make both layers visible and select both.

25. Align layers left.

26. Select file and export transfer FCM file.

27. Transfer FCM file via the internet.

Using Brother ScanNCut DX Cutting Machine
1. Turn on your Brother ScanNCut DX cutting machine and click Retrieve Data with the stylus.

2. Retrieve data from wifi.

3. Both pieces of your file will now be on the screen.

4. Using the stylus, select the file you are not cutting right now.

5. Click edit with the stylus.

5a. Click the trash can icon with stylus.

5b. Confirm delete.

6. Select the tool icon.

7. You will now edit the cut area.

8. Select the mat size to fit this file. In this case, 12” x 24”.

9. Confirm the mat size.

10. Confirm mat size.

11. Click OK. We are now ready to select the task for your ScanNCut DX.

12. Click OK.

13. Using the stylus, click “please select” to open the menu of functions your ScanNCut DX can do.

14. Select cut.

15. Select tool below “cut”.

16. Adjust the depth and pressure settings to your preferences.

17. Confirm settings.

18. Load 12” x 24” mat with vinyl into ScanNCut DX.

19. Using the stylus, click Start.

20. When cut is complete, click OK. Repeat these steps again for the other piece to cut.

21. Here is what the initial placement looks like.

22. This isn’t pretty. Because the mat isn’t as large as my mat, I cut and placed my pieces where I liked them.

23. Using painter’s tape, I secured the vinyl placement to prevent shifting.

24. Dab paint onto the mat. You may need to press the vinyl, but if you use thicker paint, it should go where you want it. Glob it on. Don’t water down the paint or it will seep under the vinyl.

25. Here is what the paint looks like. Let dry and when ready, gently peel off vinyl and tape.

26. Here is what the mat looks like. Isn’t it cute? Imagine making mats for all seasons? These would be perfect for gifts too!


