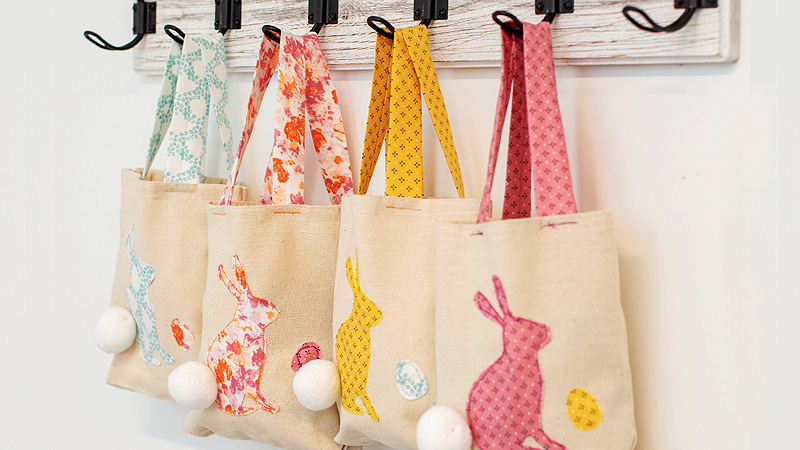
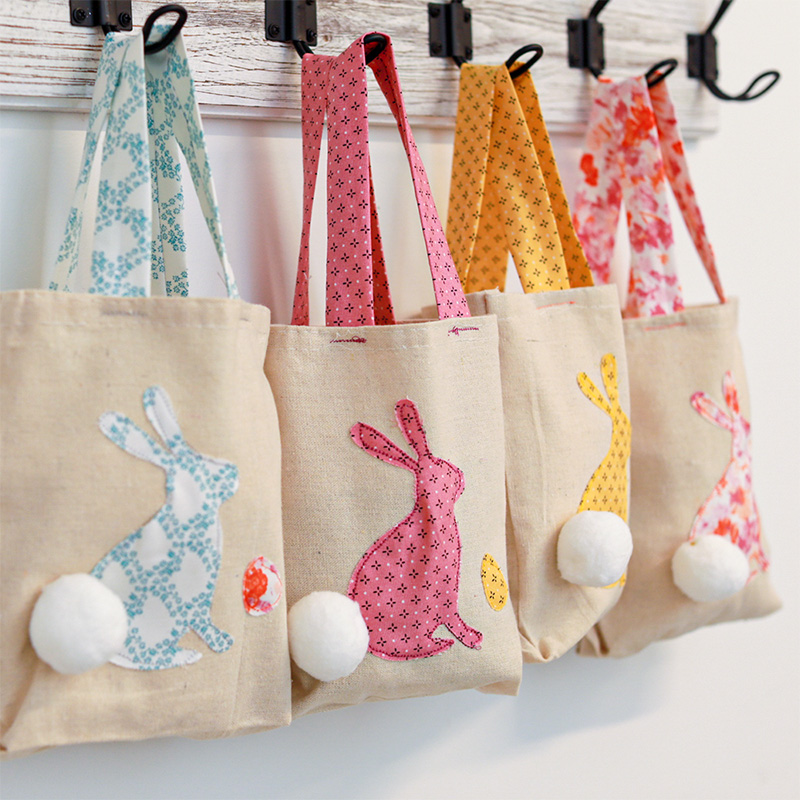
A Fun Easter Tote: A Sews Crafts Crossover Project
You will need:
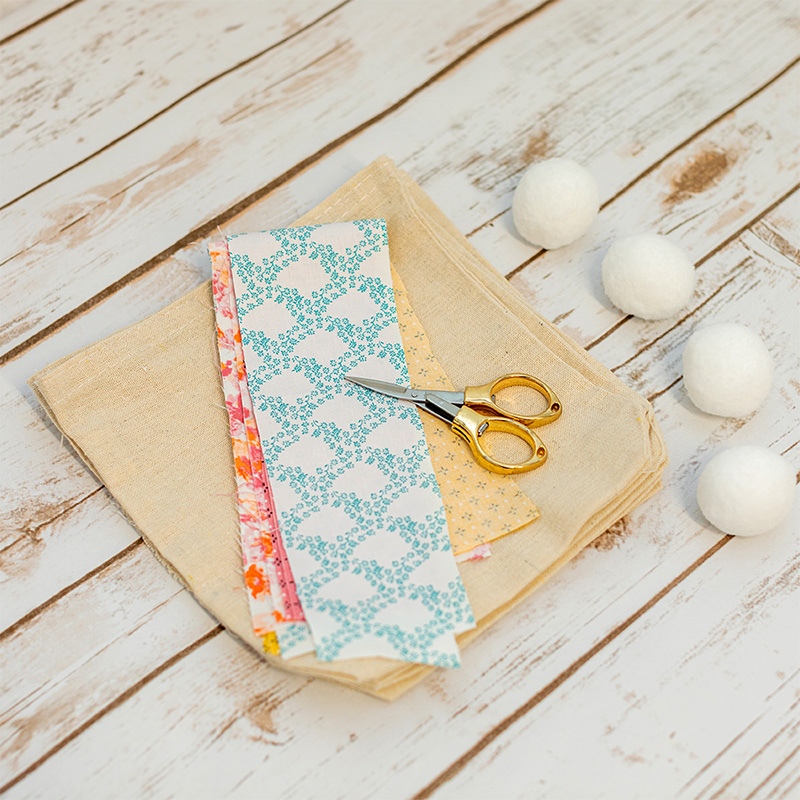
- Fabric in colors of your choice, white pom-poms, ScanNCut DX, Thin Fabric Auto Blade, High tack fabric support sheet, sewing machine, thread, needle, scissors, pins, canvas tote bags (we used small totes that measured about 7” w x 9”h. They came with one side unsewn to make the sewing process easier), Brother Sewing Machine
- Bunny.fcm
Steps:
1. Download “Bunny.fcm” to your machine.
2. Measure out 6”x6” squares of fabric for each bunny you want to cut out. Trim the fabric to fit this size.
3. Apply your fabric to the standard mat using a high-tack fabric support sheet.
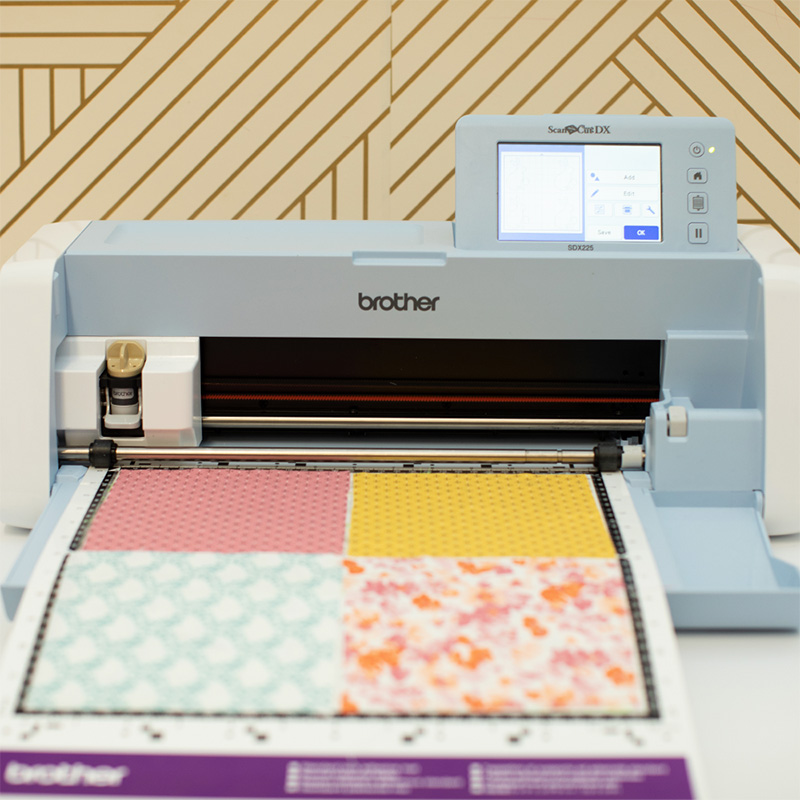
4. Using the Thin Fabric Auto Blade, cut out the patterns.
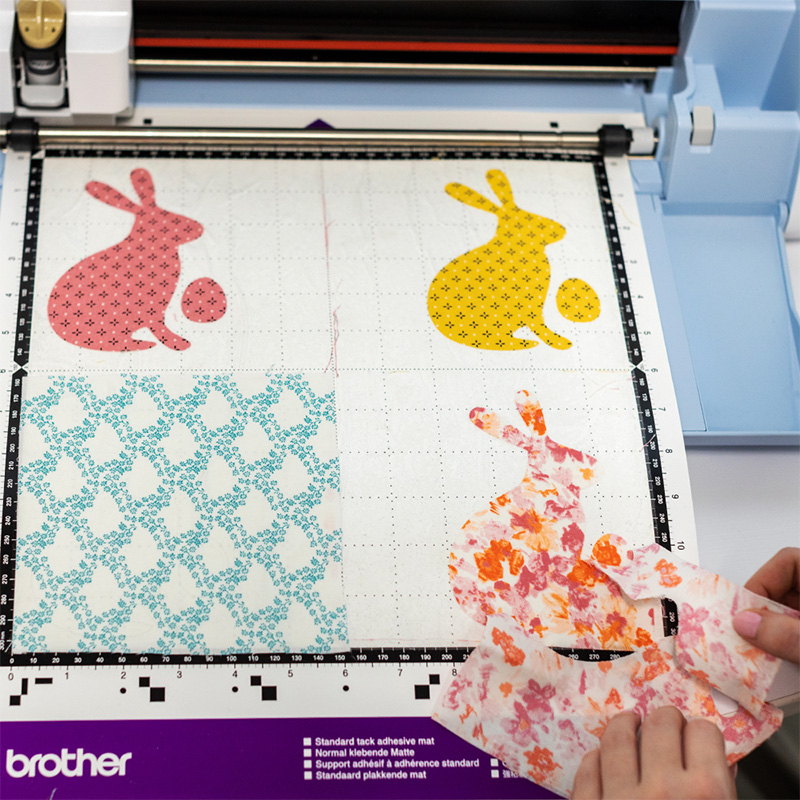
5. Very carefully remove the fabric cutouts from the mat—don’t pull too hard to avoid fraying the fabric.
6. Use pins to attach the cutouts to your tote, then head to your sewing machine.
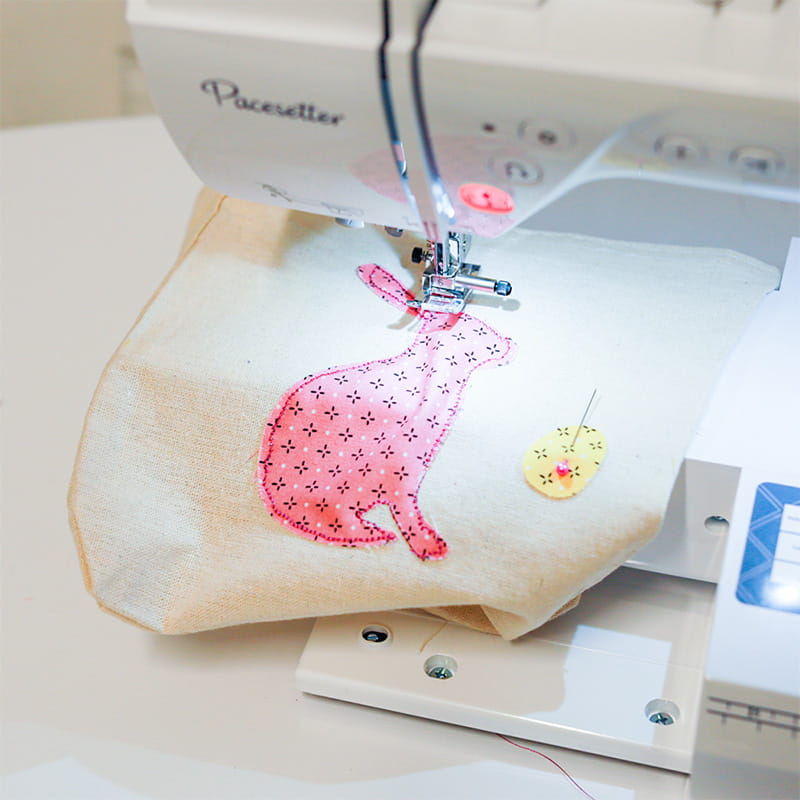
7. Stitch the bunny and egg cutouts to the tote fabric, carefully free-handing the stitches around the border of the cutouts. We used about a ⅛” seam allowance setting on our sewing machines (but use your own discretion).
8. Once you’re done, use a regular needle and thread to sew the white pom-pom to the rear of the bunny.

9. For each tote, we used the excess fabric that matched the bunnies to create a handle (optional).
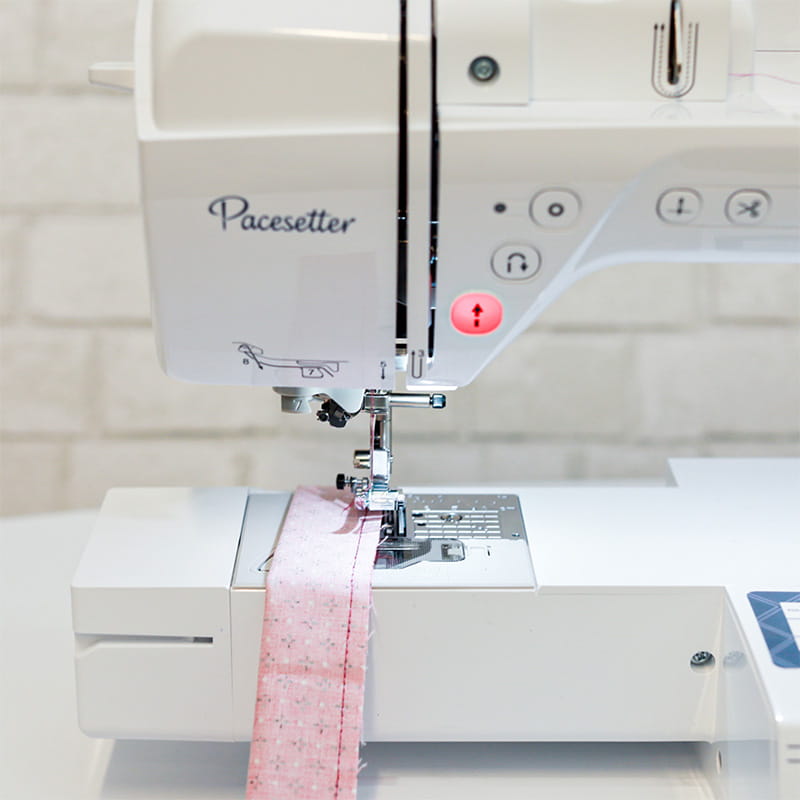
• For these, we simply trimmed the fabric to be about 12” long x 3” wide, folded it lengthwise in thirds (so that it was only 1” wide), and stitched along the edges for a crisp look. We then sewed the handles to the inside of the tote bags.
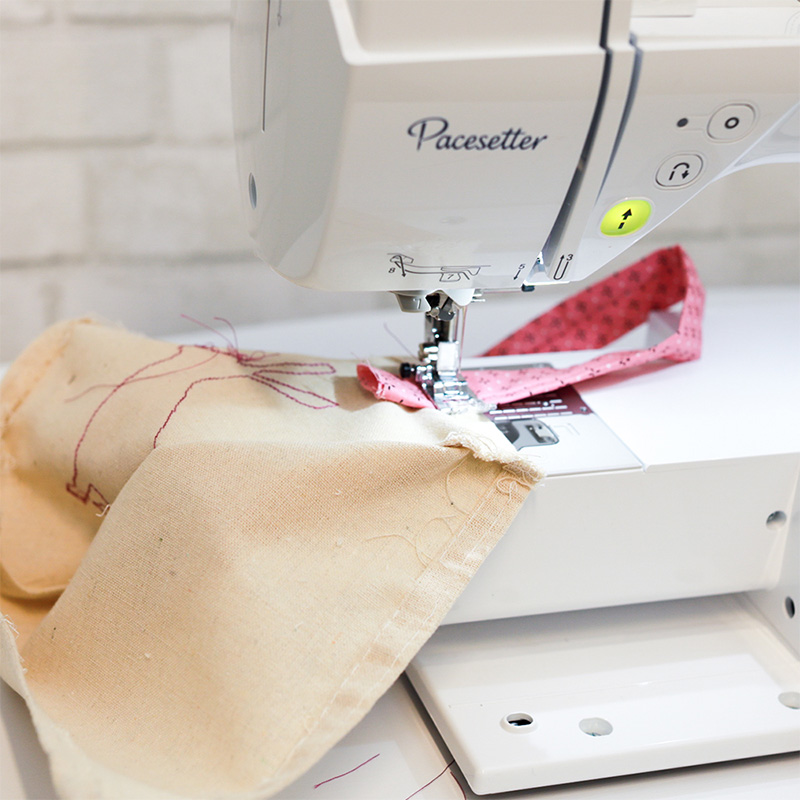
10. Sew up the side of the tote bag and trim any loose ends.
11. You’re done!
Related Projects
Stay Connected
* Required fields