How To Make a DIY Patriotic Stencil for Home Decor
-Brother Crafts Blogger
Supplies:
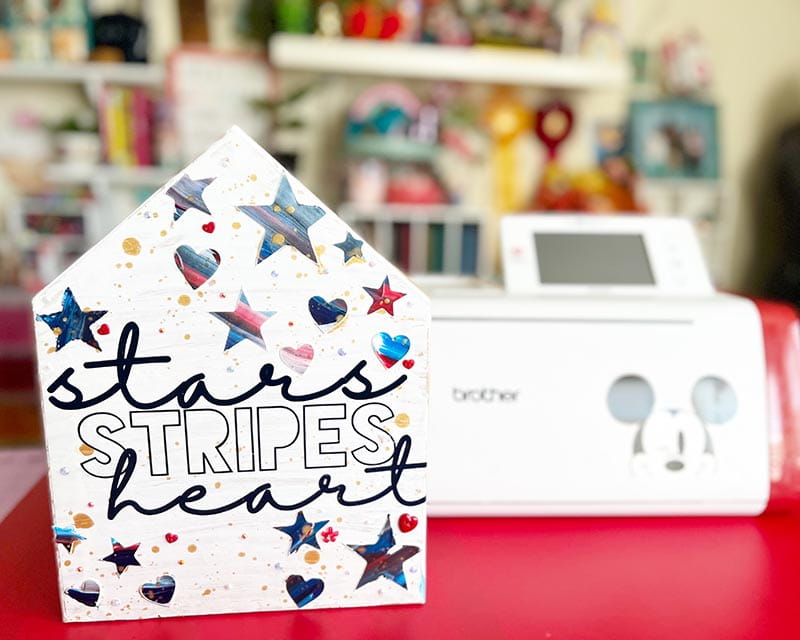
- ScanNCut DX
- standard mat
- vinyl
- transfer material
- décor house shape (paper or wood)
- acrylic paint
- rhinestones and buttons
- sealant (if desired)
- adhesive
Customizing your home décor with a ScanNCut DX is a fun and easy way to add flair to your interior design. In this video tutorial we will explore how to create a reusable stencil from a plastic sheet, and how to combine this technique with vinyl words and paint. You can create any combination of words from the built-in fonts and words. Or you can using this electronic cutting machine to scan and upload your own handwriting. In this project, May Flaum will show how to use the Font Converter tool to quickly turn words on her computer into cut files.
1. To create your word files, open the Font Converter tool on your computer. Type a word, and save to a USB drive. Repeat with all words individually.
2. Insert USB drive into ScanNCut DX (any model works for this project), and then select the USB option for retrieving data. One at a time, select one of the files then in edit select all letters, unify the word, and re-size as desired.
3. Repeat for remaining word(s)
4. Place sticker/craft vinyl onto the mat, load into the ScanNCut DX, and select cut. Before cutting the designs select half cut in the tools in order to cut only the vinyl, and not the backing sheet.
5. Cut apart and weed the words to remove all excess vinyl from the backing sheet.
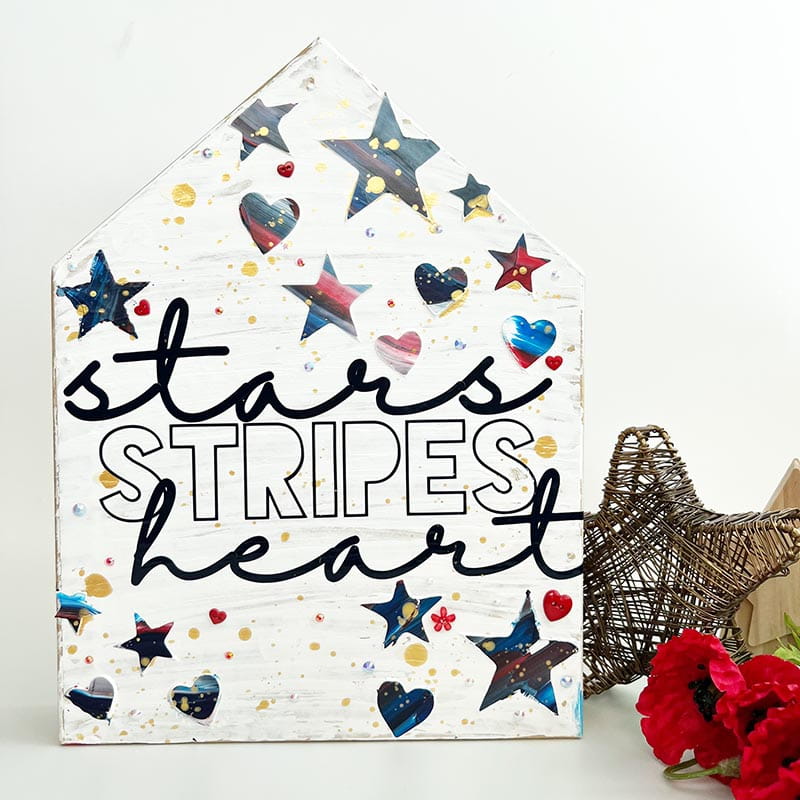
6. To create the stencil design place a sheet of plastic, acetate, or other material onto your mat and load into the ScanNCut DX. Then select your designs (built-in heart and star), size, rotate, and add additional as desired. Cut the material and remove carefully from mat when complete.
Tip: when possible, leave 1-2” at all edges of stencil for easier use, and so accidentally spreading paint over the edge is less likely.
7. Using transfer material transfer your words onto your base (house) one at a time.
8. Place the stencil onto the house and use masking or washi tape to secure in place if needed. Add white paint, spread, and then top with blue and red paint for a unique effect. Other colors and effects can be used here with ease.
9. Clean stencil, allow project to dry between layers, and add additional designs with paint, ink, or other materials.
10. To finish this project add gold watercolor, rhinestones, buttons, or other details to add finishing touches.
What is so fun about making your own stencils is that you can create sizes, shapes, and designs that will prove useful to you again and again. This works best with a plastic material as they are the easiest to clean off fully, and will last the longest. For one-time use stencils paper works well, or a material with temporary adhesive.
Related Projects
Stay Connected
* Required fields