How to Make A DIY Pillowcase

Supplies:
- Brother ScanNCut DX
- Standard Mat
- Fabric
- Heat Transfer Vinyl
- Brother sewing machine (Any model)
- Thread
- Pillow (any size)
One of the first sewing projects I took on was a decorative pillow. It is easy, no pattern needed, and the decorative options are limitless especially when you get your ScanNCut involved! For a simple pillow case all you will need to do is sew the two ends (that will be exposed/fold over to create the back flap for pillow insertion) over so raw edge does not show, and then stitch the two sides closed. So simple! It works for any size pillow as well.
How-to:
- Determine your pillow size (12x18” used here) and cut a piece of fabric 1” wider, and 2 ½ times longer than your pillow front size. So in my example, my fabric is 30 x 19”. Iron the two ends (that will be exposed) folded over twice, so that the raw edge will be tucked in.
- Sew the two ends that were just ironed so that the fold stays, and they are neatly finished.
- Fold your pillowcase as you will sew it (right side out) to the size it will need to be, and set aside. Make note of maximum pattern size for ScanNCut 2-3” shorter (or narrower) than full pillow size to account for curving and for best viewing.
- Open the Artspira app on your smart phone and select a pattern. I will be using the “Rose” design. Click create, transfer, and the data will be sent to your compatible ScanNCutDX machine!
- Turn on your ScanNCut DX machine, click to retrieve data and press the upper right option (cloud is there) to bring the file onto your ScanNCut machine. Then re-size as desired, add additional if you’d like, and be sure to turn on half cut before cutting out from heat transfer vinyl. Once done, weed/remove excess vinyl from sheet and set aside.
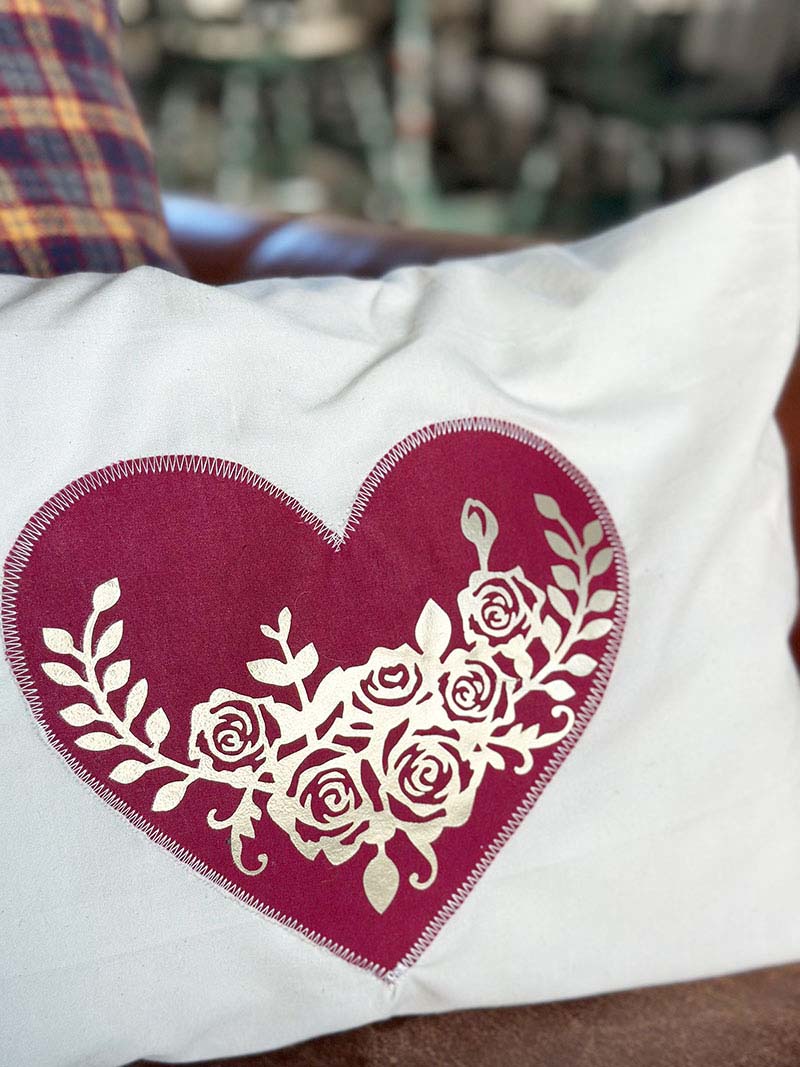
- Using a piece of fabric that has iron-on adhesive/stabilizer, cut out a heart using the ScanNCut DX. Want to ensure it is the perfect size? Bring the heart file in and place over the rose file, adjust size including height and width until it is perfect before cutting.
- Using a zig-zag stitch, first iron the fabric onto the pillowcase front, then sew the heart into place.
- Iron the rose design onto the heart using a pressing cloth to prevent over heating the design. Then turn the pillow case inside out, with ends overlapping and sew the sides together. Note that these two parts can be done in either order (iron first or sew first)
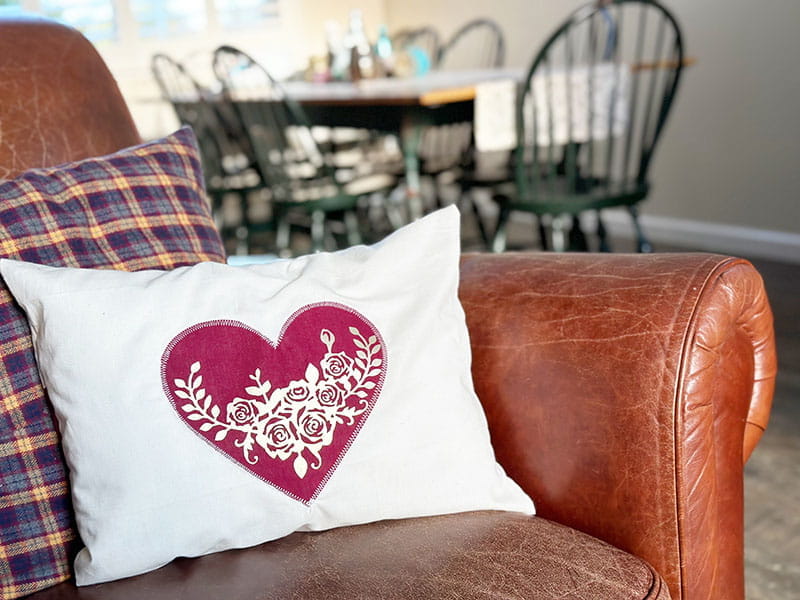
- Turn the pillowcase right side out, stuff with pillow, and enjoy!
Tip: A decorative stitch or a contrasting color of thread could be used here to create more visual interest on the back if desired.
This project would make a great gift or just way of adding seasonal easy to store décor for your home. Want to go further? Additional decorations, hand sewn or embroidered accents, and more can easily be added in!
Related Projects
Stay Connected
* Required fields