How to make a custom sign with ScanNCut
Supplies:
- ScanNCut DX
- Standard mat
- Adhesive craft vinyl
- Transfer material
- Frame
- Ribbon
- Acrylic paints
- Paint brush or application tool
- Any additional glitter or color medium you’d like to add
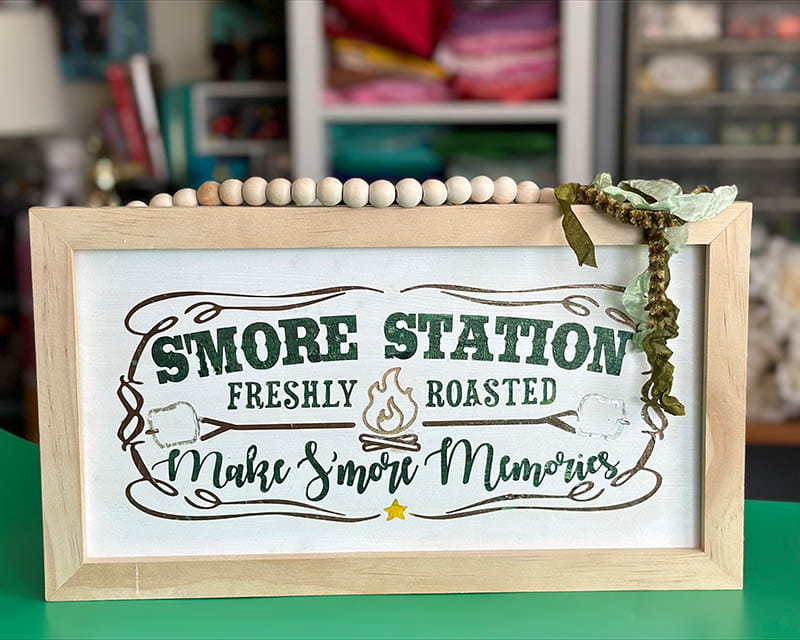
Did you know that ScanNCut DX models can all read SVG files? This opens up a world of possibilities for beautiful, often intricate cut files that you can purchase and use on your next project. For this DIY, we will be using vinyl to create a stencil with an SVG design purchased. Creating in this way allows you to paint and decorate to your heart’s content – then remove the stencil for truly stunning results. This will work for any theme or holiday- we couldn’t resist a fun s’mores campfire sign!
Step-by-step instructions:
- Insert USB drive into ScanNCut DX, then select ‘retrieve data’, select the USB drive, and select the pattern you would like and accept it.
- If needed, resize the design (use Group if file has multiple layers), then select cut. Ensure half cut is turned on, load your mat with any adhesive craft vinyl, and select start for the cutting.
- Once the design is cut out, weed the design itself. Normally, we would weed everything except the design but because we are making a stencil, we need to remove the design and leave everything else.
- . Once complete, apply transfer material and move the entire sheet of vinyl (minus the design) onto your canvas, plaque, or other base. Press firmly, and gently remove the transfer material leaving the vinyl in place and the design gaps showing. Cover any exposed areas of your surface with vinyl or masking tape.
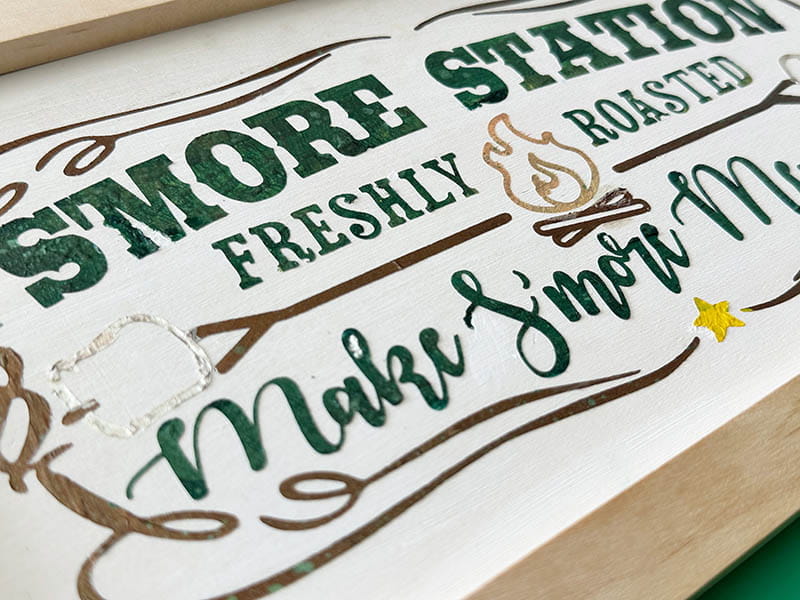
- Apply a thin layer of matte clear medium, gesso, or white acrylic paint (depending on if your base is white or not) and allow to dry.
- Apply paints, glitters, sprays, inks, and any other color mediums you would like and ‘fill’ all the stencil areas. You can allow dry time in between layers or sections as you would like, there is no wrong way to do this!
- Once completely dry, remove the stencil material. The vinyl will need to be ‘picked’ off with a tool in some smaller areas, and you may want to use scissors to trim and keep the area you’re working with small vs the entire design. Work slowly and carefully until all vinyl has been removed from the sign.
- Add any finishing touches such as ribbon or additional frame or canvas edge decorations and enjoy!
Tip: When working with stencils, applying a base layer (white or clear) will help prevent leaks and sloppy color lines when you remove the stencil! This is a quick and easy trick.
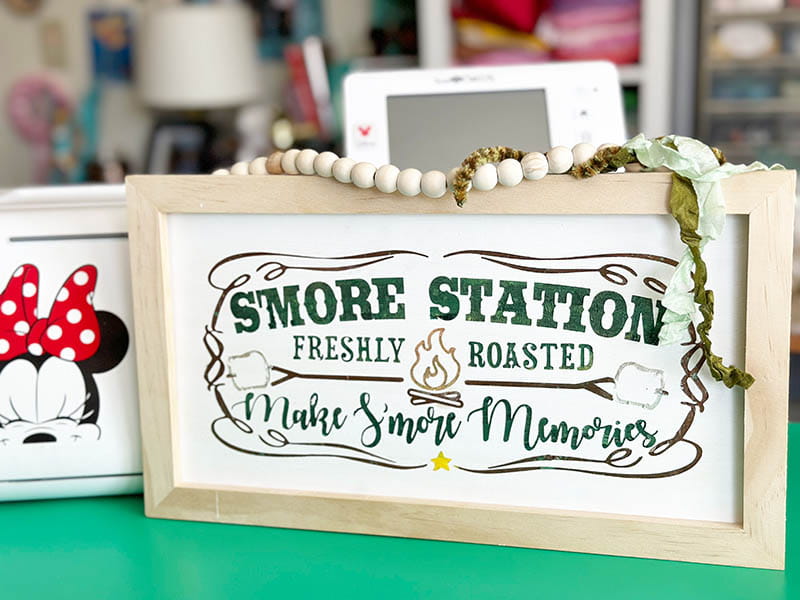
I really love all of the textures and colors this simple sign has. While this project can take multiple days (depending on dry time and climate), it is really fun! There are so many ways to customize this project and if gifting, the recipient is sure to love and enjoy your stunning work.
Related Projects
Stay Connected
* Required fields