Spring Cheer Dance Bows with the Rhinestone Kit
You will need:
- 3” wide grosgrain ribbon (pre-trimmed to 18”-20” long), Rhinestone Kit, iron, press cloth, ScanNCut DX, string or zip tie, decorative elastic, hair tie
- Cheer Bow.fcm
Steps:
1. Unbox the Rhinestone Kit and follow all set-up instructions.
2. Download “Cheer Bow.fcm” to your machine.
3. Load a Standard Mat with a black sheet from the Rhinestone Kit, fuzzy side up.
4. Set the machine’s cut settings to HALF-CUT.
5. Cut out the design.
6. Carefully remove the black sheet from the mat. Use a pair of scissors to trim away the cutout pattern from the larger sheet, and set the larger sheet aside.
7. Peel the backing from the black sheet, making sure to leave behind all of the excess material (it will look like black dots are being left behind on the backing).
8. Stick down the weeded pattern sheet onto a piece of backing board from the Rhinestone Kit. Smooth out thoroughly.
9. Following the kit’s instructions, pour out some rhinestones on top of the pattern sheet.
10. Use the brush tool to spread the rhinestones over the pattern, moving in circular motions until all the pattern holes are filled with rhinestones.
11. Use a slightly larger rhinestone to fill the center hole of the pattern.
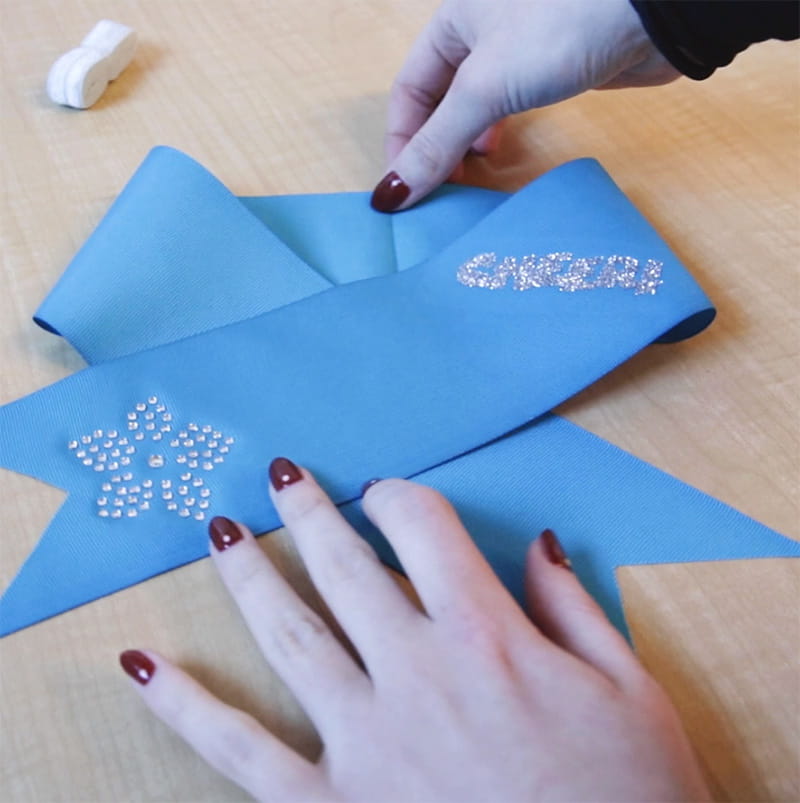
12. Next, trim a piece of the transfer sheet (included in the Rhinestone Kit) to fit over the rhinestone pattern.
13. Peel off the transfer sheet backing and press over the rhinestones on the pattern. Gently lift the sheet, with all rhinestones adhered.
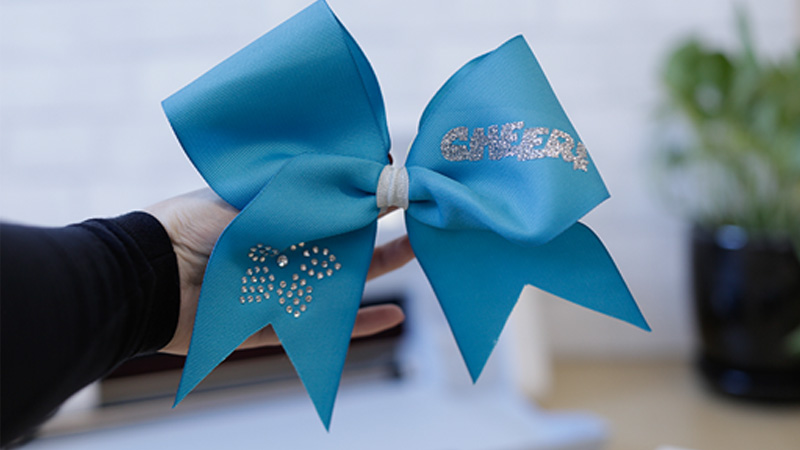
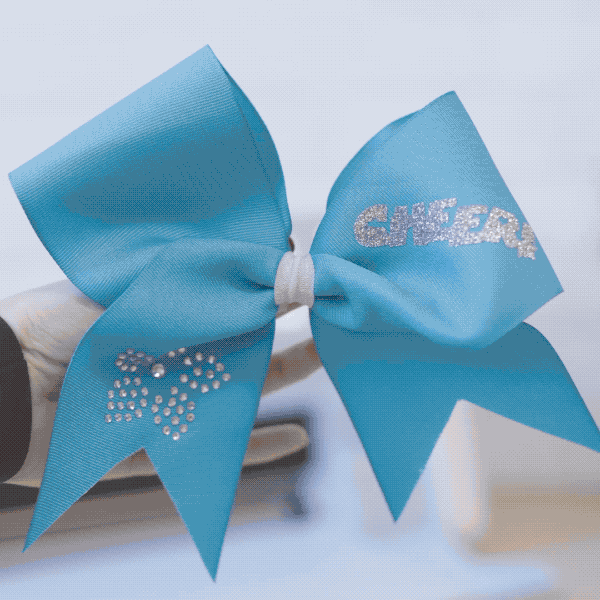
14. Align the rhinestone pattern onto your ribbon in your desired location (we stuck it on near the end).
15. Lay a press cloth over the design, and use an iron to press the rhinestones into the ribbon.
16. Let cool for a minute or two, then remove the transfer sheet. Rhinestone application complete!
17. Next, assemble the bow. Lay the ribbon out straight with any designs facing down. Fold the ribbon in half and use an iron to crease the fold. This will be the center marker for the bow.
18. Unfold the ribbon, again with designs facing down. With the center mark in the center, fold the tails of the ribbon one over the other, creating a “loop” shape as shown:
Make sure to keep the center mark in the center, and make sure that the tail length is even on both sides.
19. When everything is aligned, pinch the center of the bow along the center mark and at the points where the tail cross to begin making your big, fluffy bow shape. Feel free to move the bow and tails around until you’re happy with the shape.
20. Use a zip tie or a small length of string to secure the bow. Tighten the zip tie or string around the center of where you’re pinching the bow until it’s secure.
21. Use a shiny decorative elastic ribbon to hide the zip tie or string in the center. Tie it around the center, but before you secure a knot slip in a hair elastic to finalize the cheer bow.
22. You’re done - Enjoy!
Related Projects
Stay Connected
* Required fields