Valentine’s Day Table Runner
It's never too early to start thinking about what fun Valentine's Day project you would like to start. Today, ScanNCut Specialist, May Flaum, walks you through the steps of creating a festive Valentine's Day Table Runner, just in time for the heartwarming day!
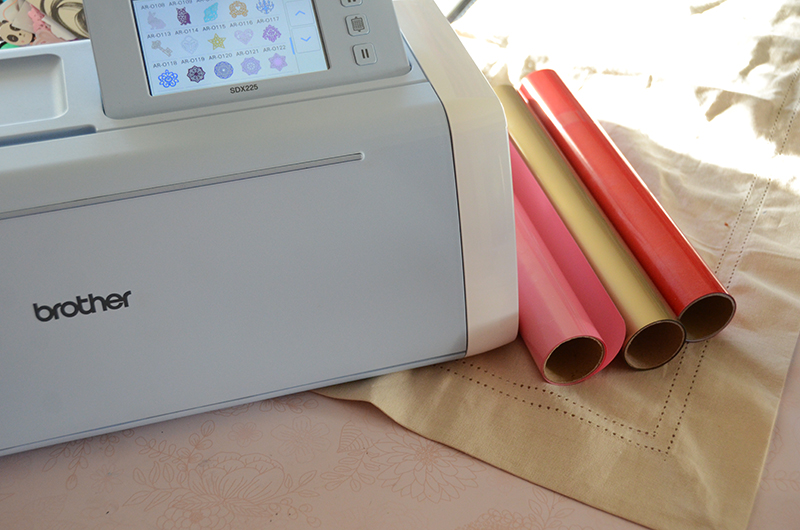
Supplies Used: Iron, Iron-on Vinyl, ScanNCut DX and standard blade and mat, table runner, buttons, thread
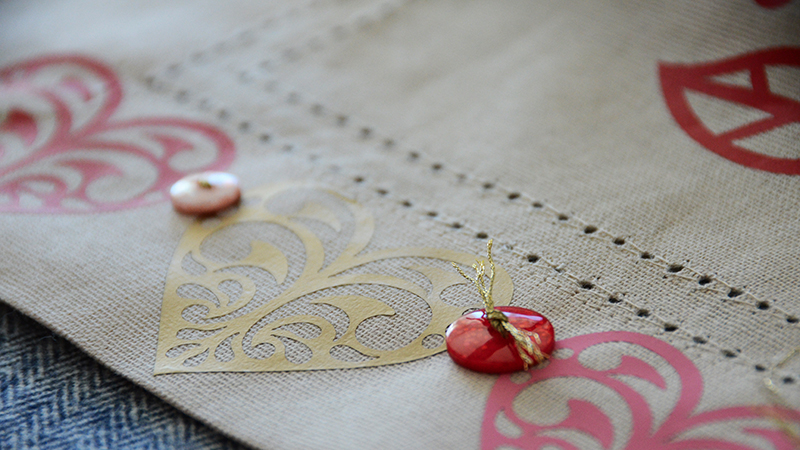
May breaks it down: When it comes to home décor, I’m a fan of adding my own personalization and special touches to things, and having a lot of fun with the process! This year for my Valentine’s day table I decided to create a fun ornate set of heart designs to customize a simple cream table runner. This is a lot of fun because you can get right into the creative process of decorating, and it will work with a wide variety of colors and styles as well. Before you begin, I recommend measuring your table runner and being very clear on what size(s) you are looking to work with so that you can have a smooth working process and have results that shine! I love that there are so many options from very simple and single design to mixing in other mediums such as sequins, beads, or buttons. Have fun with it – and enjoy a home décor piece unlike anything else to be found! The ScanNCut DX lets me be an original and have fun doing so.
Directions:
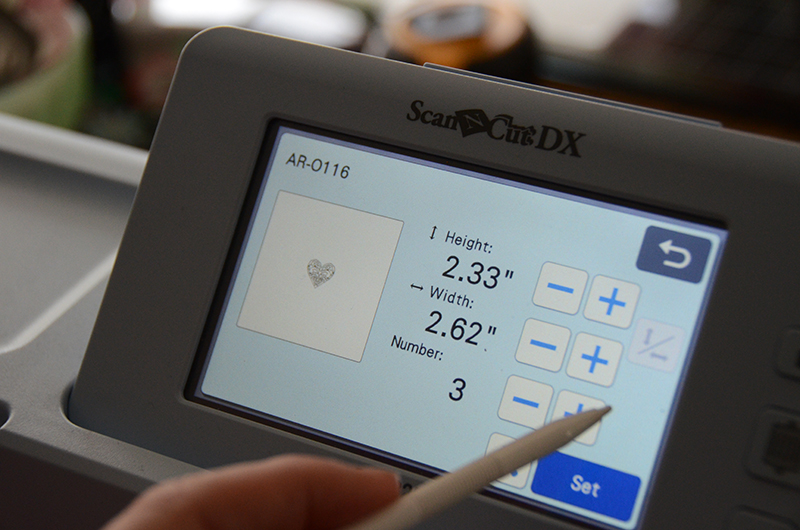
1. Select your pattern (AR-0116) and size (2” high is what I am working with), as well as the number of items you need. For this project, I selected three of the ornate hearts.
2. On the edit screen, move your objects as needed, then “ok”, and select cut. Click the tool button to select “half cut: on” for the vinyl option.

3. Load your vinyl onto your mat (shiny/carrier sheet side down) and load your mat into your ScanNCutDX, carefully placing it centered in the mat loading area, with the arrow facing the machine. Press the mat loading button.
4. With your half cut on and mat loaded, cut the hearts from your vinyl material.
5. Remove the mat by pressing the mat loading button, and remove your vinyl. Place a new piece of vinyl, and cut the hearts again. No steps aside from loading the mat and pressing “start” need to be repeated as you want the same sizes of hearts, simply different colors.
6. Repeat with a third color (or more) if desired.
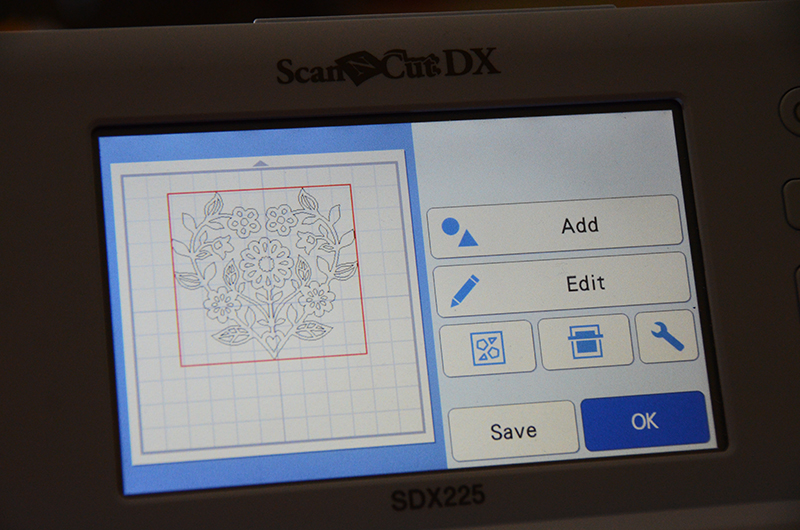
7. Select a new pattern (AR-0126) and size it (8” wide) as needed. Press “Set”. Then move it on the screen as needed before pressing “Ok”.

Tip: You can always go into edit and edit the object – moving it, resizing, adding more, or anything else you wish! You’re never more than a few clicks from changing and editing anything with the ScanNCut!
8. Load your vinyl material (carrier sheet down) onto your mat, and your mat into the ScanNCut DX and cut the material. Be sure “half cut” is still on, if not click the tool button and select it.
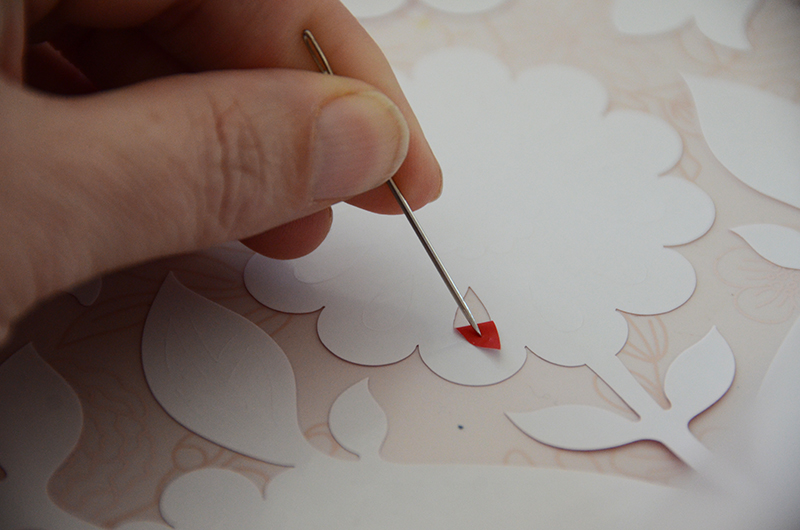
9. Remove the vinyl from the mat, and now weed all of your vinyl pieces. This means to pull off all pieces of vinyl that you do not wish to use or adhere to your project.
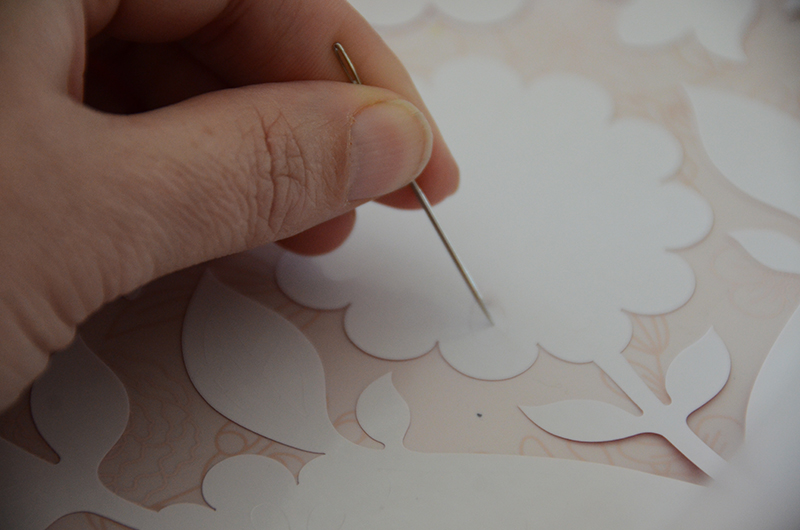
Tip: Use a needle or pick to get small pieces of vinyl weeded from your design quickly.
10. Cut around each shape to be used, and place over your fabric and arrange until pleased. Once you are satisfied, remove them once again and iron your fabric.
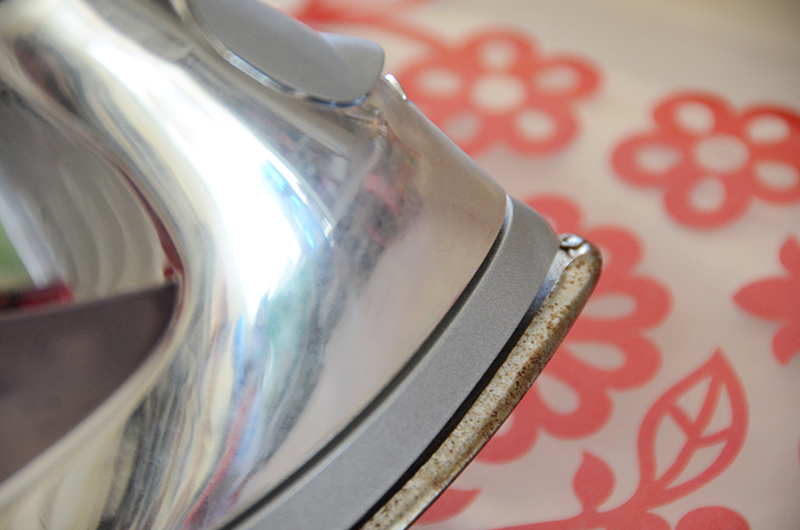
11. One piece at a time, heat the area, place your iron-on design, and press/iron into place. Allow the piece to fully cool before removing the transfer sheet, and be sure to move slowly in case any area is not fully transferred. You don’t want to rip or tear your design
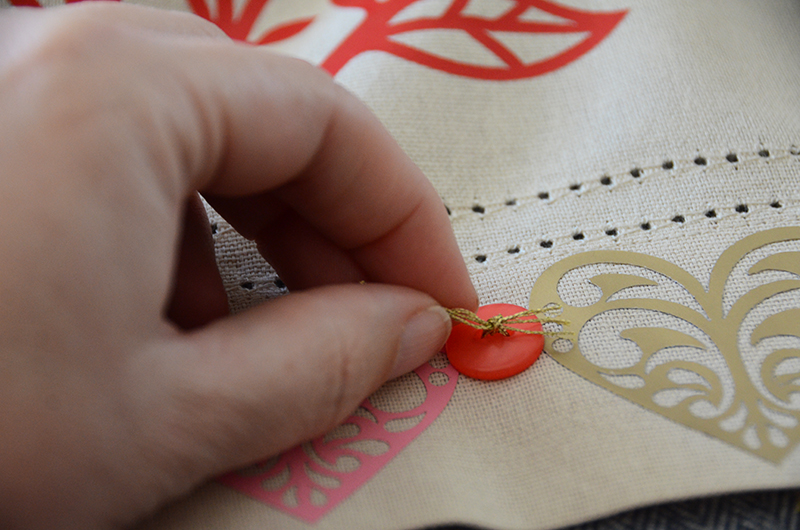
12. Add any final touches such as sewing on buttons to complete your table runner. Then enjoy!

Video: https://youtu.be/Ib8FYK2he5s
Related Projects
Stay Connected
* Required fields