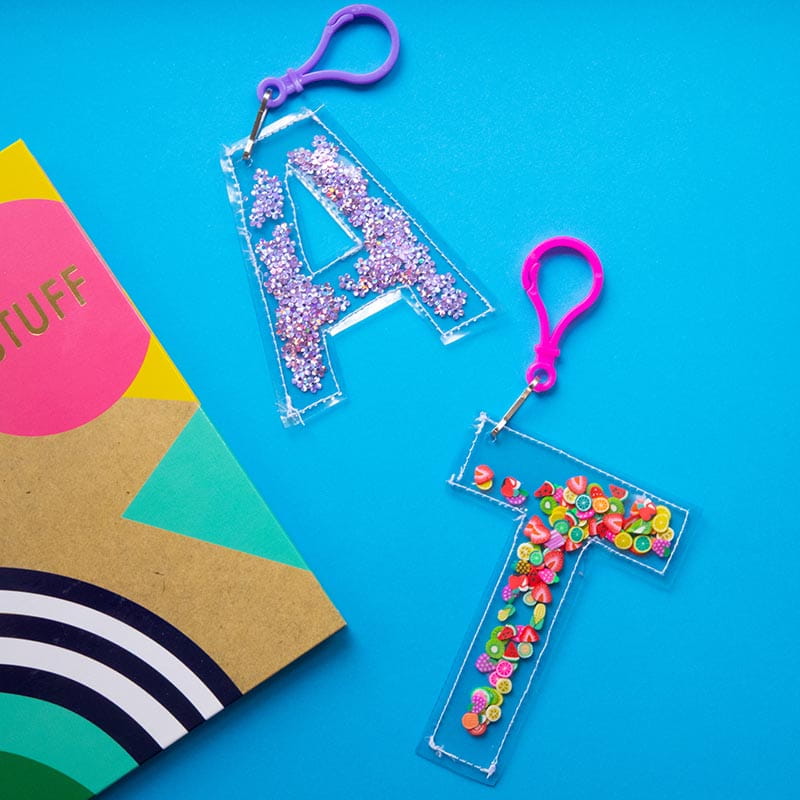
How to Make an Alphabet Vinyl Keychain
SUPPLIES
- Clear vinyl (in the colors of your choice)
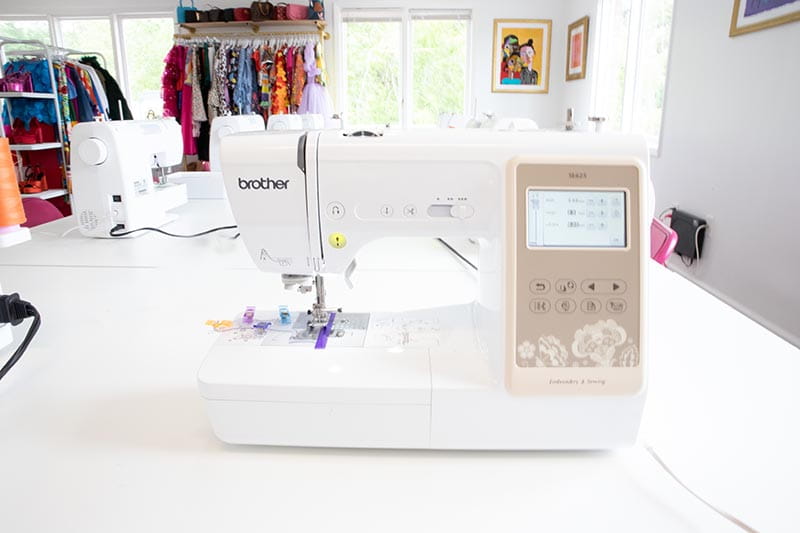
- Brother ScanNCut
- Brother Sewing Machine
- Needle for sewing with vinyl
- Non-stick pressing sheet sewing foot
- Keychain attachment
- Confetti
- Fabric Clips
- Keychain Attachment
- Washi Tape (optional)
Creating projects with vinyl fabric can be a lot of fun! Vinyl fabric is a versatile material for a wide range of projects. Vinyl fabric can be used for a wide range of projects, including clothing, bags, accessories, home décor, and more. The possibilities are endless, and you can let your creativity run wild! Vinyl fabric is relatively easy to work with and doesn't require a lot of special equipment or techniques. You can sew it with a regular sewing machine and cut it with scissors or a rotary cutter, but it’s so much easier cutting it with the Brother ScanNCut.
Sewing with clear vinyl fabric can be a bit challenging due to its unique properties. Here are some tips to help you sew with clear vinyl fabric:
- Use the right needle: When sewing with clear vinyl fabric, use a needle that is suitable for sewing through thick materials. A size 14 or 16 needle should work well.
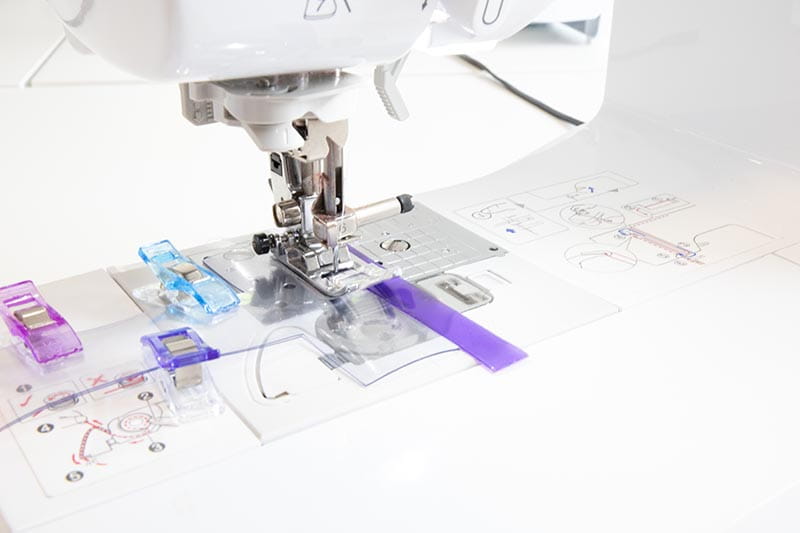
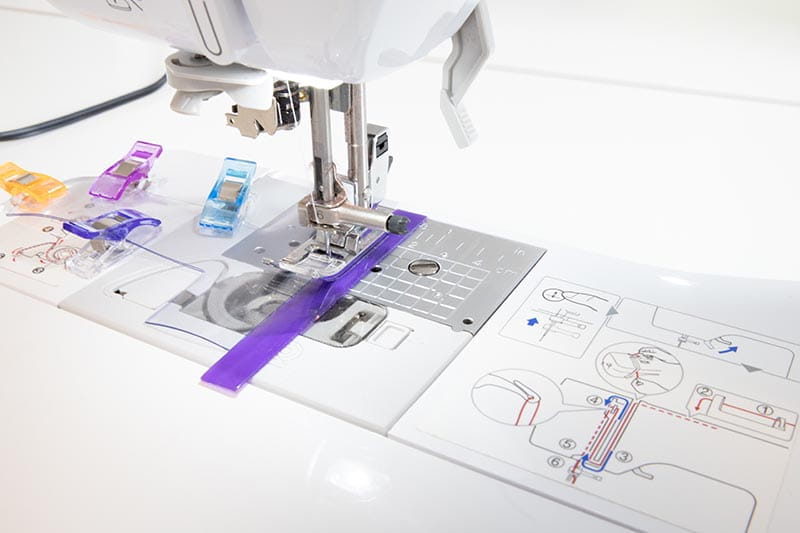
- Use a teflon foot: A teflon foot is designed to help feed vinyl fabric through the machine evenly without the fabric sticking to the foot. I couldn’t find mine, but there is a little trick using tape. You’ll stick tape to the bottom of the regular sewing foot. The tape is a temporary solution. I highly recommend getting a teflon sewing foot. See #5 for another option.
- Use clips instead of pins: Because pins can leave holes in clear vinyl, it is best to use clips to hold the fabric together while you sew.
- Use a tissue paper or wax paper layer: Placing a layer of tissue paper or wax paper between the vinyl and the presser foot can help the vinyl glide more smoothly under the foot, reducing friction and preventing the vinyl from sticking to the presser foot.
- Trim the seam allowances: After sewing your seams, trim the seam allowances to reduce bulk and prevent the seams from becoming too stiff.
- Test your stitches: Before sewing your project, test your stitches on a scrap piece of clear vinyl to make sure you are using the right needle and stitch length and to check that the thread tension is correct.
With these tips, you should be able to sew clear vinyl fabric with confidence and create beautiful, functional projects. Now let’s make a really fun keychain!
INSTRUCTIONS
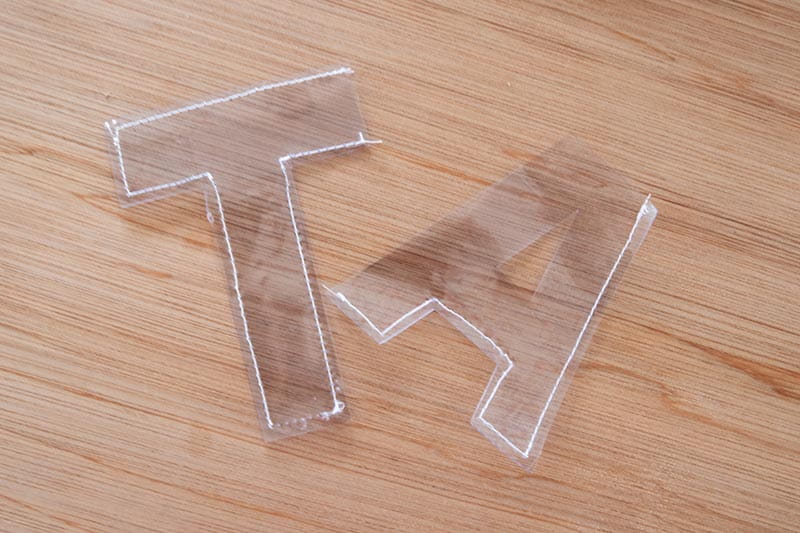
- On the machine choose your desired letter and enlarge until the biggest part of your letter is 3”. Add a small circle to the top of the corner. Duplicate. You should have two letters.
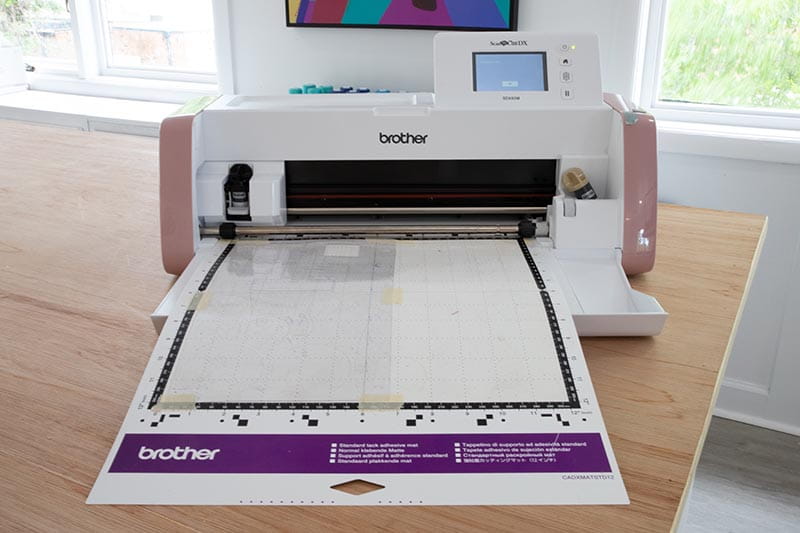
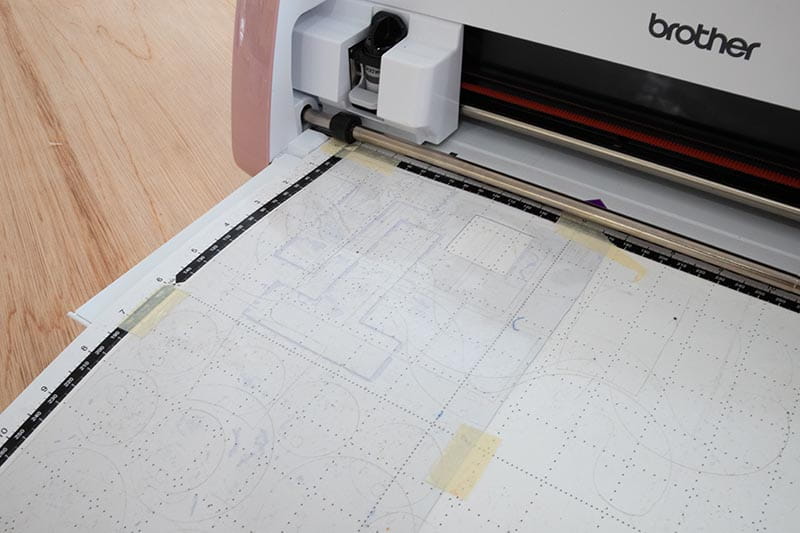
- Adhere the vinyl onto the cutting mat. Use masking tape for extra reinforcement. Do a test cut prior to cutting the final letter. When you have a clean test cut, proceed with cutting out your letter.
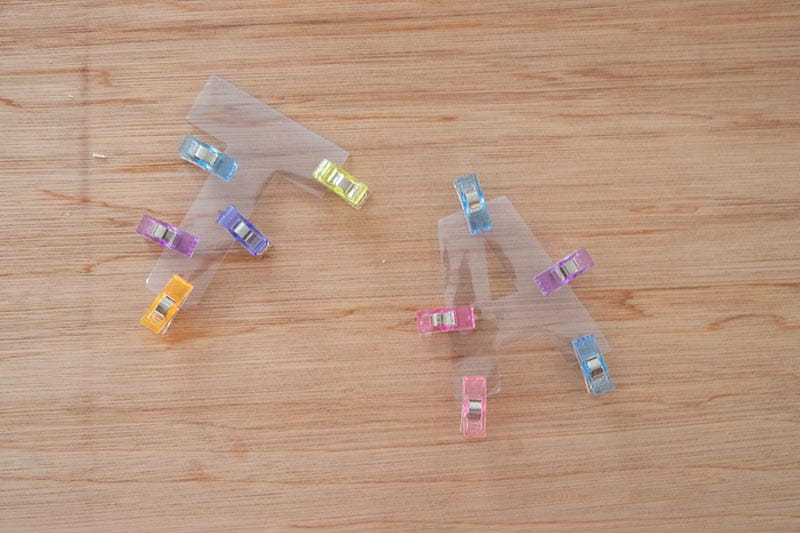
- Remove both letters from the cutting mat.
- Using fabric clips, clip the edges of the letters together.
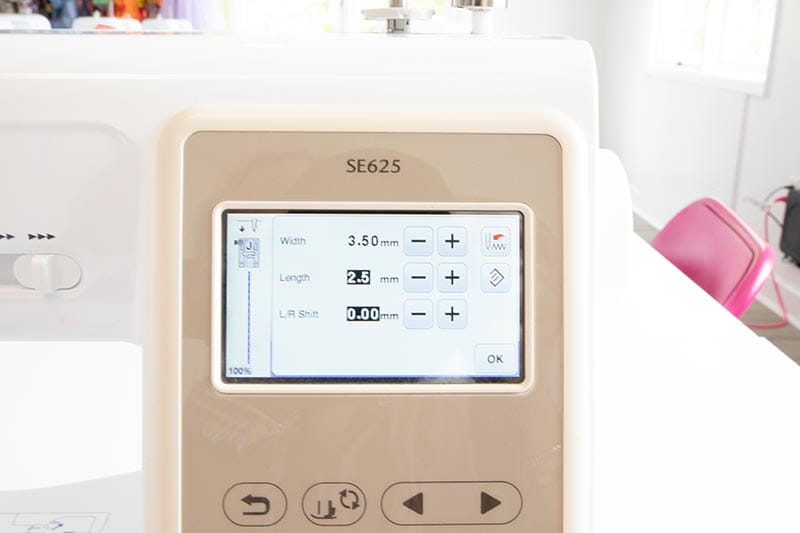
- Setup your machine for a center needle straight stitch with a stich length of 2.5mm.
- This is optional, but I adhered washi tape to a ¼” seam allowance. This way I knew I was going to have a straight seam. This allows for an easy visual when sewing vinyl.
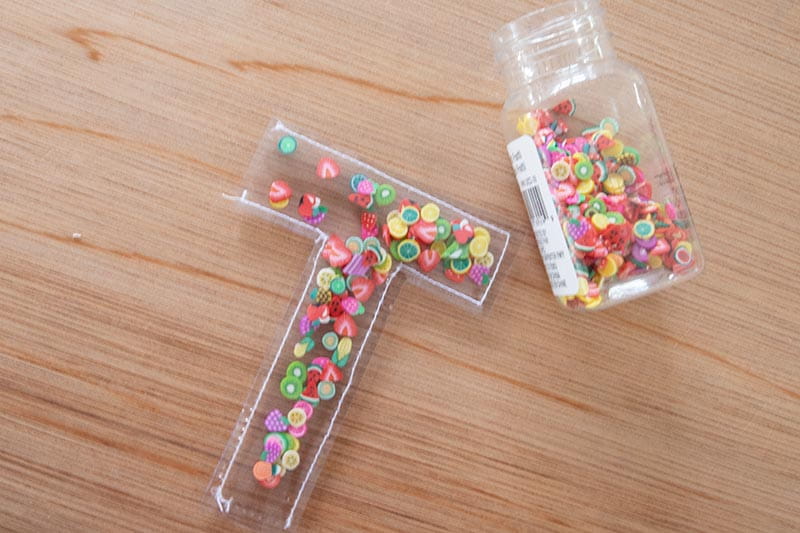
- Stitch around a few of the edges of your letters. Use your best judgment here. You’ll need to leave spaces open to add the confetti to the inside.
- Add your confetti and stitch opening closed.
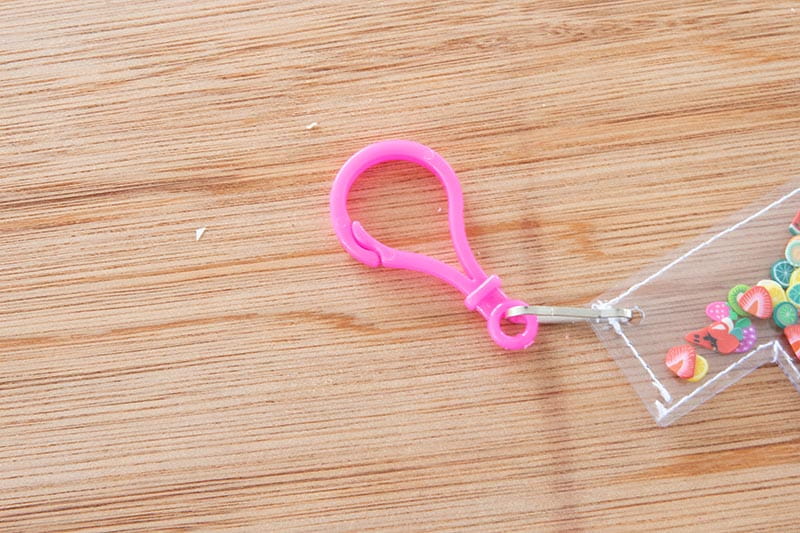
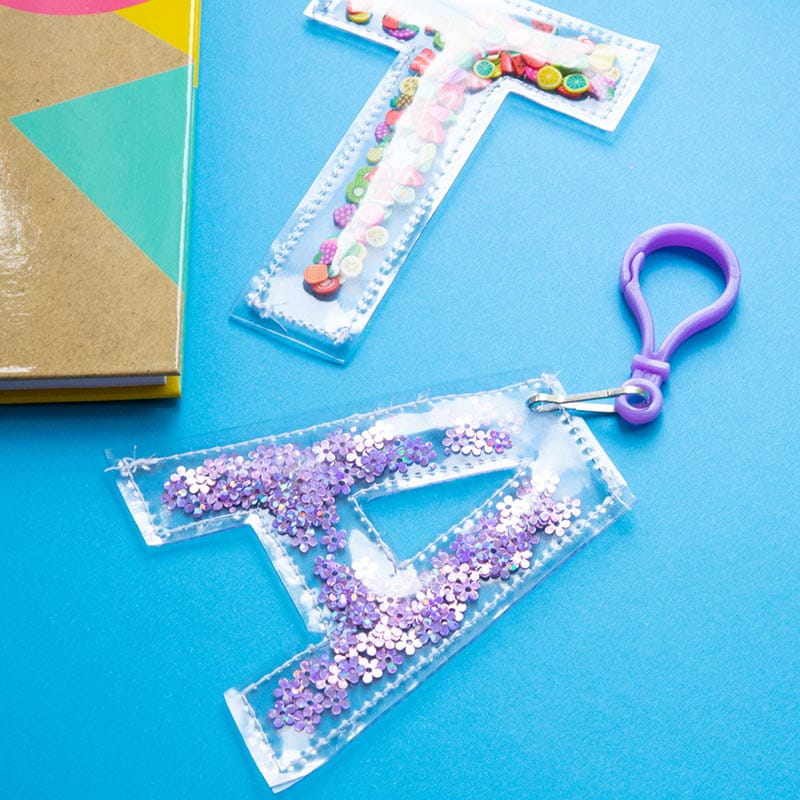
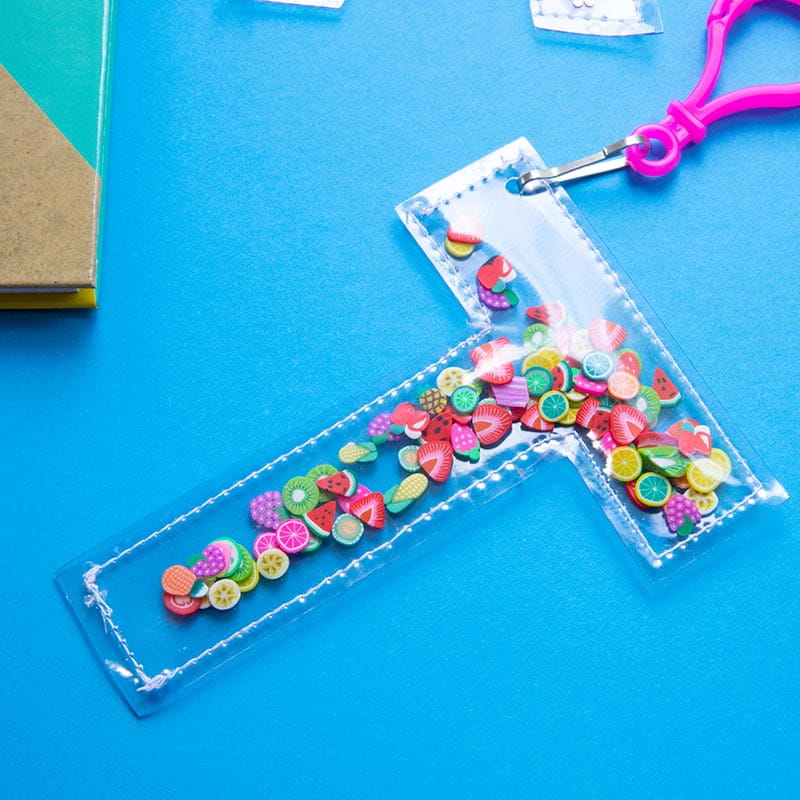
- Add your keychain attachment.
- That's it! Add a tassel for a bit more texture and fun if you want.

Related Projects
Stay Connected
* Required fields