Angel in Lace Cloud
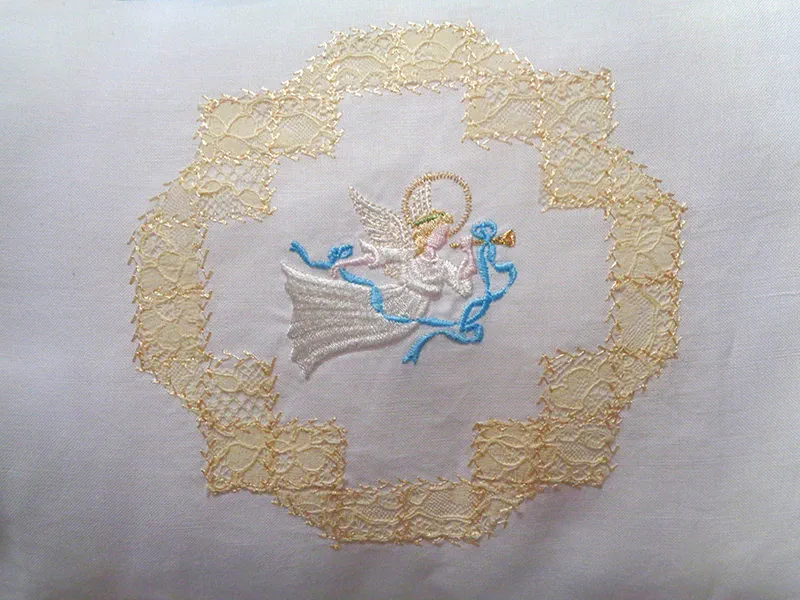
Angels are a common theme in needlework, legends, and philosophy. Featured here are two Christmas versions using a pieced technique. The first, an angel pillow with detailed instruction, is an open-ended pillow cover made from a linen hemstitched guest towel. Combined with heirloom lace, antique pearl buttons, and a heavenly machine embroidered angel from iBroidery.com,
it will be a true heirloom. She may be an advent angel for Christmas or a guardian angel for a baby. The angel is centered in a wreath or cloud—whichever you choose to call it-- of lace created with a raw-edge piecing technique. Using either the 1” or the ¾” grid, you can use up precious scraps of lace and fabric. The second is a festive and folksy dishtowel. Both may make you rethink the worthiness of tiny lace and fabric scraps. Just how small is too small to save? Angels are a popular motif and appropriate for so many situations—a remembrance angel for the loss of a loved one or maybe an appreciation angel for someone who has rendered meaningful help. So, gather your materials and get started - I think you will love this.
Note: The lace wreath made with 1.5” grid renders a 6” square wreath or cloud. (2” grid renders an 8” square.)
Requirements:
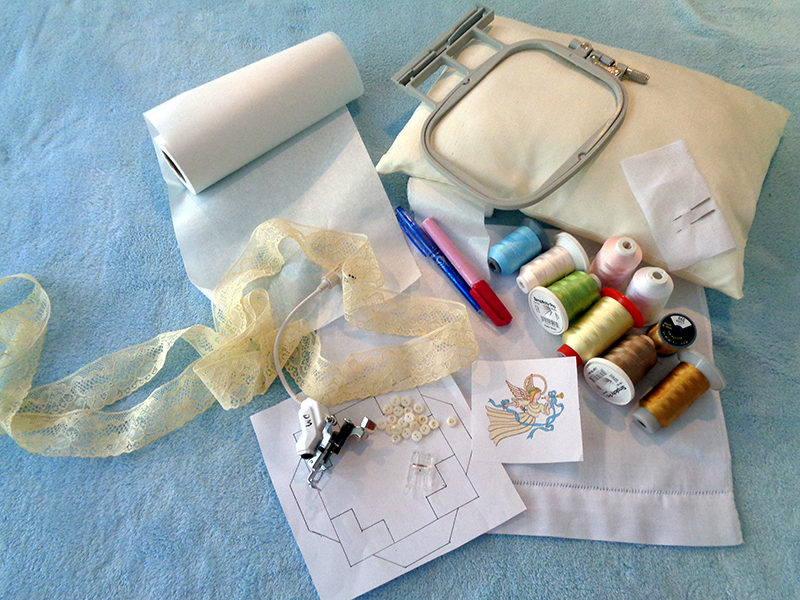
- 18” lace 1.5” or 2” wide for either ¾” or 1” grid for wreath/cloud
- 1.75 yds lace edging for pillow ends
- Hemstitched linen guest towel 14” x 21
Notions:
- 15 two or four-hole mother of pearl buttons approx. ¼” but size and style can vary
- Heat erasable or water-soluble marker
- Glue stick
- Needles #70 and #80
- Embroidery thread for angel and featherstitching; fine thread for zig zag joining of lace edging to pillow ends
- Tearaway stabilizer for 4x4 frame; 8” square-tissue paper weight tearaway or water-soluble stabilizer
- Feet: embroidery foot, open toe
- Wreath grid
- Pillow form 9.5 x 14”
Preparation:
Note: Pictured pillow cover was made with .75” grid. Instructions for 1” grid are in parentheses.
- Starch and press lace edging for wreath/cloud. Do not starch edging for ends of pillow, as it will be gathered. Cut lace to exactly 1.5”. The lace used in the sample is just a tad wider. By cutting away the lace header, it is the correct width.
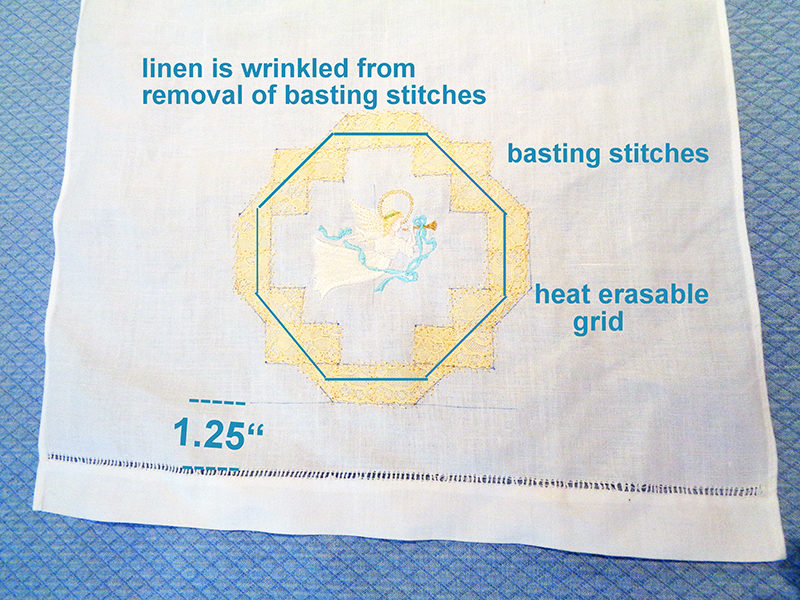
- Draw washable/erasable line 1.25” (1”) above hemstitching. Center and trace chosen grid with bottom of grid along this line.
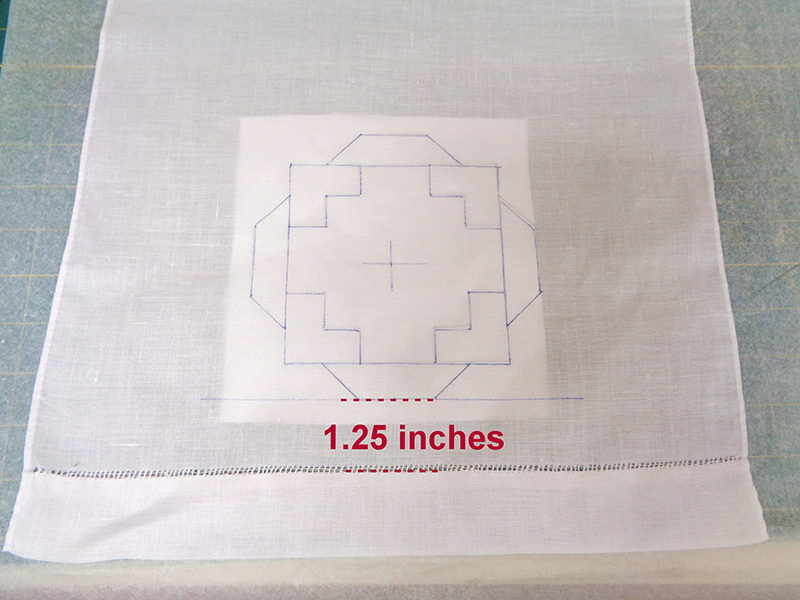
Angel Embroidery:
- Hoop tearaway or water-soluble stabilizer with linen towel in 4x4 frame.
- Center angel design on placement dot and embroider.
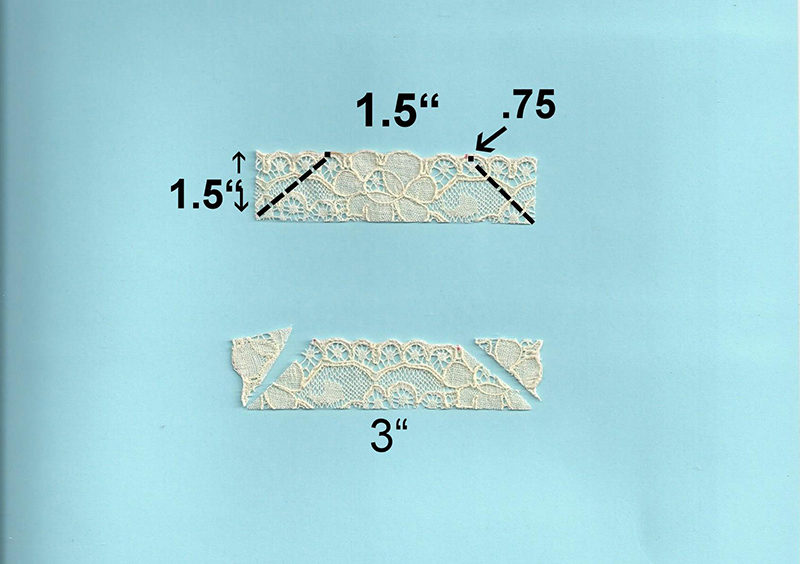
- Cut four 1.5” lace squares from starched and pressed lace (for ¾” grid). (Cut four 2” squares for 1” grid). Cut four 3” x width of lace. If necessary, trim lace width to 1.5”.
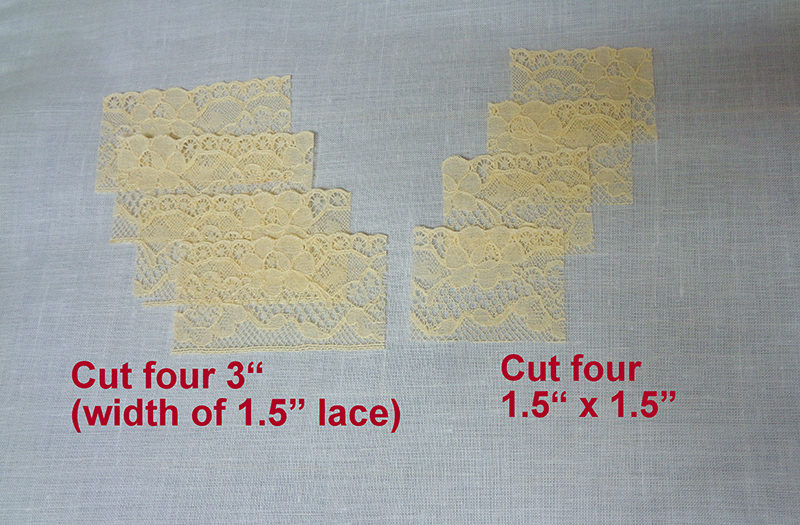
Note: When trimming squares and rectangles, keep decorative edge at top of trimmed piece. Place square on grid to determine best placement of the decorative edge and for the .75” square cut away.
- Trim squares as shown. This piece will be rotated and placed in the upper right-hand corner.
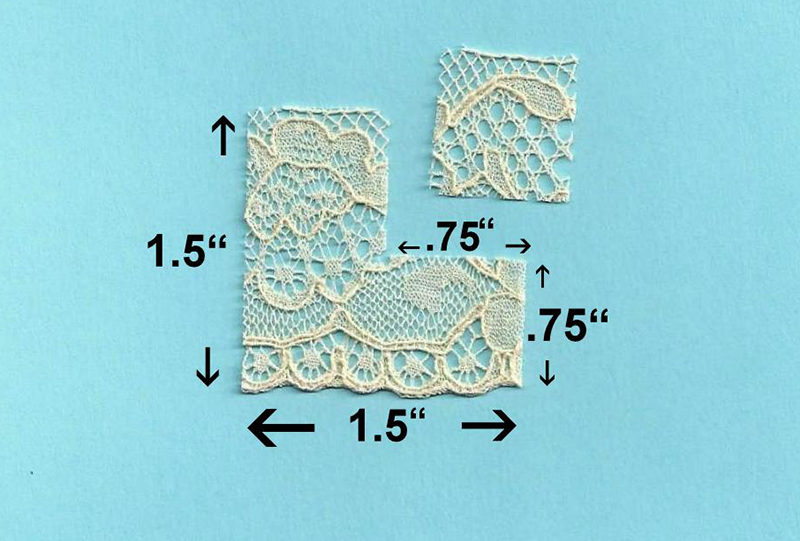
- Trim rectangles to 3/4” x 3”. (Cut four rectangles 1” x 4”). Mark a dot on decorative edge .75” from raw short side. Trim as illustrated.
Lace Cloud Attachment:
- Look carefully at lace shapes to determine the right side - which is the one on which the design is raised or more detailed.
- Lightly mark short sections of grid with glue stick, taking care not to get glue on grid lines. Add more glue as you progress around the wreath.
- Finger press lace shapes on grid, making certain that the lace pieces fit snugly against one another. Leave no gaps, scooting any gaps toward the piece closest to the center.
- Float a single 8x8” sheet of water soluble or tissue-paper weight stabilizer under grid area. Pin in a few areas.
Note: I used the tissue paper weight stabilizer which I love. But it took an eternity to pick the paper from the featherstitching. I’m rethinking this for my next project.
- Baste lace pieces in place with lengthened straight stitch.
- Thread needle with thread closely matching the lace color.
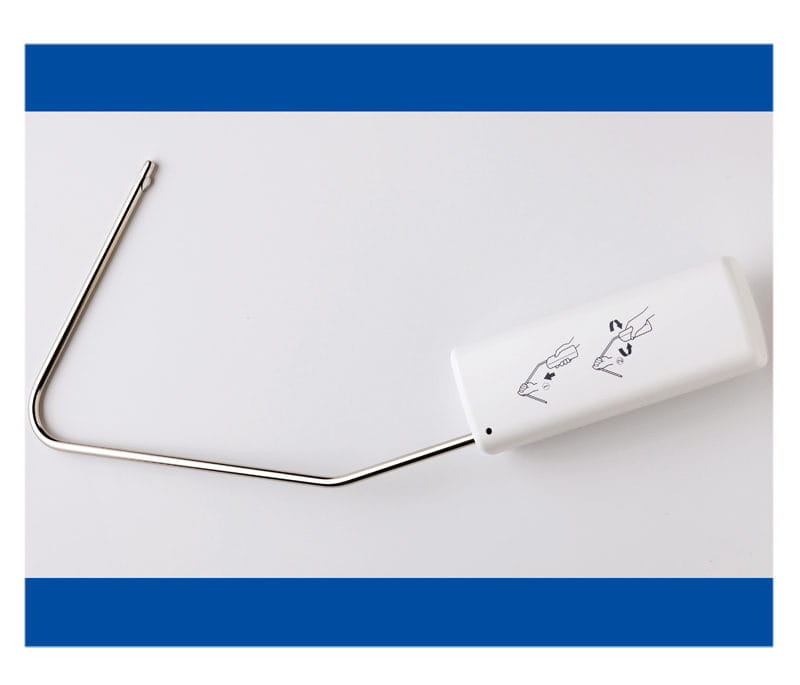
- Attach knee lift.
Note: If you haven’t made friends with this fabulous tool included with your Brother machine, now is the time. You will be so happy you have it! There is much pivoting for basting and what is to come next. With a nudge of your knee, the presser foot lifts and your hands are free to turn the fabric.
- Baste around and through the lace cloud.
- .75” grid. Instructions for 1” grid are in parentheses.
- Attach open toe foot. Plan your best route through the cloud. No matter how you navigate this path, there will be several starts and stops. Keep the center of the presser foot on the raw edge of the lace.
- Do not hesitate to stop at a pivot point and reposition. In this situation, the stitch is forgiving. An out-of-sequence stitch will not be noticeable.
- Remove basting threads and pull thread tails to back. Hand tie knots.
- Remove grid marks with a hot iron or water.
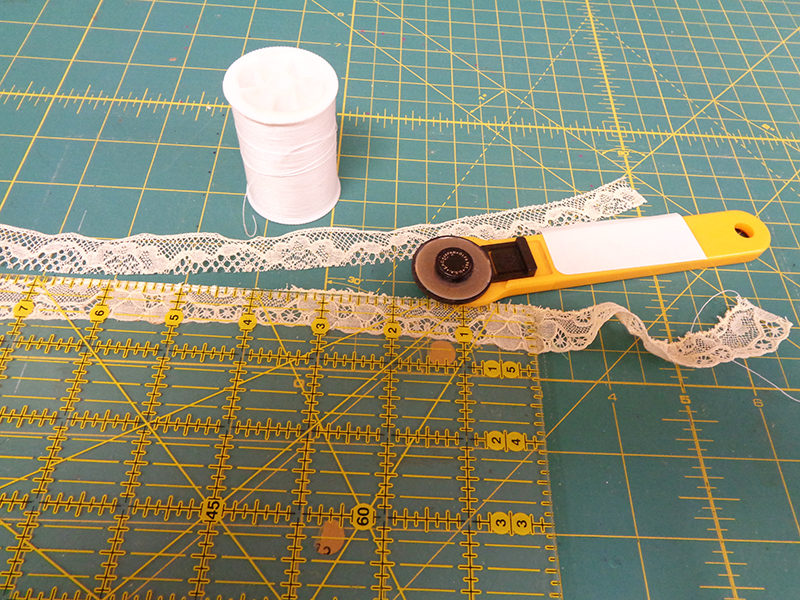
- Cut lace edging into two 32” lengths.
- Zig zag over the raw edge, enclosing a generous length of quilting thread.
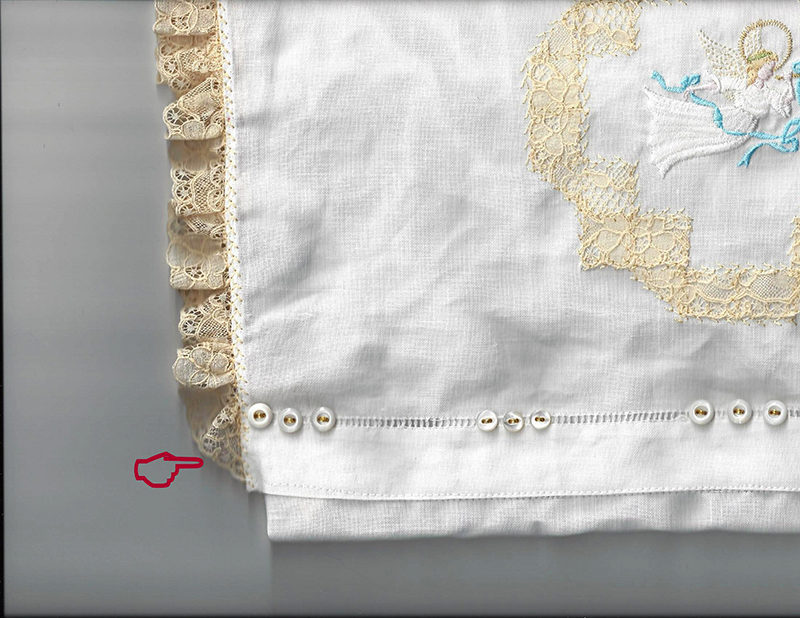
- Gather lace gently to the length of your towel, distributing gathers evenly. Finish all four raw ends with zig zag.
- Curl zig zagged short end of lace so that it is butted to the edge of the hemmed towel edge and pin through towel and stabilizer. Or you can clean finish the end with a short, wide zig zag.
- Butt remaining edge of gathered lace against edge of towel and tiny zig zag lace and towel together. Finish the opposite end just as the first end, curled and butted to the hemmed edge.
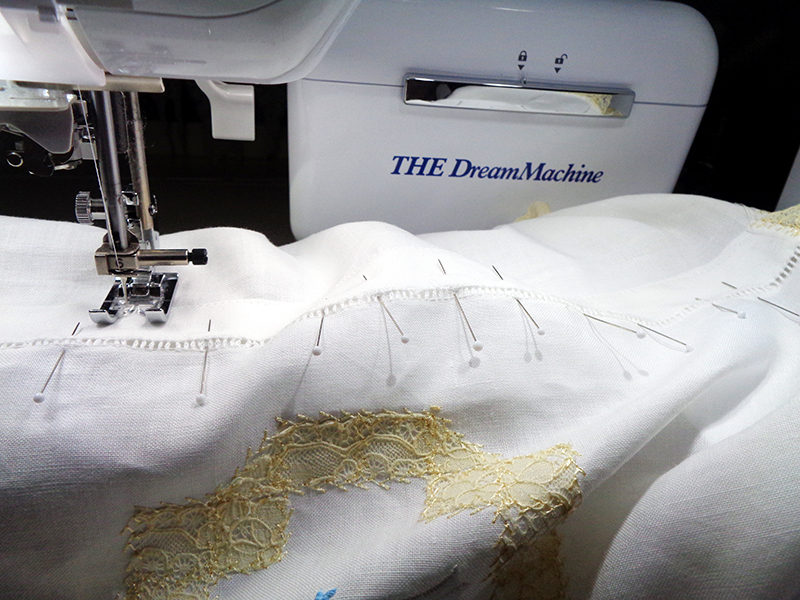
- Fold lower hemstitched edge of towel over the opposite end, forming a circle. Pin together, making certain that the hemstitching overlays the other hem by 1/8”. Baste in place with use of free arm and directional stitching.
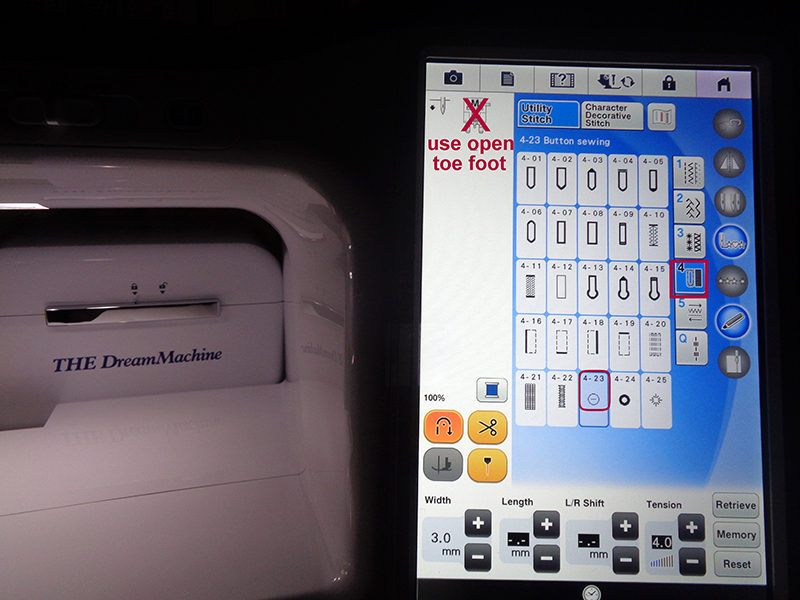
- Select the button sewing stitch in the buttonhole menu.
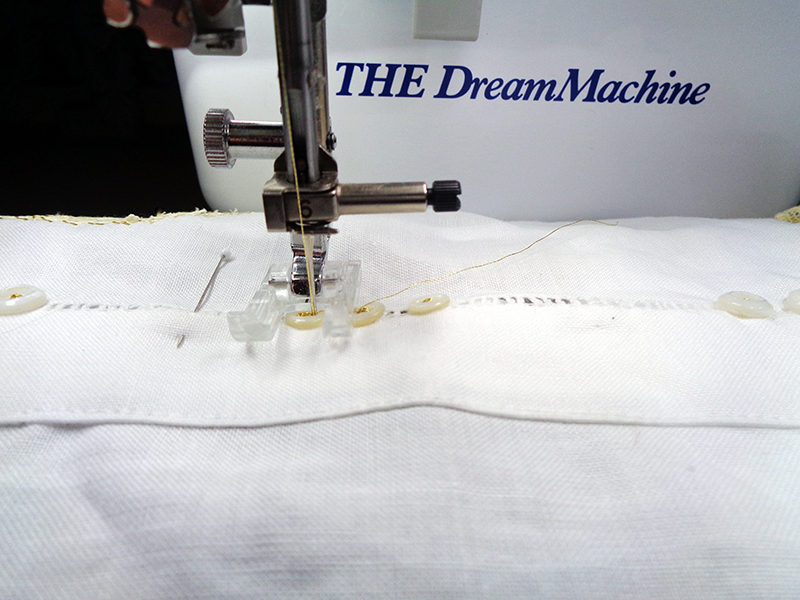
- Arrange buttons in 5 groups of three along lower edge, centered on hemstitching. Slip over free arm and sew in place through all layers, securing the two ends.
- Remove horizontal stitching basting threads.
- Insert pillow.
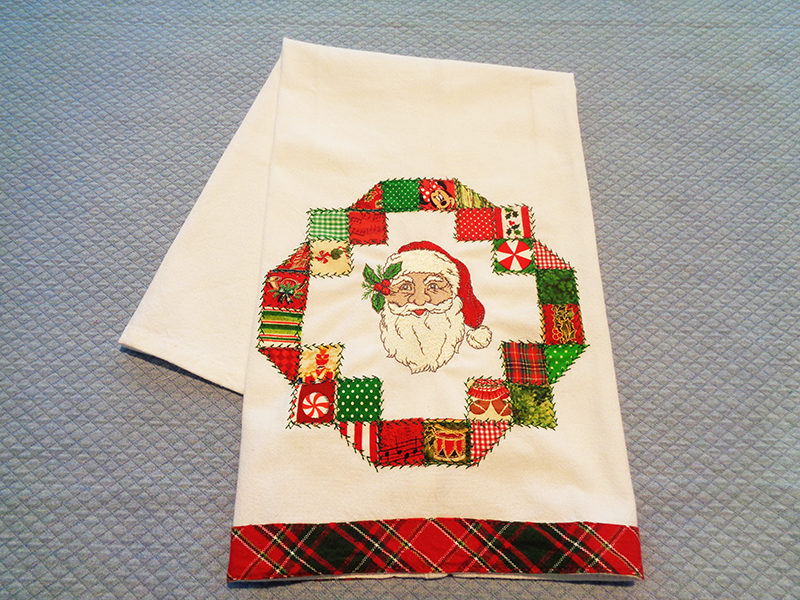
- Multitude of scraps as small as 1” square
- Santa design at iBroidery.com
- Brother embroidery machine w 4x4 frame
- Feet: embroidery foot, open toe
- 1” grid
- Embroidery thread for Santa design and feather stitching
- Fabric marker, water soluble or heat erasable
- Tearaway stabilizer for Santa
- Water soluble or tissue-paper weight stabilizer 10 x 10”
- Glue stick
- Trace 1” grid on towel, centered and with bottom line 1.25” above hem. See above image #21. This grid includes radiant lines for an angel design. Disregard for the Santa towel.
- Cut scraps into 24 1” squares. Cut 2 squares in half diagonally to create right angle triangles.
- Refer to steps #9-20 for the angel pillow.
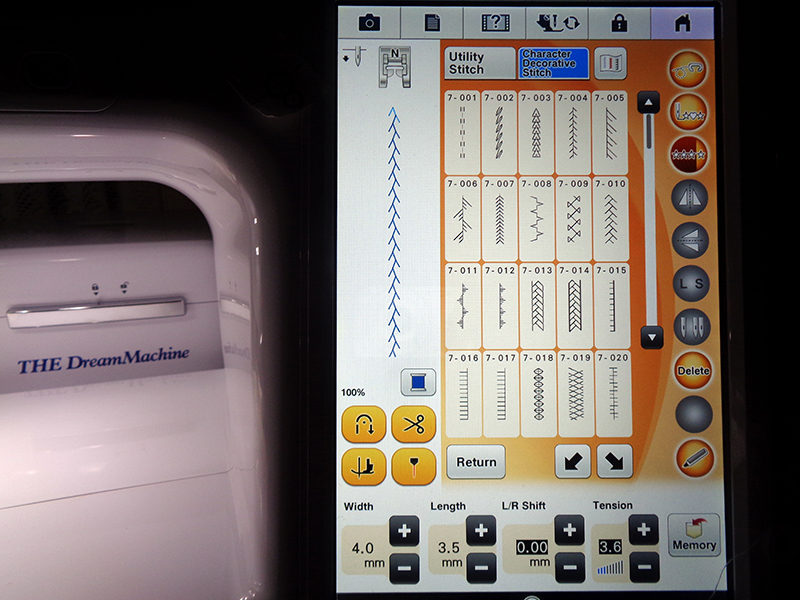
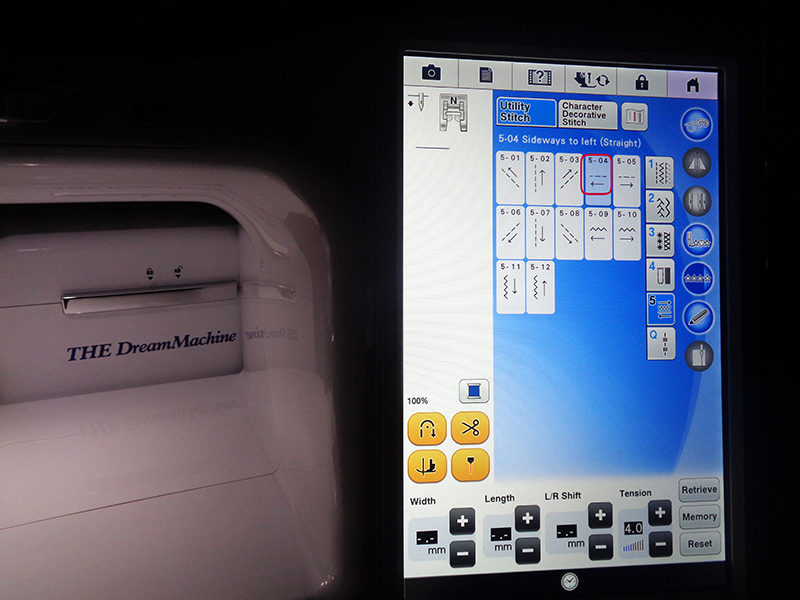
- Select feather stitch #7-010 from the Character Decorative Stitch menu on
THE Dream Machine 2.
Set width to 4.5, length to 3.0, tension to 3.6 (or whatever looks best on your machine) and multiple pattern. Use identical thread in needle and bobbin.
Note #1: Loosened tension will prevent bobbin thread from pulling to the top for this stitch. It will also give the stitch a more relaxed presentation, more like hand stitching. Note #2: Disengage the thread cutter.
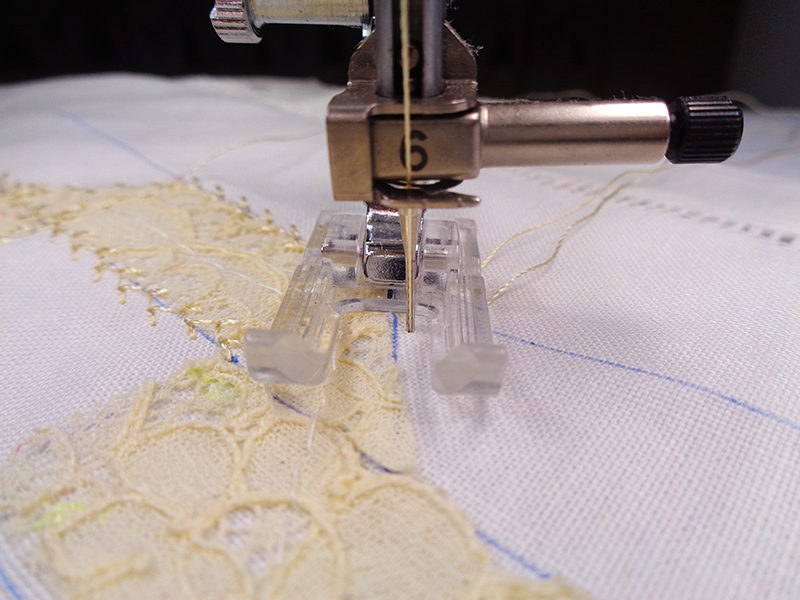
Note: Be sure to leave long thread tails at beginning and end of each run of feather stitching.
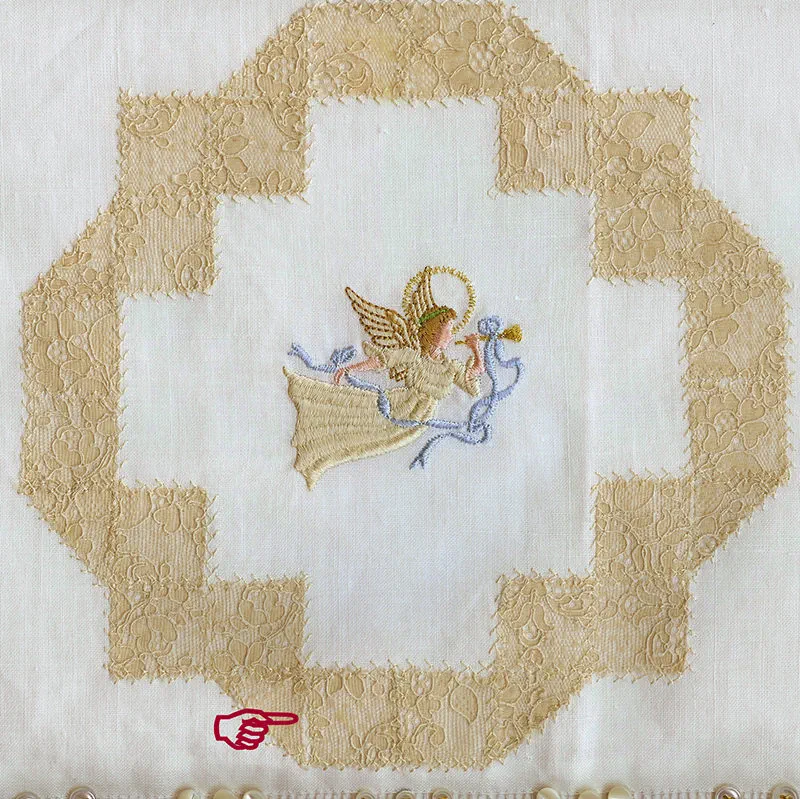
Note: This is another angel on a 1” grid. This cloud wreath was with no lace fussy cuts, only 1” squares. Note the circled gap could have been avoided by scooting the triangular piece closer to the square, disregarding the grid marks.
Lace Edging:
Note: The lace used for this wreath is 1 5/8’ wide. My personal preference is to use a narrower lace edging for the pillow ends. Since I could not find narrow lace which matched this vintage pale-yellow lace, the edging was trimmed to 1”.
Optional: Work feather stitch along this edge.
Finishing:
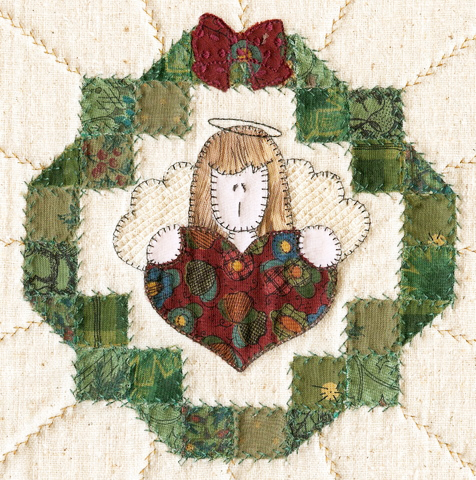
 This is another version of the wreath design, with a country theme. Country Christmas Angel based on ¾” grid. Unlike its heirloom cousin, this version uses a different piece of fabric for each piece of the grid. It has a sleeve for hanging.
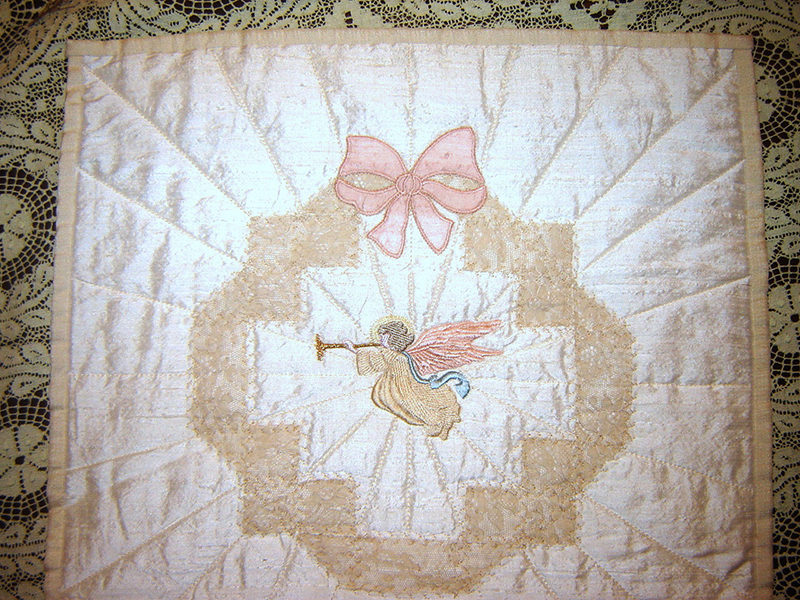
 Yet another version is a silk dupioni table-topper, lovely when displayed with a small tea light glowing one corner.
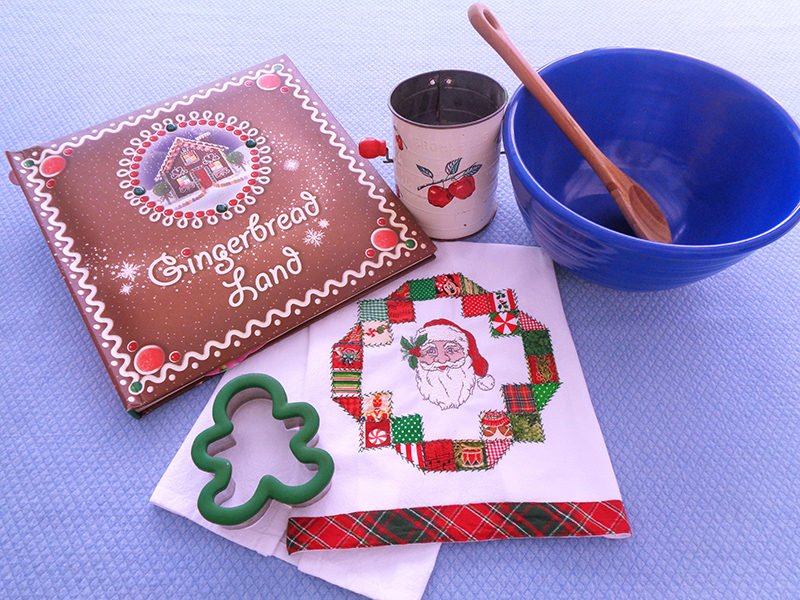
Santa Dishtowel
Requirements:
Preparation:
 Yet another version is a silk dupioni table-topper, lovely when displayed with a small tea light glowing one corner.
 So, do you have enough ideas? I’d love to hear about your version of the piecing design.

