Free Design of the Month - How to Embroider A DIY Summer Blouse with Tropical Flowers
-Brother Sews Blogger
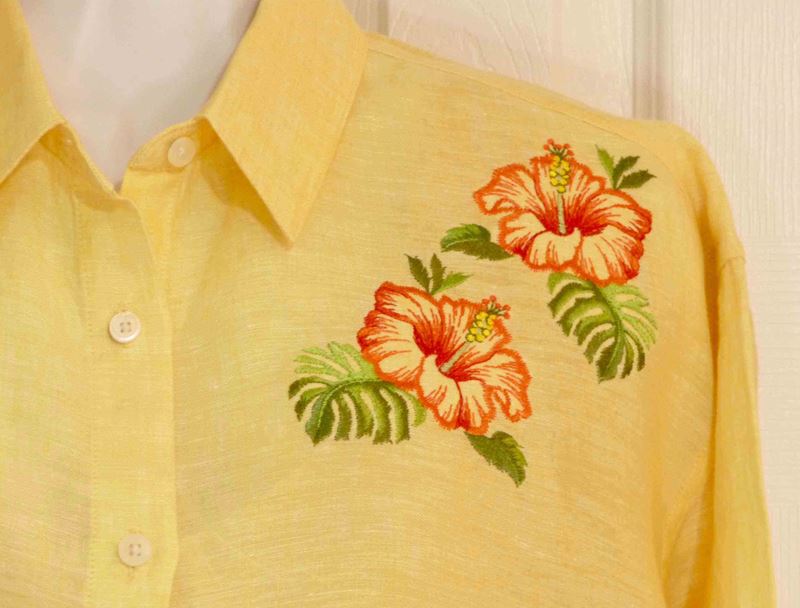
Is your summer wardrobe in need of a quick pick-me-up? In this tutorial you’ll learn how to take a blouse from blank to beautiful with gorgeous tropical flowers embroidered at the shoulder. The tropical floral design is the Brother featured free design for this month. This design fits within a 4-inch hoop but I decided to duplicate the design, mirror image it, and move it around to create a big splash near the neckline of this ordinary linen blouse. To achieve perfect placement, I chose to create the layout using the Brother PE Design 11 program, then I printed a life size template with the Snowman Marker for foolproof positioning on the blouse.
Follow along and you’ll learn some easy-to-use features within the software. Of course, depending on your own personal machine and software, there are many other ways you can achieve a similar look. I’ll outline a few more in the options and ideas section at the end of these instructions. Are you ready to embroider your own DIY floral accents? Let’s go sew!
Materials and Supplies for Sample Flower:
• Brother sewing and embroidery machine. Note: Machine featured in this project is the Brother Luminaire.
Brother PE Design software for printing template with Snowman Marker. Note: PE Design Version 11 is featured in this project.
• PEDESIGN 11 Personal Embroidery and Sewing Digitizing Software
• Embroidery threads and embroidery needle.
• SA580 Brother medium-weight tear away stabilizer.
• Temporary adhesive spray made specifically for embroidery.
• Low tack tape for securing template to blouse fabric.
• Plain blouse for embroidering. Note: I selected a linen blouse. Linen embroiders beautifully due to the weave of the fabric, the natural fiber, and ability to take starching. If you choose another fabric you may need to use alternative stabilizer such as a cut-away. Test your design if possible on similar fabric.
• Light starch product to firm up shoulder area for added embroidery.
• Brother Free Design of the Month. See design details in Figure #1
Figure #1

Steps to Create:
1. Prepare design layout and template for blouse using PE Design as follows:
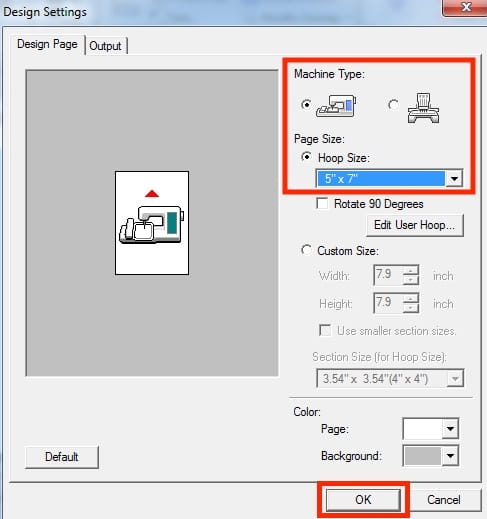
Open software and change hoop size to 5” X 7” hoop. See Figure #2a and #2b.
Figure #2a
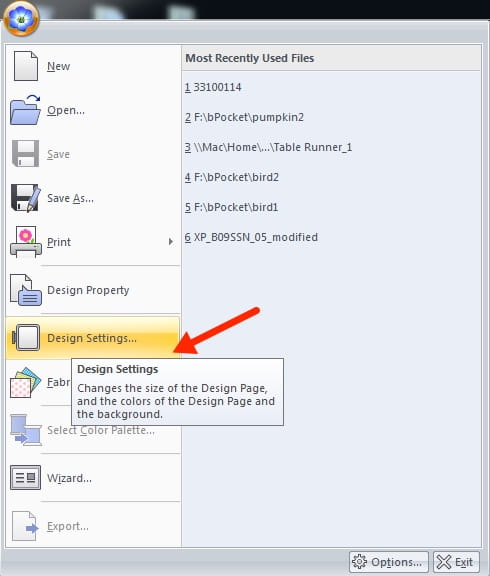
Figure #2b
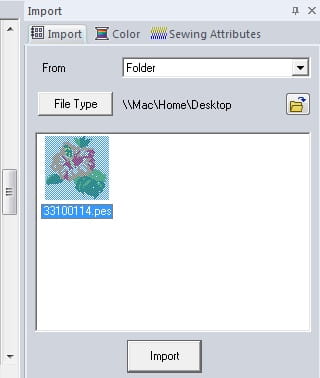
Import design from your file location. I saved my file to the desktop. Click on the design and click Import. See Figure #3a, #3b, and #3c.
Figure #3a
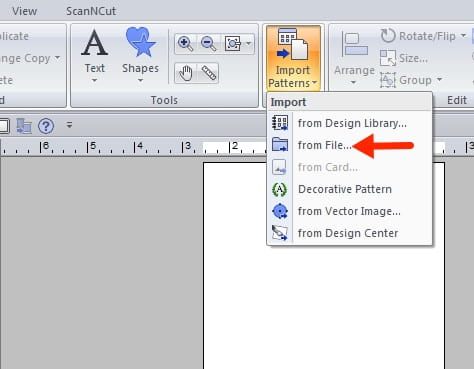
Figure #3b
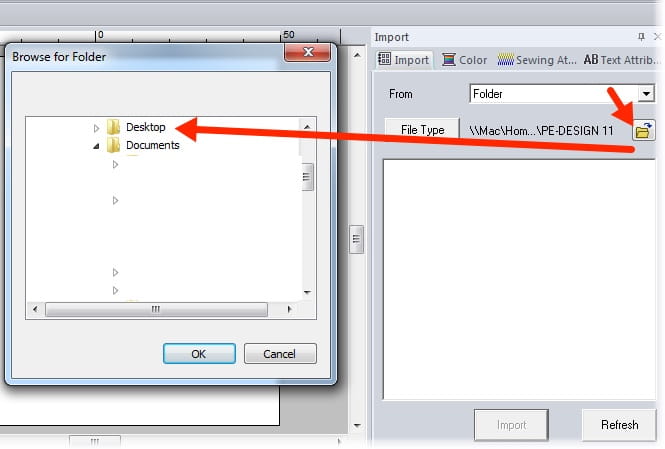
Figure #3c
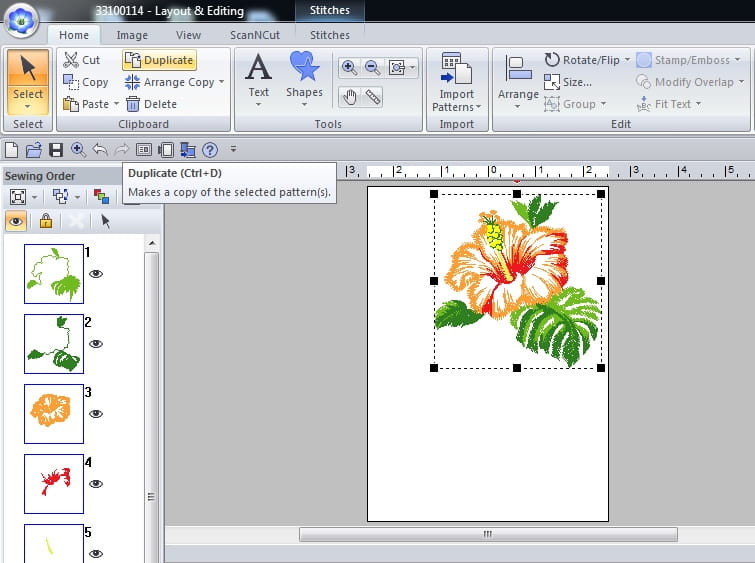
Drag the selected design to the upper right corner of the hoop. Next, click on duplicate to make a second copy. See Figure #4.
Figure #4
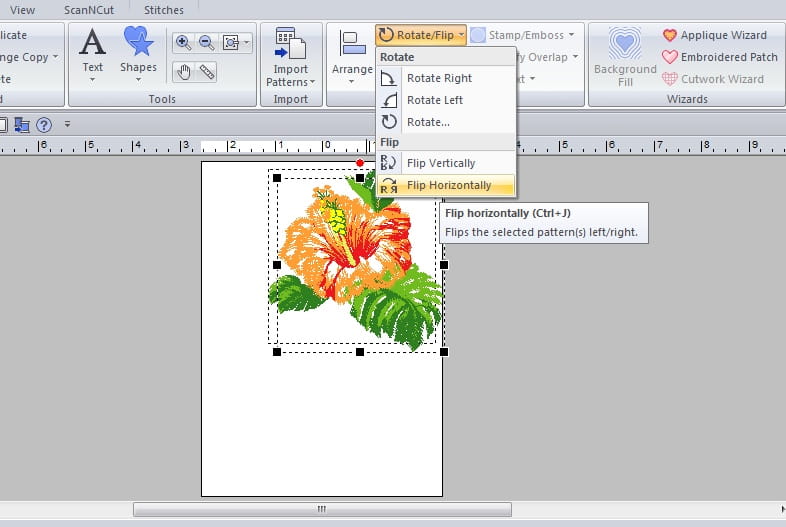
Select Rotate/Flip and flip the design horizontally. See Figure #5.
Figure #5
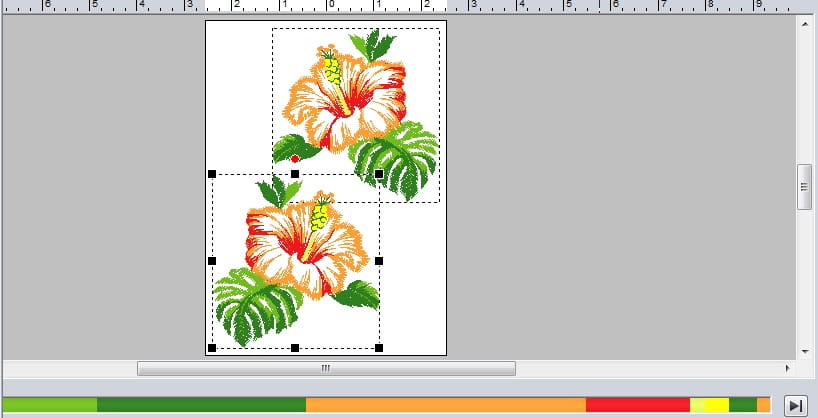
Drag the flipped design to the lower left corner. Note: Leave a little space along the edges of the design. You will want a little room around the margin of the hoop area. See Figure #6.
Figure #6
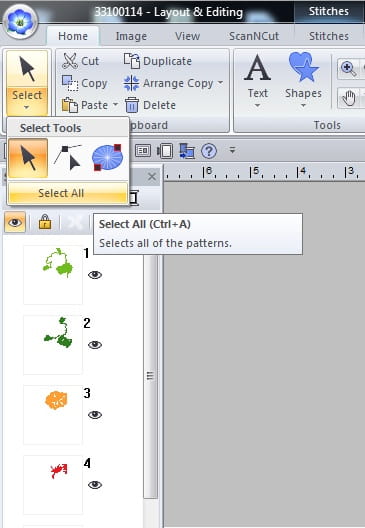
Click on Select, select all. See Figure #7.
Figure #7
Next, click on the arrange icon from the Home tab and center the entire design in the hoop. See Figure #8.

It’s time to print the template for embroidering. Click on the Pacesetter flower icon and select Print, Print Set-up. See Figure #9.
Figure #9
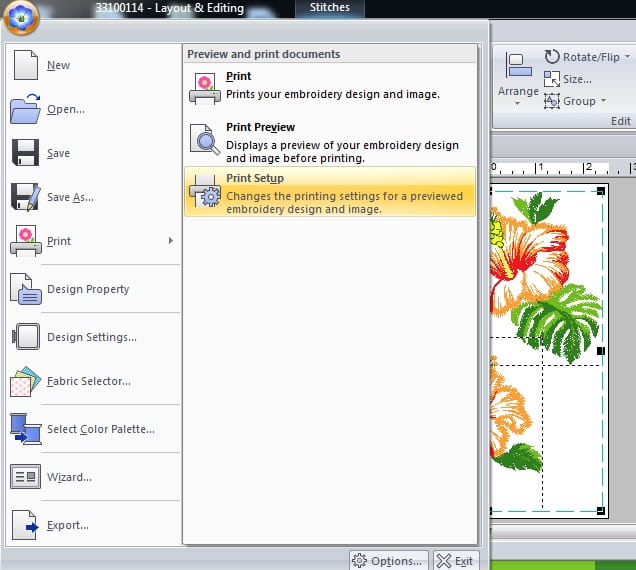
To coordinate with the Snowman Marker technology on the machine choose settings shown below in Figure #10.
Figure #10
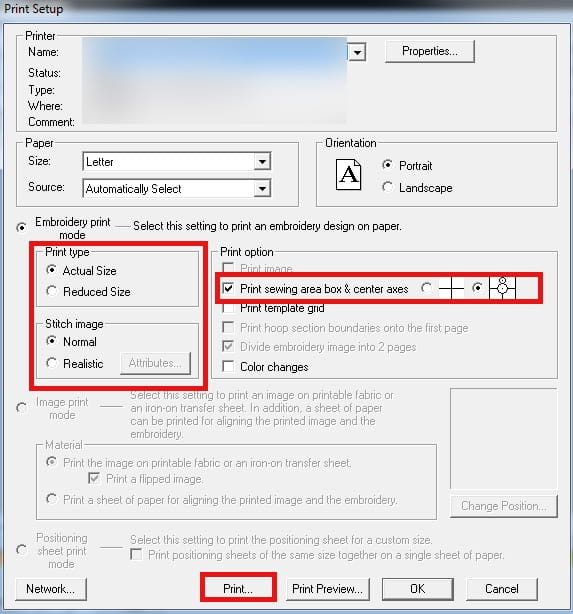
The printed template is a life size image of the design layout with the Snowman marker. See Figure #11.
Figure #11

Now we’ll trim the template close to the design and adhere it to the blouse with low tack tape. See Figure #12. Tip: Use a dress form to audition placement for the design or try on the blouse to position the template in an attractive location.
Figure #12

2. We’re ready to embroider! Lightly starch the fabric in the shoulder area. I like to use two to three applications of a light starch, ironing the area dry before applying another layer.
Cut stabilizer slightly larger than hoop and spray with adhesive. Attach to wrong side of blouse and hoop blouse with Snowman Marker near the center of the hoop. Note that your hooping it does not have to be perfectly straight. The machine will adjust and rotate the design to match the template. However, since we are using most of the available hoop space the Snowman needs to be near the center of the hoop for the technology to work as it is designed.
Place hoop on machine and be sure fabric is cleared away from underneath the hoop. Slip an additional layer of light to medium weight tear-away stabilizer under the hoop for extra stability. Note: I pinned the collar and part of the back of the blouse out of the way so it wouldn’t interfere with the embroidery field.
At the machine choose the Snowman Marker icon and scan the template. See Figure #13a and #13b.
Figure #13a
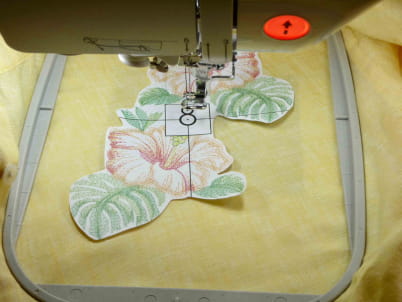
Figure #13b

Remove the template. Embroider using default thread colors or make up your own combination. The colors of this flower were absolutely perfect for this light yellow blouse! See Figure #14.
Figure #14

You are finished taking a blouse from blank to beautiful! See Figure #15a and #15b below.
Figure #15a

Figure #15b


Options and ideas:
•If your hoop size is limited to a 4-inch hoop you can create a similar design with two separate hoopings.
•Other Brother software programs have the ability to print templates. These templates include options for center markings that align with hoop template grids.
•No access to software? Consider making a sample design and use it as a guide for positioning the design in your hoop. I’ve included a link to the Brother sponsored It’s Sew Easy TV show where I demonstrated this concept. Watch show for 1407-3 for additional machine embroidery tips for ready-made garments Watch Here


