Make Buttonholes and Sew Buttons
I’ll let you in on a little secret: until recently I would do anything to avoid making buttonholes. I would use any other fastener, and just hadn’t had good luck with buttonholes. All that changed when I really realized how easy sewing buttonholes could be on my Brother sewing machine. In this post I’m sewing on the LB5000M
, but most Brother machines will have these capabilities. Check your machine manual for exact information on your specific device.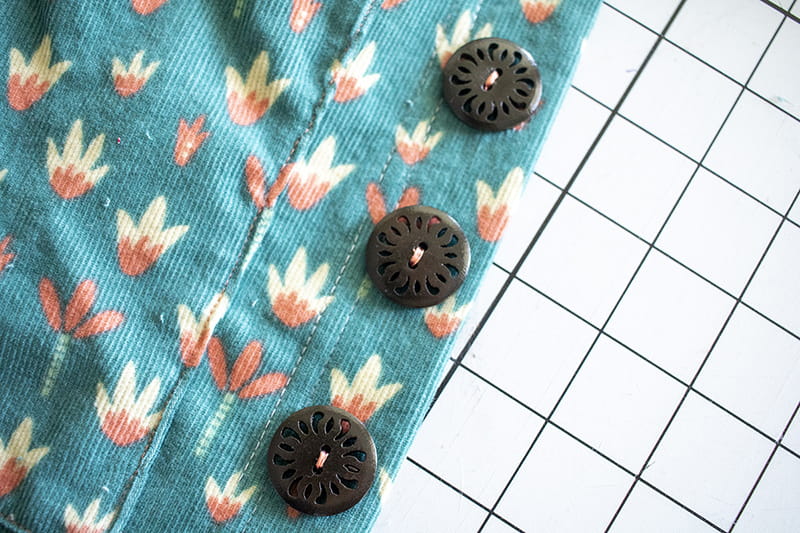 Create Easy Buttonholes-
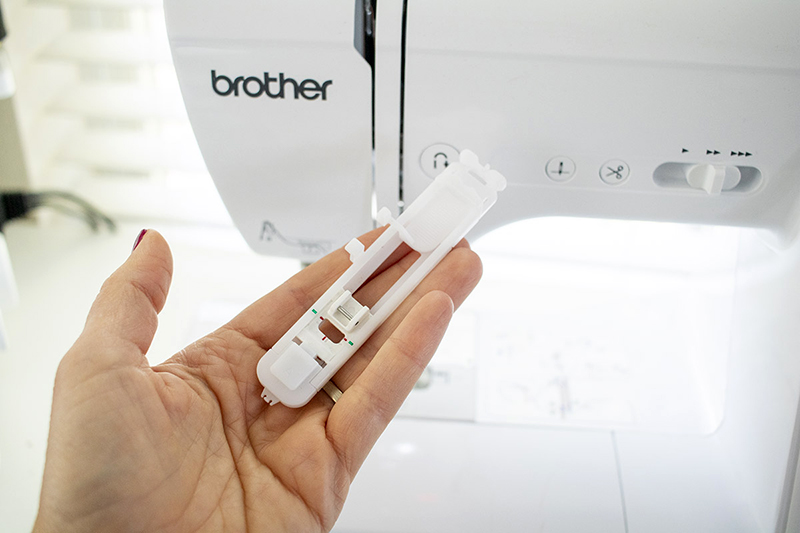
To make simple machine buttonholes, you will need your Brother machine with buttonhole foot. Notice the green and red lines marking the foot. We will use these later to line up the fabric under the foot.
Create Easy Buttonholes-
To make simple machine buttonholes, you will need your Brother machine with buttonhole foot. Notice the green and red lines marking the foot. We will use these later to line up the fabric under the foot.
 To get the size of the buttonhole perfect for your buttons, take one button and place it in the back of the buttonhole foot. Squeeze the button tight into the foot.
{tip: always do a practice hole on a scrap of fabric. I often have to remove the button and make the hole one “click” smaller on the buttonhole foot.}
To get the size of the buttonhole perfect for your buttons, take one button and place it in the back of the buttonhole foot. Squeeze the button tight into the foot.
{tip: always do a practice hole on a scrap of fabric. I often have to remove the button and make the hole one “click” smaller on the buttonhole foot.}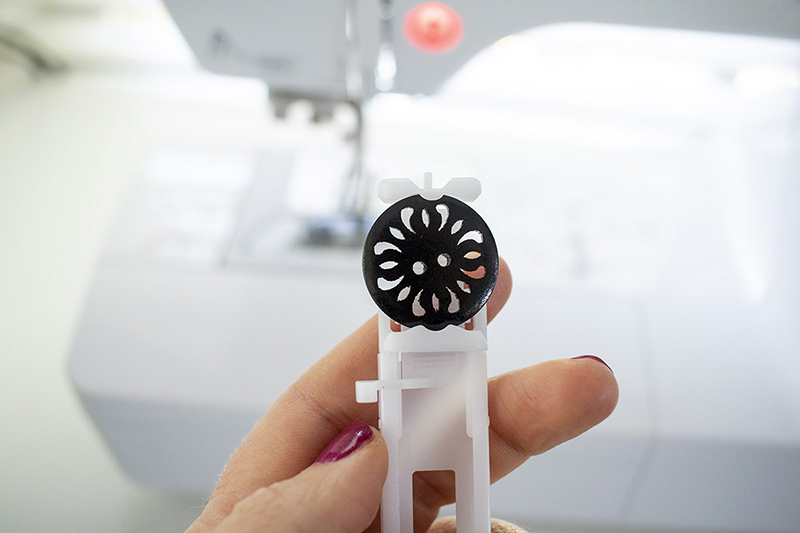 Install the foot on your machine like any other foot. Lower the buttonhole lever all the way to the foot.
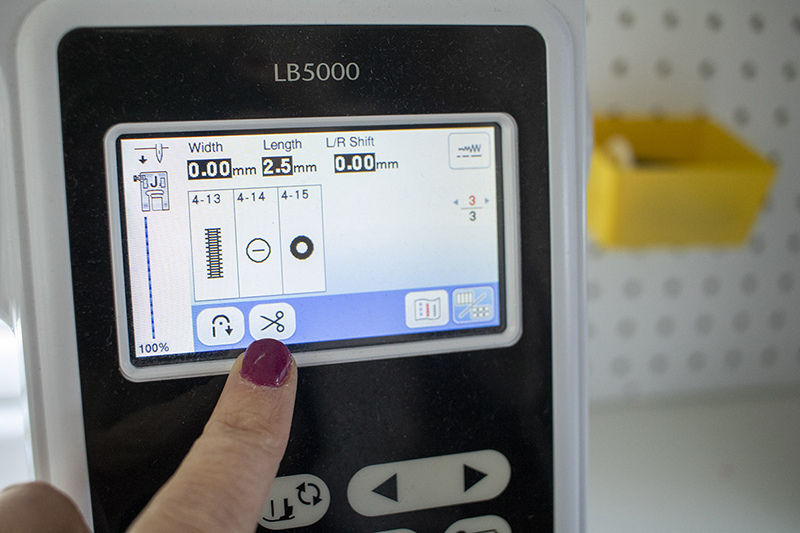
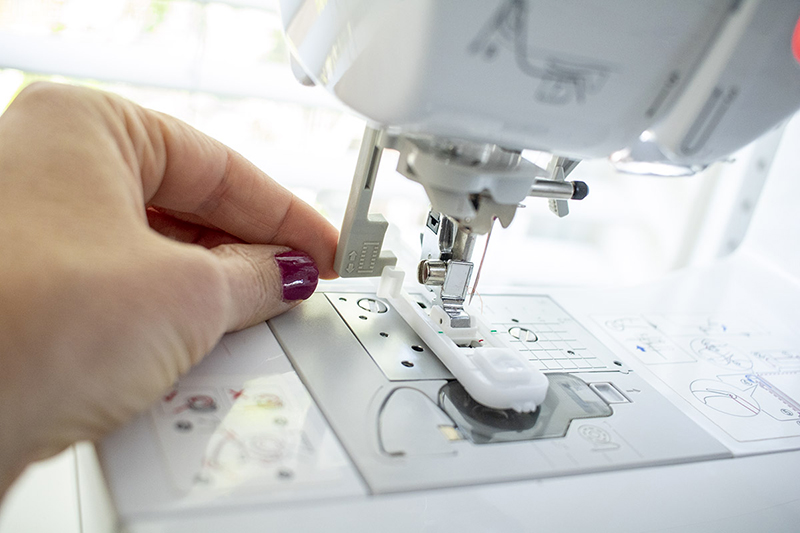 Mark the buttonhole placement on your fabric. Select your buttonhole style on your machine stitches. I’m using the standard rectangle buttonhole for this post.
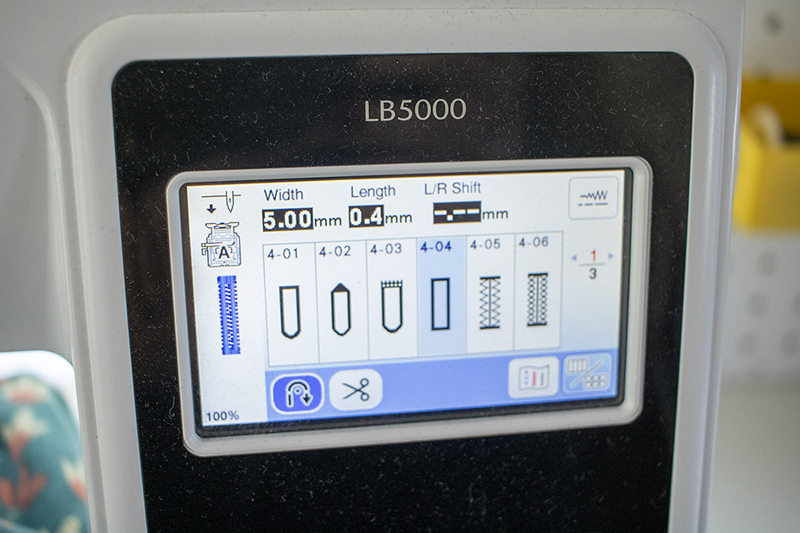 Slide your fabric under the foot and line up the mark of the button end of your placement marking with the lines on the foot. The button end of your marking should be centered in the three red lines on the foot. The green will stay with the button of the foot, while the red marks will move with the stitches.
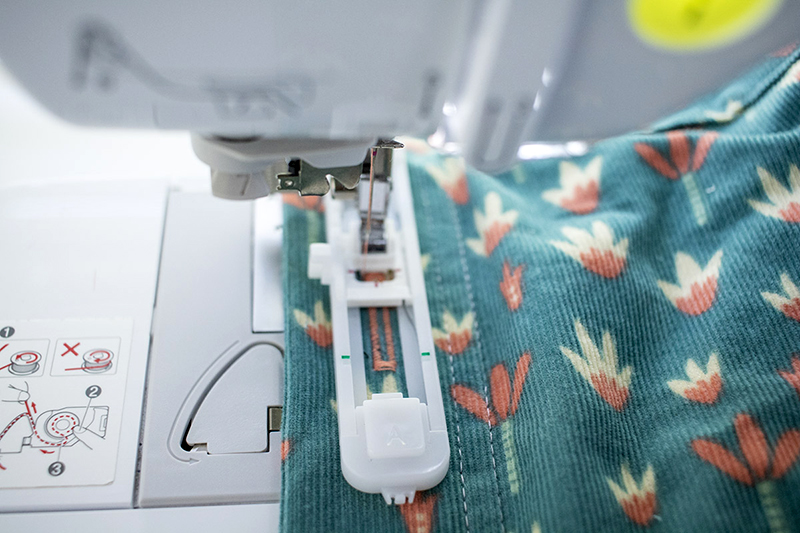 While sewing your buttonhole, keep the speed consistent with your presser foot. I like to use a medium fast speed while sewing for best buttonhole sewing.
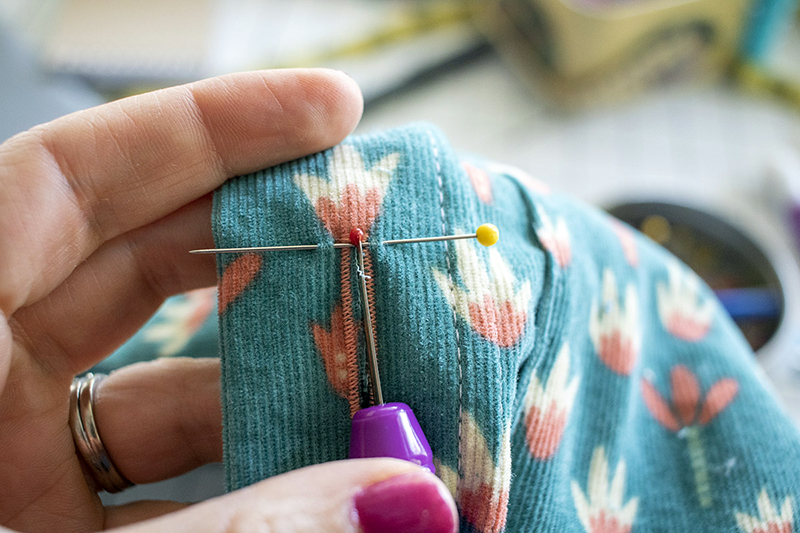
I like to place a pin at the top of the buttonhole and then slice up from the bottom with a seam ripper to open each hole. The pin stops the blade from slicing the top of the stitches (and I have done that before!).
While sewing your buttonhole, keep the speed consistent with your presser foot. I like to use a medium fast speed while sewing for best buttonhole sewing.
I like to place a pin at the top of the buttonhole and then slice up from the bottom with a seam ripper to open each hole. The pin stops the blade from slicing the top of the stitches (and I have done that before!).
 If you haven’t tried sewing buttonholes on your machine, practice a few! I bet you will be surprised with how easy it is.
Sew Buttons with a Machine -
I can’t even believe how easy it is to sew on buttons with your sewing machine. No more threading needles and tying knots - let your machine do all the work.
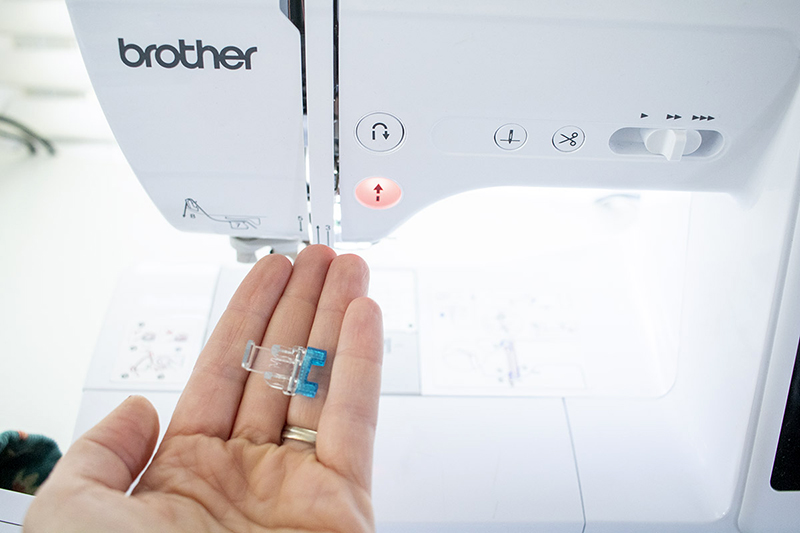
Start by grabbing your button foot and selecting the button stitch on your machine.
If you haven’t tried sewing buttonholes on your machine, practice a few! I bet you will be surprised with how easy it is.
Sew Buttons with a Machine -
I can’t even believe how easy it is to sew on buttons with your sewing machine. No more threading needles and tying knots - let your machine do all the work.
Start by grabbing your button foot and selecting the button stitch on your machine.
 Place the button foot in place and then lower the feed dogs. Don’t know how to do this? Look on the back of your machine… Do you see this slide? If not, check your machine manual. Slide to turn the feed dogs off so this doesn’t bother the button sewing.
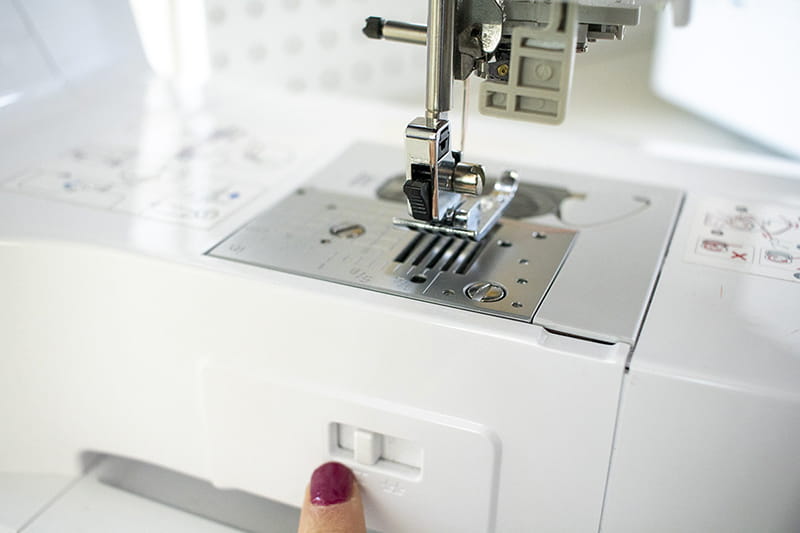 Place your project with the button under the button foot. Turn the hand wheel on the side to check the needle placement. You can adjust the button stitching width with the settings on your machine if needed.
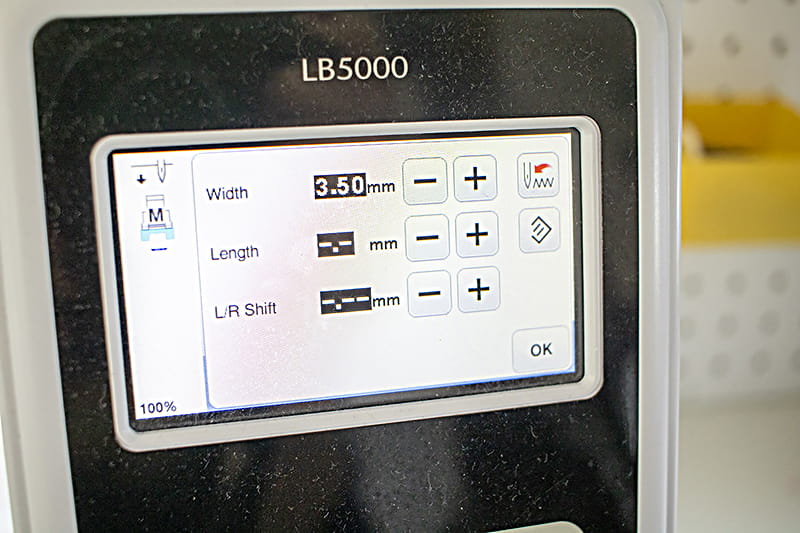 After you are sure that the needle placement is correct, step on the pedal to stitch the button in place. AMAZING! I’m simply blown away at how easy this whole process is.
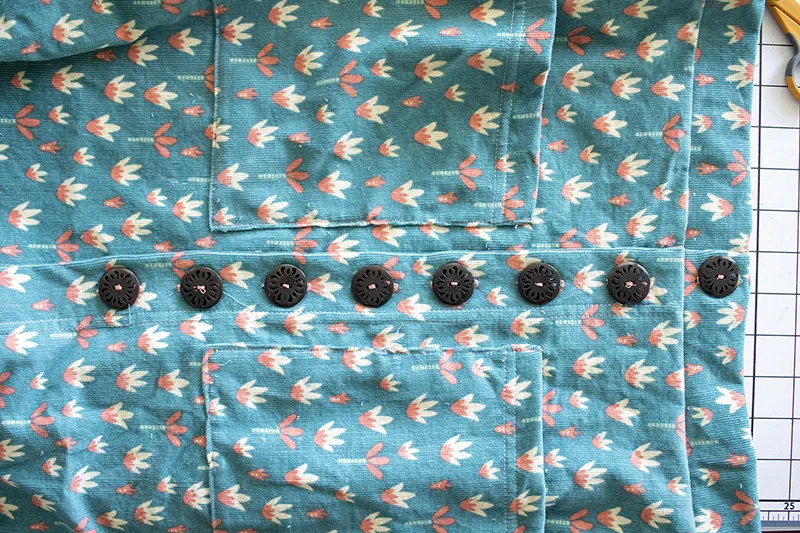
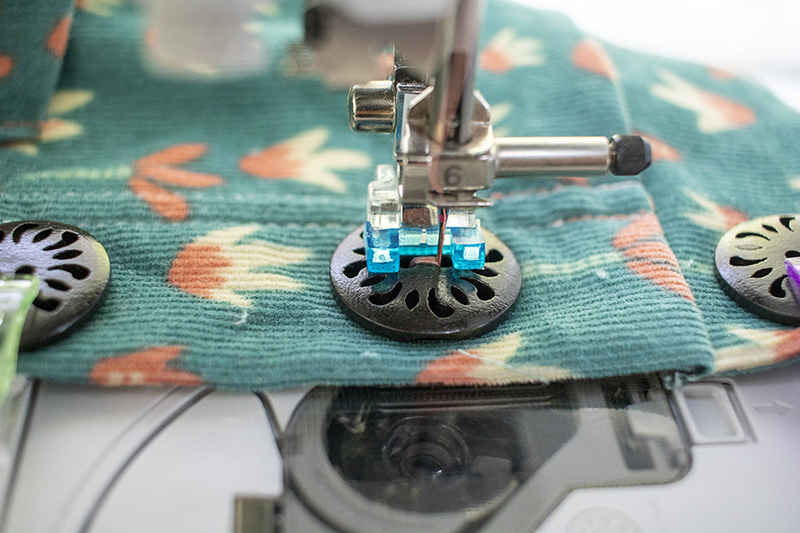 Continue stitching each button in place until your project is finished. There is no need to fear buttonholes anymore. Grab your Brother sewing machine and practice up so you are ready for your next button project.
 ***{Use video in post wherever you want}***
, but most Brother machines will have these capabilities. Check your machine manual for exact information on your specific device.
Create Easy Buttonholes-
To make simple machine buttonholes, you will need your Brother machine with buttonhole foot. Notice the green and red lines marking the foot. We will use these later to line up the fabric under the foot.
To get the size of the buttonhole perfect for your buttons, take one button and place it in the back of the buttonhole foot. Squeeze the button tight into the foot.
{tip: always do a practice hole on a scrap of fabric. I often have to remove the button and make the hole one “click” smaller on the buttonhole foot.}
Install the foot on your machine like any other foot. Lower the buttonhole lever all the way to the foot.
Mark the buttonhole placement on your fabric. Select your buttonhole style on your machine stitches. I’m using the standard rectangle buttonhole for this post.
Slide your fabric under the foot and line up the mark of the button end of your placement marking with the lines on the foot. The button end of your marking should be centered in the three red lines on the foot. The green will stay with the button of the foot, while the red marks will move with the stitches.
While sewing your buttonhole, keep the speed consistent with your presser foot. I like to use a medium fast speed while sewing for best buttonhole sewing.
I like to place a pin at the top of the buttonhole and then slice up from the bottom with a seam ripper to open each hole. The pin stops the blade from slicing the top of the stitches (and I have done that before!).
If you haven’t tried sewing buttonholes on your machine, practice a few! I bet you will be surprised with how easy it is.
Sew Buttons with a Machine -
I can’t even believe how easy it is to sew on buttons with your sewing machine. No more threading needles and tying knots - let your machine do all the work.
Start by grabbing your button foot and selecting the button stitch on your machine.
Place the button foot in place and then lower the feed dogs. Don’t know how to do this? Look on the back of your machine… Do you see this slide? If not, check your machine manual. Slide to turn the feed dogs off so this doesn’t bother the button sewing.
Place your project with the button under the button foot. Turn the hand wheel on the side to check the needle placement. You can adjust the button stitching width with the settings on your machine if needed.
After you are sure that the needle placement is correct, step on the pedal to stitch the button in place. AMAZING! I’m simply blown away at how easy this whole process is.
Continue stitching each button in place until your project is finished. There is no need to fear buttonholes anymore. Grab your Brother sewing machine and practice up so you are ready for your next button project.
***{Use video in post wherever you want}***
Tags
Shop this Project
When inspiration strikes, Brother has you covered! The products in this stylish project are available for purchase so you can click, shop, and get to sewing!

Sewing Machines
Related Projects
Stay Connected
* Required fields