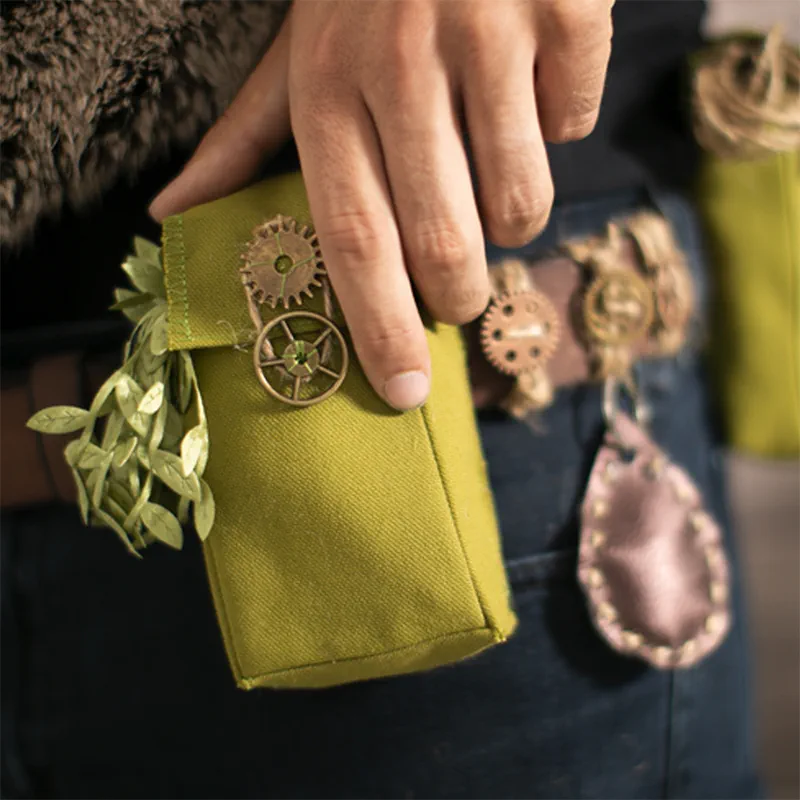
Mission Ready! Cosplay Utility Belt Pouch
With the very cool and fashionable Utility Belt Pouch, you can carry all your necessary items for your next cosplay adventure.
You will need:
- Brother Sewing machine
Use Stitch #1 on your machine. - ½ yd. fabric (we used waterproof canvas)
- Scissors
- Downloadable GenCon_blog_Pattern.pdf
- Permanent marker
and trace each piece onto fabric with permanent marker. (If you go with a darker fabric, you can use a silver marker!) Step 2. Cut out each piece and keep them separate.
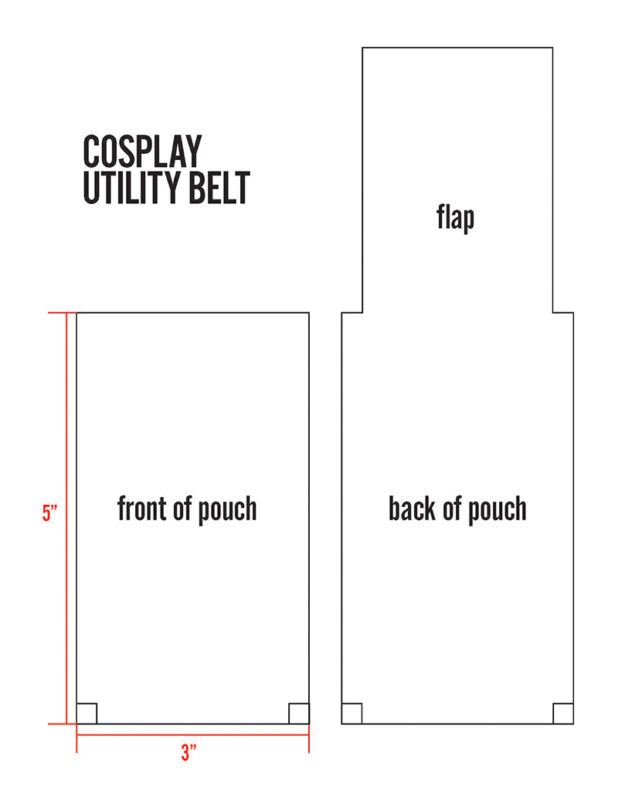
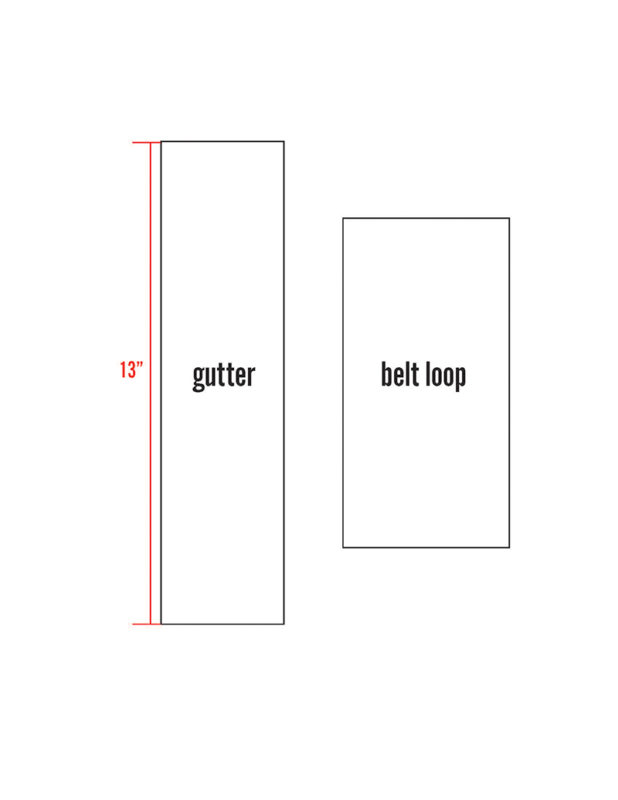 Step 3. Sew the ‘belt loop’ piece into the center of the ‘back of pouch’ piece
Note: You can make your pouch slightly larger to fit anything specific. For example, this belt is a
great way to carry around your cell phone at cons without breaking character!
Step 4. Sew the ‘gutter’ onto the back piece, with the long edge lined up with the wider corner piece of the back.
Note: The length should be 13” in order to fully cover the front and back pieces.) Leave a ¼” seam allowance.
Step 5. Snip a slit in the ‘gutter’ piece at the corners of the back panel, so that it will fold into a box shape later. Line up the corner of the back panel with the slit you just created. Sew that edge and repeat on the opposite corner.
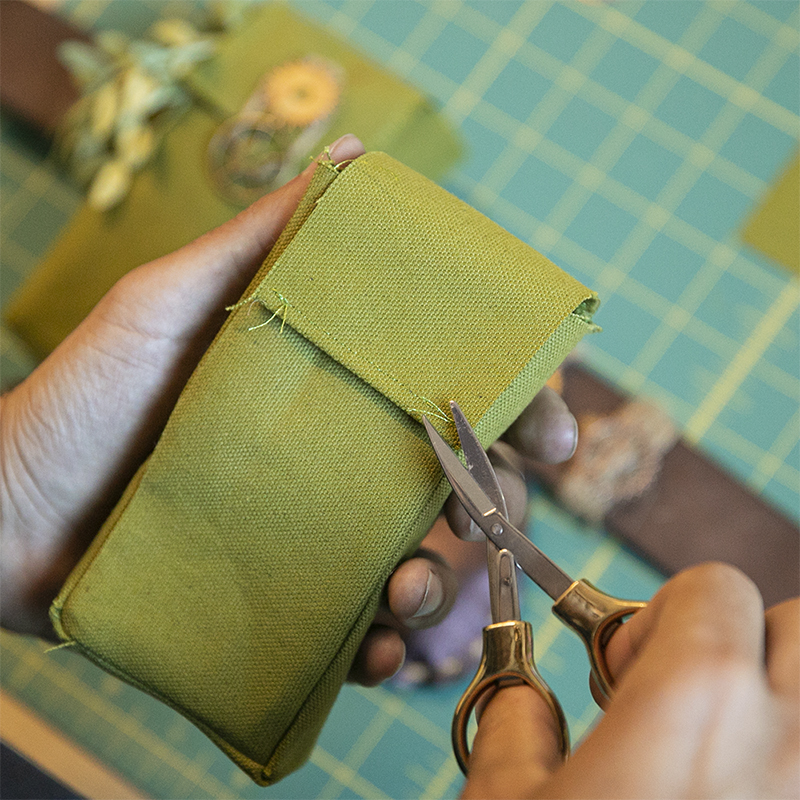
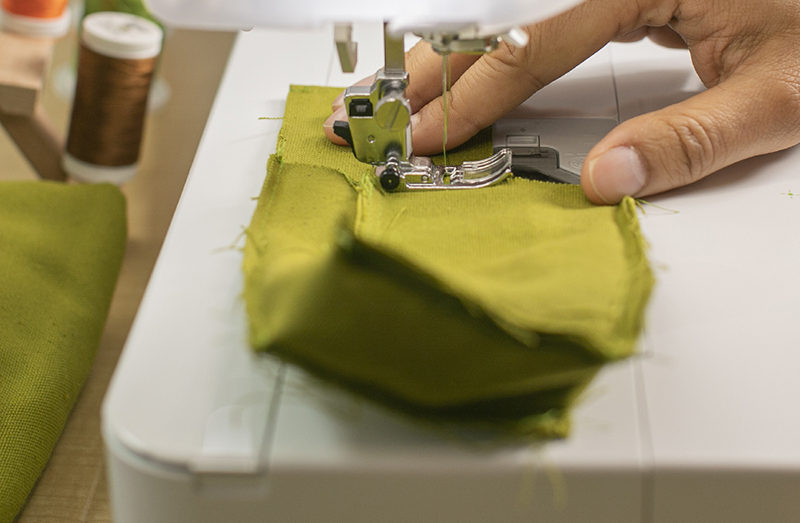 Step 6. Sew ‘gutter’ onto front piece - making sure to create slits lined up with the corners, to finish the pouch! Flip it right-side out and trim any excess threads.
 Step 7. Add decorative buttons of your choice to the front flap edge and front body of the pouch. Add some twine to secure it during your adventures.
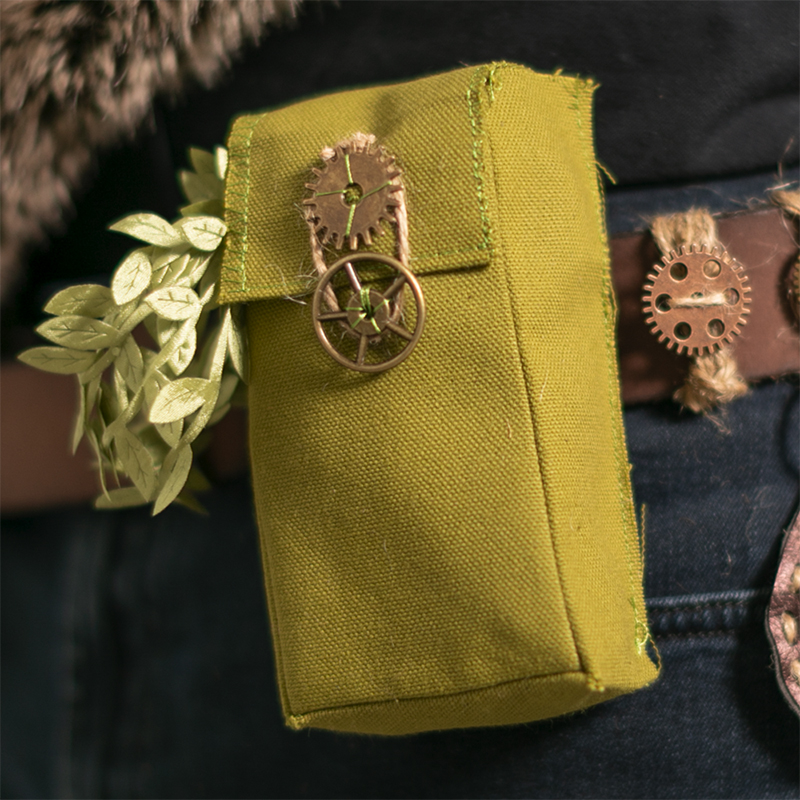 Step 8. Now you’re ready for your next mission! Repeat these steps to create as many pouches as you want for your utility belt.
