Sewing Hexagons – The Dreaded Y Seam
So, okay, I have to be honest. I’m totally one of those guys that doesn’t read instructions. Like I like to just get into something and see if I can figure it out on my own. I mean, I wouldn’t like try to change the alternator in my car or anything. But if it’s something that I think my brain is equipped for, I prefer to just dive right in. The same is true for sewing and, in this case, machine piecing hexagons together.
Before this, I had sewn y-seams before, but they weren’t ever the shining moment in a project. So, in my head, I figured that if I constructed a quilt primarily using said y-seams then I’d get pretty good by the end. I call this a skill-development project. And since sharing is caring and stuff, this post is dedicated to showing you where my brain landed on the process.
 Once all of the columns of hexagons were sewn together, I pressed all seams open and the adventures of machine sewing y-seams began. As long as you cut all the hexagons the same size, geometry should do its job and all corners and seams should match up. When I first started sewing the columns, together, I would mark the corner I was sewing on each hexagon to make sure that it matched up correctly with it’s partner seam.
 Then, using a ¼” foot, sew the sides of the hexagons together until the needle reaches the middle of the seam. (If the seam is not visible because it is on the bottom, go slowly and lift the top hexagon corner until you see it reach the seam.)
 With the needle down, line up the next two sides and repeat. (Sometimes the fabric around the needle will bunch up as you line up the sides. Using tweezers to pull the bunch from under the path of the next needle pass worked like a charm for me.)
 Once I was done sewing all the hexagons together, I alternated pressing a full length of seams from one side to the other and then pressed everything super flat on the top.
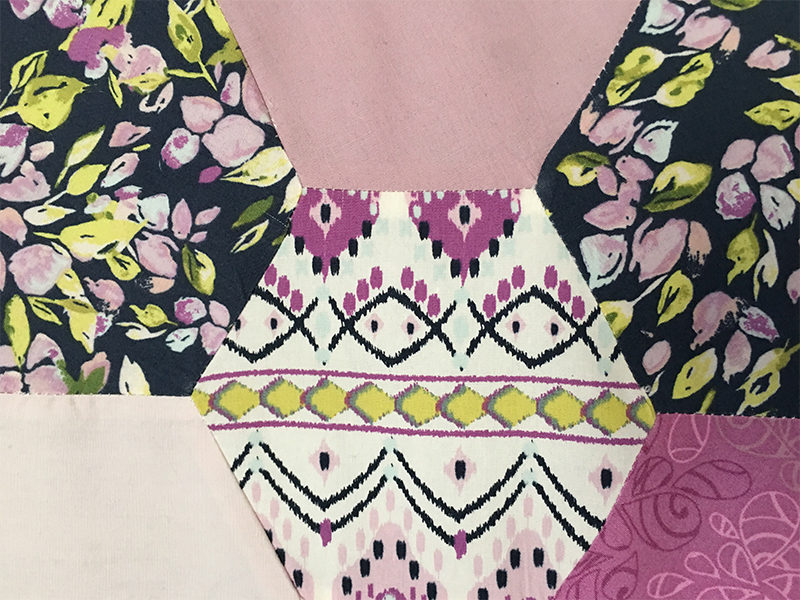 So yaaaaaaaaay! The dreaded Y-seam has been conquered. And like this is where my no-instruction-reading self landed after one crash course, so if y’all have any other tips of sewing Y-seams, please share in the comments and I totally promise to read them.

How I Do My Y-Seams
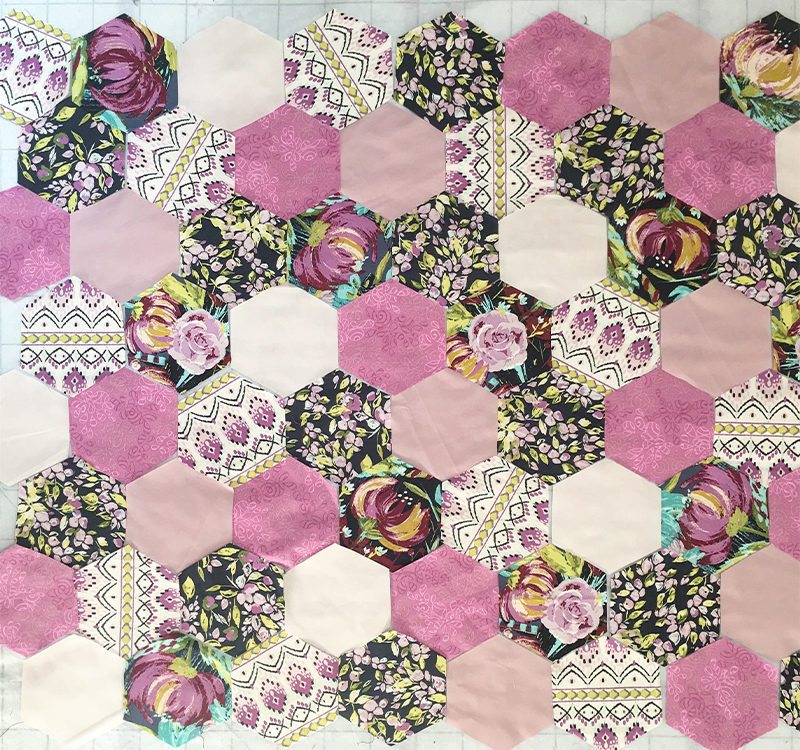
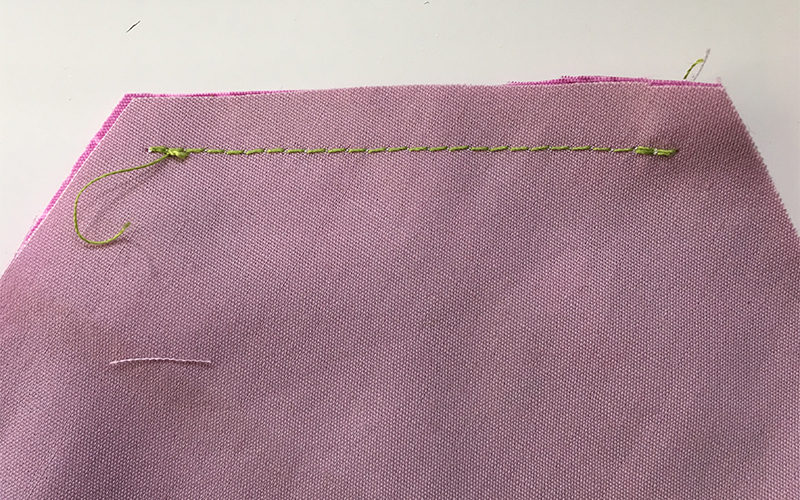
Using a ¼” seam allowance, I began by sewing each vertical column together (see layout above), basically sewing the bottom of the top hexagon to the top of the hexagon directly underneath. A trick I learned was to begin and end the stitch ¼” from the edges also making sure to secure both ends of the stitch. Once all of the columns of hexagons were sewn together, I pressed all seams open and the adventures of machine sewing y-seams began. As long as you cut all the hexagons the same size, geometry should do its job and all corners and seams should match up. When I first started sewing the columns, together, I would mark the corner I was sewing on each hexagon to make sure that it matched up correctly with it’s partner seam.
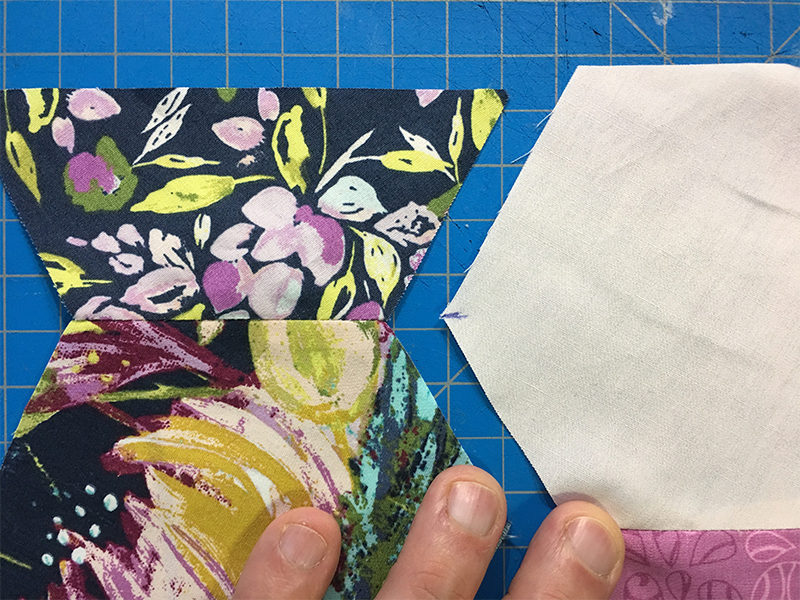
 Then, using a ¼” foot, sew the sides of the hexagons together until the needle reaches the middle of the seam. (If the seam is not visible because it is on the bottom, go slowly and lift the top hexagon corner until you see it reach the seam.)
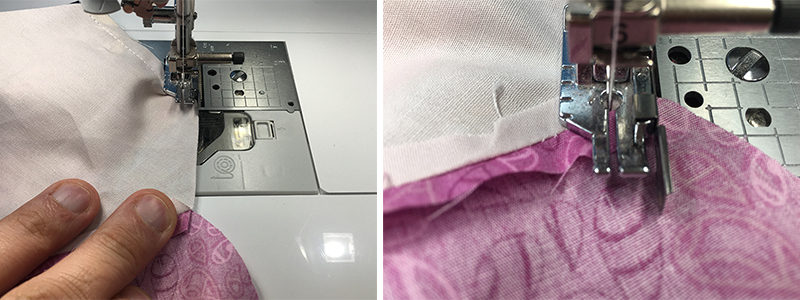
 With the needle down, line up the next two sides and repeat. (Sometimes the fabric around the needle will bunch up as you line up the sides. Using tweezers to pull the bunch from under the path of the next needle pass worked like a charm for me.)
 Once I was done sewing all the hexagons together, I alternated pressing a full length of seams from one side to the other and then pressed everything super flat on the top.
 So yaaaaaaaaay! The dreaded Y-seam has been conquered. And like this is where my no-instruction-reading self landed after one crash course, so if y’all have any other tips of sewing Y-seams, please share in the comments and I totally promise to read them.

