Quick Tip: How To Sew Tapered Satin Stitching Using Width Control Feature
- Brother Sews Blogger

Ever wished you could easily taper your satin stitch from wide to narrow, narrow to wide, and everything in between? In this quick tip you’ll learn about temporarily setting your speed control to use it as a stitch width control for adjusting the stitch width as you sew. The following samples show how to taper a satin stitch, using it to create a simple appliqué with satin stitch accents.
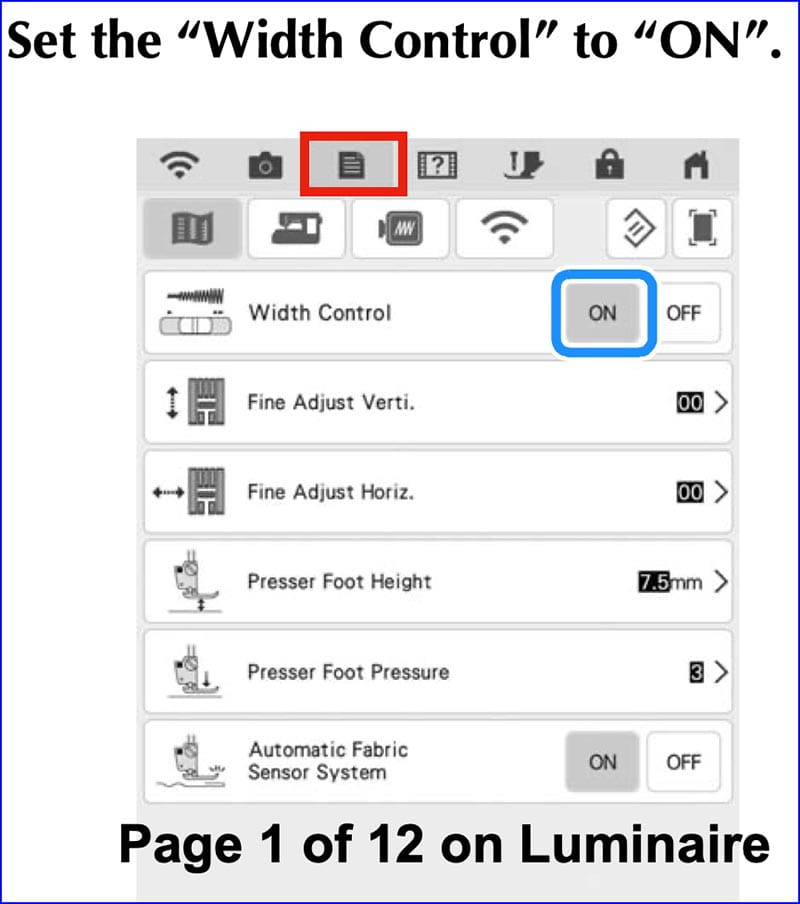
Note: The Brother Luminaire machine is featured in these samples. You’ll find the width control feature on a variety of Brother machine models. Check the setting mode page for this option. See example in Figure #1.
Steps for using Width Control for satin stitching:
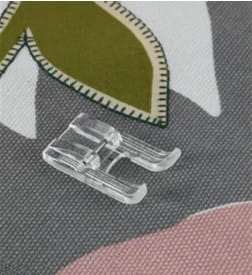
- Preparation for this sample is as follows: Attach fusible web to cotton batik, cut a leaf shape, and fuse to base fabric. Use the triple straight stitch to create veins for the leaf. Attach an open toe foot such as SA147 Clear View Open Toe foot or SA186 Metal Open Toe foot shown here.
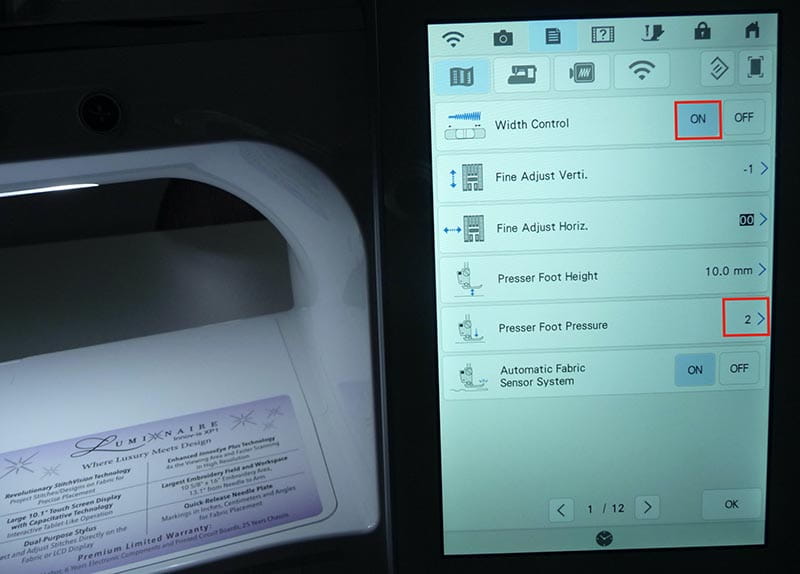
- Turn width control to “ON” in the set mode. Lighten up the presser foot pressure by setting it to 2, for more maneuverability as you sew the appliqué. See Figure #2.
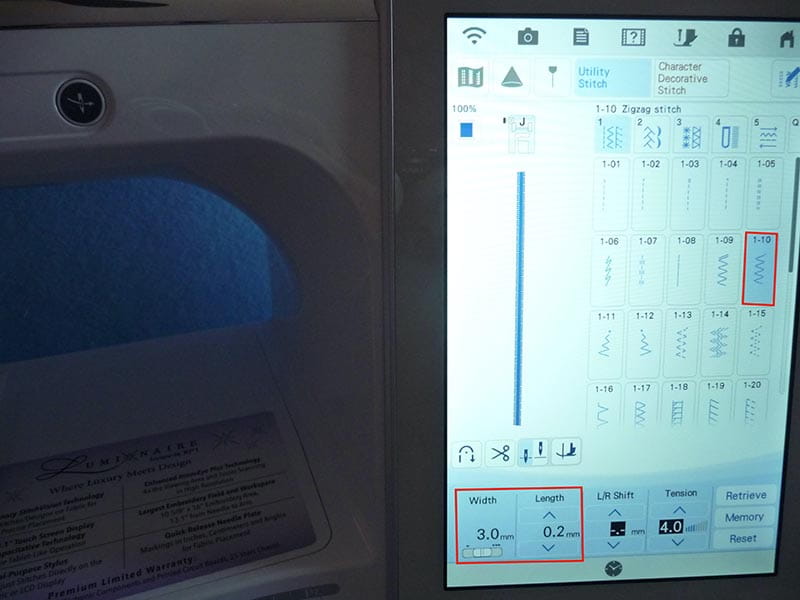
- Thread machine with decorative thread in the top and bobbin thread in the bobbin. Select a zig zag for sewing appliqué. I like a width of 3.0 and a length of 0.2 for my standard satin stitch. Loosen the upper tension a little at a time if bobbin thread shows on the top side. See basic setting in Figure #3.
- Place your thumb or finger on the speed control dial and slowly move to the left to decrease the width and to the right to increase the width. I find that I have the most control by placing my thumb on the slider, resting my other fingers on the top of the machine. When moving the slider, you’ll hear a click each time the stitch is increased or decreased by 0.5.
- Begin with settings in Figure #3 and then slowly decrease to a width of 1.5 to satin stitch over the raw edge and taper to a narrower stitch at the point of the leaf. Tip: You can also start stitching at a narrow setting and slowly increase the width. I find it easier to go from wide to narrow than from narrow to wide on an appliqué. See satin stitched leaf Figure #4a and Figure #4b.
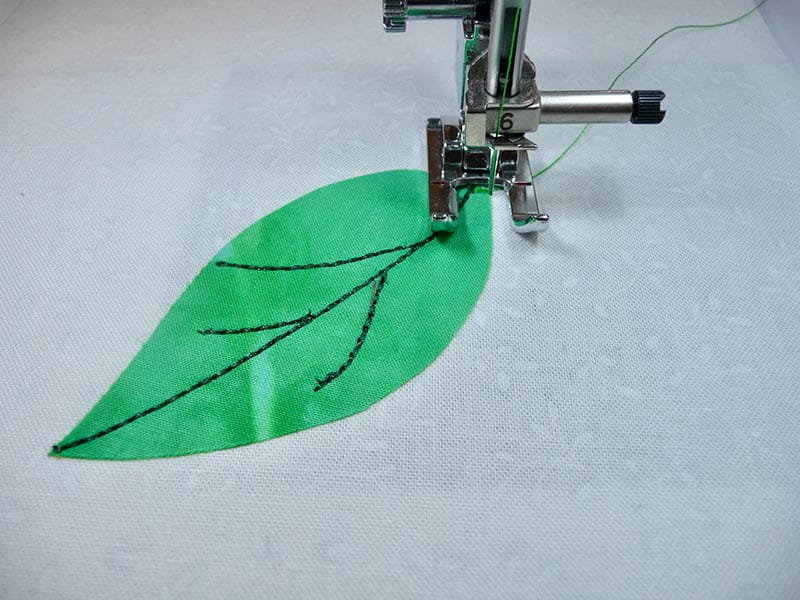
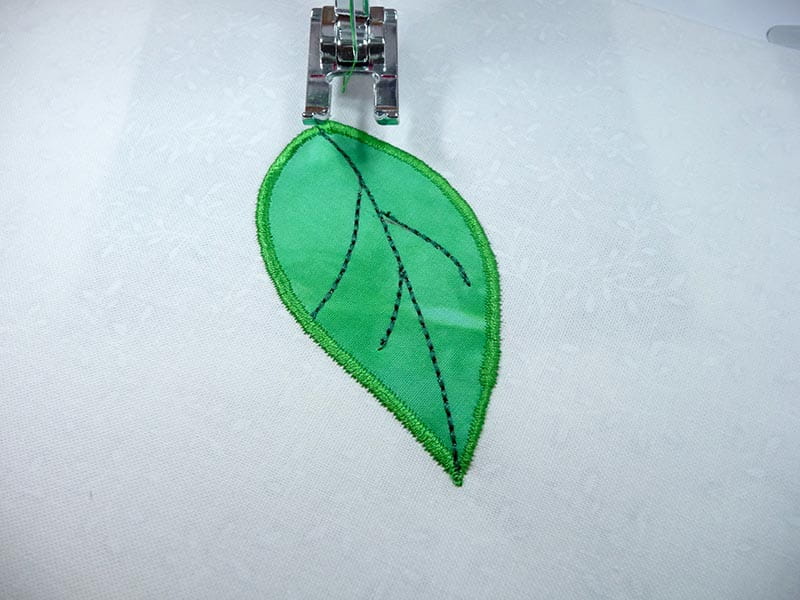
- Add tapered satin stitch stems to the leaf using the same method for increasing and decreasing the stitch as you sew. Notice how this creates a realistic look for something like leaf stems. See finished sample in Figure #5.

You can manipulate many other 7mm wide stiches using this feature. To test this feature with other stitches simply select the stitch and then move the width control to see if the stitch width changes. If it does, you are good to go and ready to sew! Enjoy playing around with this feature to give added interest to your projects!


