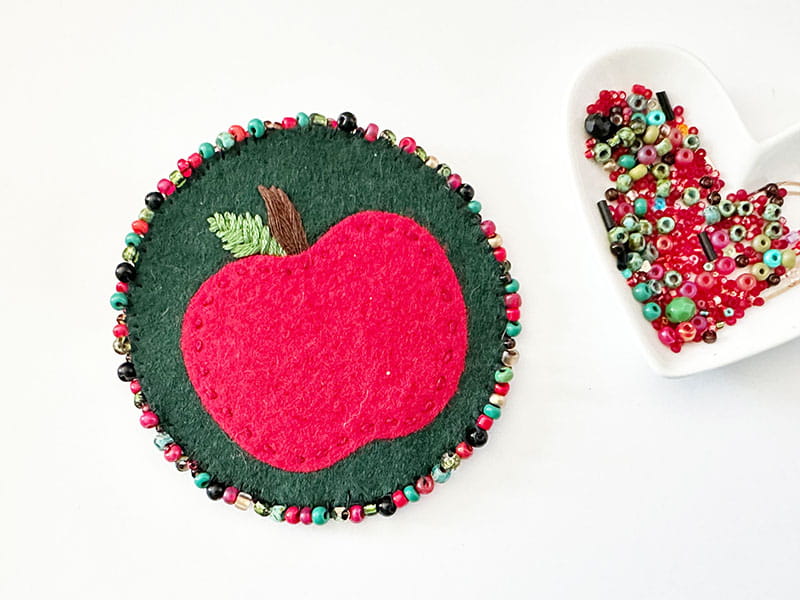
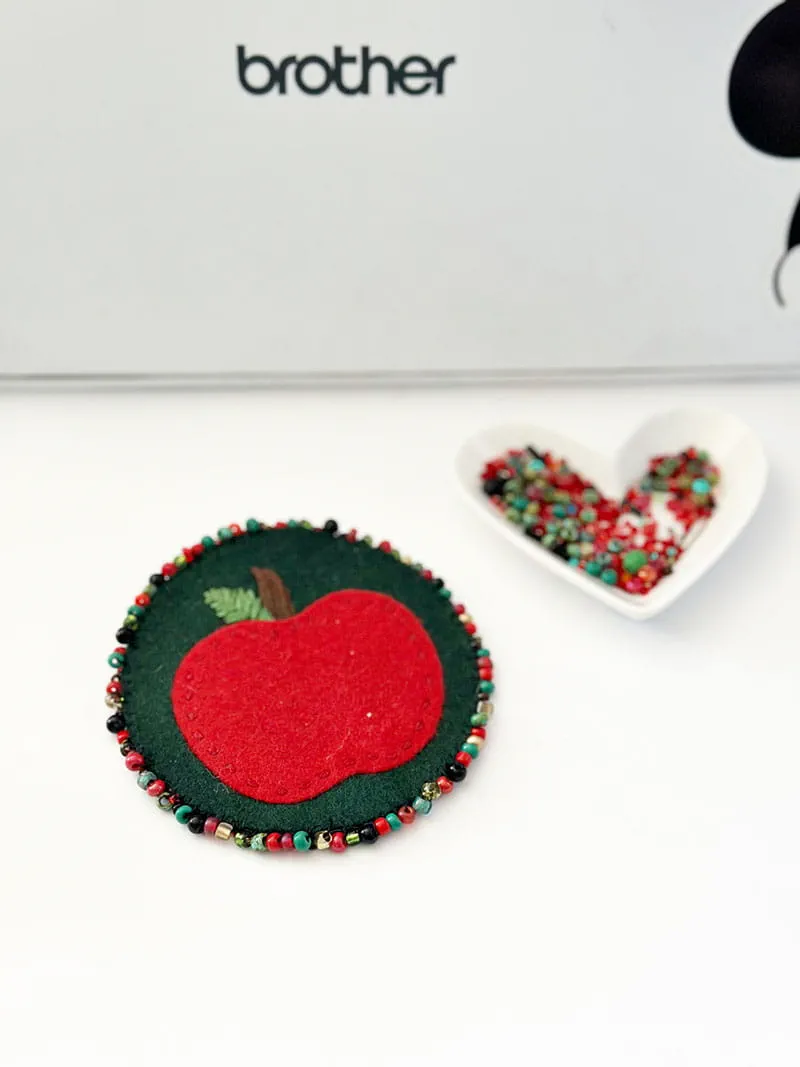
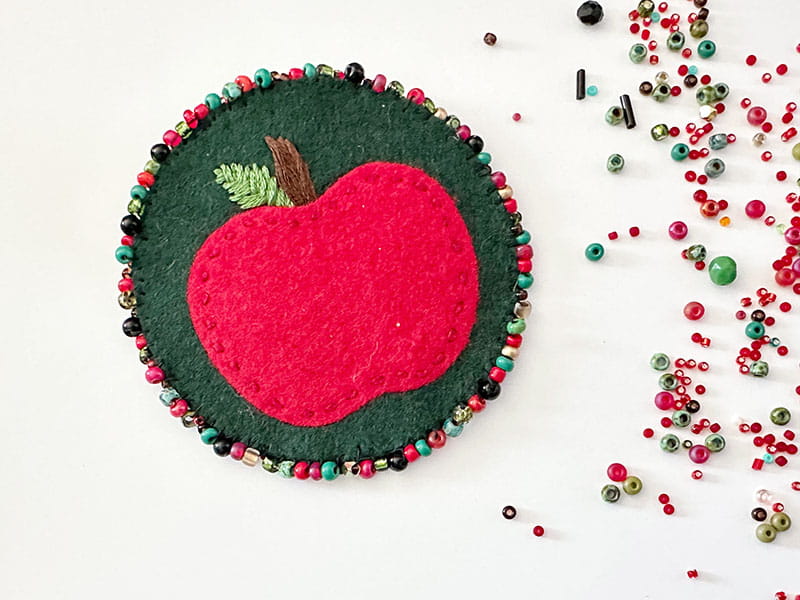
DIY Apple Pin
Supplies:
- ScanNCut DX
- Standard mat
- Felt (double-sided fusible web, like Brother Iron-on Applique Fabric Contact Sheet, optional)
- Brooch/pin backing
- Embroidery thread
- Needle
- Beads
- Iron
There is nothing like fall to inspire me and have me wanting to work with beads, felt, and stitching. What could make it better? The ScanNCut DX can do all of the hard work of cutting felt for you! All you’ll need to do is to select a shape, design, and start stitching! This project idea will work for any theme and can be done from very intricate to simple – or anything in between.
Step-by-step instructions:
- Back felt with iron-on adhesive sheet and leave the protective paper cover on. Load pieces on to a standard mat (adhesive side down). This both protects your mat from felt fibers, and makes creating your project much easier!
- Select circle pattern (two of them - 3 ½”) and then apple pattern (2 ½”) and just select the apple (not the stem) design. Scan your mat and adjust positioning to your felt pieces as needed.
- Select cut, and cut out the pieces of felt. Then remove from mat.
- Leave the paper backing on all felt except for the apple. Use iron to press and ‘glue’ to one of the rounds (iron to the side that does NOT have iron-on backing). Once cooled, remove the paper backing from the round that you have ironed together with the apple.
- Gather your needle and thread, and stitch in any style you like to both decorate and secure the apple to the round. While iron-on adhesive is good, over time and with wear it often weakens so adding some stitching will ensure your project stays beautiful for years to come!
- Once the stem and leaf have been stitched to your liking, add stitching around the outside of the apple. When you have completed any decorations and/or details for the front, then it’s time to remove the paper backing from the second round, and iron those two (iron-on adhesive sides facing each other) together. This will complete the project, and hide all of your stitching.
- If you would like to further secure the project and add detail, use thread and needle with seed beads around the edge! Simply loop through the edges, adding a bead each time and securing with your fingers to keep the bead placement steady. Need more security? You can loop a second round of thread through if needed.
Related Projects
Stay Connected
* Required fields