DIY Haunted House with ScanNCut
Suplies:
- ScanNCut DX
- Standard mat
- Craft (sticker) vinyl
- Transfer material
- Canvas board (or wood, other material)
- Acrylic paint
- Adhesive
- (Optional) Embellishments to complete
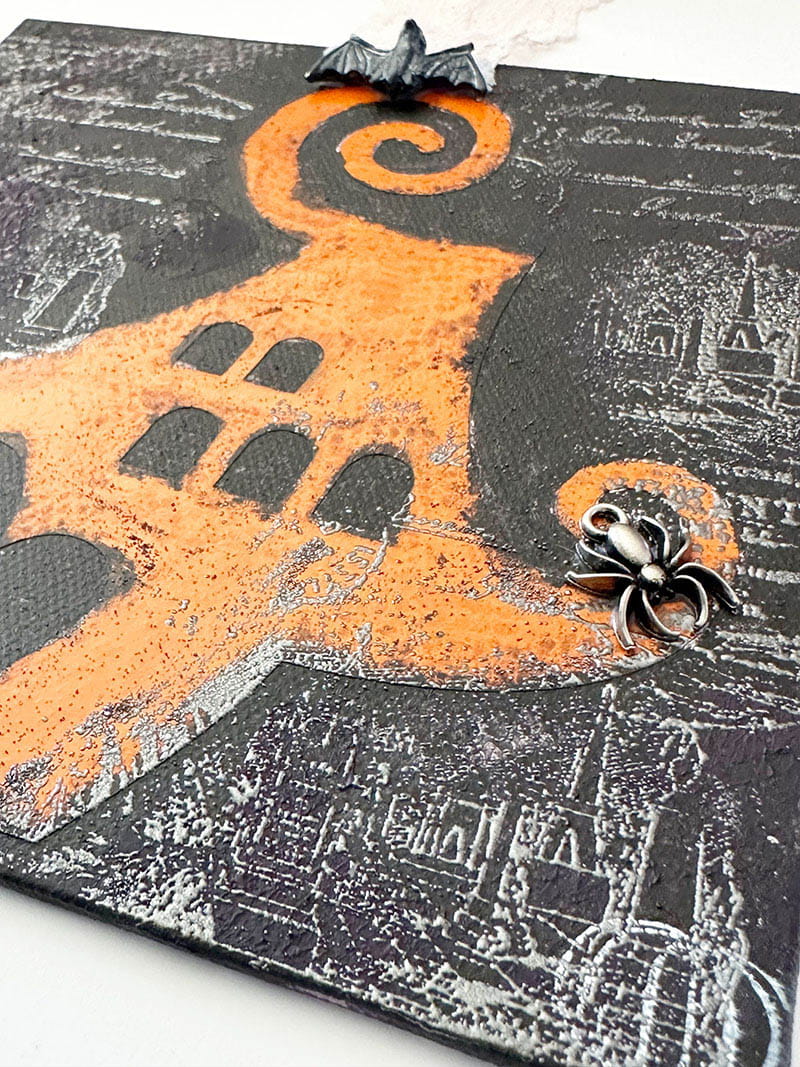
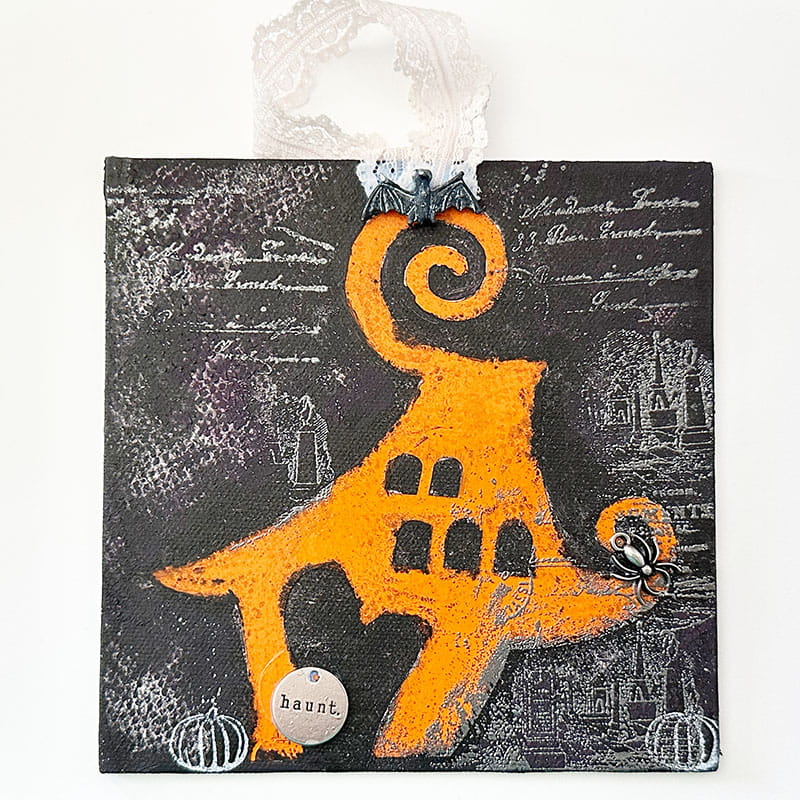
When it comes to Halloween décor from the big to the small – it’s all a lot of fun to make! Using the Brother Artspira app, you can find extra inspiration to use on your ScanNCut DX – and new ways to inspire creative projects. For this project I blended paints, vinyl, and the coolest little haunted house for some custom wall décor. There are endless options – I chose a grungy, aged look, and it couldn’t be easier.
Step-by-step instructions:
- Select your Artspira design (haunted house), and transfer to ScanNCut DX machine.
- Retrieve the data (cloud icon, top right) and do any re-sizing or editing needed for your design. Tip: Working with smaller pieces of material? Just click scan so that you can see your material and decide where to perfectly place your design.
- Select cut (and ensure half cut is enabled) and cut out your haunted house design from sticker vinyl.
- Weed out all excess vinyl and transfer your design to transfer material, pressing firmly until it smoothly is moved.
- Center and place design onto canvas board (or other base), lifting off transfer material carefully.
- Use various colors of acrylic paint and coat the whole surface, blending and mixing as you like. Blot off excess and repeat until desired depth, texture, and color pattern is achieved. For the house, use a wet paintbrush or cotton swab to moisten the house area, then blot with paper towel or cloth to remove some paint. To remove all the paint, repeat and work carefully. Leaving a little paint will create an aged and funky effect we are going for here.
- To add more texture and dimension, stamp or stencil designs onto the background area. This can be achieved with paint, ink, or even embossing. To emboss apply the ink to your design and press, then coat in embossing powder. Shake off and heat set to finish the embossing process.
- Finish the project by adding any buttons, charms, metal accents, or other embellishments to the piece with hot glue or strong liquid adhesive.
Related Projects
Stay Connected
* Required fields