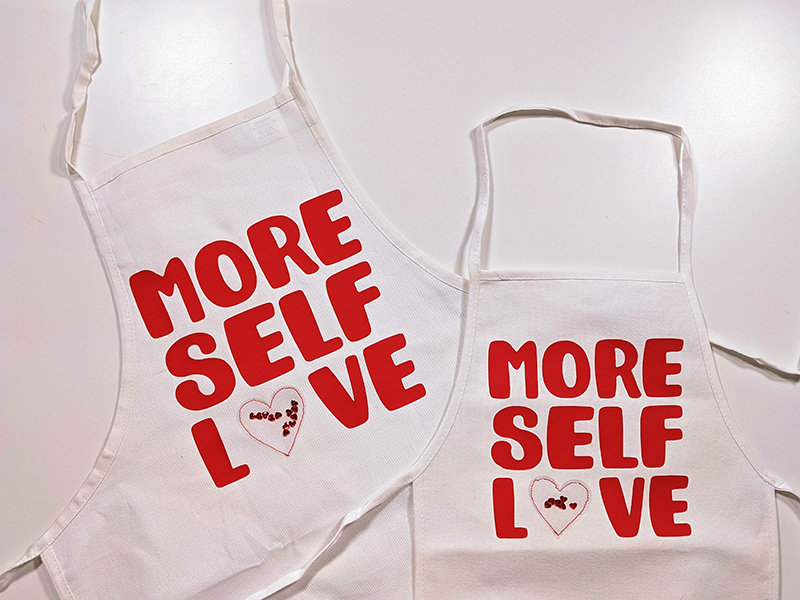
Stylin' Heart Inspired Apron
Hi all, I’ve created a new project this month for you and your mini. It’s a fun apron that you can make with your child while you are having fun bonding.
 Processed with VSCO with g6 preset[/caption]
1. Download and save the ‘MORE SELF LOVE’ file to a thumb drive
2. Place the thumb drive into your Brother ScanNCut and retrieve that file.
3. Adjust the size of the file based on how big or small you want the design to look on the front of your apron.
4. Prior to cutting out the design, make sure you set your cut to ‘half cut’ and test. If your test cut comes out perfectly (which means not cutting the vinyl all the way through), proceed to cutting the full design. If your test cut did not come out properly, make necessary adjustments.
5. To cut out the heart, find the shape of a heart online and adjust it to the height and width that coordinates with the letters you previously cut.
6. Remember, be sure to turn off ‘half cut’ and test cut the vinyl fabric prior to cutting your design.
7. Once all your pieces are cut, set them aside.
8. With a warm iron, iron your apron and remove all wrinkles and creases.
9. Place your ‘MORE SELF LOVE’ vinyl onto your apron with the clear plastic facing up and vinyl facing your apron.
10. Place a towel or cotton fabric on top of your vinyl.
11. With a hot iron and no steam, press your image into the apron. Press and move the iron every 10 seconds.
12. Check to see if the vinyl has attached to the apron by lifting up the clear film. If it has not, continue to press. When the vinyl has attached, remove the towel and clear film.
13. Moving on to the fabric vinyl, stitch the vinyl heart ¾ closed in its place between the letter ‘l’ and ‘v’. (Note: If your sewing foot is sticking to the vinyl, use a nonstick sewing foot.) I personally didn’t have any issues using my regular sewing foot.
14. When the heart is stitch closed ¾ of the way, slide in some gem stones or crystals through the opening. Slide the crystals to the opposite end of the heart making sure to clear the way for the sewing foot to stitch it closed completely.
[caption id="attachment_23944" align="aligncenter" width="600"]
Processed with VSCO with g6 preset[/caption]
1. Download and save the ‘MORE SELF LOVE’ file to a thumb drive
2. Place the thumb drive into your Brother ScanNCut and retrieve that file.
3. Adjust the size of the file based on how big or small you want the design to look on the front of your apron.
4. Prior to cutting out the design, make sure you set your cut to ‘half cut’ and test. If your test cut comes out perfectly (which means not cutting the vinyl all the way through), proceed to cutting the full design. If your test cut did not come out properly, make necessary adjustments.
5. To cut out the heart, find the shape of a heart online and adjust it to the height and width that coordinates with the letters you previously cut.
6. Remember, be sure to turn off ‘half cut’ and test cut the vinyl fabric prior to cutting your design.
7. Once all your pieces are cut, set them aside.
8. With a warm iron, iron your apron and remove all wrinkles and creases.
9. Place your ‘MORE SELF LOVE’ vinyl onto your apron with the clear plastic facing up and vinyl facing your apron.
10. Place a towel or cotton fabric on top of your vinyl.
11. With a hot iron and no steam, press your image into the apron. Press and move the iron every 10 seconds.
12. Check to see if the vinyl has attached to the apron by lifting up the clear film. If it has not, continue to press. When the vinyl has attached, remove the towel and clear film.
13. Moving on to the fabric vinyl, stitch the vinyl heart ¾ closed in its place between the letter ‘l’ and ‘v’. (Note: If your sewing foot is sticking to the vinyl, use a nonstick sewing foot.) I personally didn’t have any issues using my regular sewing foot.
14. When the heart is stitch closed ¾ of the way, slide in some gem stones or crystals through the opening. Slide the crystals to the opposite end of the heart making sure to clear the way for the sewing foot to stitch it closed completely.
[caption id="attachment_23944" align="aligncenter" width="600"]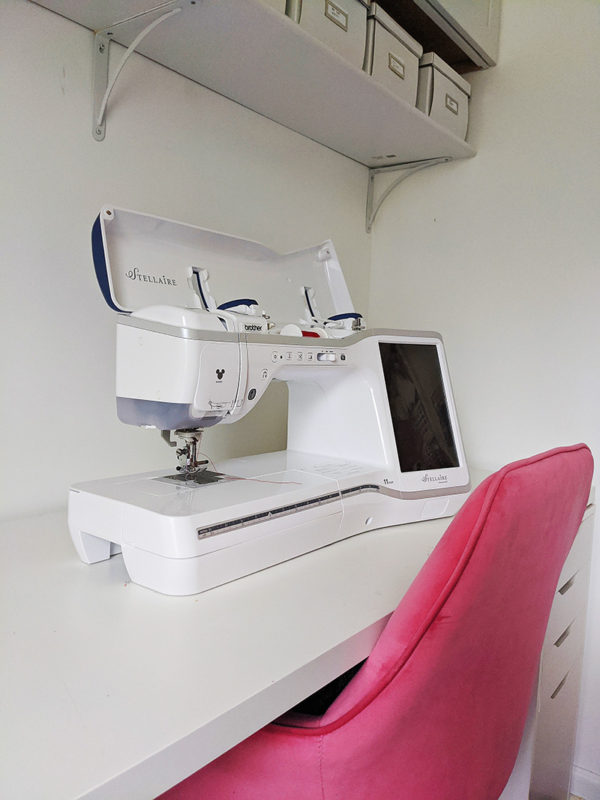 Processed with VSCO with s3 preset[/caption]
15. Once, the crystals are placed inside, stitch closed.
16. You’re finished!
https://youtu.be/xkV728TzCP8
Stylin’ Heart Inspired Apron _Stitching Sewcial.pdf
Processed with VSCO with s3 preset[/caption]
15. Once, the crystals are placed inside, stitch closed.
16. You’re finished!
https://youtu.be/xkV728TzCP8
Stylin’ Heart Inspired Apron _Stitching Sewcial.pdf
Materials:
- Blank Canvas aprons (your choice of color)
- ScanNCut DX
- Brother
Sewing Machine - Red vinyl
- Red thread
- Red crystals
- Iron + Ironing Board
- Clean towel or cotton fabric
- MoreSelfLove.fcm
Processed with VSCO with g6 preset[/caption]
1. Download and save the ‘MORE SELF LOVE’ file to a thumb drive
2. Place the thumb drive into your Brother ScanNCut and retrieve that file.
3. Adjust the size of the file based on how big or small you want the design to look on the front of your apron.
4. Prior to cutting out the design, make sure you set your cut to ‘half cut’ and test. If your test cut comes out perfectly (which means not cutting the vinyl all the way through), proceed to cutting the full design. If your test cut did not come out properly, make necessary adjustments.
5. To cut out the heart, find the shape of a heart online and adjust it to the height and width that coordinates with the letters you previously cut.
6. Remember, be sure to turn off ‘half cut’ and test cut the vinyl fabric prior to cutting your design.
7. Once all your pieces are cut, set them aside.
8. With a warm iron, iron your apron and remove all wrinkles and creases.
9. Place your ‘MORE SELF LOVE’ vinyl onto your apron with the clear plastic facing up and vinyl facing your apron.
10. Place a towel or cotton fabric on top of your vinyl.
11. With a hot iron and no steam, press your image into the apron. Press and move the iron every 10 seconds.
12. Check to see if the vinyl has attached to the apron by lifting up the clear film. If it has not, continue to press. When the vinyl has attached, remove the towel and clear film.
13. Moving on to the fabric vinyl, stitch the vinyl heart ¾ closed in its place between the letter ‘l’ and ‘v’. (Note: If your sewing foot is sticking to the vinyl, use a nonstick sewing foot.) I personally didn’t have any issues using my regular sewing foot.
14. When the heart is stitch closed ¾ of the way, slide in some gem stones or crystals through the opening. Slide the crystals to the opposite end of the heart making sure to clear the way for the sewing foot to stitch it closed completely.
[caption id="attachment_23944" align="aligncenter" width="600"] Processed with VSCO with s3 preset[/caption]
15. Once, the crystals are placed inside, stitch closed.
16. You’re finished!
https://youtu.be/xkV728TzCP8
Stylin’ Heart Inspired Apron _Stitching Sewcial.pdfRelated Projects
Stay Connected
* Required fields