Newbie Sewing Zipper Bag Project
Looking for a fun zipper bag sewing project that even a sewing newbie could finish? Well, look no further! Here we have a fun zipper bag project from a recent Lunch and Learn event that took place at the Brother HQ.
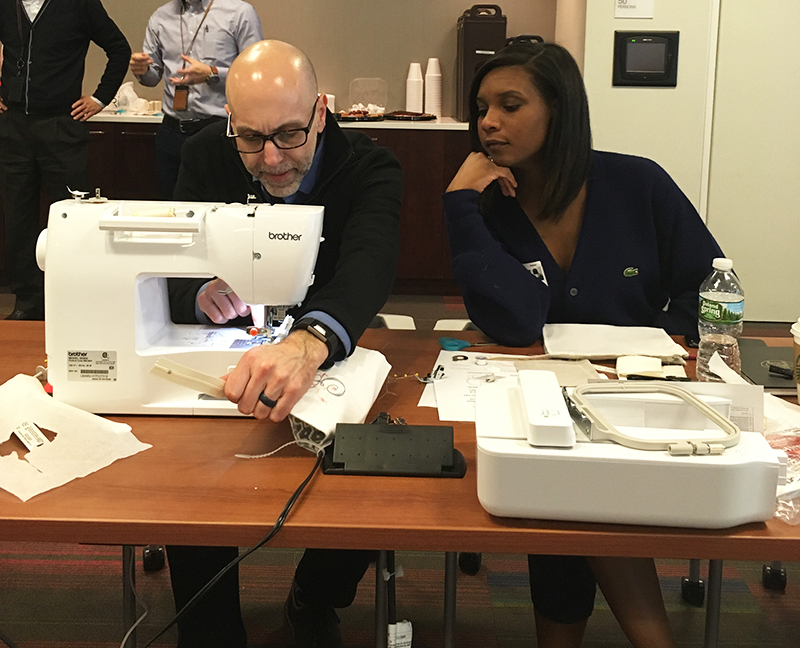
The Lunch and Learn featured several Brother sewing Educators who were on hand to talk about the different characteristics of the many Brother sewing and embroidery machines
we had on hand for the class and to also walk us through a fun (I mean 'daunting'), zipper bag project. Their mission was to give us some real hands-on sewing and embroidery experience in a calm, relaxed atmosphere. These folks look relaxed, right?
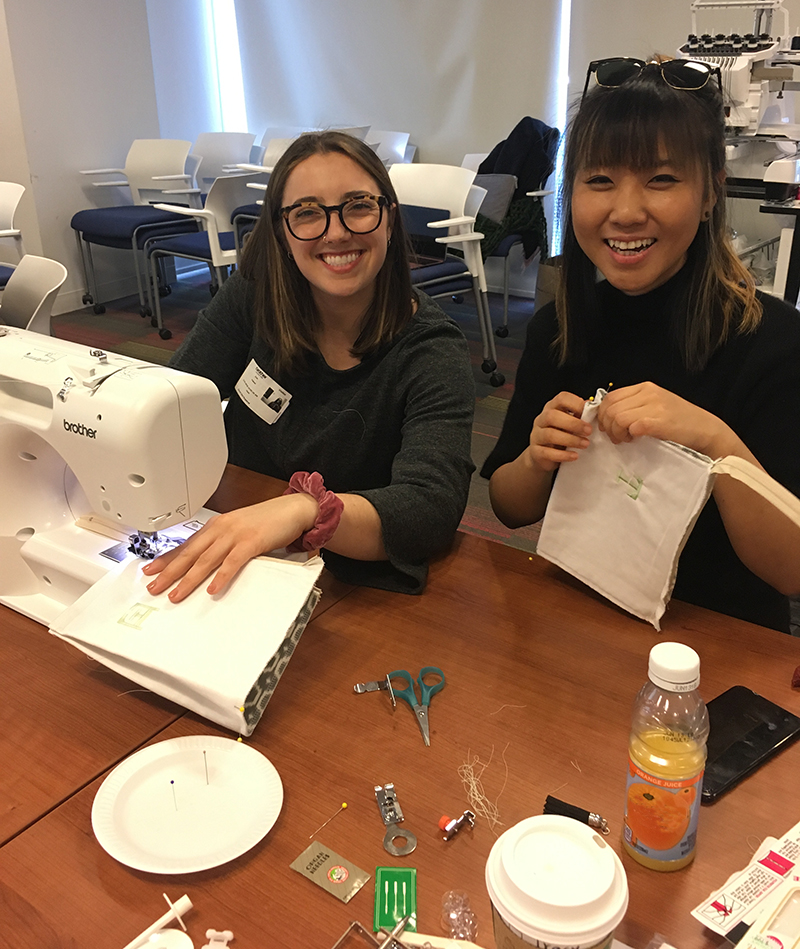 How'd it go? Well, in the beginning, there was a small number of 'oh no's' mumbled, but by the afternoon, there were certainly more 'ah-ha's,' than 'oh no's' being heard. In the end, we sewing-newbies had the chance to see what creative sewers have known all along - sewing is pretty cool.
 Check out the Zipper Bag Project below!
Supplies:
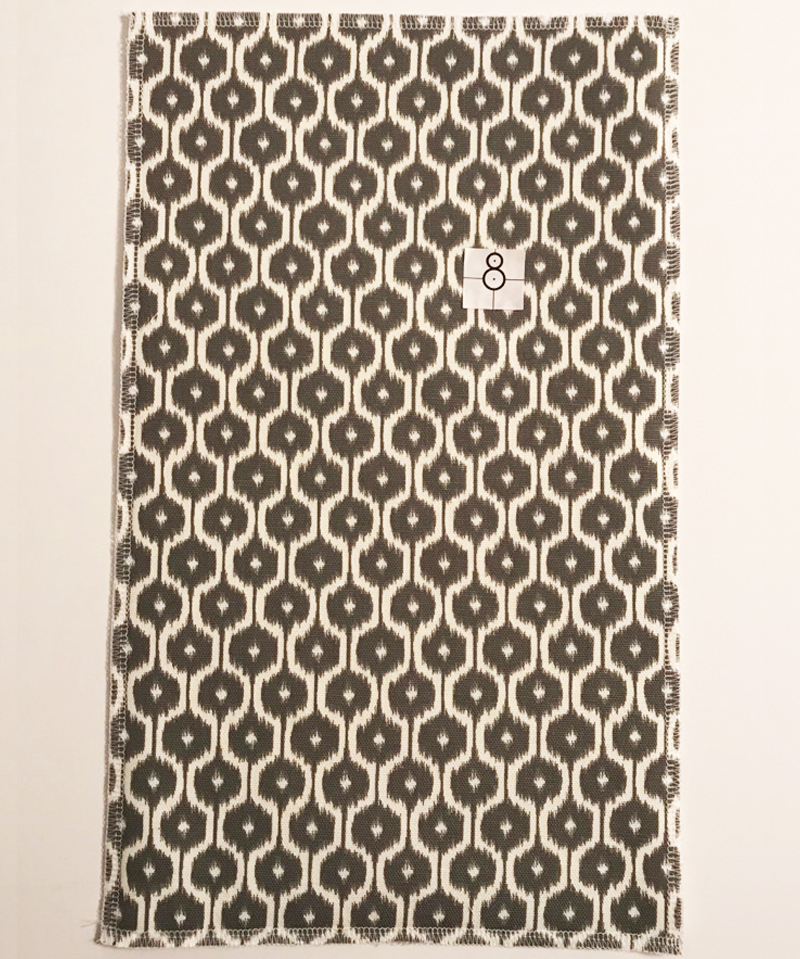
- One piece 15" L x 9" W outer fabric
- One piece 15" L x 9" W fusible fleece
- One piece 15" L x 9" W lining fabric
- One 12" zipper
- One decorative zipper pull
Preparations:
- Apply fusible fleece to the wrong side of the outer fabric following manufacturer’s instructions.
- Layer lining fabric on top of fleece with right side facing out.
- Serge around all four sides to keep the layers together and finish the edges.
- If you do not have a serger, you can use a zigzag stitch on your sewing machine instead.
Note: As the bag is constructed, you will treat the outer fabric and lining as one. This alternative method for lining a bag saves time and steps.
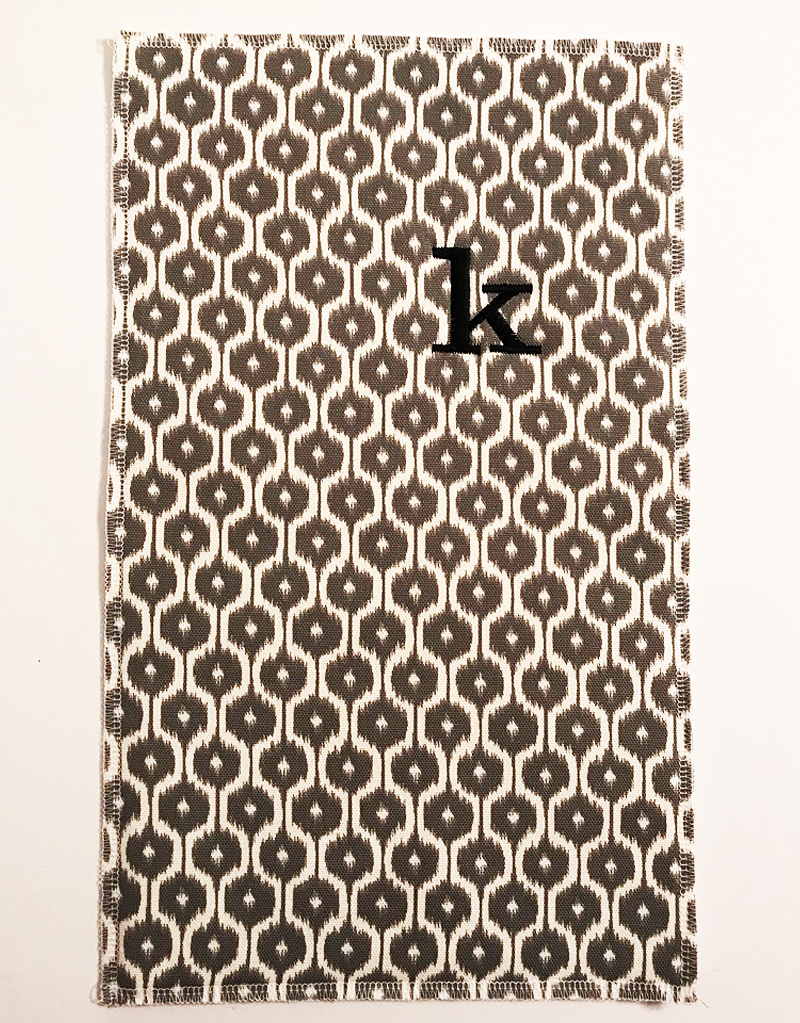
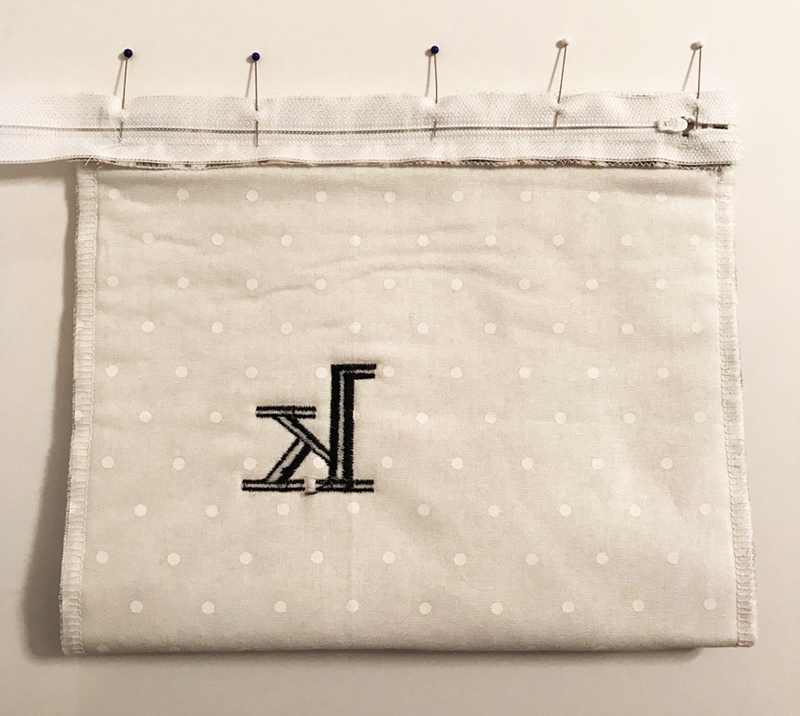
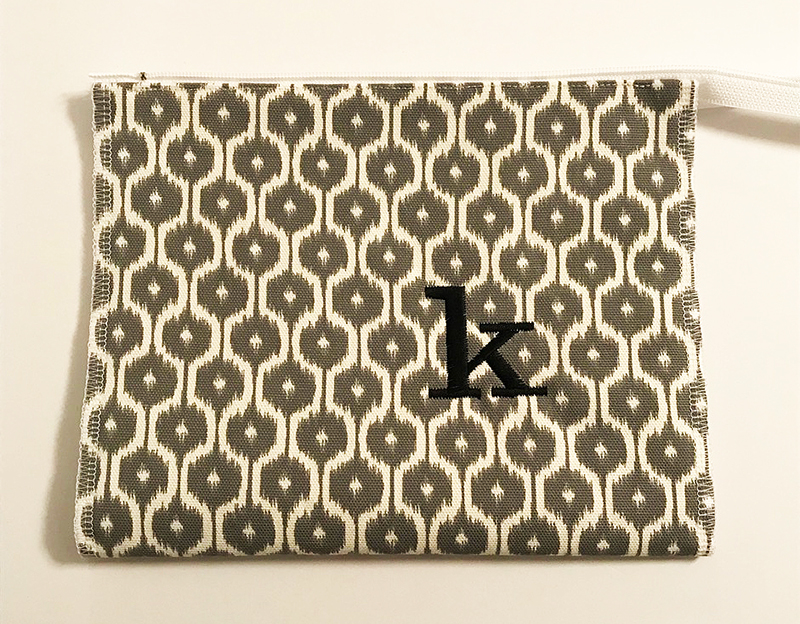
- Embroidery Placement
- Outer fabric facing up
- 4¼" down from top short edge
- 3" in from right long edge
- Choose a single letter monogram from the available built-in embroidery fonts If possible resize to approximately 1¾" tall.
- Hoop stabilizer and fabric, making sure placement mark is in center of embroidery area.
- Stitch the design.
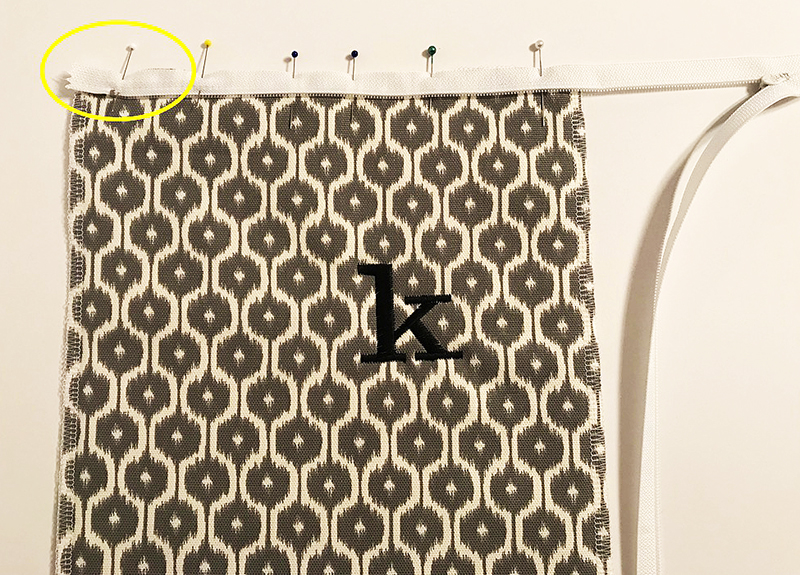
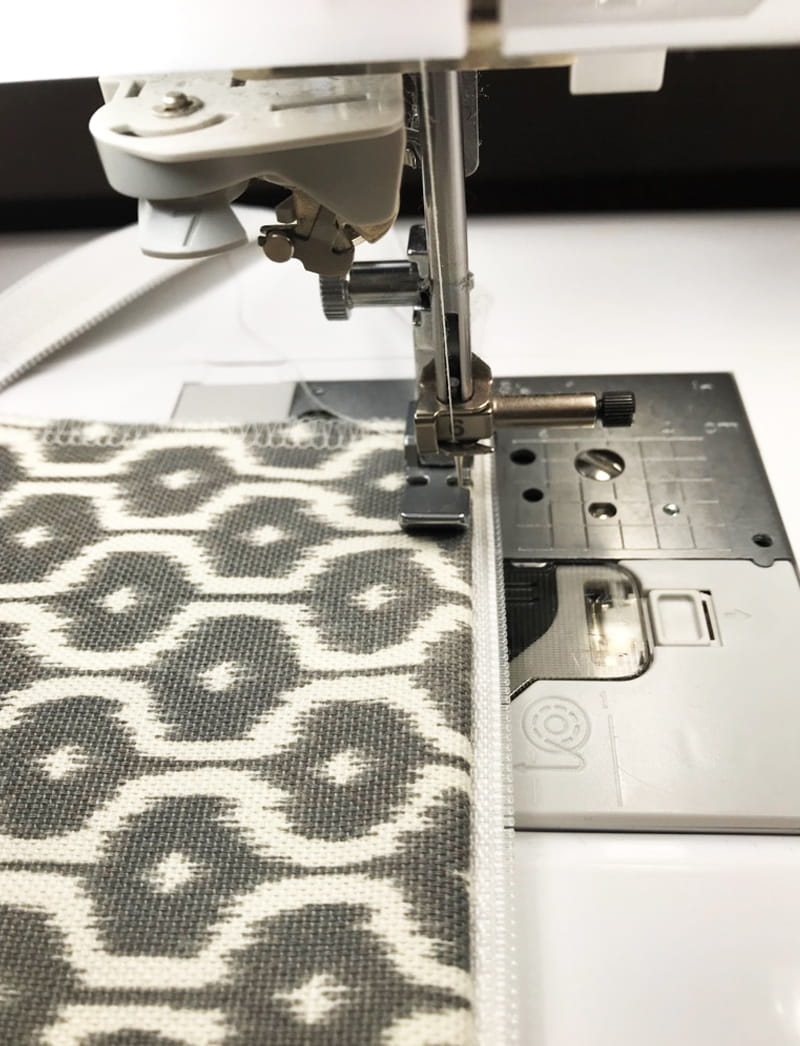
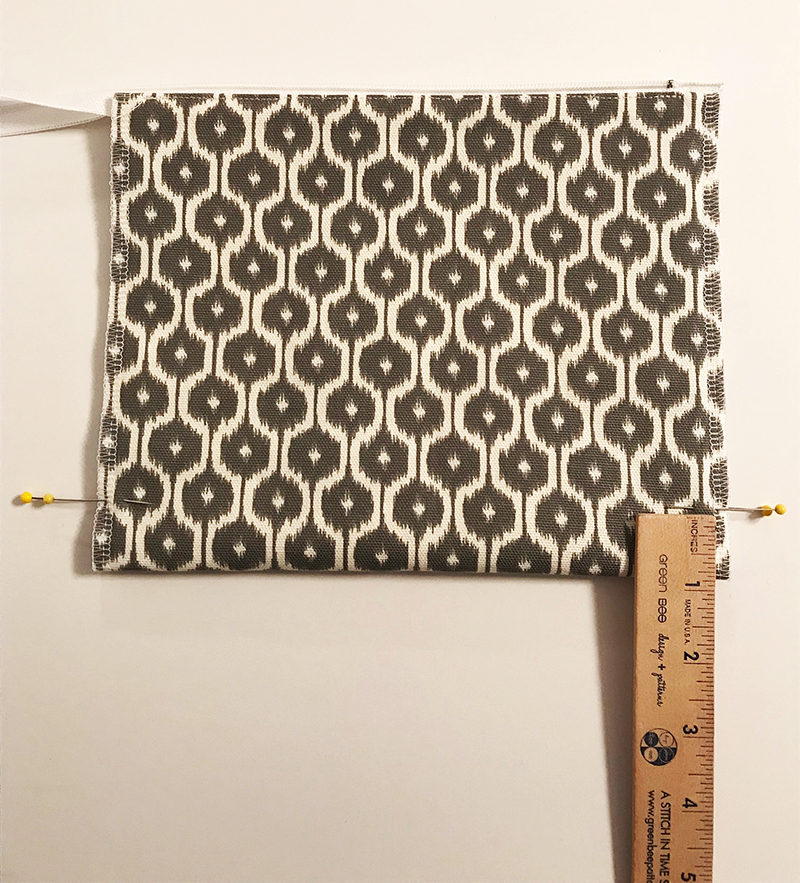
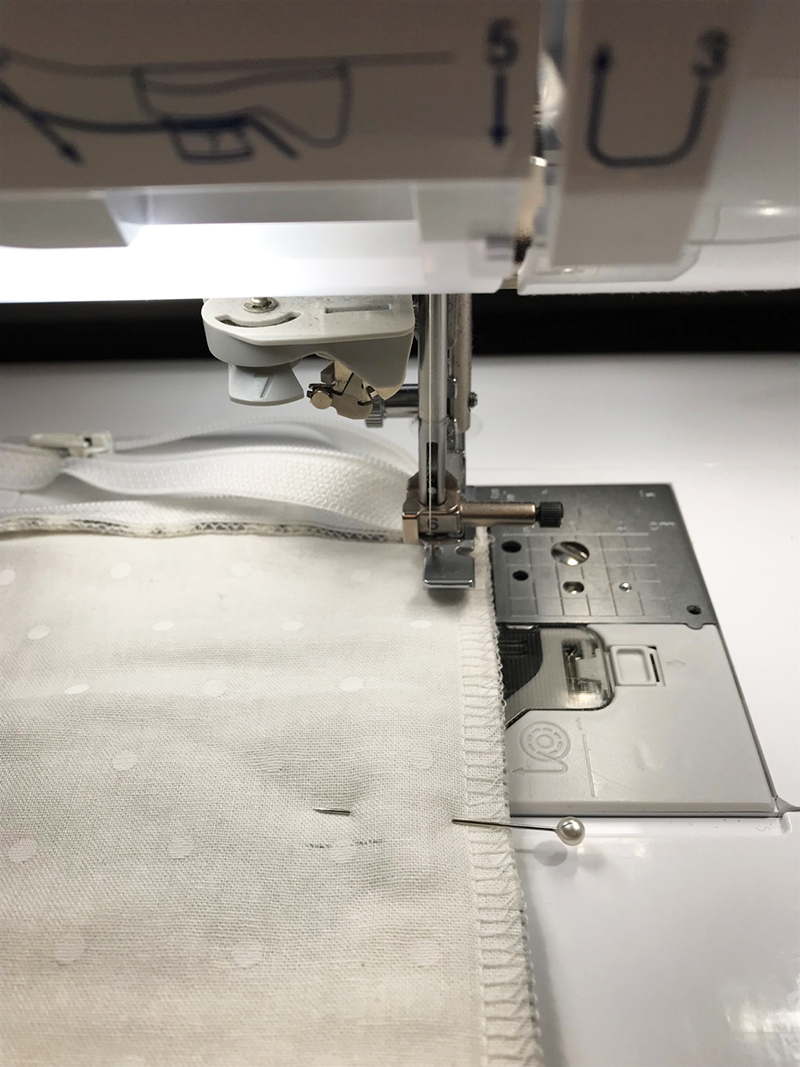
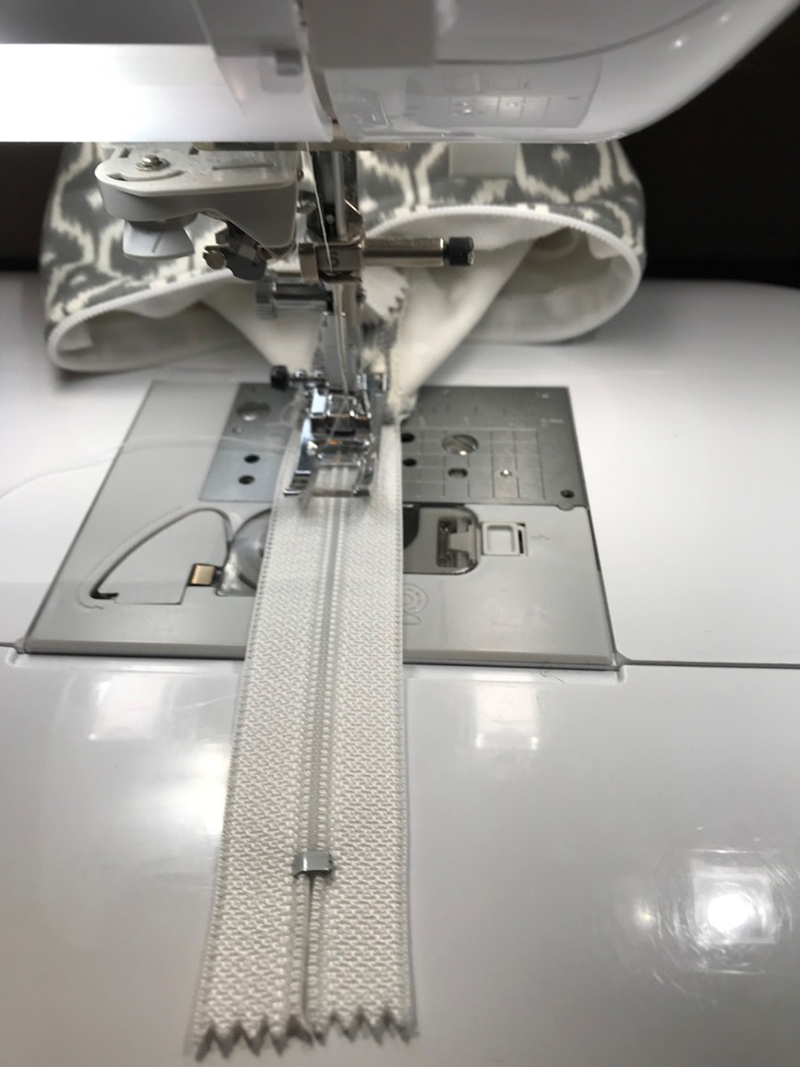
- Open zipper and pin one side along upper edge of bag.
- Place zipper teeth right side down.
- Align zipper tape with cut edge of fabric on the left and across the top - excess zipper to the right.
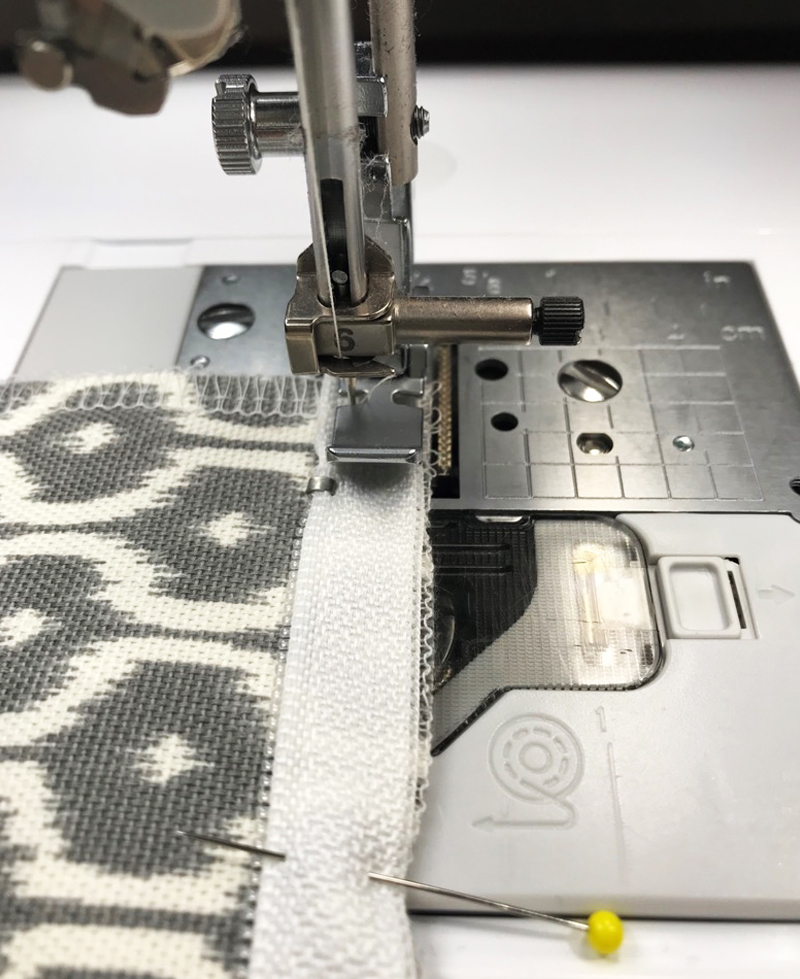
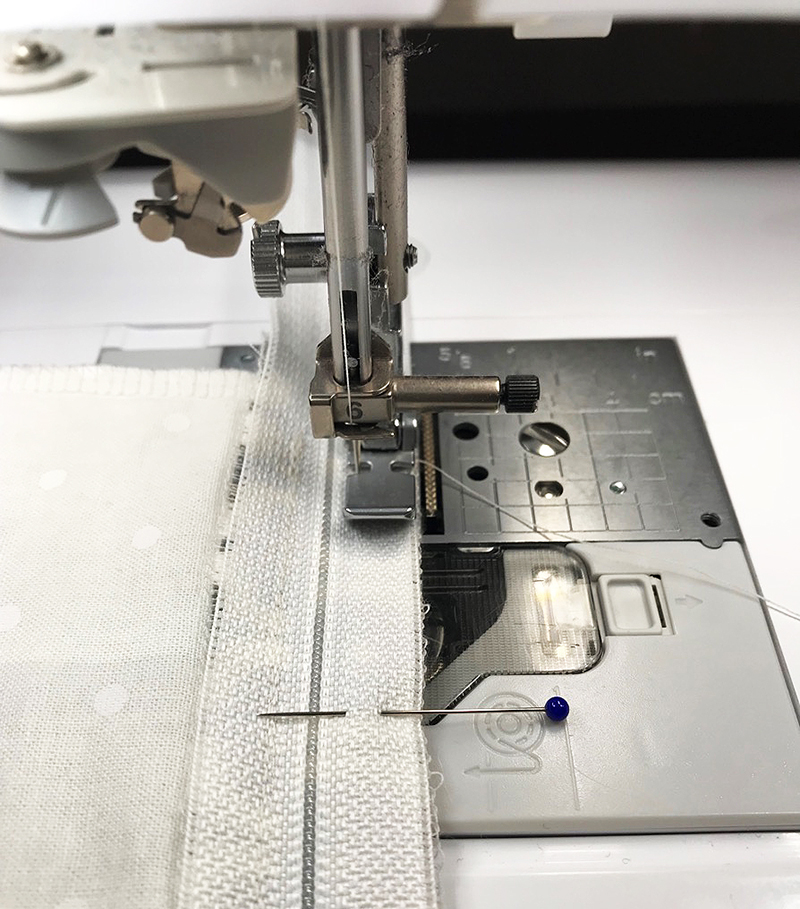
- Attach zipper foot so that needle will be to the left of foot.
- Select straight stitch and adjust needle position to the left.
- Position fabric under the foot.
- Sew approximately ⅛" from the zipper teeth - stopping ½" from the edge of the fabric.
- Backstitch to lock the stitching.
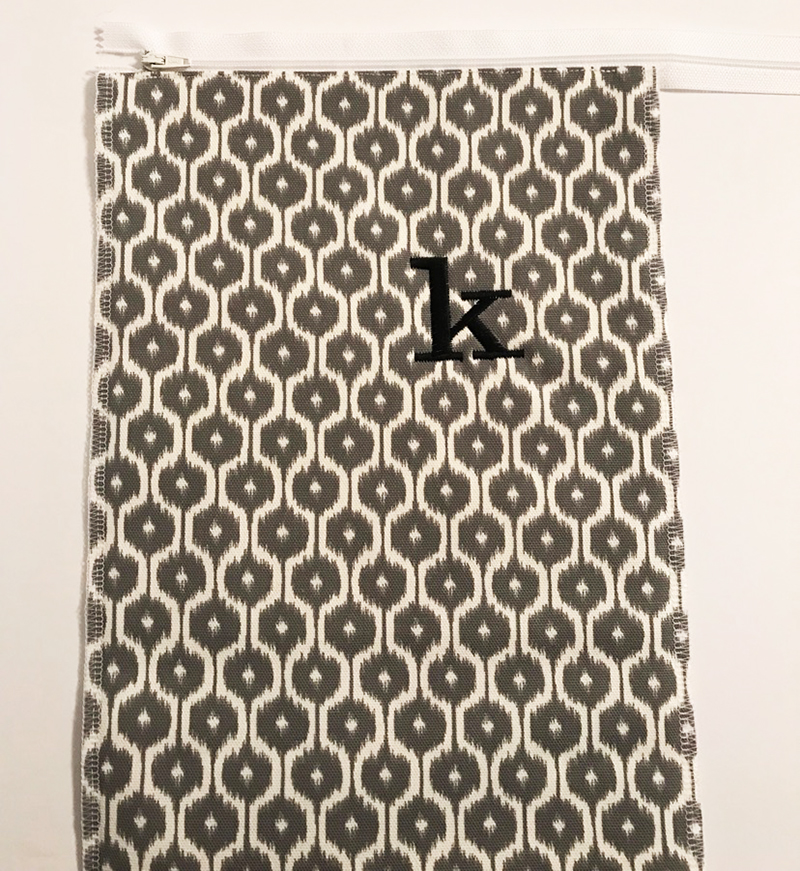
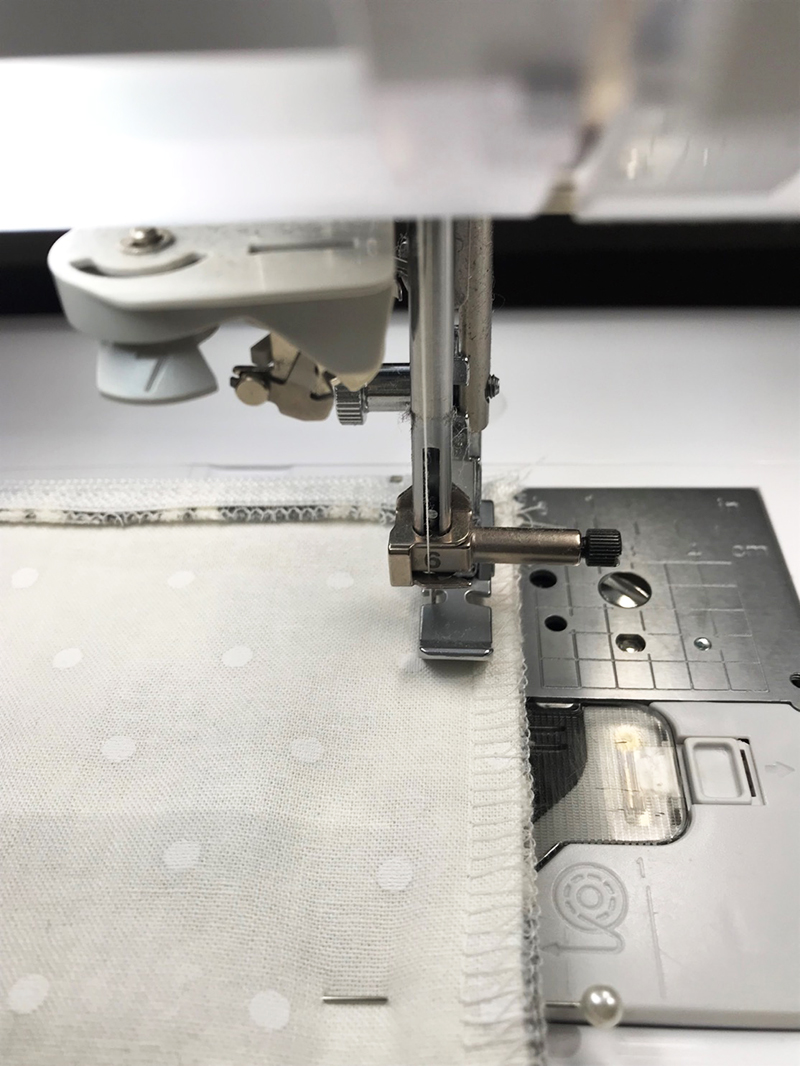
- Press zipper tape to the wrong side of the fabric.
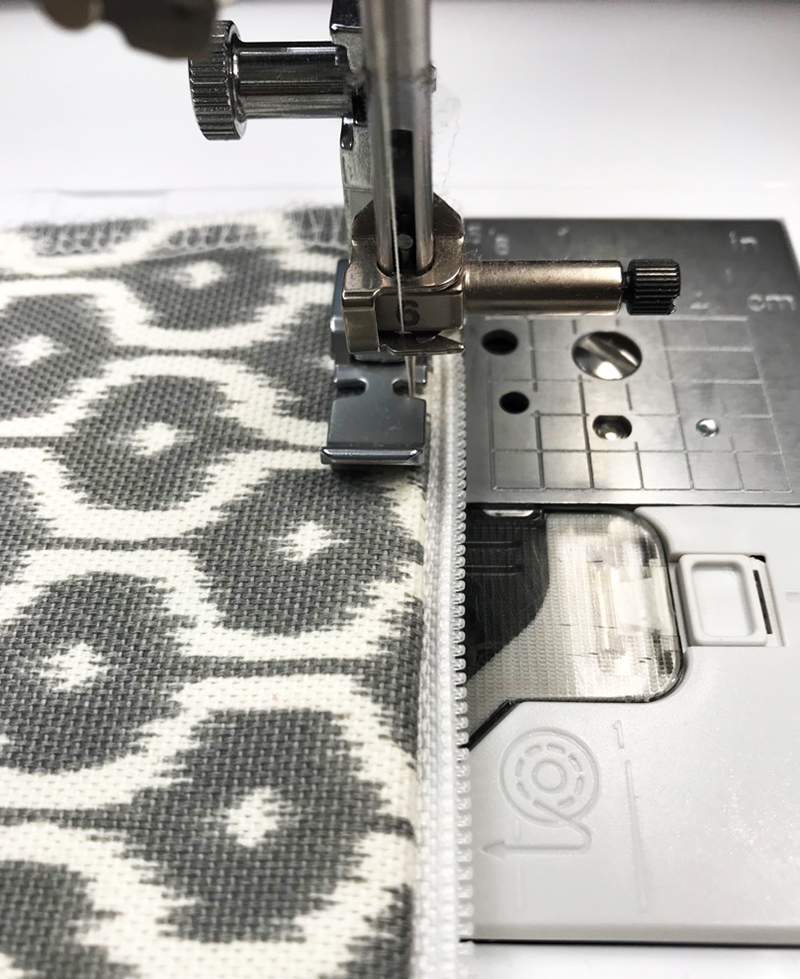
- Adjust needle to the right side of the foot.
- Topstitch along the upper edge -stopping ½" from the edge of the fabric.
- Backstitch to lock the stitching.
- Close the zipper.
- Fold outer bag fabric with right sides together, aligning second short edge with zipper tape.
- Zipper teeth should be face down.
- Pin.
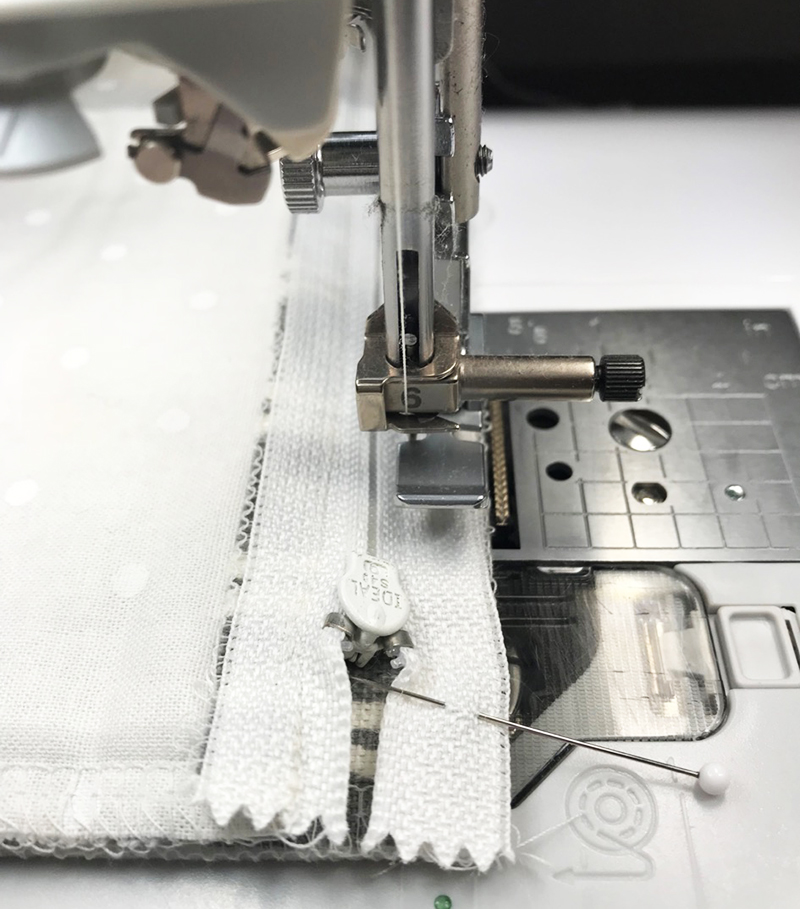
- Adjust needle position to the left of the foot.
- Begin stitching ½" from the edge.
- Backstitch to lock the stitching.
- Sew along zipper tape approximately ⅛" from the teeth.
- Sew to approximately 1½" from the zipper pull and stop with the needle down in the fabric.
- Lift the foot.
- Unzip the zipper so the pull is behind the foot.
- Sew to the edge of the zipper tape.
- Press zipper tape to the wrong side of the fabric.
- Adjust needle to the right side of the foot.
- Topstitch along the upper edge -stopping ½" from the edge of the fabric.
- Backstitch to lock the stitching.
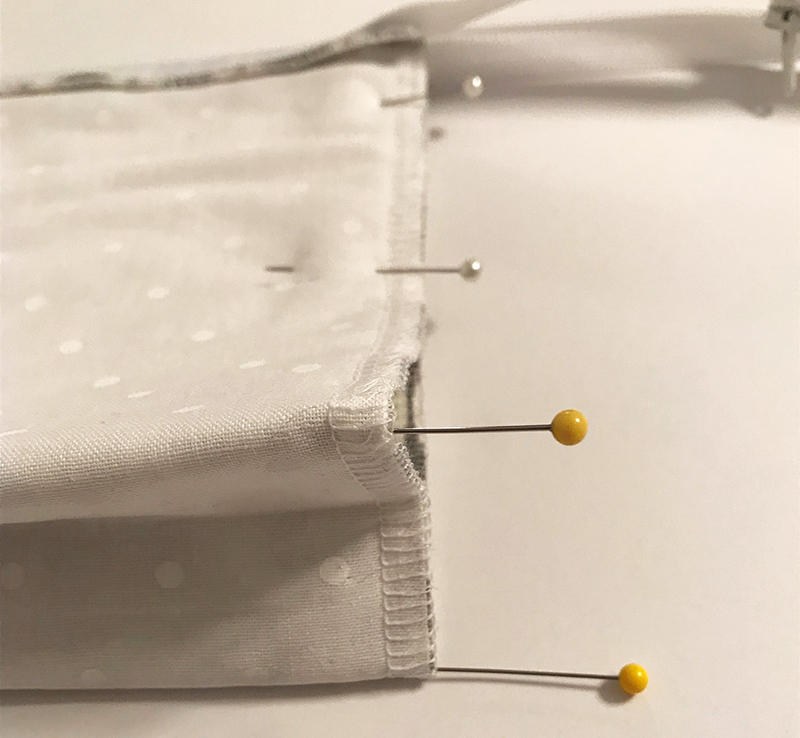
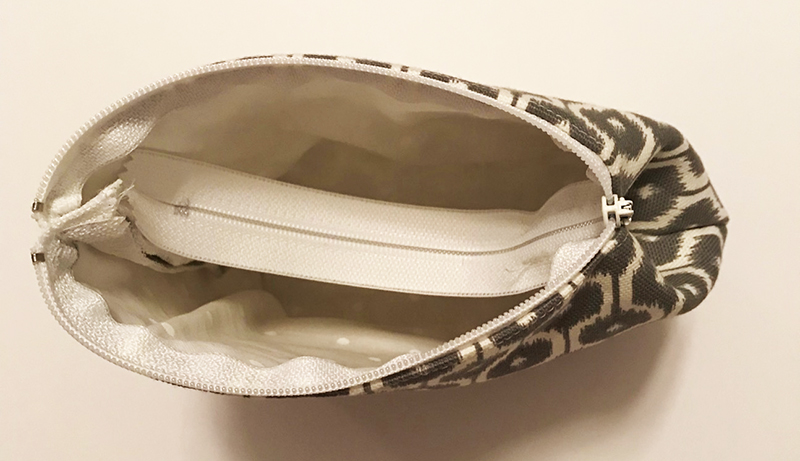
- Turn bag right side out.
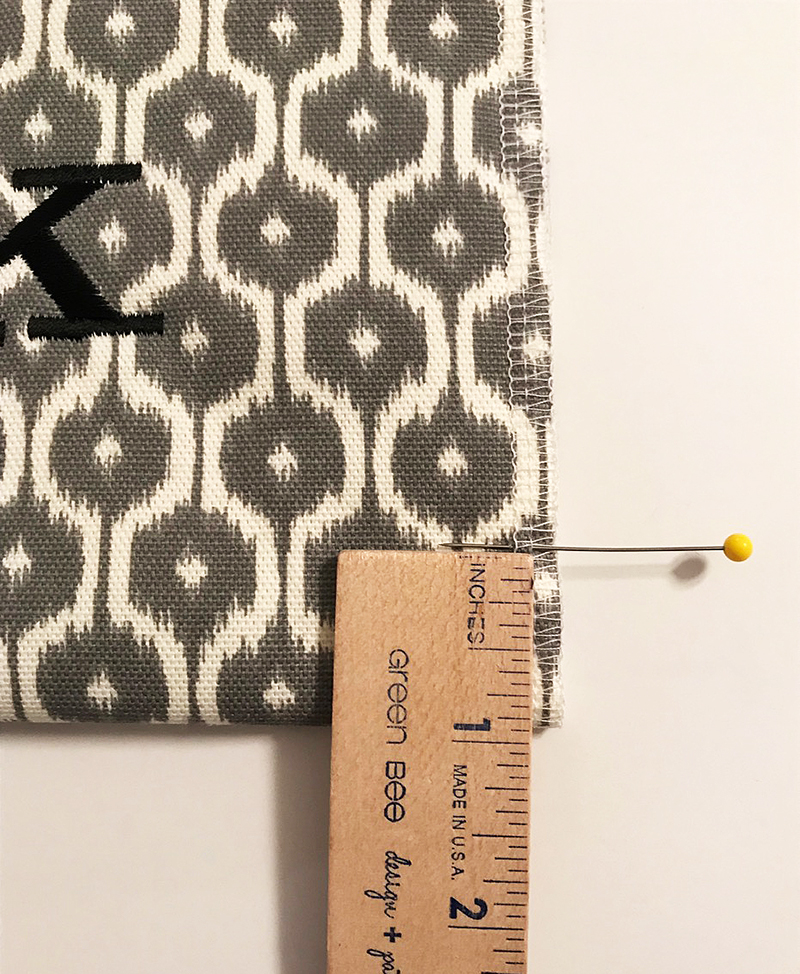
- Making sure zipper is exactly at top, finger press a fold line at the bottom of the bag.
- Measure 1" up from the fold line and mark with a pin.
- Repeat to mark right and left corners.
- Place pin in top fabric only - do not pin layers together.
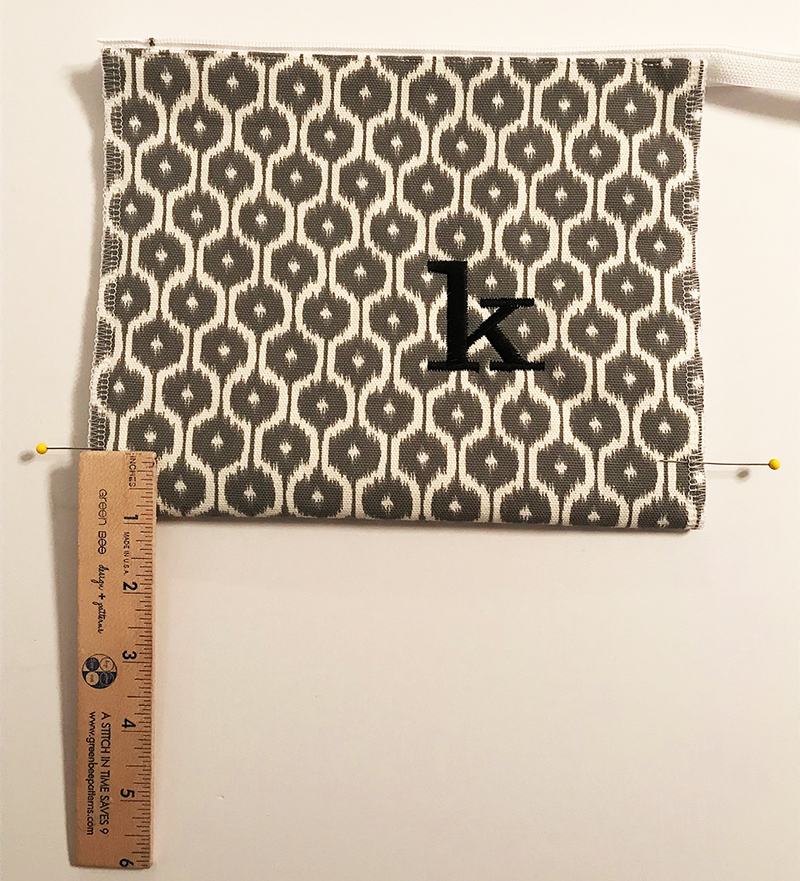
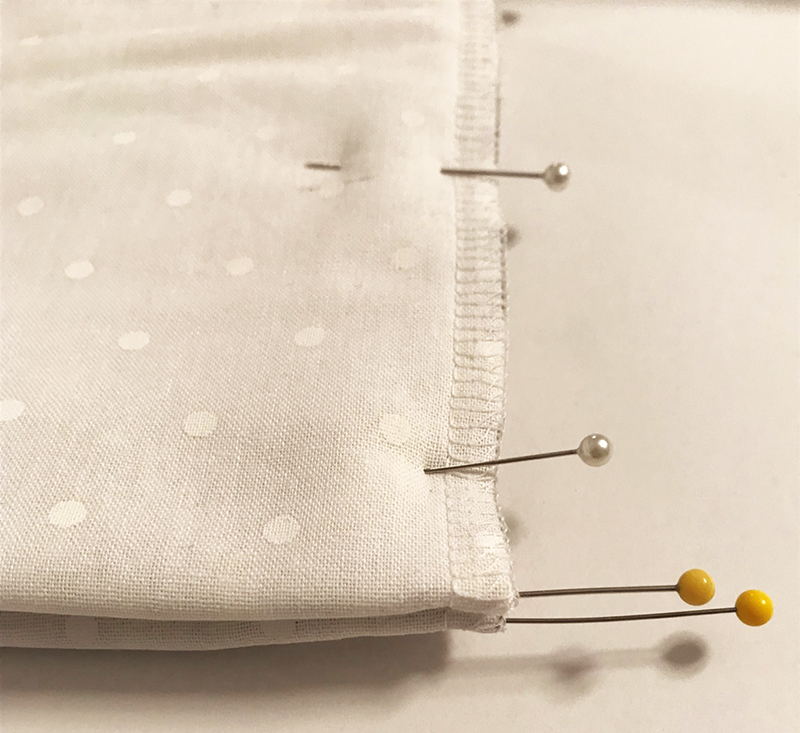
- Turn bag over and mark backside of fabric in the same manner.
- 1" up from the fold line.
- Mark right and left corners.
- Pin through single layer of fabric only.
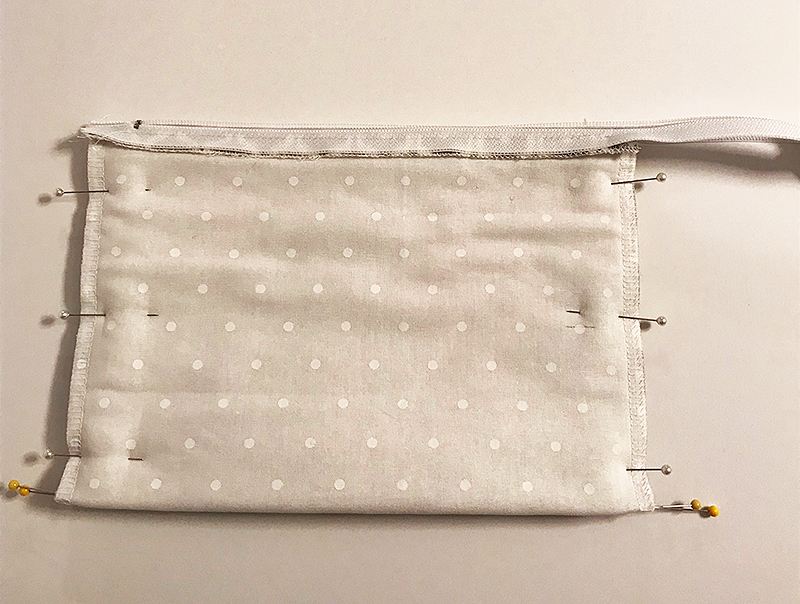
- Open zipper and turn inside out - right sides are now together.
- Fold so that 1" markings become bottom of bag and excess fabric is pleated inside.
- Pin along both sides of bag.
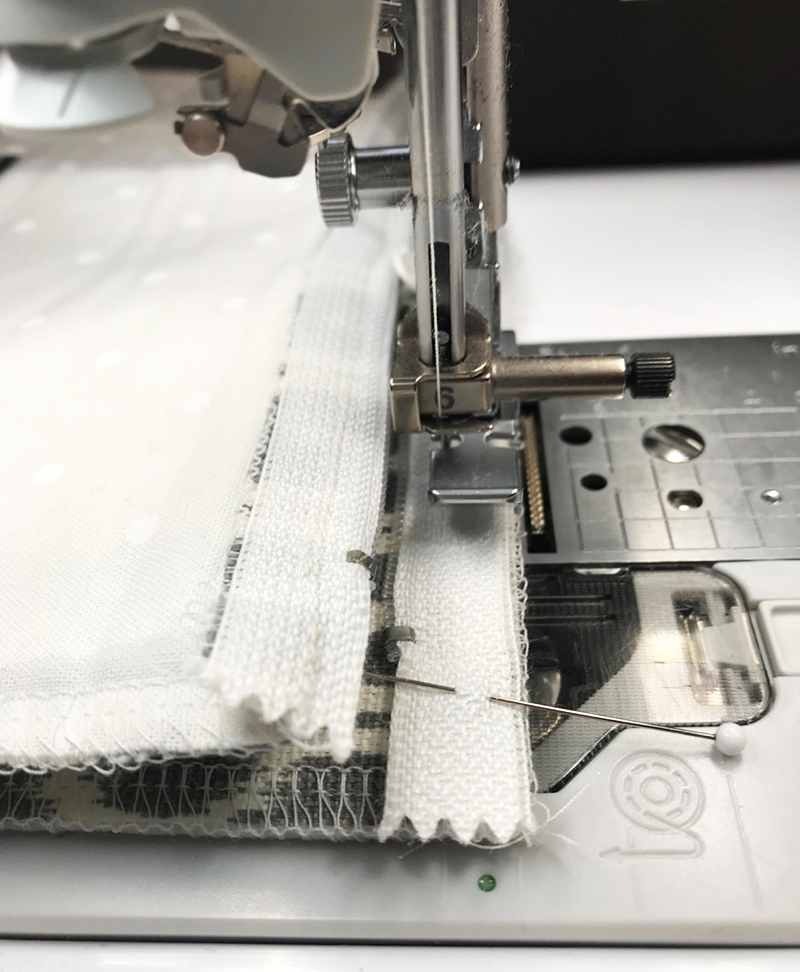
- Adjust needle position to left of foot.
- Make sure zipper is open all the way.
- Pull excess zipper tape back so it is away from edge of fabric.
- Sew side seam, stitching ½" from cut edge.
- Backstitch at the beginning and the end of the seam.
- Repeat for second side.
- Adjust needle position to left of foot.
- Stitch ½" from cut edge.
- Backstitch at the beginning and the end of the seam.
- Turn bag right side out.
- Close zipper until the pull is visible on the outside of the bag - not all the way.
- Attach standard presser foot.
- Select a zigzag stitch.
- Adjust stitch.
- Width = 4.5
- Length = 0.6
- Sew across the zipper teeth approximately 1" from the corner of the bag.
- Trim off excess zipper tape - below your stitching line.

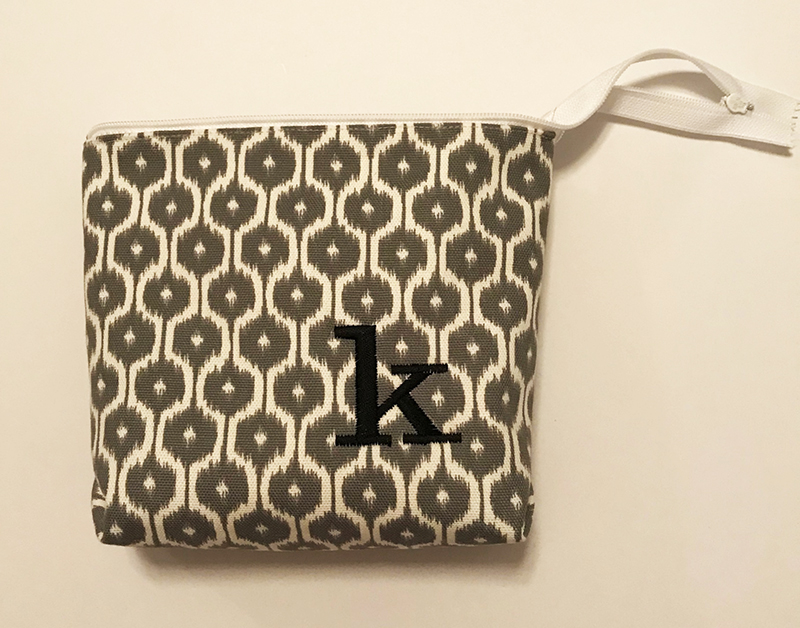
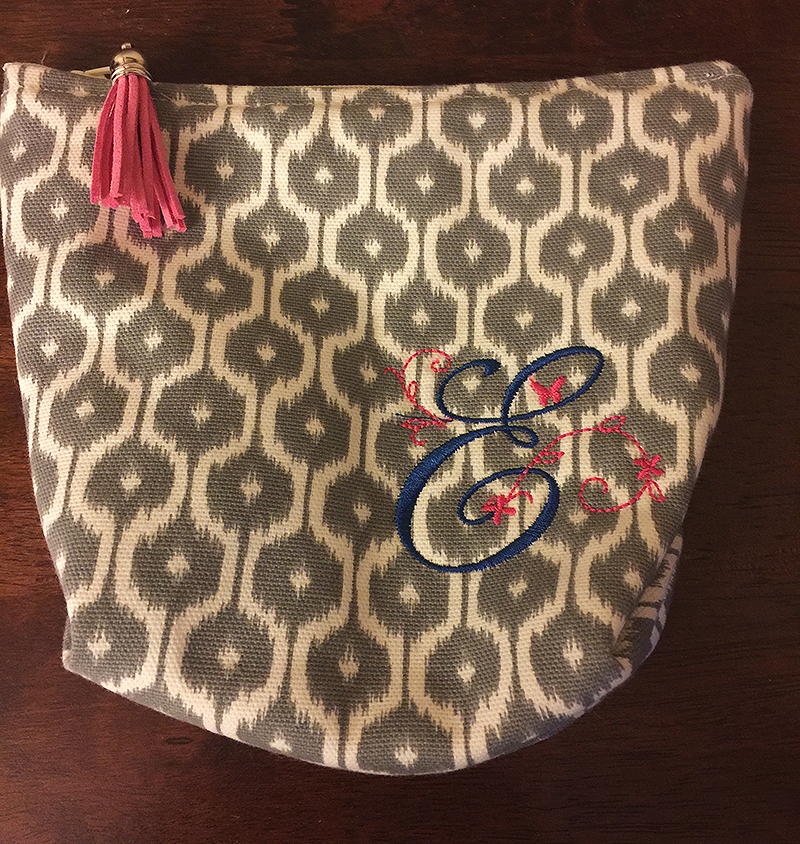
- Close zipper and add decorative pull to the zipper tab.
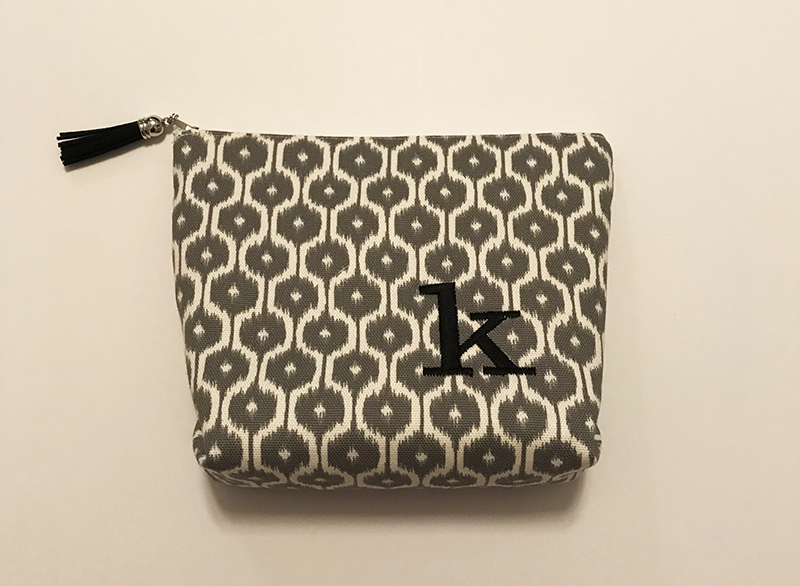
Ta-da!!
How'd we do?? Well, we sewed, we laughed, we embroidered, we made mistakes, we changed feet, we trimmed, we hooped, we threaded thread and, by the end of the day, we all completed the project (and it was fun!). Upon further inspection, some of the bags had twisted stitches and fabric pulls; others were misshapen or had zipper catches. But we all marveled at our zipper bags with big smiles and a burgeoning sense of pride. Me? After working with the Brother SE625,I gave my wonky looking zipper bag to my daughter, and it melted hearts, hers and mine. I would say that is mission accomplished.
 P.S. A Big Brother Thanks to Brother Educators Cheryl Hoffman and Kim Novak for lending their time and expertise to this eye-opening event! We all had a great time learning more about Brother Sewing and Embroidery machines as well as creating the fun zipper bag!
Related Projects
Stay Connected
* Required fields