Pete’s Dragon Sleepover Set Part 2
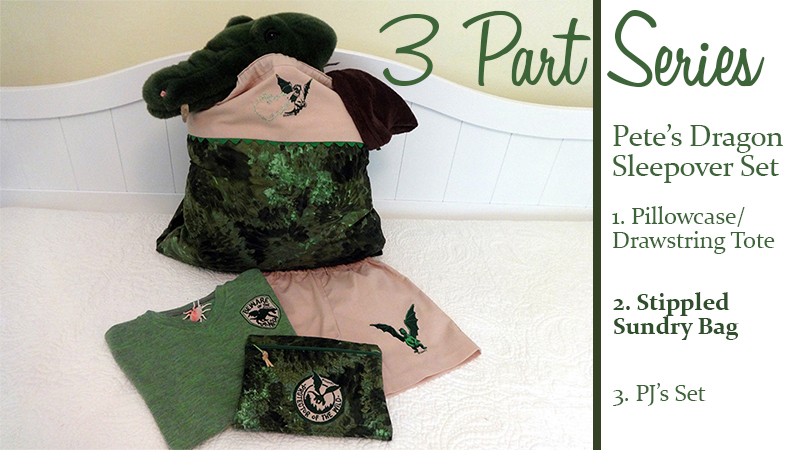
Part Two in this Three Part Series, will walk you through how to make a Stippled and Quilted, Zippered Sundry Bag so he (or she) has a place to put his toothbrush and comb for that Sleepover! Download the Protector of the Wild design
from iBroidery.com
, load it into your Brother Embroidery Machine and off we'll go on our own adventure!
Stippled Sundry Bag
Materials and Supplies
- Brother Sewing and Embroidery machine
- THE Dream Machine®
- for using the Stippling feature described in this post - Embroidery and Appliqué Design: PTD04 Protector of the Wild from iBroidery.com design [click this line to go right to iBroidery.com]
- SA5810 Medium-weight, tear away stabilizer
- 20 x 12” forest print quilting fabric
- 20 x 12” tan quilting cotton
- lightweight cotton quilt batting
- 12” green zipper
- Double sided tape
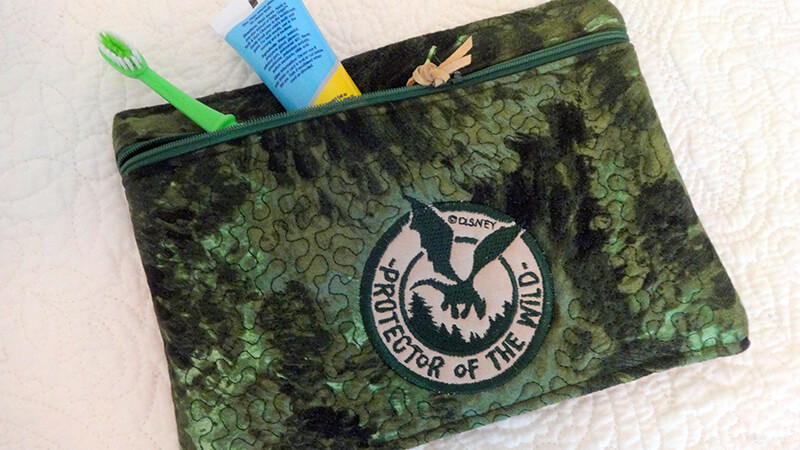 This handy stippled bag is sized to carry the necessary miscellany for a youngster’s overnight adventure. I love stippling and the interesting texture it gives a project. THE Dream Machine® has an amazing function that embroiders precisely spaced stippling stitches. This is a perfect project for mastering this technique as you learn to stipple around an existing design, the PTD04 Protector of the Wild
. Creating the surrounding intricate curlicue stitches requires contrast between the design and the background fabric. However, on this project the design/background fabric combination gives too little contrast for an acceptable scan. There is an easy remedy. A solution to achieving adequate contrast is to cover the forest fabric background with stabilizer, leaving the embroidery exposed. Here’s how.
Steps
- Hoop your tear-away stabilizer in the 8x12 frame.
- Go to the setting page by tapping the key boxed in green.

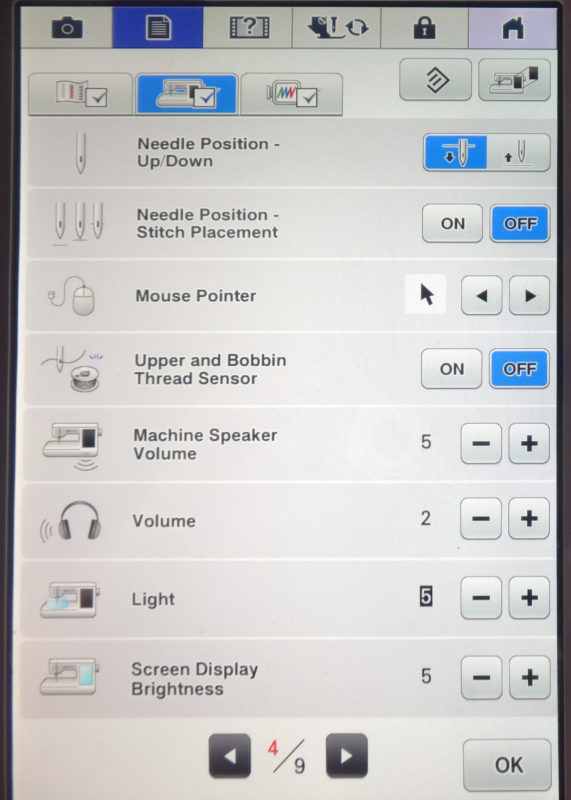
- Disengage the Upper and Bobbin Thread Sensor on settings page 4.
- IMPORTANT: Remove both needle and bobbin threads. Stitching will be done with no thread.
- Position the PTD04 - Protector of the Wild design centered 4” from inside top of hoop.
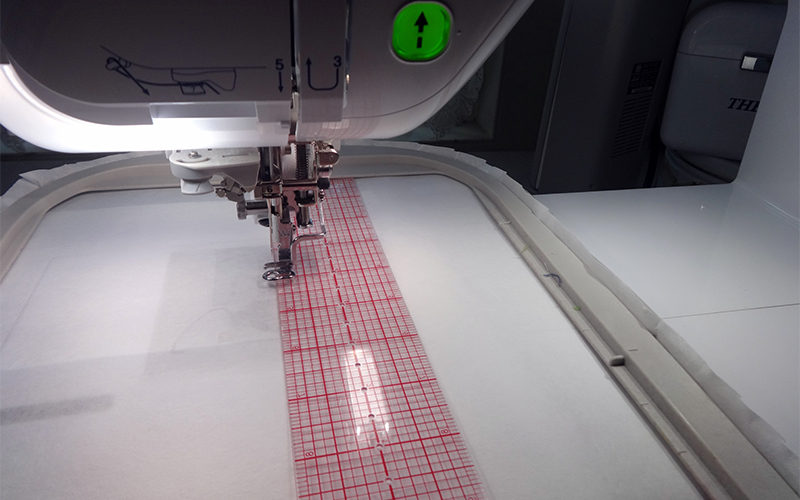
- Stitch the first color, a straight stitch circle.
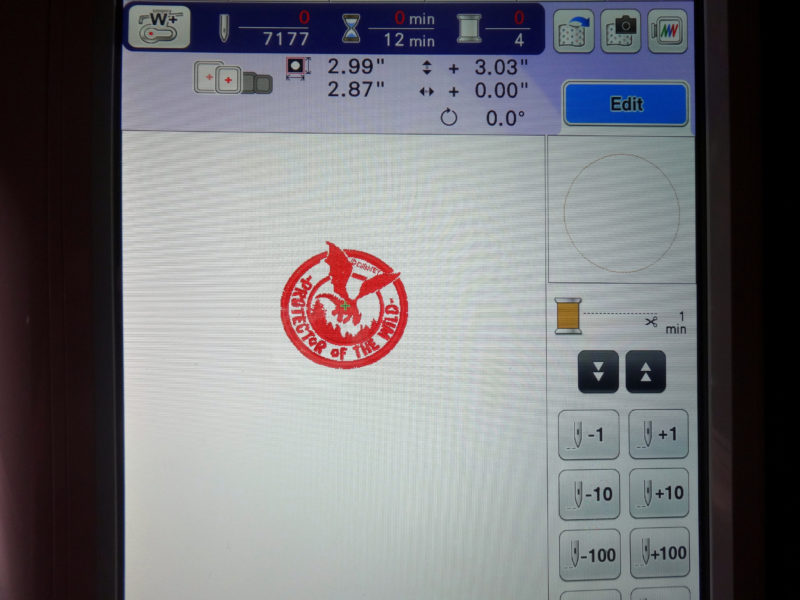
- Scroll ahead through the stitches to stitch the wing tips that extend beyond the circle.
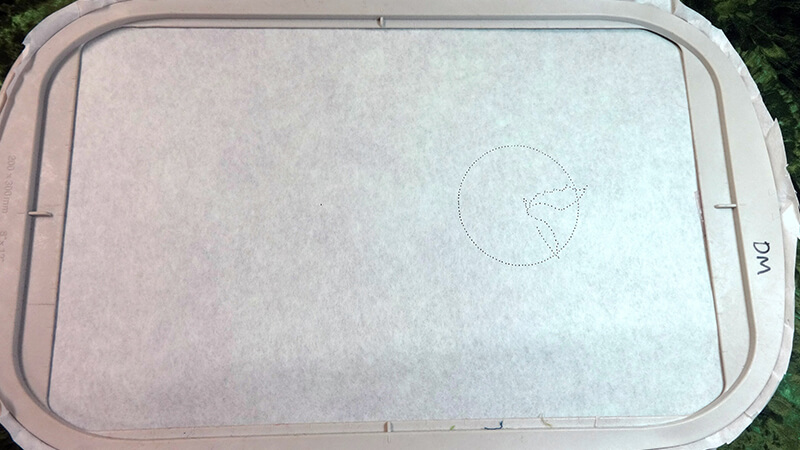
- Cut around needle holes, making a window for the actual design.
- Set aside stabilizer template and re-engage Upper and Bobbin Thread Sensor on settings page 4.
Embroidery
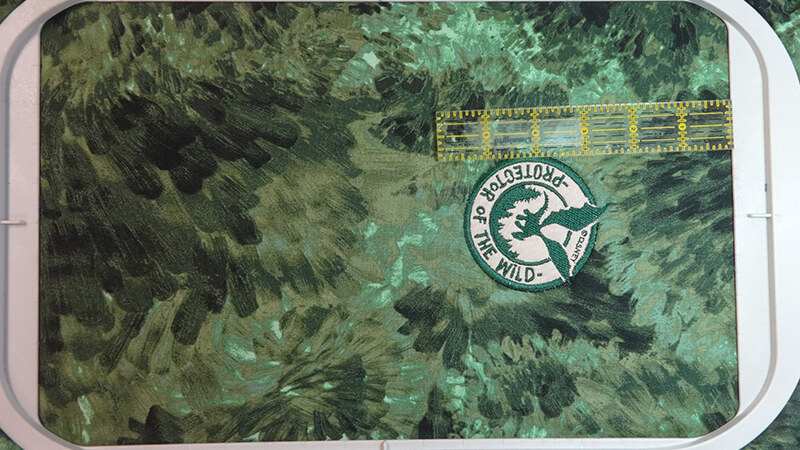
- Hoop 3 layer quilt “sandwich” with tan fabric on the bottom (right side out), batting, and forest fabric on top in 8x12 hoop. No stabilizer is used.
- Cut a 4” circular scrap of the tan fabric.
- Open PTD04 and center the design 4” from top/inside of frame and embroider the appliqué design.
Stippling
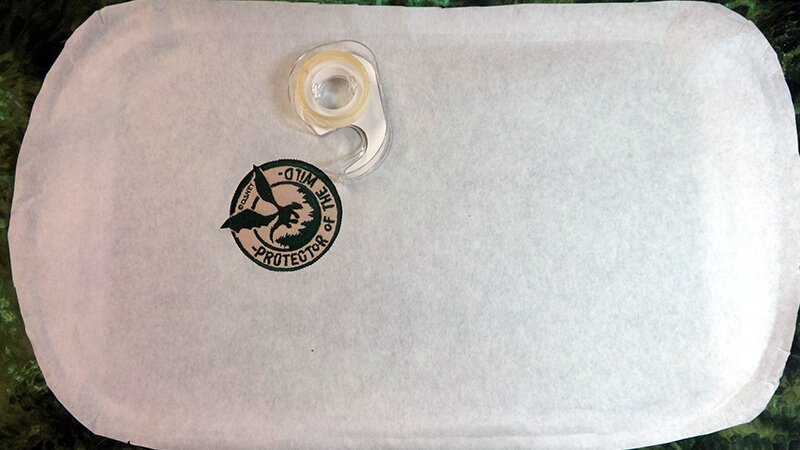
- Apply double-sided tape to the underside of the stabilizer template and press in place with embroidery peeking from the cut out window.
- Open My Design Center.

- Select the Image scan key, indicated in the purple box.
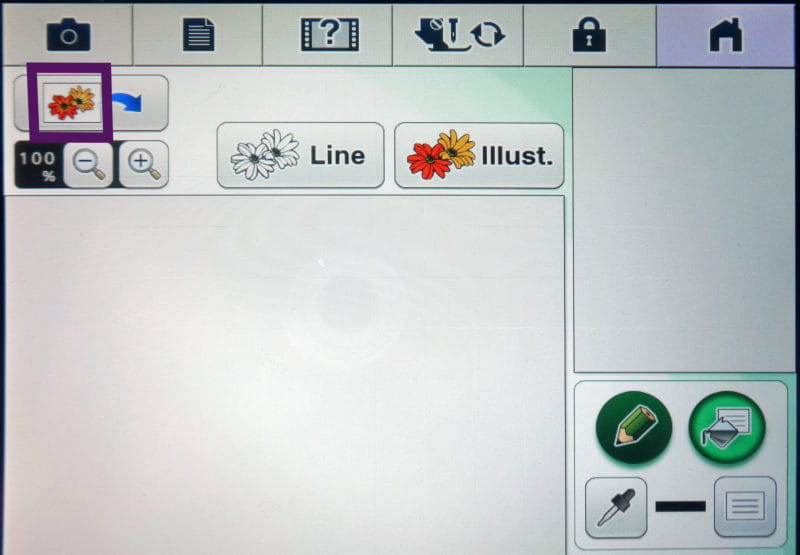
- Press OK.
- The frame will move as the scanner does its job. As it scans, the message that it is recognizing is on the screen.
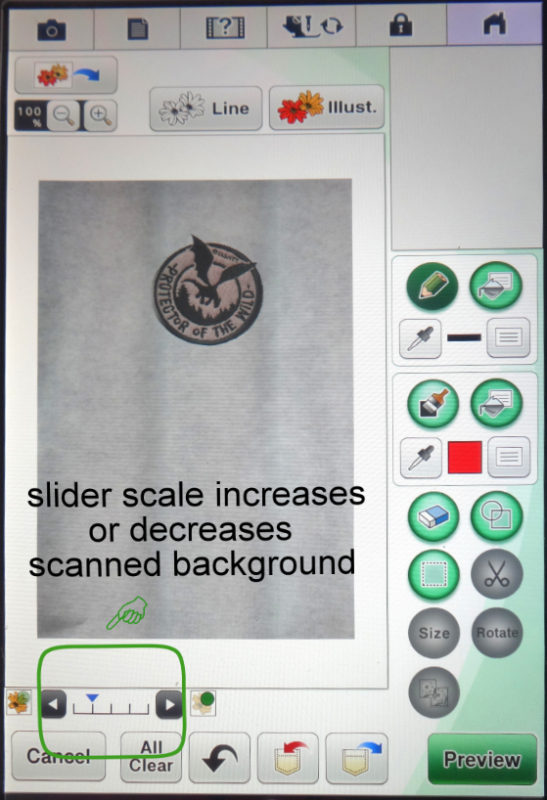
NOTE: The background brightness of the scanned image can be controlled by the slider scale in the green rectangle as shown above.
- Remove the stabilizer template.
- Select the Illustration design key with the double flower. This changes the scanned image into an embroidery design.
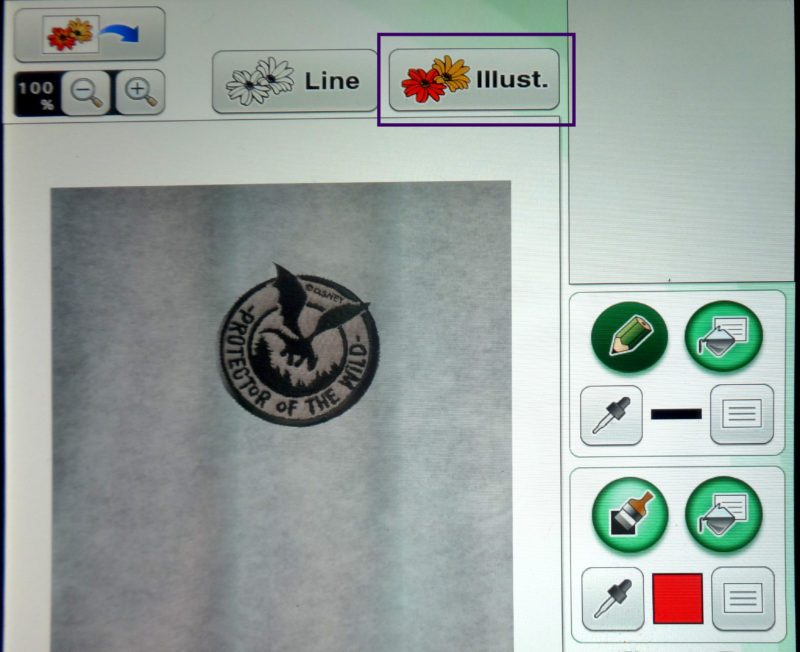
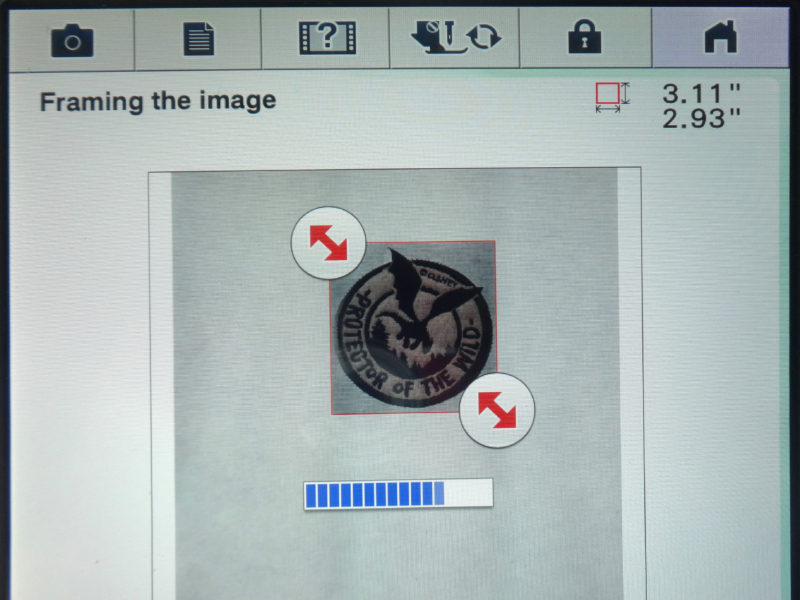
- Frame (crop) the scanned image by dragging the arrows into place with your stylus.
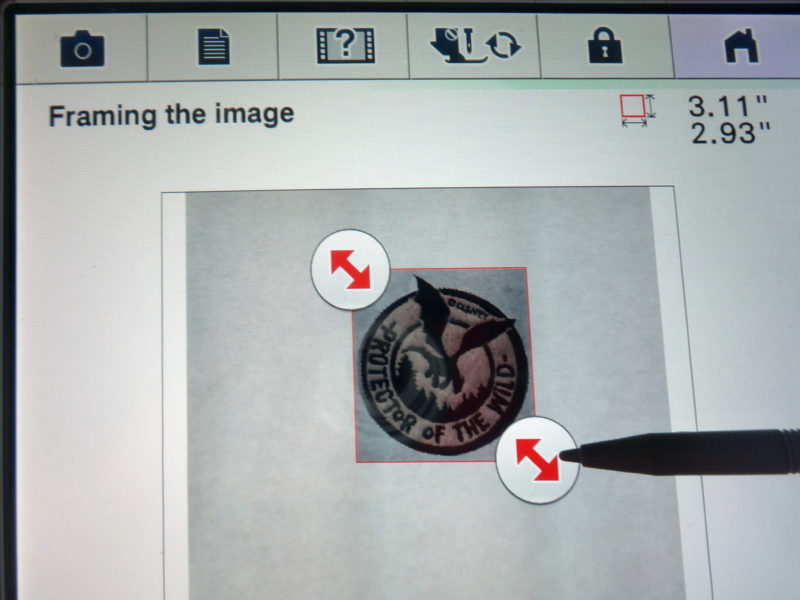
- Press OK. You will be prompted to “Please wait a while” as THE Dream Machine® processes this new information. After the wait is over, press OK again. The cropped image is now an embroidery design. You might be thinking, “But I’ve already embroidered it!” It’s okay. Trust me.
- Press Set then select the Stamp key, shown in the purple circle.

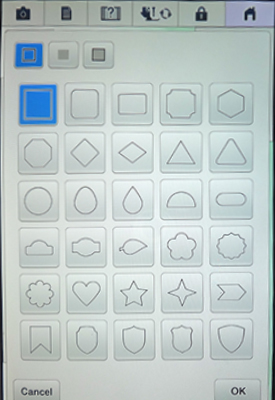
- Select the two squares in blue when this screen appears. The smaller square is the stamp type. The larger is the stamp shape. Press OK.
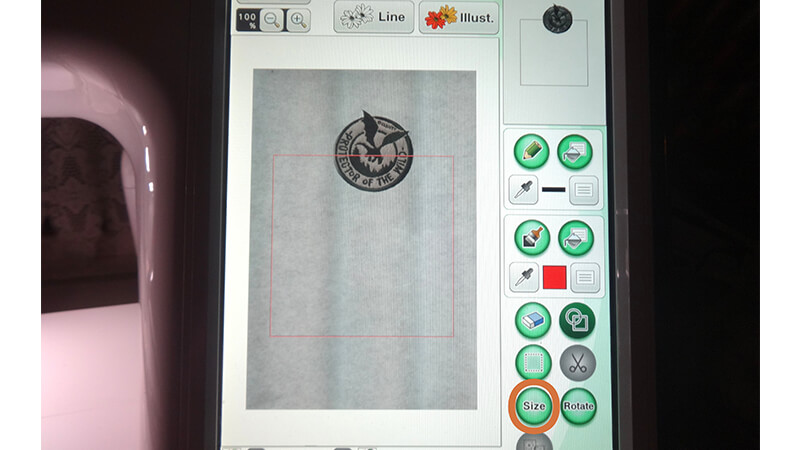
- Select the Size key circled in orange. Use the arrows to resize the red box superimposed on the image. Enlarge until it fits the scanned area and it becomes a rectangle. Press OK.
- Within the Line tool key menu, Select the Page key in the aqua box. IMPORTANT: This begins the process of preventing that rectangle from being stitched, so don't skip it.

- When the next page comes up, Select the Line WITHOUT stitch key boxed in yellow. This creates a region rather than a stitch line. Press OK.
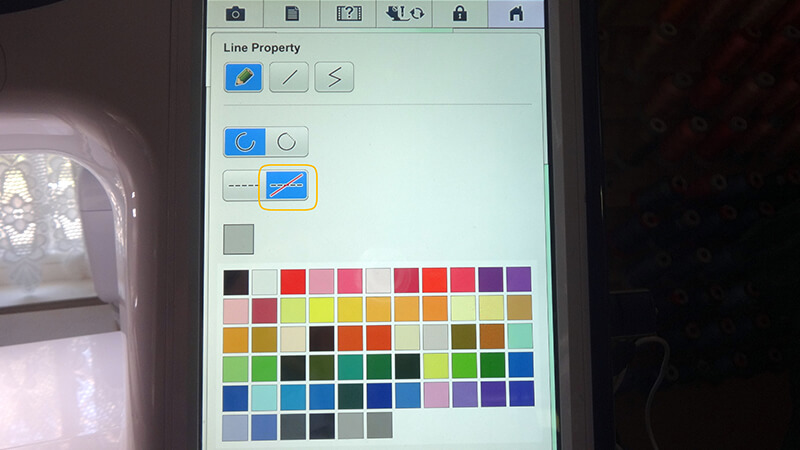
- Apply that change by selecting the Set key circled in pink within the Line key tool menu.

- Activate that change by touching the red rectangle with your stylus. Now it will not be stitched or included in the embroidery pattern.
- From the Brush tool key menu, select the Page key to select the brush type and fill color, boxed in lavender.
 This screen will come up.
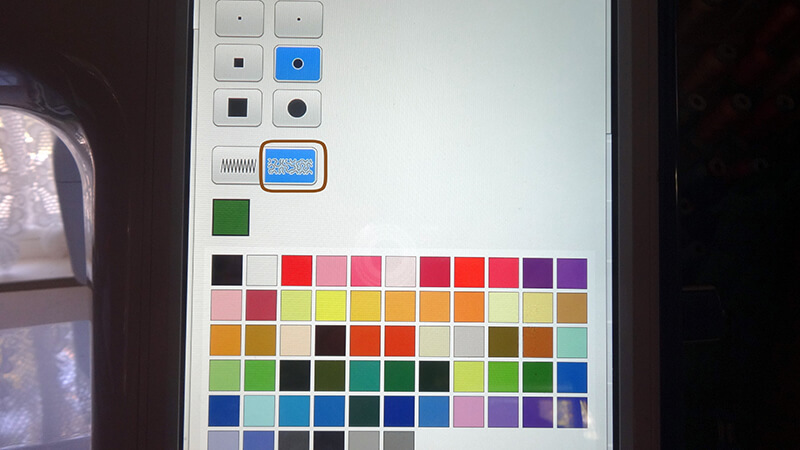
- Select the Stipple pattern boxed in brown.
- Scroll down to the color chart to select the color of your choice for the stipple stitches. this will allow you to have an idea of what it will look like before you stitch. The image above shows that dark green has been chosen.
- Press OK. Next, the screen with the embroidery design comes up.
- Select the icon circled in black to apply the stipple stitches to the design.
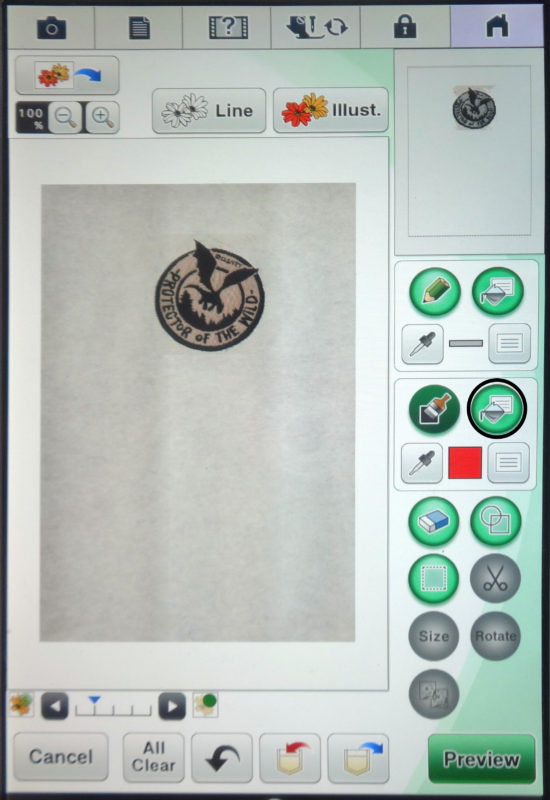
- Apply the stippling stitches to the area by touching it with your stylus. It’s magic! The stitches appear. But they cover the entire area rather than surrounding the embroidery design. Carry on.
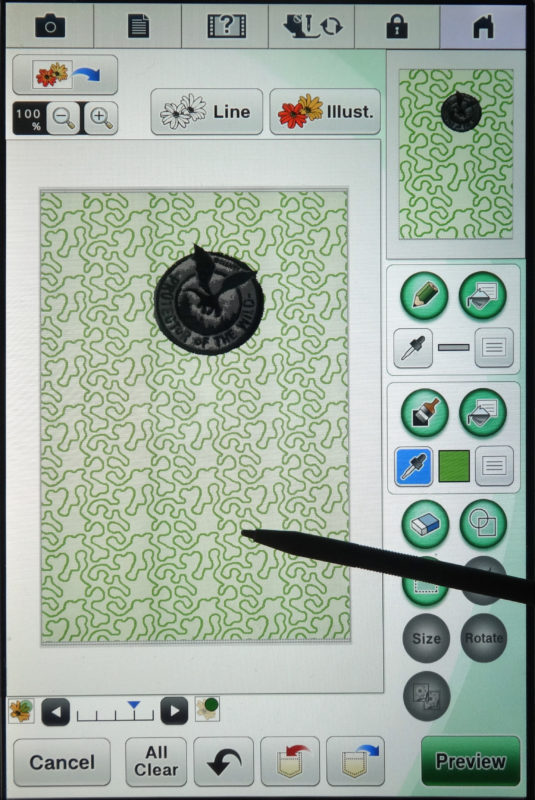
- Tap on Preview in the green rectangle in the lower right hand corner of the screen. A message pops up “The My Design Center data will not be saved. OK to continue?”
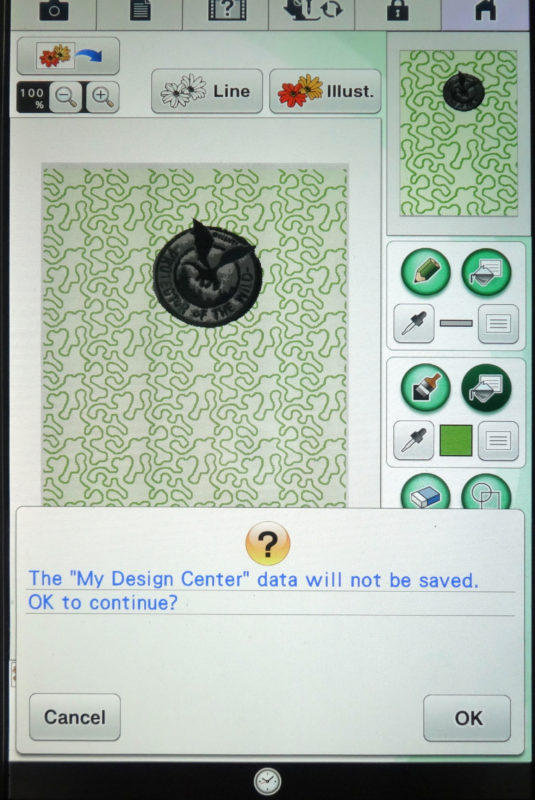
- Press OK.
- See the Preview screen. It offers an array of options.
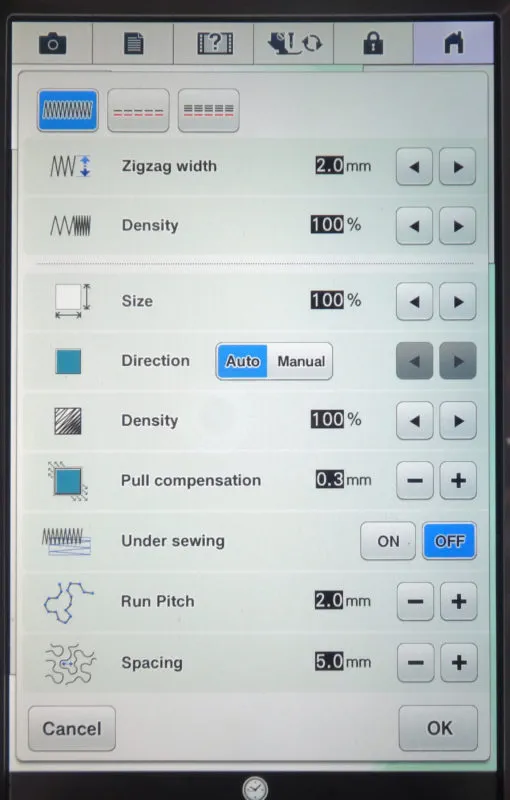
For this project, leave all the default settings in place. Press OK. A message will ask ”Please wait a while.” The information will be loaded, creating perfectly placed stipple pattern around the perimeter of the design.
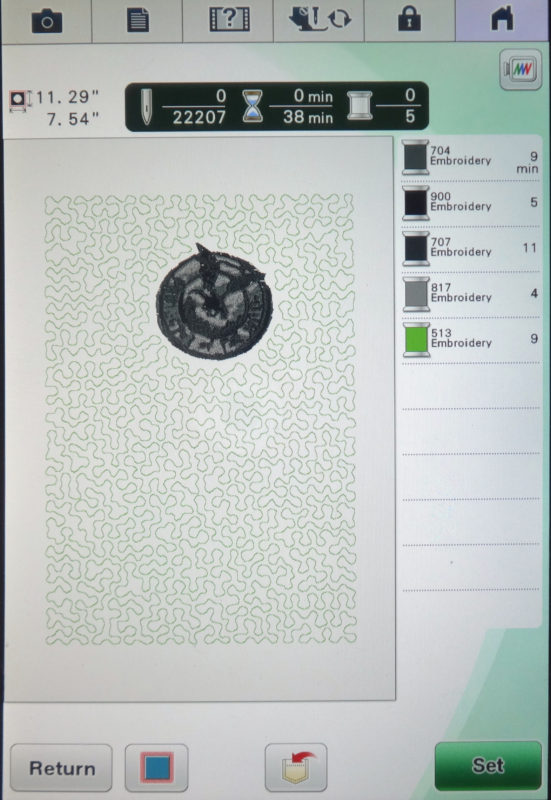 Notice that the stitches hug the edges and veer around the wing tips. How amazing is that?
- Tap Set then OK. The next screen will give you this message: “Converted to the embroidery pattern and My Design Center will be exited. Ok to continue to embroidery edit screen?”
- Press OK then press Embroidery. Here comes another message: “Please wait a while.” Next this screen appears:
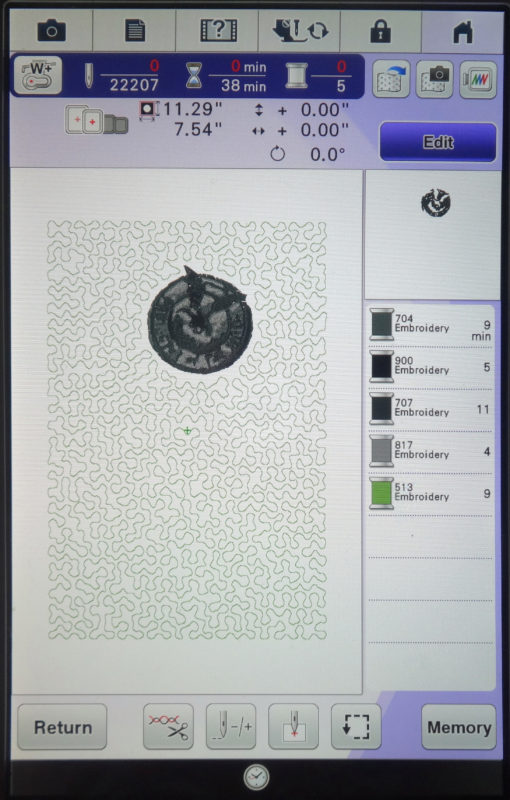
- Scroll down through the embroidery colors until you get to the stippling. PTD04 has been made a part of the stippled embroidery design. Since that was previously embroidered, only the stippling remains to be stitched.
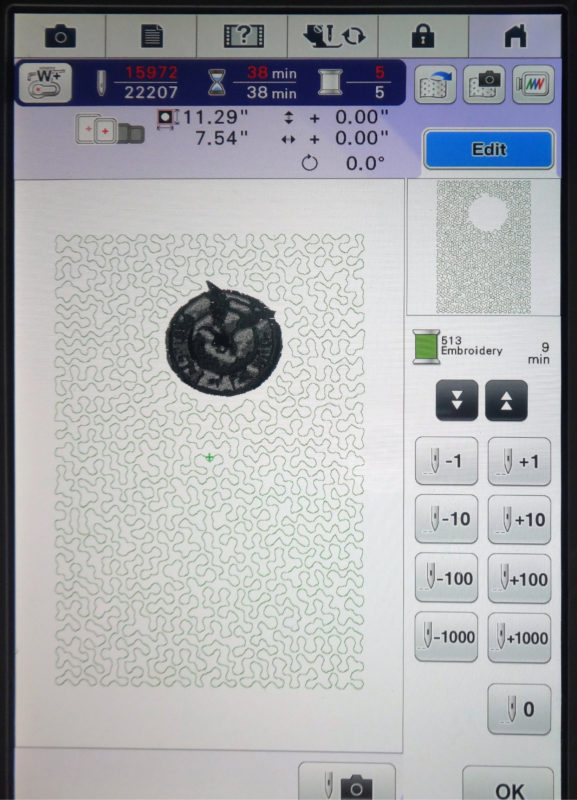
Embroider your perfect stippling stitches. Awesome, isn’t it!
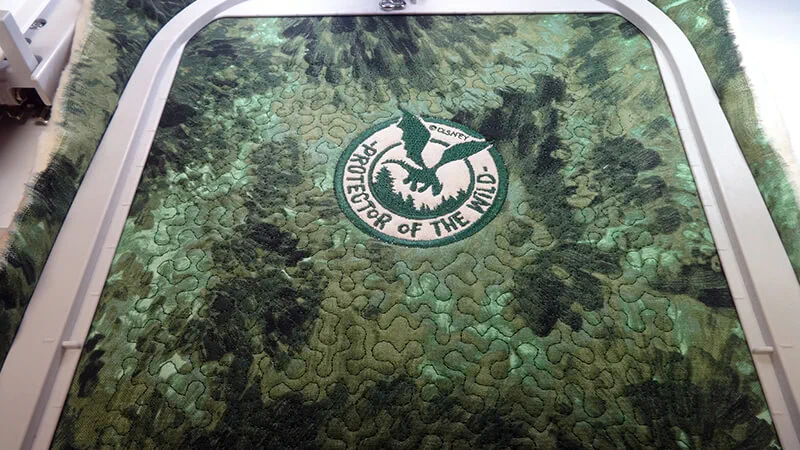
Construction
An excellent video tutorial by Angela Wolf is posted here at Stitching Sewcial. Her serger tucked zipper bag has unlimited uses—like this sundry bag for the Pete’s Dragon Sleepover set. First, follow the three steps below:- Cut the embroidered and stippled piece to 9 x12, approximately 1” beyond the stippling stitches.
- Stitch around the perimeter close to the raw edge. This keeps the 3 layers in place for the next step.
- Serge or clean finish all four sides.
- Go to Angela Wolf’s excellent video tutorial for construction instructions for the sundry bag found here.
These embroidery designs have been manufactured by Brother under a licensing agreement with The Walt Disney Company, through which Brother has permission to use Disney images. The embroidery patterns offered on iBroidery are for personal non-commercial use only. No license is granted for any commercial use of these embroidery patterns and any such use is strictly prohibited.

