Winnie the Pooh Madeira Quilt
With THE Dream Machine
and PE-Design software,
this lightweight Winnie the Pooh themed quilt is a joy to make. It offers a perfect opportunity to use many of the designs in your embroidery library, some built into your machine and some new ones in the iBroidery.com collection.
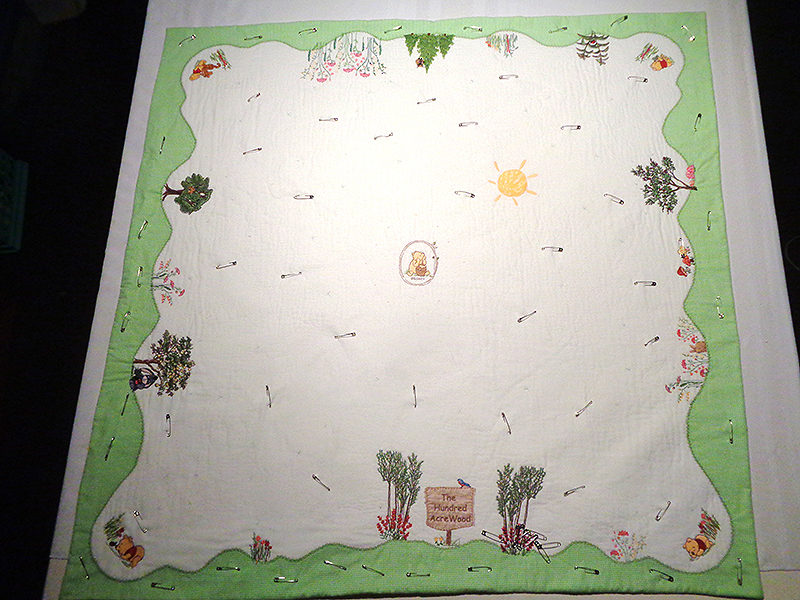
Create unique designs for your special little one, making this almost an I Spy quilt. It features Winnie the Pooh and his friends, napping and playing in their magical world. The flannel square is bordered with a green gingham Madeira hem, mimicking the rolling landscape of ‘The 100 Acre Wood.’ THE Dream Machine
makes it easy to combine, edit, resize and precisely place your designs. Scan the frame, drag the design to the selected location, and rotate it by 1, 10 or 90 degrees for perfect positioning. Combined with the Pooh bib
and Pooh burp cloth
in previous Stitching Sewcial posts, this quilt makes a baby gift any mother would treasure.
Materials:
Fabric:- 2 yds. ivory champagne cashmere flannel
- 1.5 yds. 100% cotton lime gingham 1/8” check (Madeira technique will only work on natural fiber fabrics as cotton and linen)
- 1.5 yds. ivory pima cotton broadcloth
- 50” lightweight quilt batting
- Embroidery threads, Madeira template, water soluble thread, water spray bottle, point turner, basting spray, lightweight tearaway stabilizer, safety pins
- 200811107
Classic Pooh enlarged - 200910889
(in Animals category) extract a single bee - exd03 51
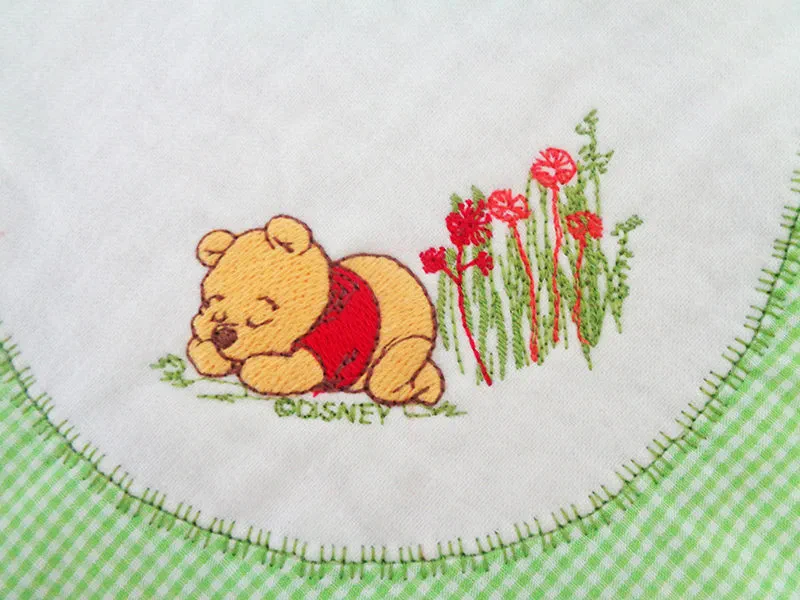
Tall Grass and Flowers - 200810530
Baby Pooh & Little Friend - 200811001
Baby Pooh - 200811003
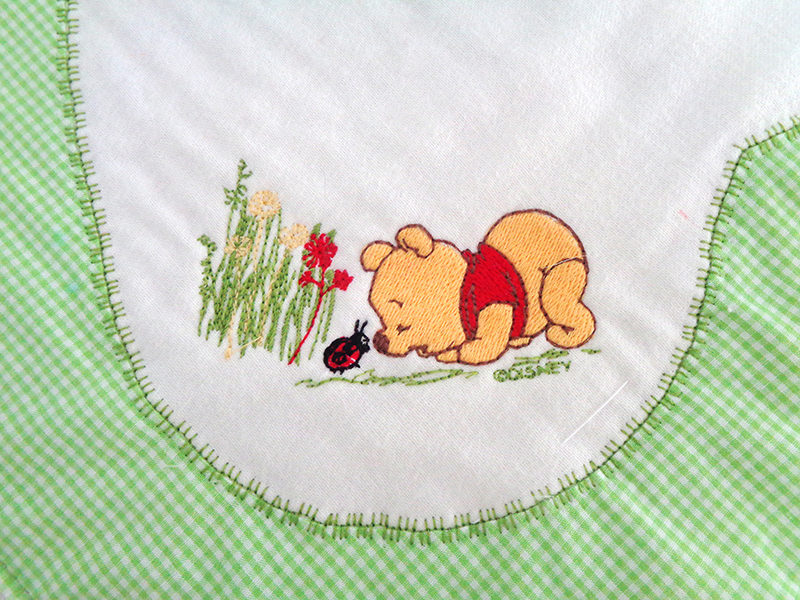
Baby Pooh Napping - 200811011
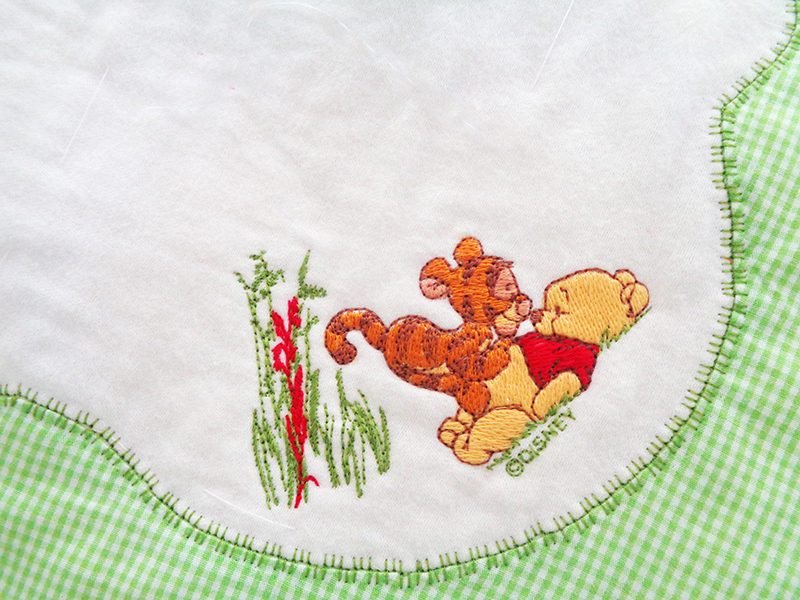
Baby Pooh & Baby Tigger - 200811009
Baby Piglet & Snail - 200810528
Baby Eeyore
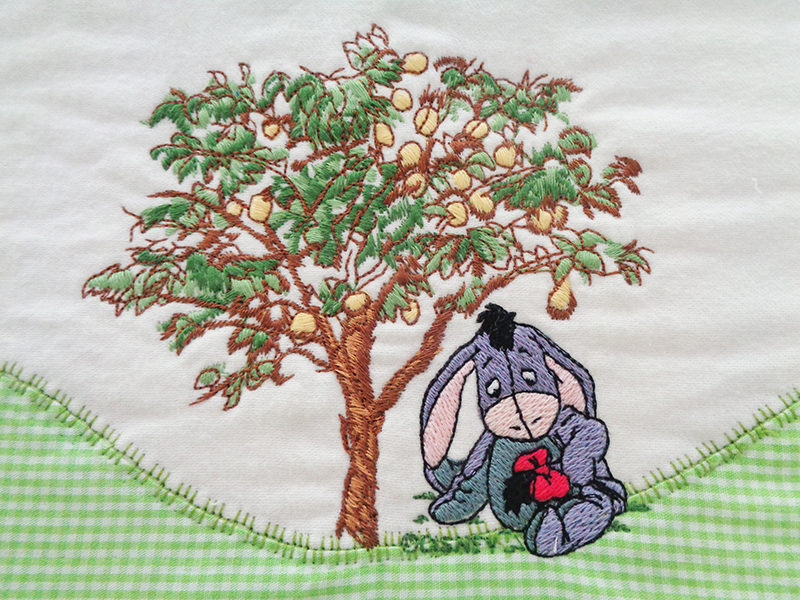
Note: Many of the trees were taken from Brother card #33 Trees. Eeyore was tucked under the lemon tree and is shown below in step 25.
- DC SC0401
Bird House - robin was extracted - 200911554
Building/Nature/Others - everything was deleted but the trees. - 200910508
Flowers - These flowers were recolored and placed at the base of the trees in the above bicycle design. - BIC-MTGBAB002
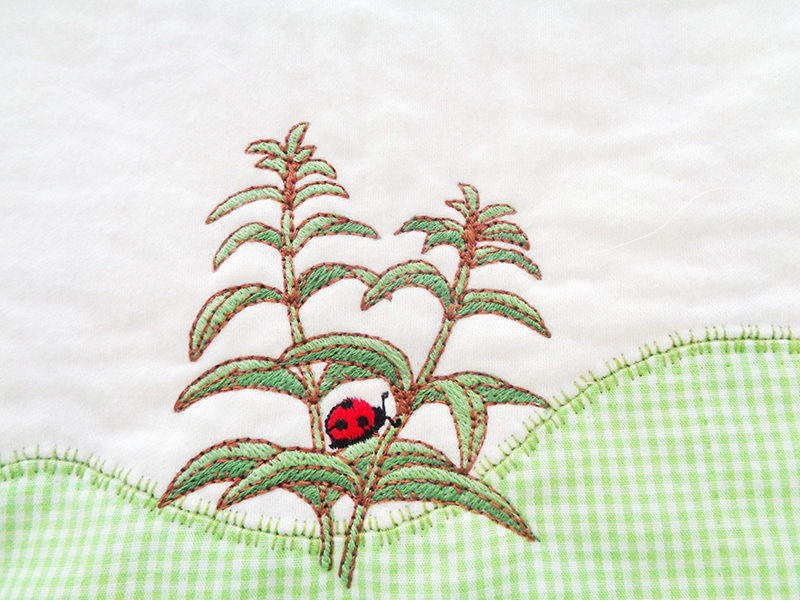
Ladybug on Daisy Stem –ladybug was extracted and added to the stalk from Brother card 49, Country - 200910144
Fruits –enlarged and edited to remove grass and ground - 200910145
Fruits –enlarged and edited to remove ground then Eeyore was added.
Instructions
Preparation:- Prewash, dry, and press all fabrics before cutting.
- Separate the tall grass design into two sections, to be combined with the four Pooh designs as you choose. I varied the flower colors for interest. Suit yourself. I suggest you load the designs onto a memory stick or send to them electronically to THE Dream Machine
or to your computer. Then bring them up one by one and add the tall grass as you like. Put the design into memory, ready to go when you are set to embroider. - Cut a piece of champagne flannel to fit the largest Dream hoop. Use this single hooping for stitch rehearsal of each Disney iBroidery.com design for which you cannot print a template. Iron on stabilizer beneath each design area. Insert the stabilized fabric into the frame. This is such an important step in getting the colors just right. These stitch outs will also be used as templates.
- Select many other designs and print templates. Wait to embroider the stitch rehearsal until you are certain you want to use these designs. Many will be rejected. Stitch out those selected designs on flannel to determine sizing and thread colors.
- Print the Madeira corner curve template.
Cut and Mark Fabric
- Cut two 45” squares, one of flannel and another of green gingham. This is larger than needed but the extra inches give a margin of error. Extra will be needed for as you audition the designs.
- Cut 47” square of lightweight batting. Again, this is larger than necessary, but good insurance. Set aside and let it “relax” before being put to use.
- Fold the gingham in half and press the fold crisply.
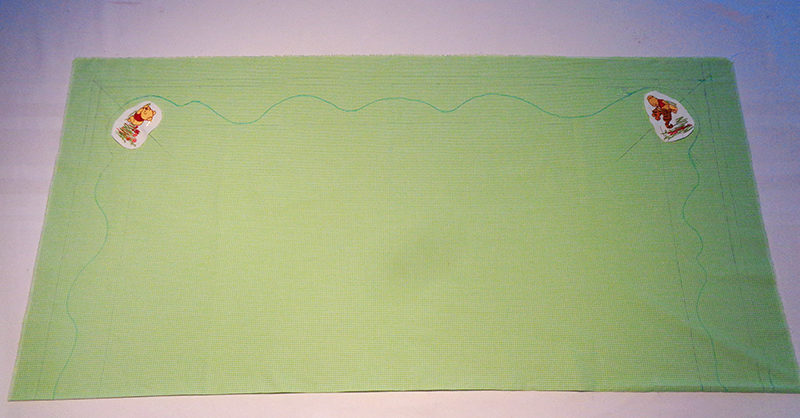
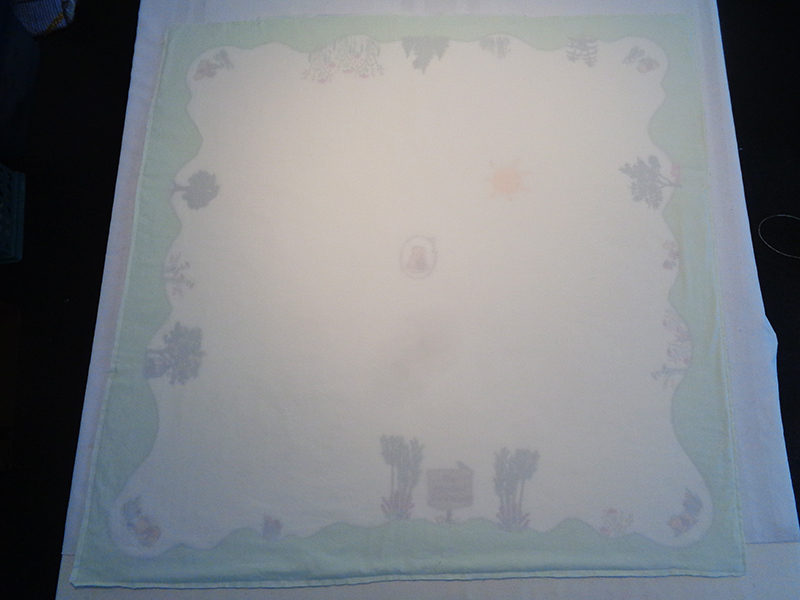
- Mark the gingham as indicated in this image with a heat erasable or water-soluble marker.
- Mark the 40” perimeter which will be the cutting line.
- Mark ½” inside that for the seam line.
- Mark 3 ½” above the seam line to indicate the top of the Madeira hem.
- Draw the Madeira corner curve ¾” above the seam line. Be sure to mark the 45-degree line.
- Draw irregular curves for hills and valleys, with valleys at least ½” above marked seam line and hills no higher than 3 ¼”, leaving room for a ¼” seam line at the top of the marked 3 ½´ upper Madeira hem line.

Note: At the fold, it is best that the line to be in a flat valley. If you draw a curve, make certain that at the fold, your curve is the smooth top of the hill. Do not end with your curve going up or you will have a pointy peak not a round hilltop.
Creating the Madeira Hem
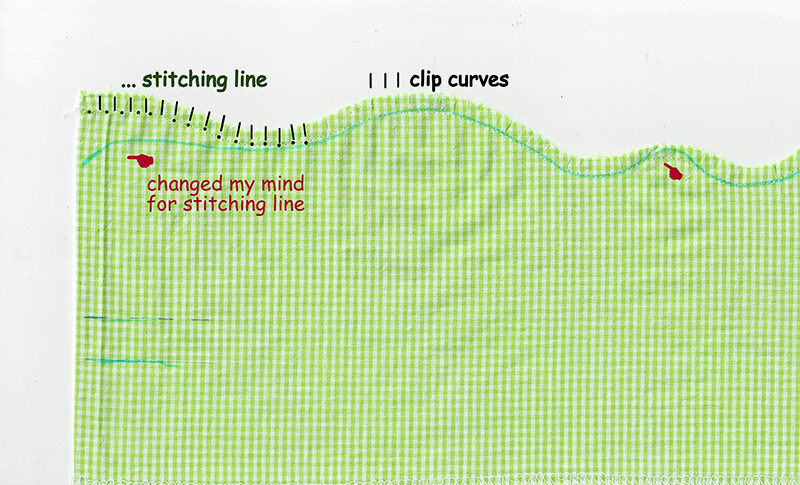
- Thread #75 needle with water soluble thread and bobbin with regular sewing thread. Stitch on marked line.
- PRESS ALONG THE STITCHING LINE FROM THE UNMARKED SIDE. When applied directly, the iron’s heat will melt the water-soluble thread. Pressing below the stitching line will remove any heat erasable lines you may want to access later.
- Trim ¼´from the stitching line, toward to center of the folded piece. Clip perpendicular and very close to seam line approximately every ¼” on sharp curves, a little less frequently on less sharp areas.
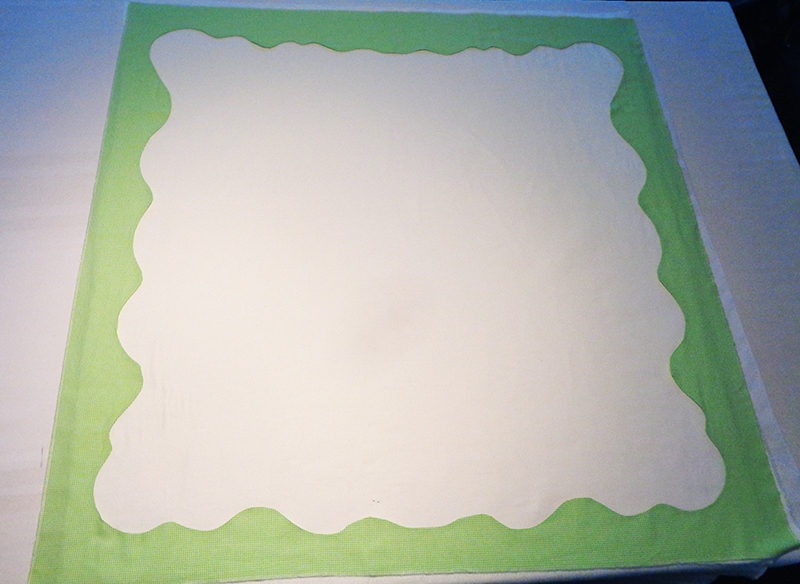
- Turn the piece right side out, using a pint turner to carefully pull the curve’s seam to the edge. Press a short section at a time until satisfied with the entire piece.

- Spritz water 5-6” along the seam. Give a minute for the water to soak into the fabric, then gently pull apart the seam as far as the thread has dissolved. Because the piece is folded, you will be working in a tube. Carefully press one side of the opened seam UNTIL IT IS ABSOLUTELY POSITIVELY DRY. Then rotate the tube and press the other side, again until it is absolutely dry. Continue spritzing short sections with water, opening the seam and pressing as before. After the first seam parting, it becomes easier as you have a wider opening.
Note: If you have questions, refer to Pooh burp cloth tutorial,
specifically, steps 6-8 with images.
specifically, steps 6-8 with images.
Join Flannel, Batting and Madeira Hem
- Spread batting flat. It is helpful to tape the edges of the batting to a surface. Apply basting spray.
- Place flannel on batting.
Note: This is really a two-person job, with one hand on each corner. Have your helper and the flannel ready. Pull the flannel taut and place it on the flannel. Smooth out any wrinkles. For extra security, hand baste after the flannel is in place.
- Center the Madeira hem on the flannel. Again, this is most easily done with two pairs of hands, though possible with one. Pin generously to flannel and batting.
Options: Again, hand baste for additional security.
- Machine baste gingham hem to flannel and batting along straight bottom edge. Then machine baste approximately 3/8” from curved edge.
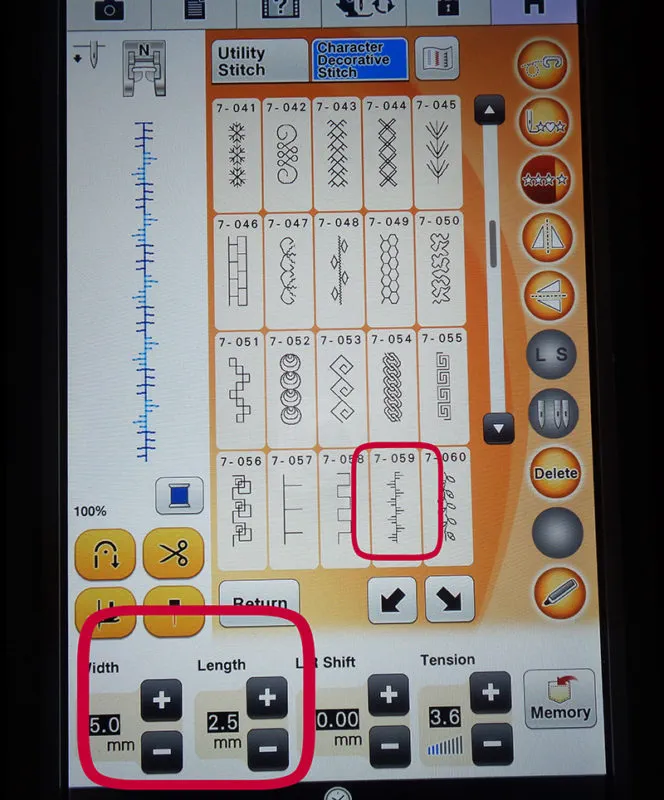
- Pin strips of lightweight stabilizer under the curved edge of the Madeira hem. Insert your knee lift which makes all that pivoting so much easier. Use lime thread and stitch to join the curved hem edge to flannel with stitch #7-059 with default settings.
Embroider Border Designs
Note: Hooping the flannel and batting is not advised. Using a very lightweight stabilizer and basting the piece to the stabilizer works well and prevents hoop burn. It is wise to use a larger hoop than necessary to make placement easier, as the piece tends to shift as the basting frame is stitched. After it is stitched to the stabilizer, you can begin exact placement with plenty of wiggle room.
- Use Pooh stitch rehearsal pieces to mark corner placement for designs. Embroider corners.
- Combine a Baby Pooh design with one of the tall grass designs. Nestle this into one corner and embroider.
Note: If you have hand basted, take extra care to snip the basting threads as the foot approaches them. The threads will snag on the embroidery foot and wreak havoc. Do not walk away from the machine while embroidering with basting threads in place.

- Repeat with each remaining three corners.
- Place printed design templates in valleys and on hills to create the sort of Wood Winnie the Pooh and his friends would inhabit.
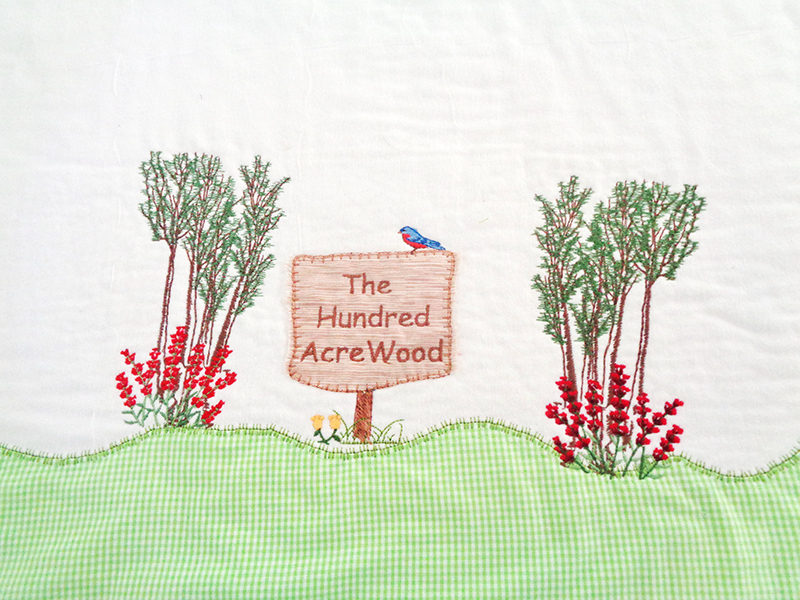
- Create a Hundred Acre Wood sign for an introduction to the quilt’s theme. No design was available, so an appliqué frame was taken from the old Winnie the Pooh card SA 305D, text added with PE-Design and a post from a treehouse. The remaining designs were from iBroidery.com--the trees from the bicycle design, the flowers added to the base, the robin extracted from the birdhouse.
- Plunk Eeyore under a lemon tree from Brother tree card #33—doesn’t that seem appropriate for the sad creature with the sour outlook on life?
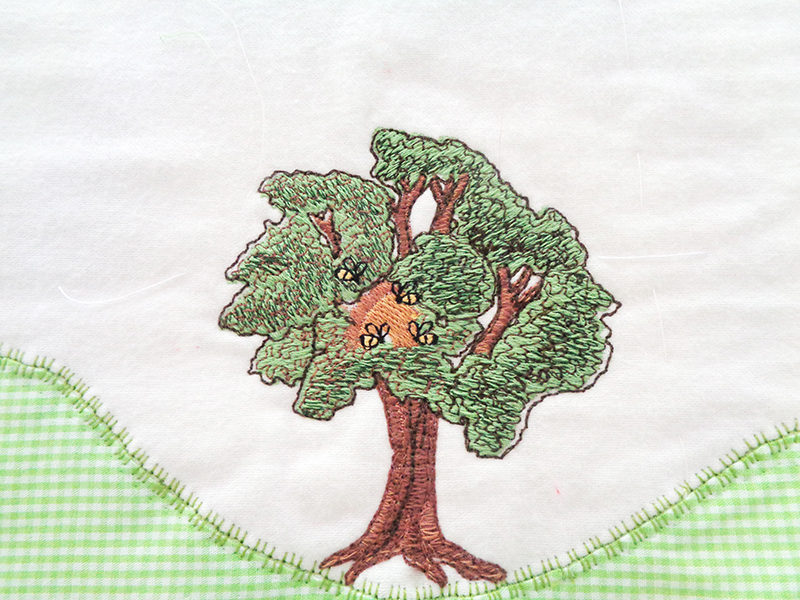
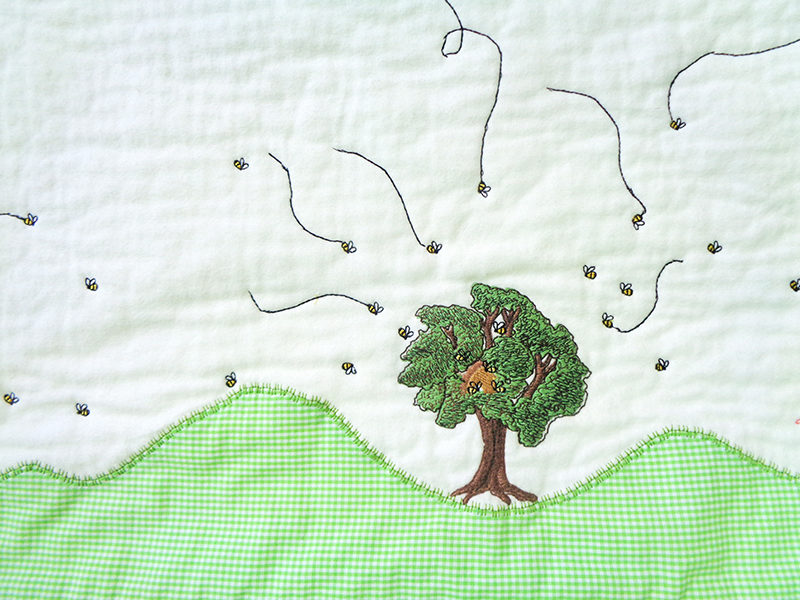
- Add a bee hive from Baby Pooh and Friends card SA318D to an enlarged apple tree from card #33 Trees.
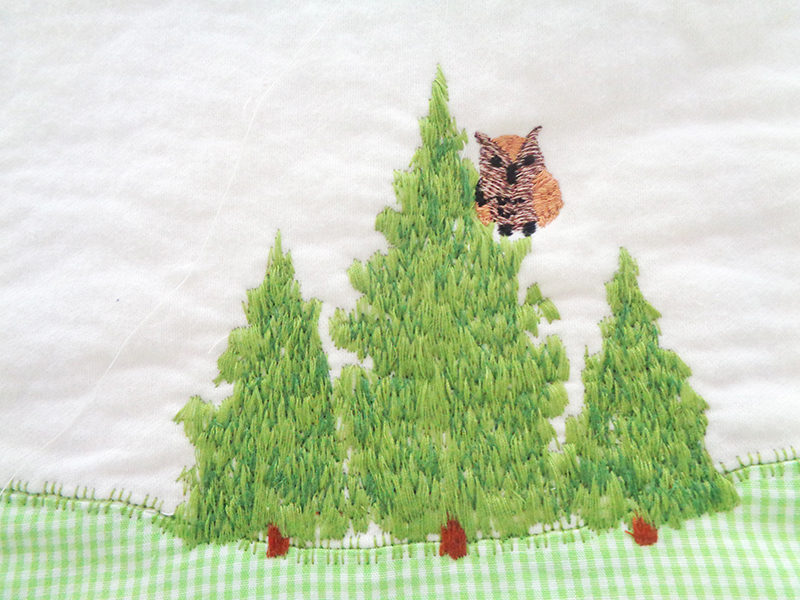
- Select several trees, like these three heavily textured evergreens from the Scenes card. Owl seems to be coming in for a landing to watch over the happenings in the Wood.
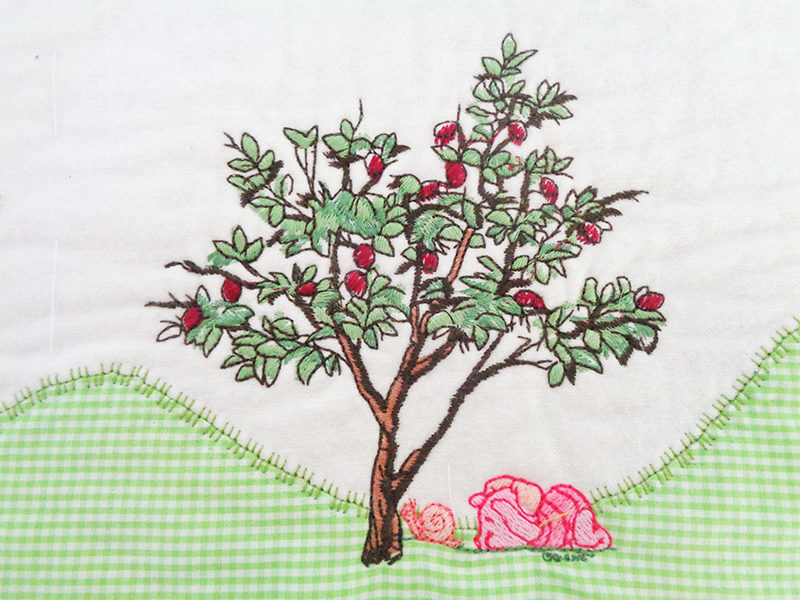
- Watch Piglet track a snail as he approaches an apple tree from card #33.
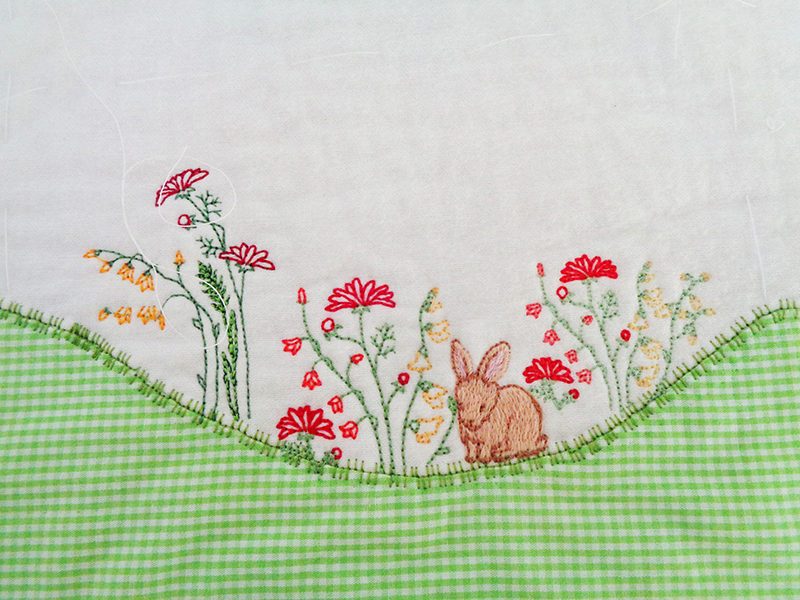
- Hide the little bunny in the wildflowers. He doesn’t look much like Rabbit who hangs out with Pooh and the gang. Perhaps this is Rabbit’s little cousin.
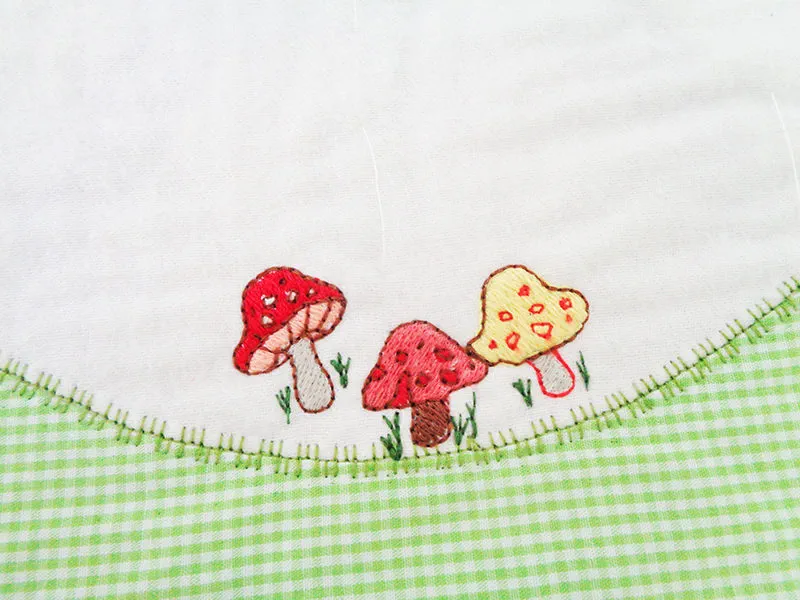
- Add mushrooms from the Snow White card for some botanical variety.
- Place a ladybug on the tall stalk from card 49 Country. Could this be the same insect Pooh was studying in one corner?
- Embroider remaining designs around perimeter just above or nestled into the hillsides.

- The remaining Madeira border embroideries were combinations of wildflowers and tall grasses.
Embroider Center Designs
- Mark the center and embroider Classic Pooh in the oval in the center of the flannel. The design is sized as 2.06 x 2.56” but can be resized up to 4.14 x 3.37”. Do not yet embroider the bees. They are the last designs stitched, after the backing is attached, and serve to join the backing to the batting and embroidered flannel.
Note: The design was also modified by changing the grass to green. This was done by stitching slowly and changing thread when coming to this area of the design. The practice stitch out was very helpful to accomplish that by writing down the stitch numbers when it came time to change threads.

- Bring sunshine into The Hundred Acre Wood with this appliqué sun which is stitched last. The design is from Winnie the Pooh card SA 305D.

Add Backing
- Pull quilt top taut and join to flat surface with tape, right side up. Cover with taut pima cotton backing and pin securely around edges.
- Sew the two backing to the quilt with ½” seam, leaving a generous 12” opening for turning right side out.
- Trim corners and then trim seams to ¼”, but leave the entire ½” seam allowance at the 12” opening.
- Turn right side out, carefully poking corners out. Press edges and hand whipping the 12” opening closed.
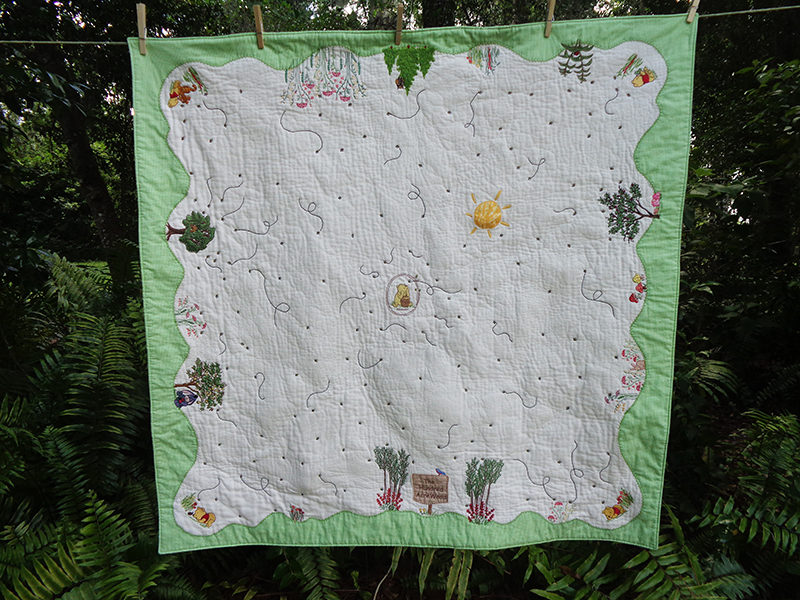
- Note, I am a big believer in hand basting. Because this was such a time-consuming project, I opted for safety pins to temporarily join the three layers of the quilt sandwich, rather than hand basting. The quilt backing shows the poor results from neglecting this step. If you have the time, I suggest you hand baste.
- Straight stitch around the outer edge. This is precisely done using Brother’s Edge Joining/Stitch in the Ditch foot SA184 with the needle in the far-left position.
Quilt with Bees
- Add single bees extracted from iBroidery.com design 200910889. These adorable, petite buzzers do the job of holding the quilt together. Lay the quilt flat and use an erasable marker for placement. I chose to circle bees around the center Pooh with his HUNNY pot to create a frame.
Note: I chose to use a fine cotton thread for the bees.
- More bees were added as needed to securely hold the quilt together. Hoop stabilizer as before, baste the quilt in place and embroider bees where the placement marks are. Remember that the bees can and should be rotated relative to their position near the flowers, trees, etc.
- The bee flight paths were added on the sewing side, without embroidery. I selected utility stitch 1-05, a very unwise choice. First, the bee flight does not need all that heavy stitching and second, it is very hard pivot a back and forth stitch like that. A simple straight stitch would have looked nicer and been much quicker.
Note: If I had given that more thought, I would have realized that fewer bees would have been needed if I have marked the flight paths. As it is, there are enough bees to make honey for all the bears in a 600 acre wood. I suggest you include the flight plan with your bee markings and embroider fewer bees.
 And now it is done - wasn’t that a fun challenge? Now, if you combine the Pooh bib
and the Pooh burp cloth,
you have an extravagant gift for a special baby.
Related Projects
Stay Connected
* Required fields