Multi Colored Mickey and Minnie Outfits
Step out beyond Mickey and Minnie’s traditional red and black palette with these fun, multicolored iBroidery.com designs. The coordinating toddler brother/sister outfits will bring big grins to children as well as adult Disney fans. Requiring only a 4x4 frame, iBroidery.com’s delightful, contemporary Mickey and Minnie can be embroidered on any Brother Disney machine. Planning a trip to Disney World with your little ones? Deck them out with unique and eye-catching new Minnie and Mickey designs.
Requirements
Note: Requirements and pattern modifications for Minnie’s dress: View A, size large, 18 months. Smaller sizes will need other adjustments. Mickey’s romper: View C, is size medium, 12 months.
For each outfit:
- Fabric: white twill for bibs, multicolored print for skirt and romper bib piping, blue pique’ for romper and skirt bib piping.
- Notions: two 1.25” blue buttons, 2 pink buttons, ¼” and 1” elastic, thread for embroidery and construction, piping trimmed to 3/8 seam allowance, fray block
- Brother embroidery sewing machine with 4x4 or larger frame
- iBroidery.com designs: MMUP01 (Mickey)
and MMUP02 (Minnie) - Pattern Simplicity 1378
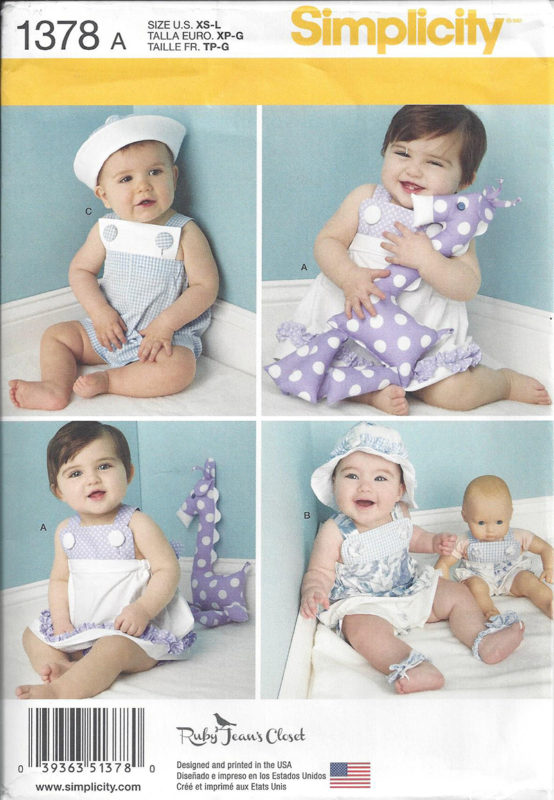
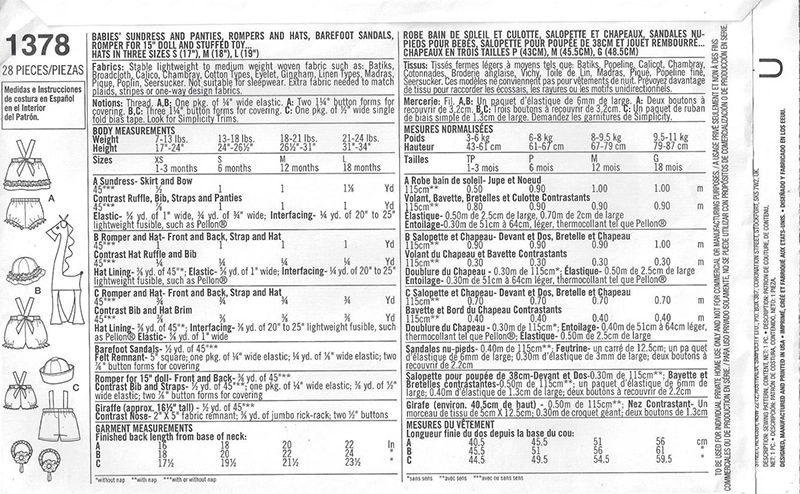
Disclaimer: Simplicity pattern #1378 is part of the Simplicity Creative Group. Brother International Corporation makes no representations or warranties regarding such product.
Preparation
- Prewash and press fabrics.
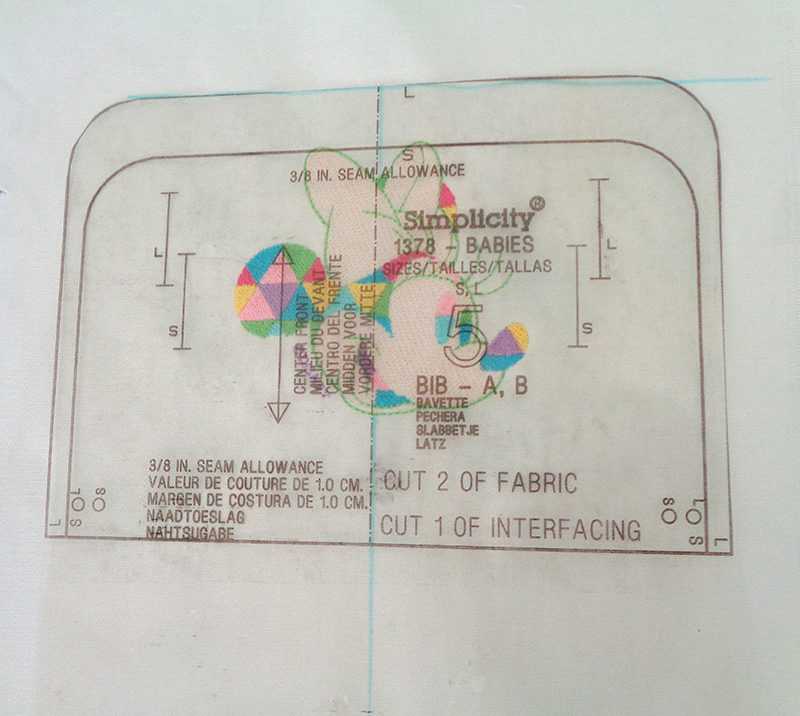
- Scan bib pattern piece and print on card stock, template plastic or trace onto tissue paper, extending bottom of pattern by 1/2”.
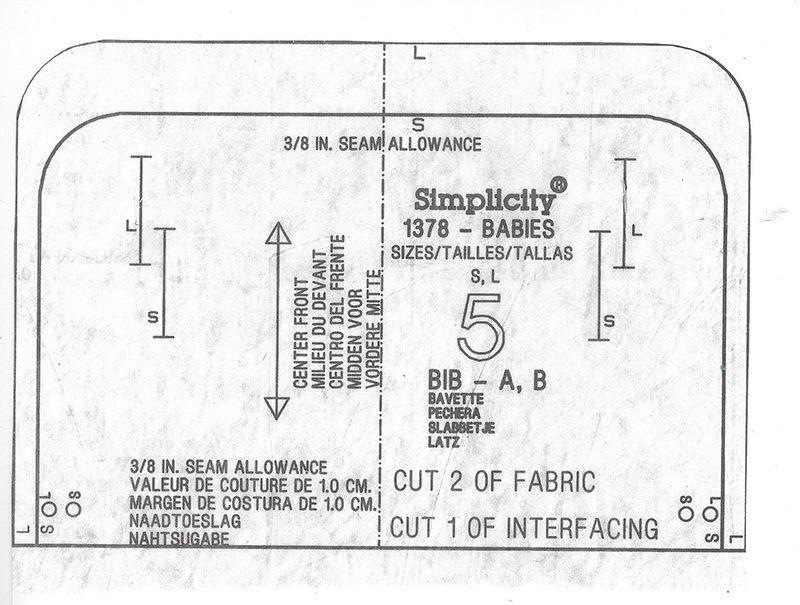
Note: Because a Disney design template cannot be printed, there is no way to be certain the design will fit on the yoke, especially on smaller sizes. The width is not a problem, but the height of the design might extend into the seam allowance, especially on smaller sizes. By embroidering on a larger piece of fabric, the overlaid pattern template can arrange for perfect placement. If necessary, extra bib length can be accommodated by moving the buttons to a comfortable length.
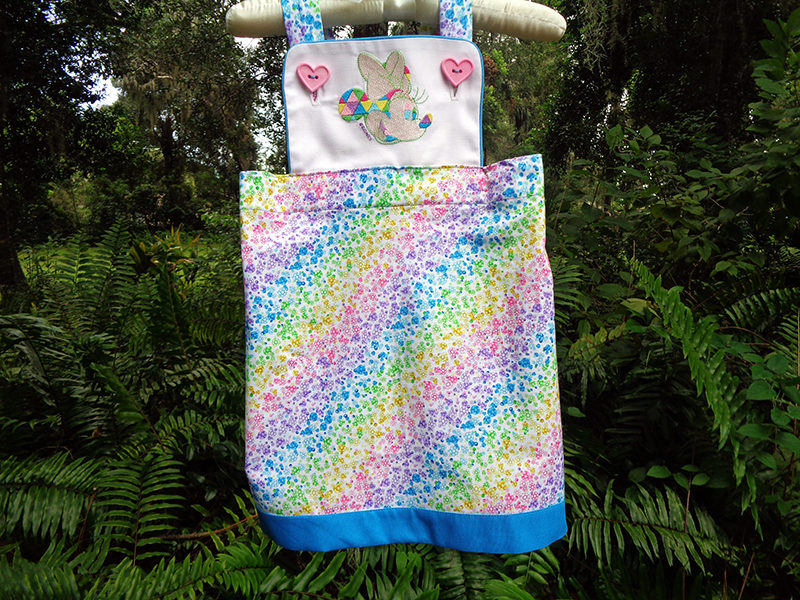 Minnie dress: size L (18 months): Bib
Embroidery
- Cut one 10” square white twill. Center twill in hoop and embroider MMUP2 Multicolored Minnie,
coordinating thread colors with skirt fabric. - Draw a line parallel to and 5/8” above the highest point of the embroidery. Draw through vertical center of embroidery.
Note: This leaves ¼” between seam line and embroidery.
- Cut out template adding 1/2"” to bottom. Slit through template for buttonhole marks.
- Line up top of template with top drawn line on embroidered piece. Trace template and mark for buttonholes.
Instructions
- Apply blue piping to bib before cutting out. Use blue or contrasting thread in the bobbin as well as the needle. Because a mini piping was chosen, use of open toe foot SA186 works well.
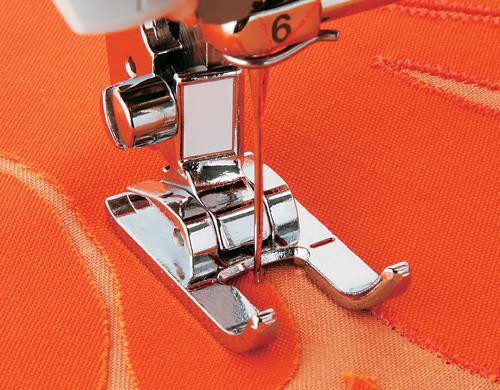
- For standard or jumbo piping, foot SA192 is best.
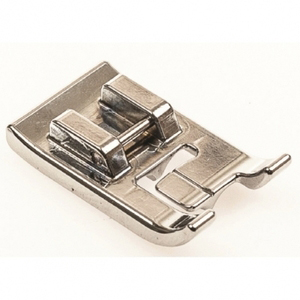
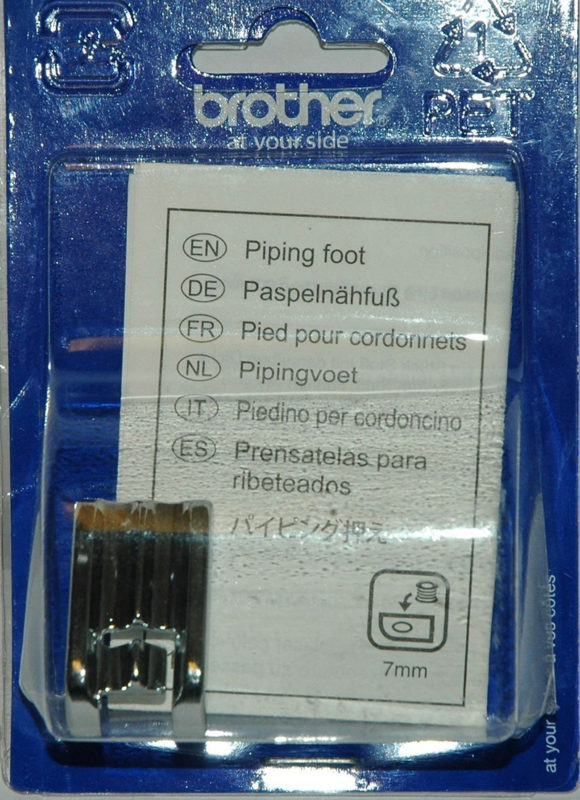
- Extend piping to bib’s lower lengthened edge.
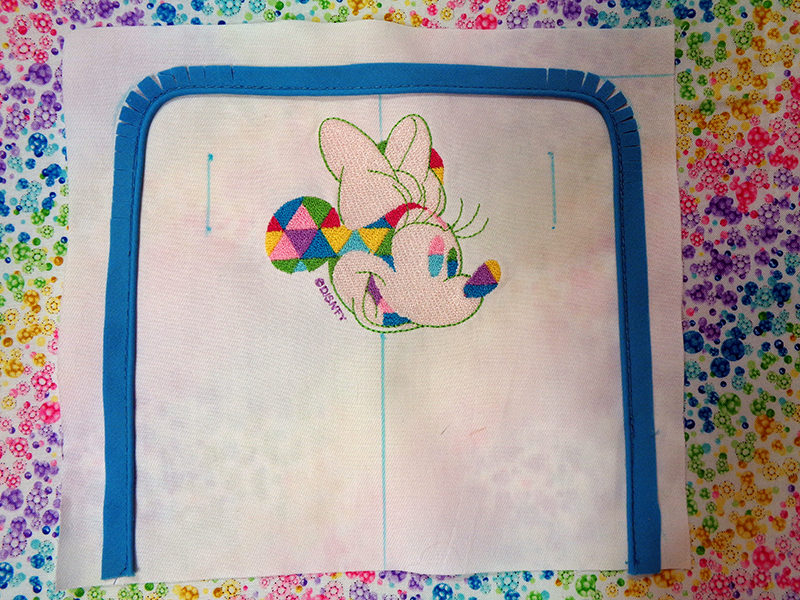
- Cut out second white bib piece larger than cut out bib.
Note: Interfacing was eliminated because the twill fabric is sturdy enough to support the bib. Lighter weight fabric would require interfacing.
- With right sides together, seam both sides and top, using the piping seam line as a guide. Leave bottom edge open.
- Trim up to seam allowance. Clip curves, turn right side out and press.
- Stitch buttonholes.
- Overlay bib template and cut bottom edge ½” longer than pattern.
- Clean finish raw edge with zig zag, serger or my personal favorite Brother accessory, the SA177 Side Cutter.
- Select an “S” (for side cutter) stitch from the menu on page 1. #29 worked well for me.
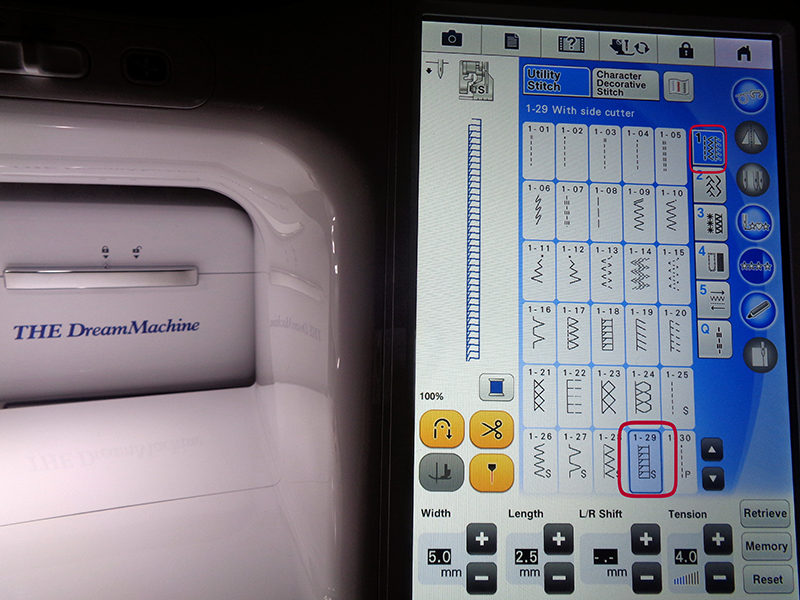
- Thread needle before attaching side cutter.
- Attach side cutter to clean finish bottom edge of bib.
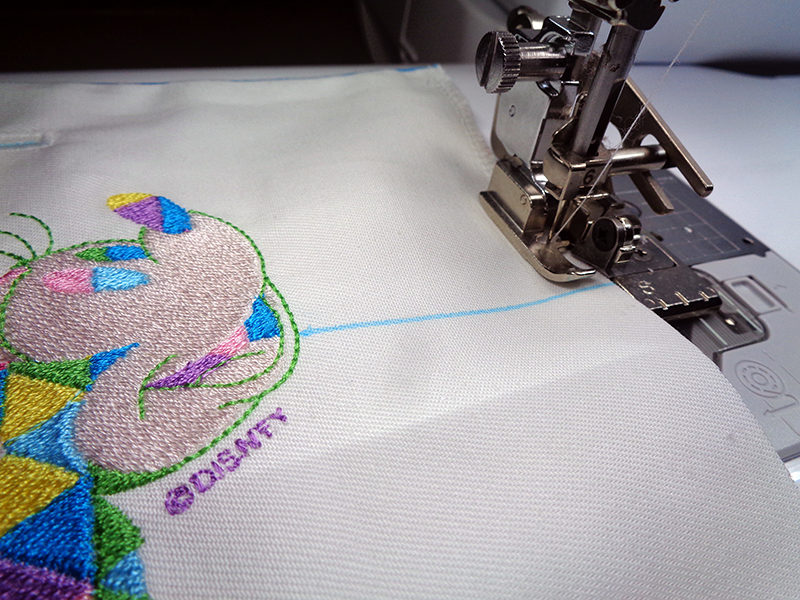
Skirt and Bib Attachment
- Construct skirt as directed in pattern, seaming front to back with 5/8” seam allowance.
Note 1: The front and back skirt pattern pieces for size Large, 18 months, are each 11” on the fold. That renders a 44” skirt. I chose to seam the 45” width of fabric together in a tube, with one seam at center back.
Note 2: Option: cut skirt 2” shorter which is the hem allowance. Bind it with blue pique instead.
- Mark center front of skirt and transfer pattern marks, indicating where elastic ends, are stitched-in place.
- Fold and press 1.5” from top raw edge for casing. Use stitch in SA191 Stitch in the Ditch Foot
to straight stitch a perfectly placed tiny header along the fold. Move the needle 4 positions to the left.
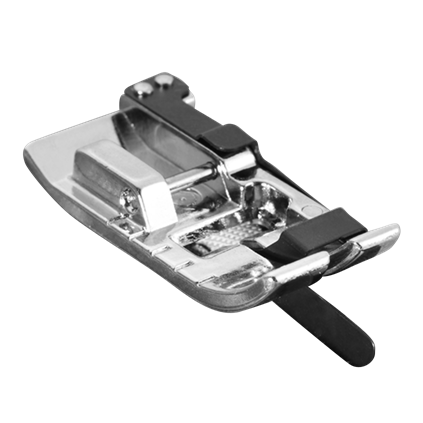
- Press raw edge under a scant ¼”. Stitch casing down leaving an opening between “o” pattern marks for elastic insertion.
- Mark the elastic 16” from the end but do not cut. With a large safety pin, thread elastic through casing. At the place where the lower casing ends, stitch the elastic in place. Pull the elastic tail through the casing until the 16” mark is visible, then stitch that end in place. Cut away the excess elastic.
- Pin right side of the embroidered bib against wrong side of the skirt, aligning the center marks. Then stitch the casing closed, catching the clean finished edge of the bib in the same seam.
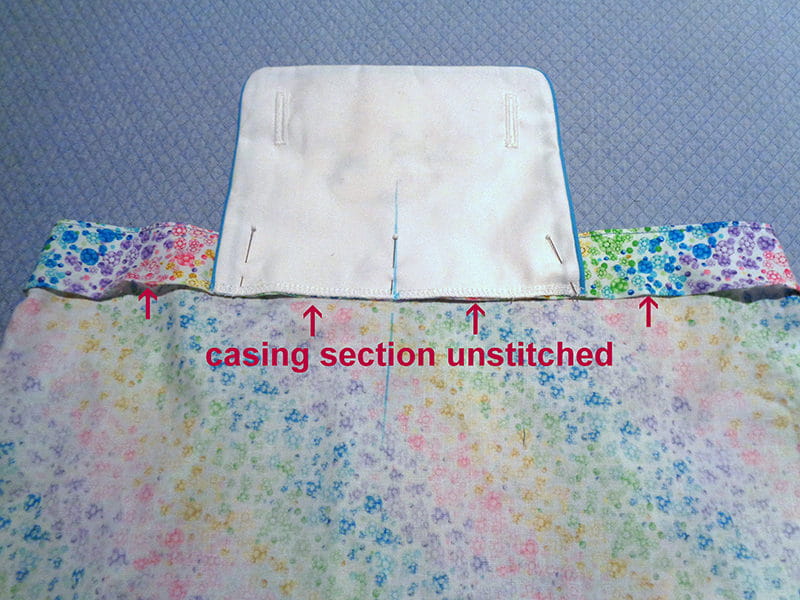
- Use SA191 Edge Stitch Foot
to complete closing casing and attach bib.
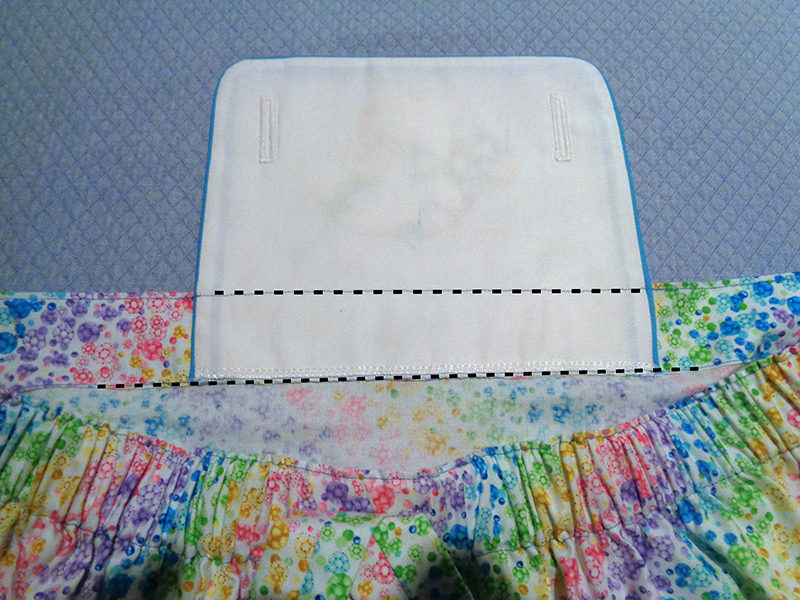
- Stitch over existing tiny header along the bib front to secure the bib top.
Straps
- Cut two strap pieces and mark diagonal stitching line. Complete as directed in guide sheet.
- Attach straps as per pattern instructions.
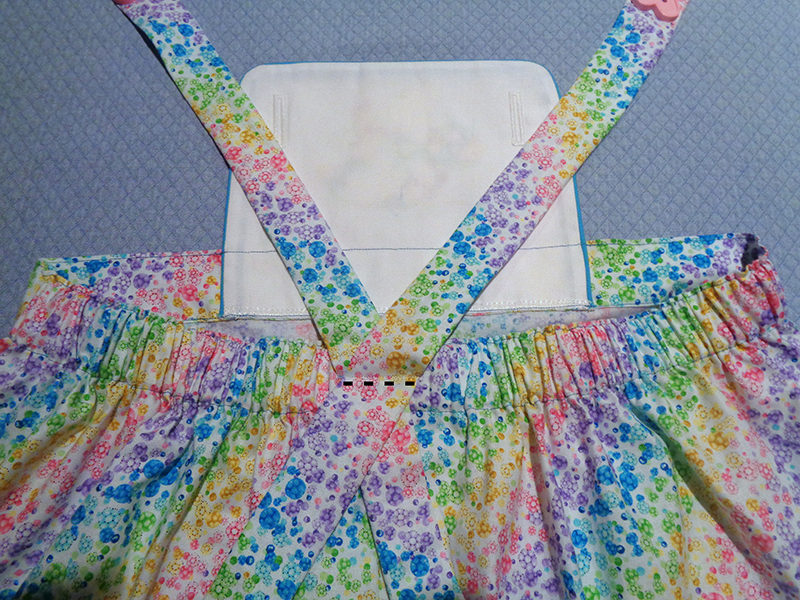
- Stitch buttons to straps.
- Cut buttonholes open.
Note: Applying a fray block to the buttonhole before cutting leaves a cleaner opening. Make sure fray block is dry before cutting.
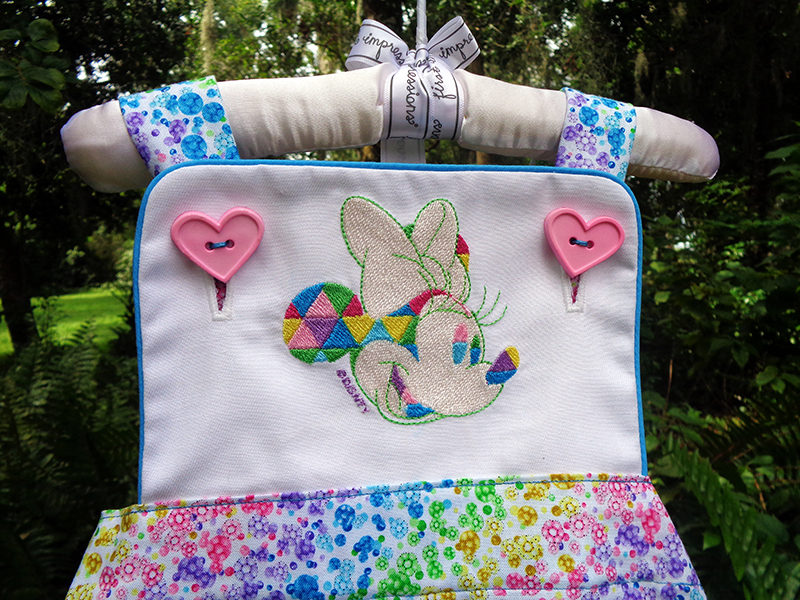
- Tie strap tails into a bow.
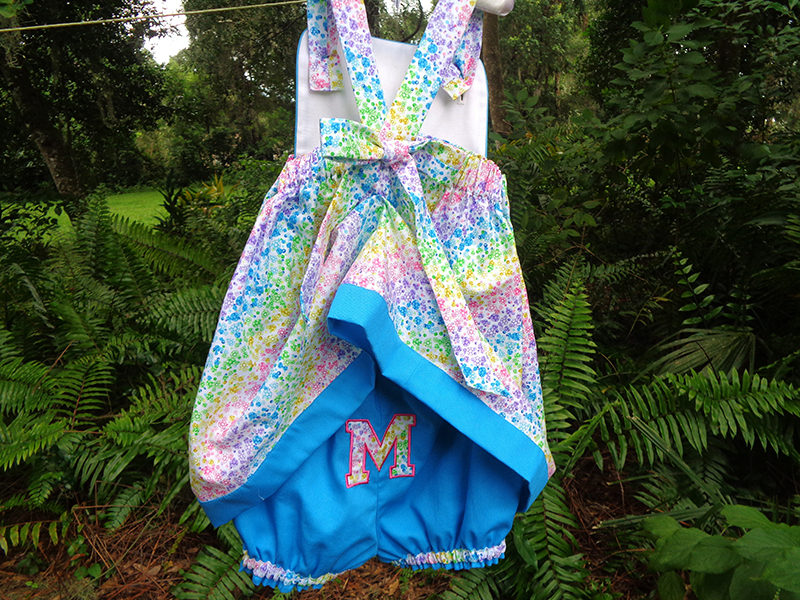
Hem
- Turn up 2” hem as instructed or bind with blue pique as shown.
- Binding Option:1.5” was cut from skirt hem. A three inch strip of blue pique’ was stitched into a circle measuring the same circumference as the skirt. It was folded in half, then joined to the hemline with ¼” seam allowance.
Panties
- Cut out two pantie pieces as directed on pattern.
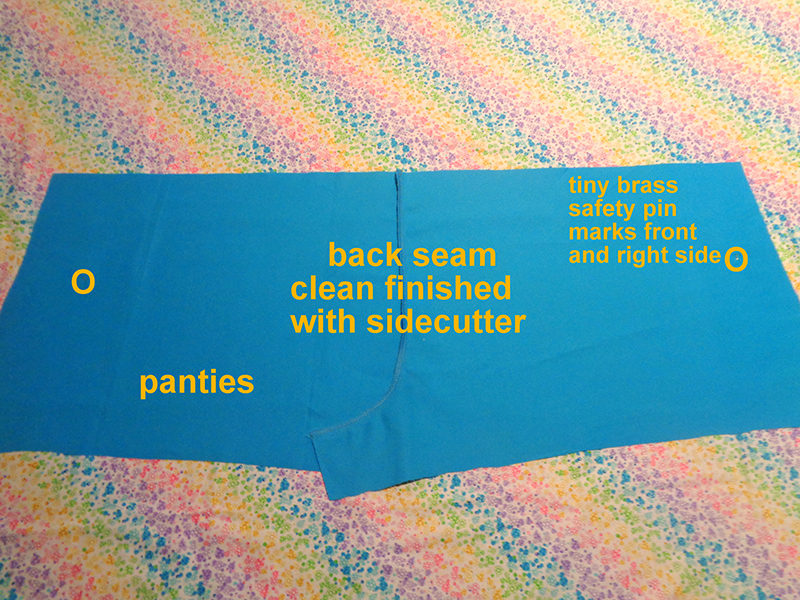
Note: It is helpful to insert a small brass safety pin a few inches from each front cut line. Especially when using fabric with similar but certain right and wrong sides, as the pique’ used, the pins also mark the right sides.
- Stitch the back seam with recommended 5/8” seam allowance. Trim seam and clean finish as before with zig zag, serger or accessory side cutter.
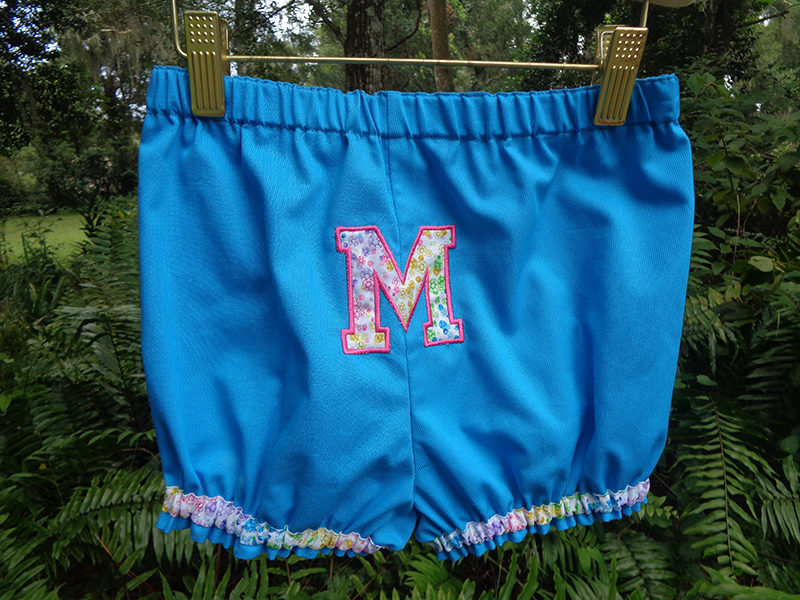
- Optional: Appliqué an M for Minnie on the back of the panties. Center monogram over back seam.
- Make print elastic leg casing.
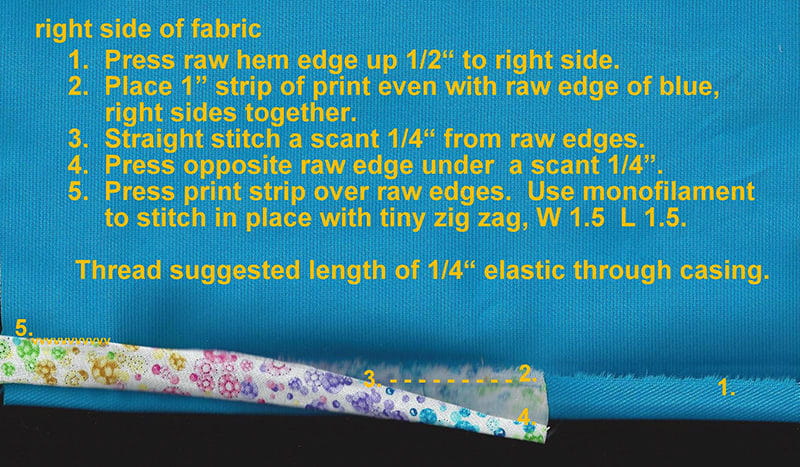
- Thread ¼” elastic through casing and stitch securely at each end.
- Seam crotch with right sides together, then clean finish.
- Press crease 1.25 in from raw edge of waistline.
- With Stitch in the Ditch foot, straight stitch 3 positions from center along the crease. This gives a pretty little header, as on the skirt waistline.
- Press a scant ¼” crease along waistline raw edge. Press casing to panties.
- Stitch close to fold, leaving an opening for elastic insertion.
- Seam elastic to specified length and close casing.

Mickey Romper
Note: Just like the dress bib, ½” was added to the bottom of the romper bib pattern piece. Then the white twill bib was embroidered, cut out as per the pattern and constructed. Piping was made from the floral print from the dress skirt and attached in the same manner.
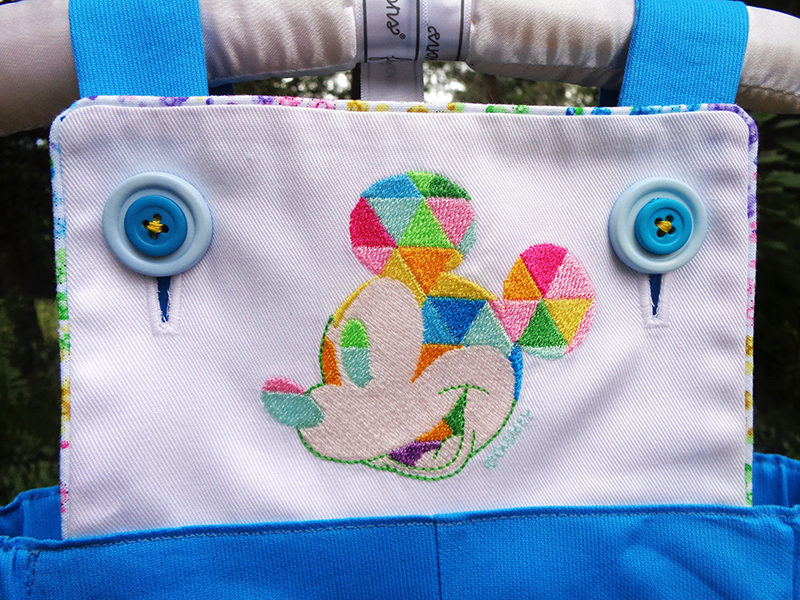
Note: Buttons for Mickey’s romper created a challenge when I could find none which were both the right size and the right color. The only blue buttons I could find that were similar in color to the pique’ were too small. My solution was to use lighter blue buttons that were the correct size and then stack the darker blue button on top.
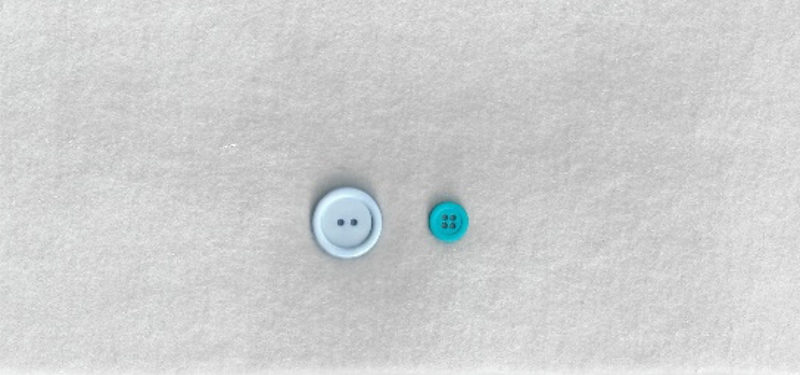
- A second challenge was that the larger buttons were 2-hole and the darker blue were 4-hole. In order to make them work, two holes of the free-standing smaller buttons were hand stitched through two holes in order to fill them to look completely stitched when joined to the larger button.
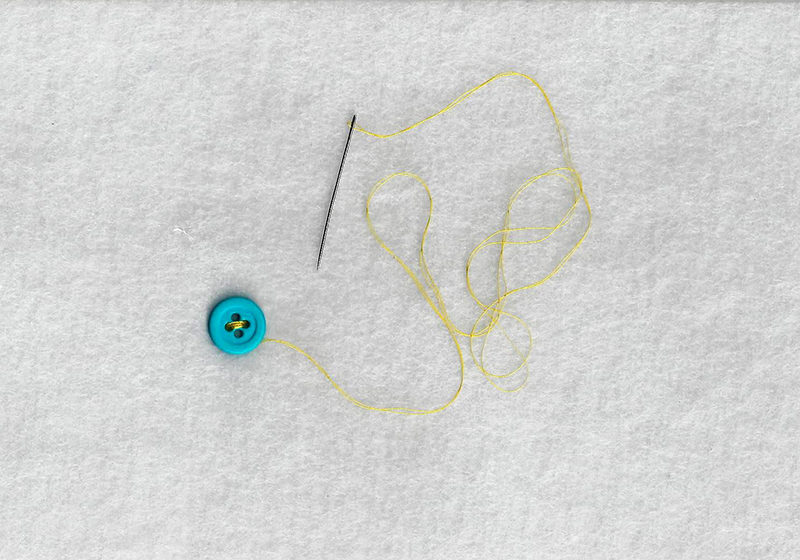
- Then the empty two holes were lined up with the holes of the larger buttons and hand stitched together.

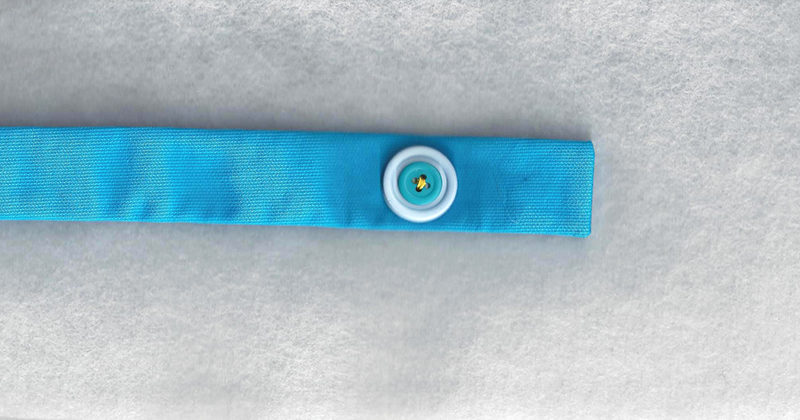
- Finally, the stacked buttons were machine stitched through the two large buttonholes to the straps. I think I like this look better than a single button.
 Oops, I somehow missed taking a single photo of the finished romper, except in the group shot at the top of this tutorial. But I expect you can see the finished romper there. These brother/sister outfits would be so sweet together. Alone, each has is comfortable and has enough charm to enchant a child.

