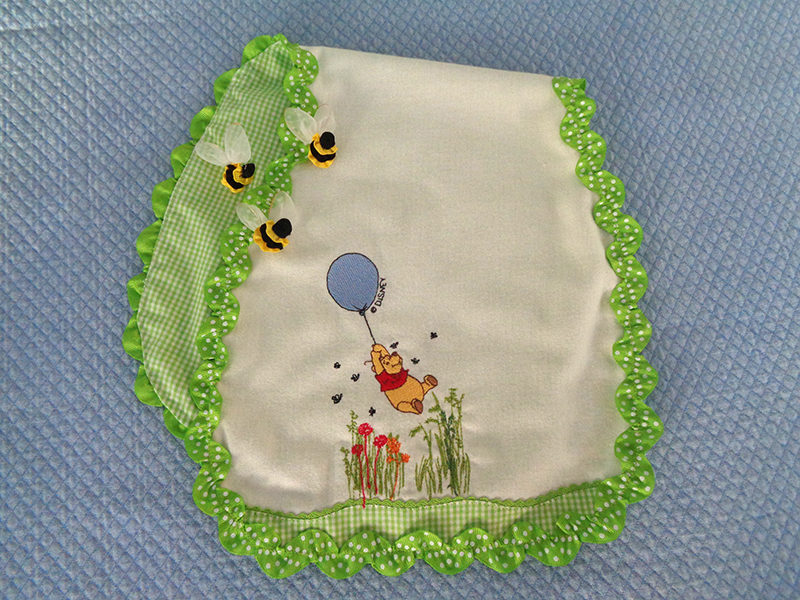
Part 1: A Winnie the Pooh Inspired Burp Cloth
Beloved for generations, Disney's Winnie the Pooh is a storied philosopher bear. In this fun inspired project, he is featured floating from a balloon, having just lifted off from The Hundred Acre Wood. Pooh’s airborne adventure is sure to delight children and those who pat their little backs awaiting the burp. Celebrate Pooh and his wisdom with THE Dream Machine
or another Brother embroidery machine with Disney designs. Stitch this burp cloth for your favorite baby or for a baby shower gift. Learn an easy Madeira applique’ technique and how to combine designs. Upcoming posts will feature a coordinating Winnie the Pooh bib and blanket. What a sweet layette the three pieces will make!
- Fabric: flannel: 10 x 20”, green gingham check: 10 x 20”, 11”x 1.5”
- Designs: iBroidery.com designs: Pooh balloon
and Tall Grass - Threads: embroidery, construction, water soluble, monofilament, bobbin
- Notions: glue stick, waste cardboard approximately 11” x 4” (for glue stick application), 11” baby rick rack, 66” ruffled grosgrain ribbon, tearaway stabilizer, #75 needle
- Or another Brother embroidery machine with Disney designs embroidery/sewing machine with 5x7 frame NOTE: This could also be embroidered in the 4x4 frame by rehooping.
- Feet: Open Toe Foot, J Multipurpose foot, W Embroidery foot
Instructions
- Starch and press 10” x 1.5”gingham. Fold in half rendering a strip 5” x 1.5”.
- Use erasable marker to draw irregular curve at top edge of folded gingham to mimic terrain. Make the line near the fold relatively flat with at least ¼-3/8” between line and top raw edge.
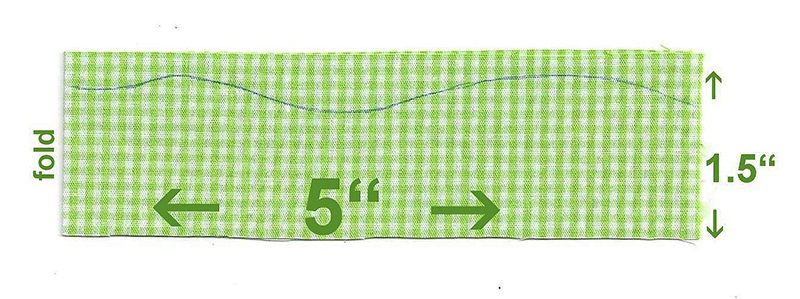
- Attach open toe foot. Thread needle with water soluble thread then stitch slowly, directly on marked line.
Note: Use of knee lift is helpful for frequent pivoting to insure a smooth line.
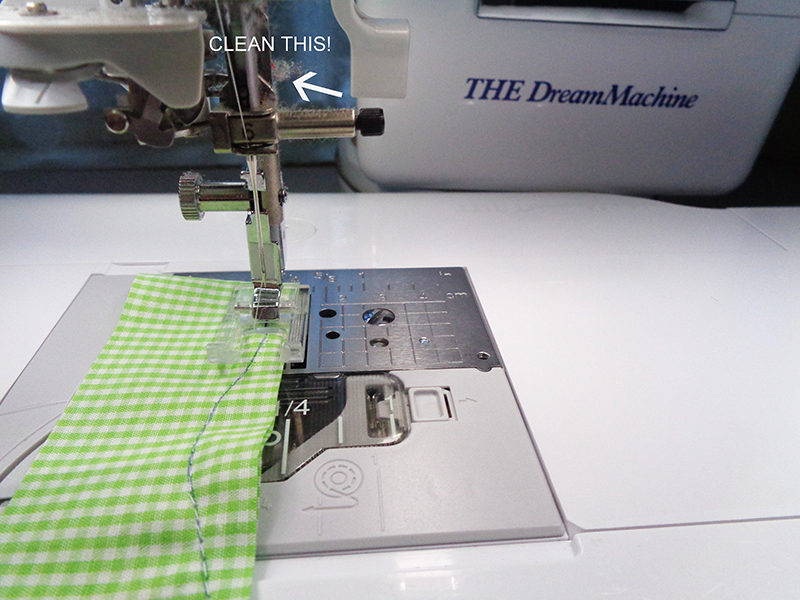
- Press on unmarked side.
Note: Pressing directly on water soluble thread may melt it.
- Trim ¼” from stitching line. Clip curve exactly perpendicular to stitching line.
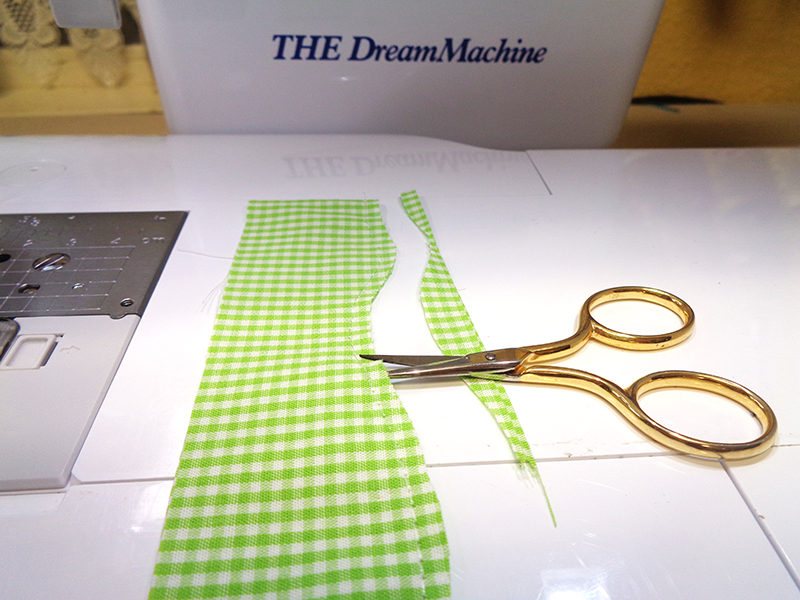
- Turn right side out. Press, making certain that the seam runs along the top folded edge.
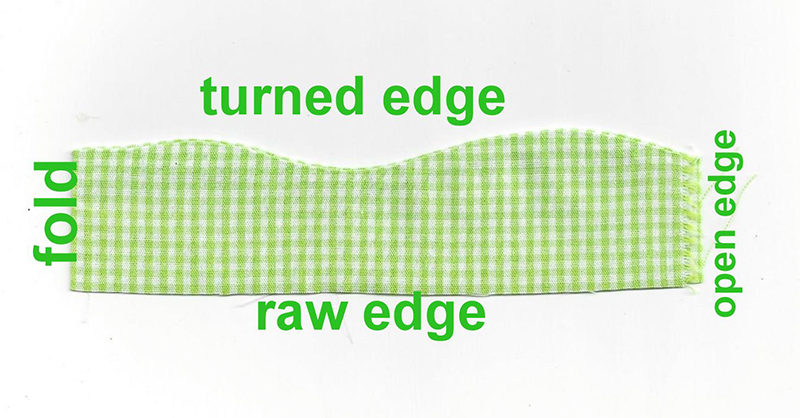
- Apply spray starch, followed quickly by PRESS.
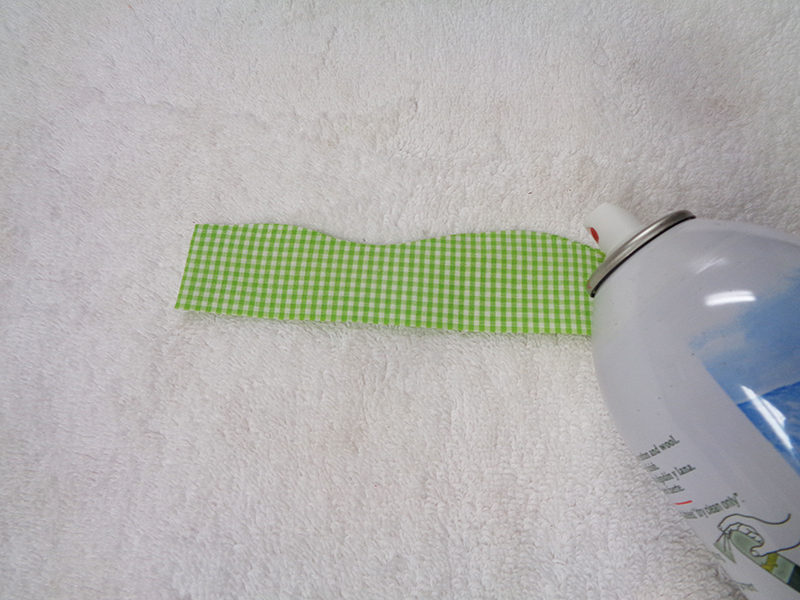
Note: Do not slide iron over fabric. Lift to determine if gingham is completely, positively dry. Make certain it is before proceeding.
- Pull gently to unfold the gingham. If there is resistance, carefully clip the thread which did not dissolve. Press out center fold.
 Remove Water Soluble Thread!
- Apply glue stick to WRONG side of Madeira hem. Then press baby rick rack so that points extend beyond folded edge.
Note: Place Madeira wrong side up on card board to prevent glue getting onto unwanted surface.
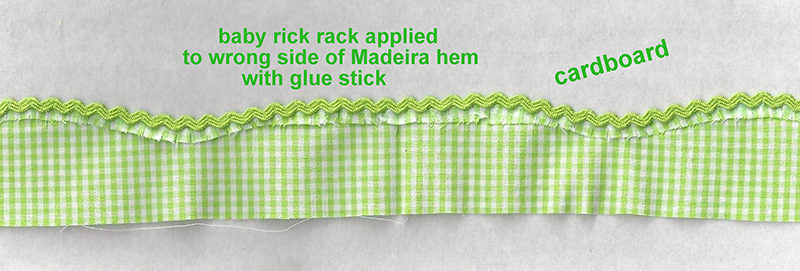
Note: Pressing the rick rack strengthens the adhesive.
- Pin Madeira hem to right side of flannel, matching raw edges. Handle gingham carefully so as not to disturb the rick rack. Baste hem to flannel along bottom edge with very scant ¼”seam allowance.
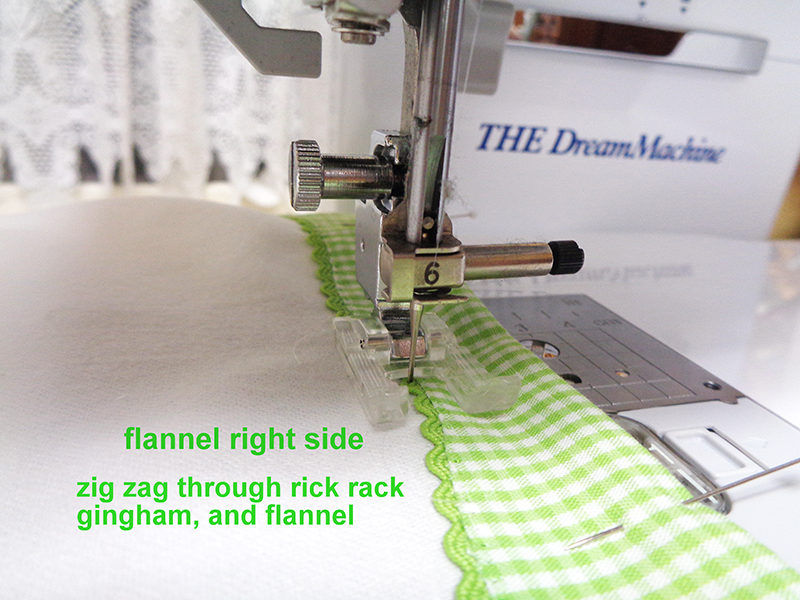
- Thread needle with monofilament, select zig zag stitch #1-10, w 1.5, L 1.2, attach open toe foot and knee lift.
- Join gingham Madeira hem to flannel by zig zagging slowly into the rick rack and the gingham. Pivot frequently with your wonderful knee lift.
- Use a saucer and salad plate or bowl to mark flannel with rounded corners, shoulder curves and opening for turning. Use water soluble or heat erasable marker.
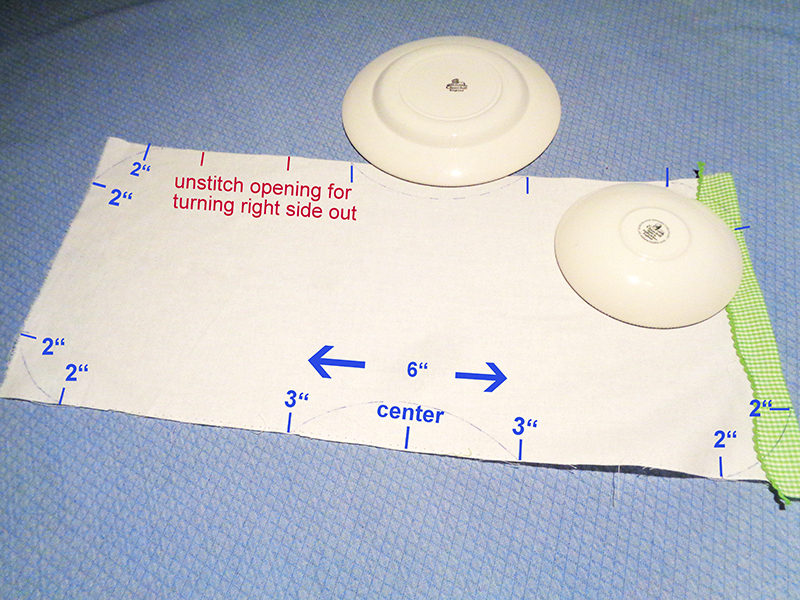
Note: These marks to help with design placement. After embroidery, they will be transferred to wrong side.
Embroidery
- Transfer tall grass design and Pooh with balloon to memory stick.
- Hoop tearaway stabilizer in 5x7 frame. Spray lightly with adhesive. Place flannel with hem ½” to 1” from bottom of frame.
- Baste flannel in place with frame approximately 5 x 7”. To baste with built in shapes, select #4 in the right column of the opening embroidery menu.
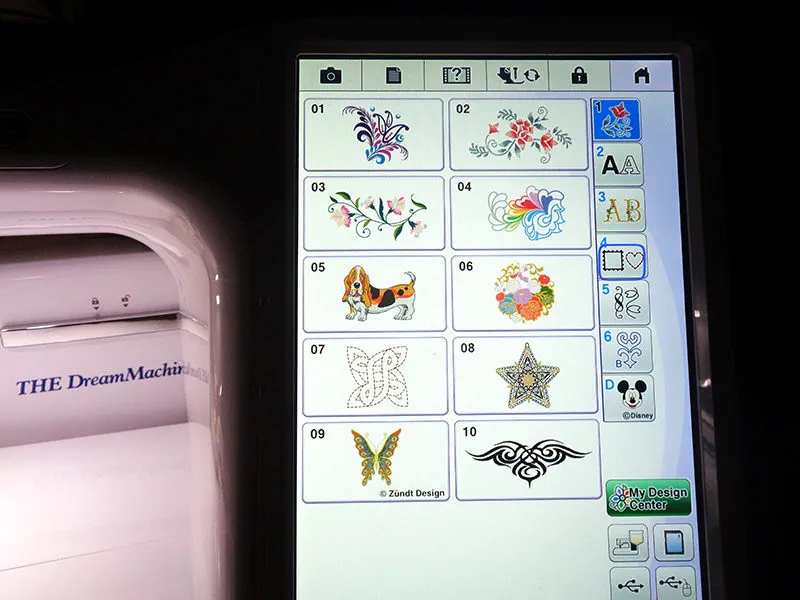
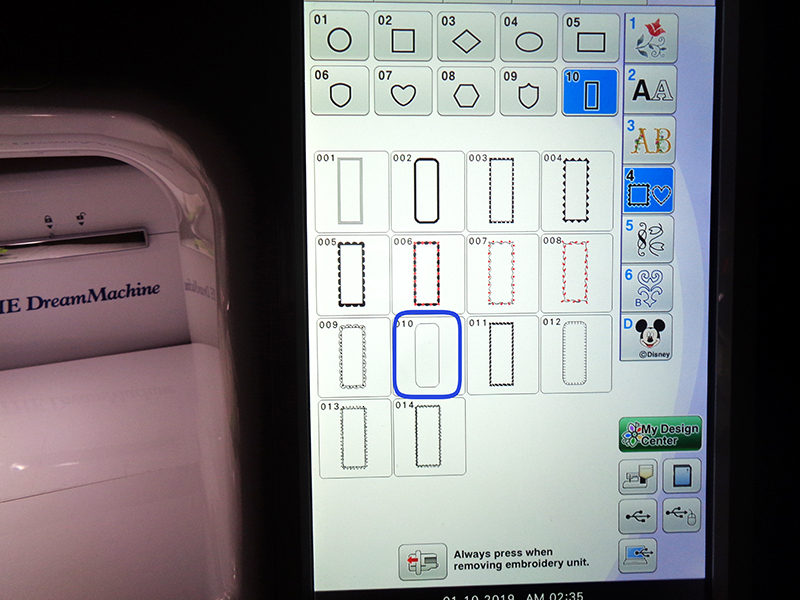
- Select rectangle shape #10 on the next page. Select the straight stitch frame #10.
- Resize frame to nearly fill 5x7 frame. Use arrow keys to enlarge the rectangle.
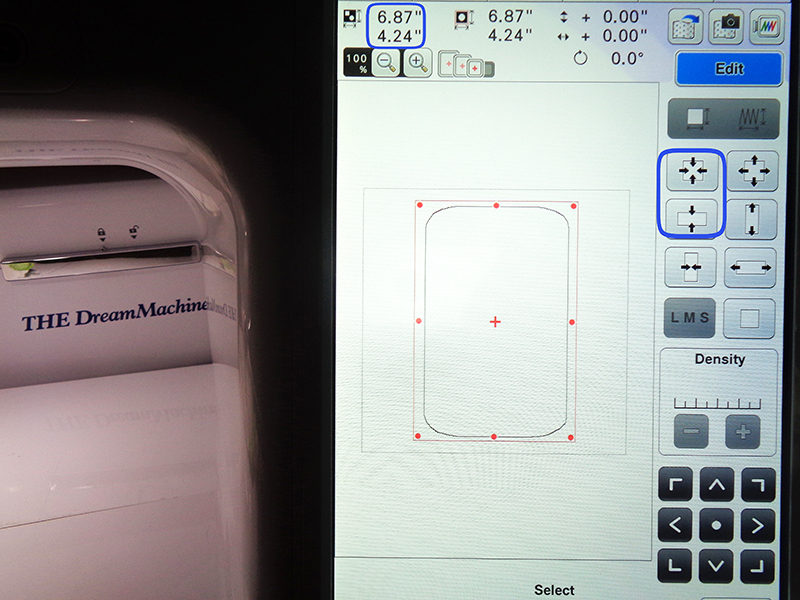
- Baste flannel to stabilizer.
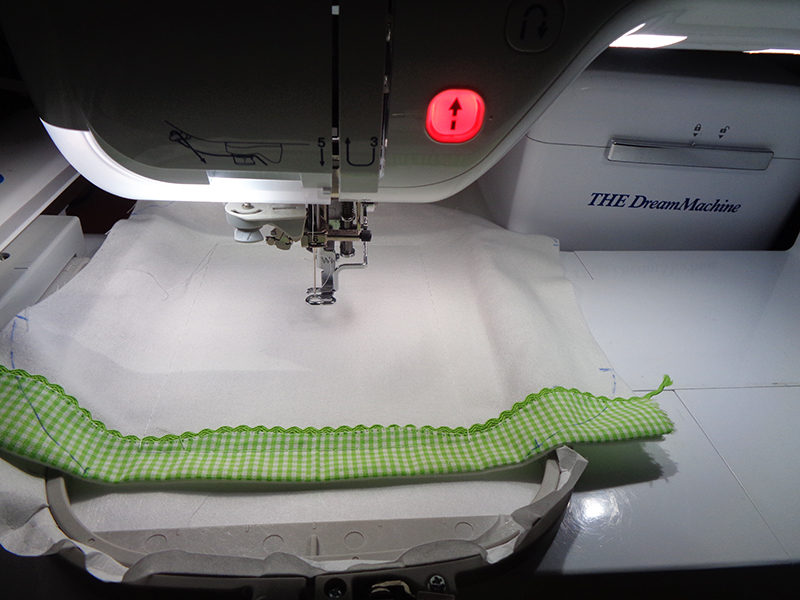
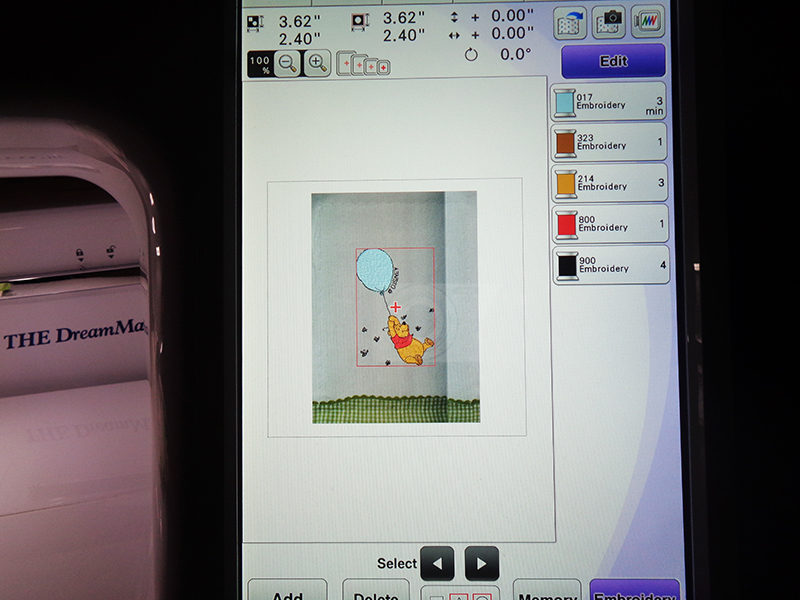
- Select the Pooh with balloon design then select the camera tab at the top of the page, boxed in red. Then scan the frame.
Note: Placement of Pooh is not important at this time. After the other component, Tall Grass, is added, the designs can be repositioned.
- Add the tall grass design.
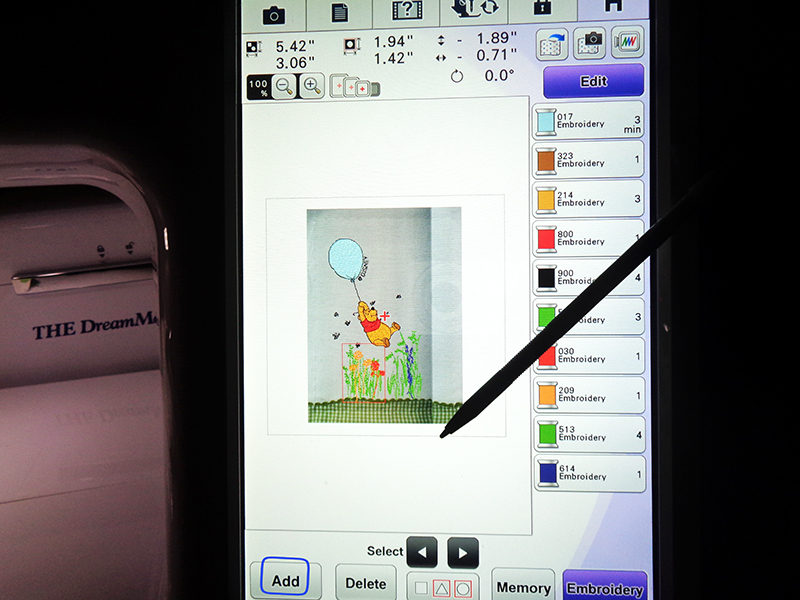
- Use stylus to drag designs in position, taking care to avoid any overlapping stitches.
- Embroider design, changing colors as desired.
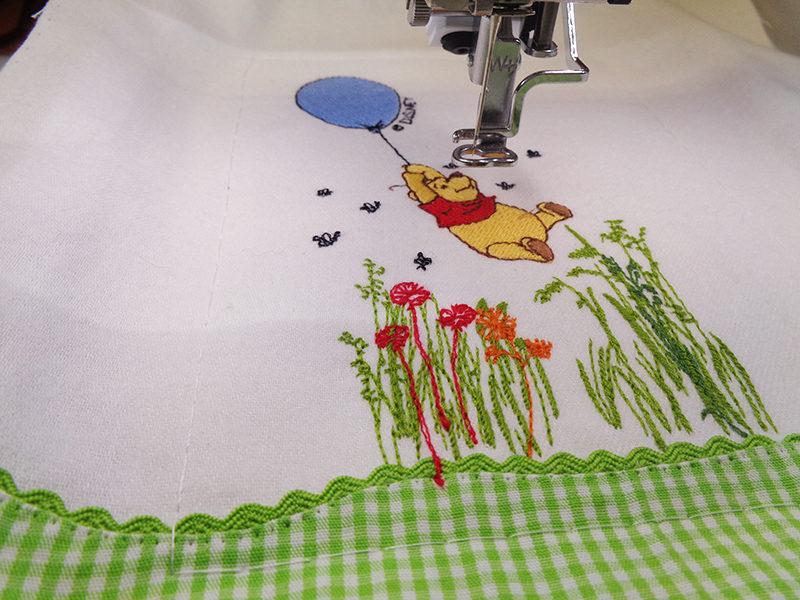
Construction
- Transfer marks to wrong side of flannel.
- Stack 10 x 20” flannel and gingham, right sides together, with marked flannel on top.
- Attach J foot and straight stitch with foot edge on fabric raw edge, treating the curves as the edge of the fabric. Leave marked opening for turning.
- Trim excess fabric from curves. Clip curves and turn right side out.
- Fold edges of opening toward center and close with straight stitch close to the edge. Press.
- Thread needle with monofilament, attach open toe foot and stitch gathered ribbon to flannel edge. Place ribbon’s gathering thread about ¼” from outer edge of flannel. When ends meet, stitch through overlap and apply seam sealant to raw ribbon edges.
Note: It is helpful to reduce tension when using monofilament.
A super cute Winnie the Pooh burp cloth is now finished!
